
Auton 1001-LCD Motorized Projector Lift
- Product Name: 1001-LCD Motorized Projector Lift
- Manufacturer: Auton
- Performance Rating:

- Value Rating:
- Review Date: July 02, 2009 08:28
- MSRP: $ 2849
- Welded Steel Construction for Maximum Strength
- Smooth Rack & Pinion Operation
- Optional Controllers for this Model:
- Radio Remote (S4P-RF)
- Infrared Remote (S4P-IR)
- Low Voltage/Dry Contact Control (LV56)
- Momentary Rocker Switch (RS-3MO)
- Maintain Rocker Switch (RS-3MA)
- Current Sensor (S4P-CS)
- 26 x 24 x 16 (L x W x H)
- 100 lbs. Max load
- Adjustable height setting
Pros
- Very convenient
- Aesthetically appealing
- Sturdy construction
- Fully adjustable
- Cool Factor
Cons
- Expensive
- Heavy
1001-LCD Build Quality and Installation
You've already purchased your front projection system and all your components, and now you're left with a daunting task. How do you mount the projector, without hearing an earful from your significant other; or in this case, in a conference room with a commercial drop-ceiling? Many mounts and stands can be not-so-appealing to the female eye, such as a pole dropping from the ceiling, a stand behind the couch, or a box sitting on the conference room table. You ask yourself: does visual perfection really have to come at such a price?
Meet Auton Motorized Systems. Since 1955, they have been building motorized lifts for televisions, and other visual displays. The product in review is the Auton 1001-LCD projector lift. Said lift enables you to totally conceal the projector until use, at which time, a simple push of a remote button lowers the projector to the precise, optimal, optical position.
Build Quality
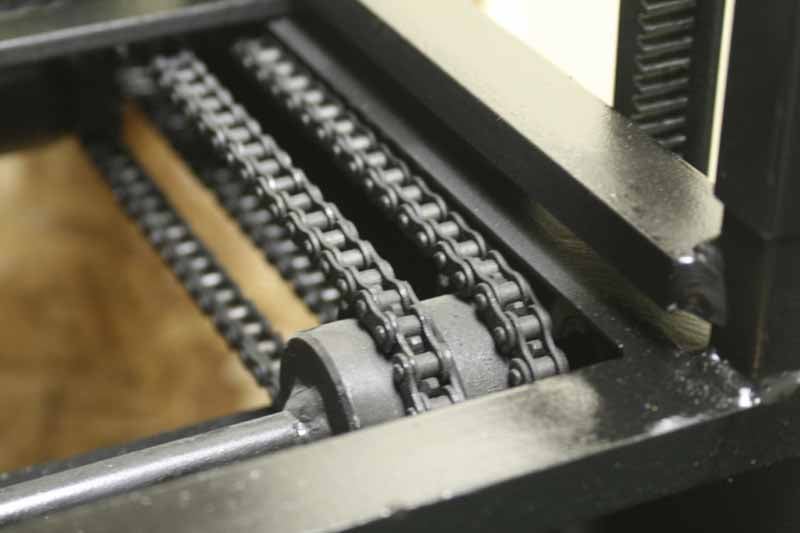 It was very obvious from the moment we received the package until the unit was lowered under power, Auton had cut no corners on their construction. While the unit is fairly heavy, it is also that much more sturdy. Built from steel, square tubing and angle-iron, and with full welds at every junction; I would have no problem letting this unit support all of my "trim" 260 lbs. Along with the well-built frame, is the use of all metal gears, drives, and chains. This system is full of parts you would find looking at a McMaster Carr catalog (Industrial Supplier), or looking under a Caterpillar D-9 (bulldozer). On one hand I could mention that making this cage and frame from aluminum would lighten things a bit; on the other, some of the structural integrity would be lost as well.
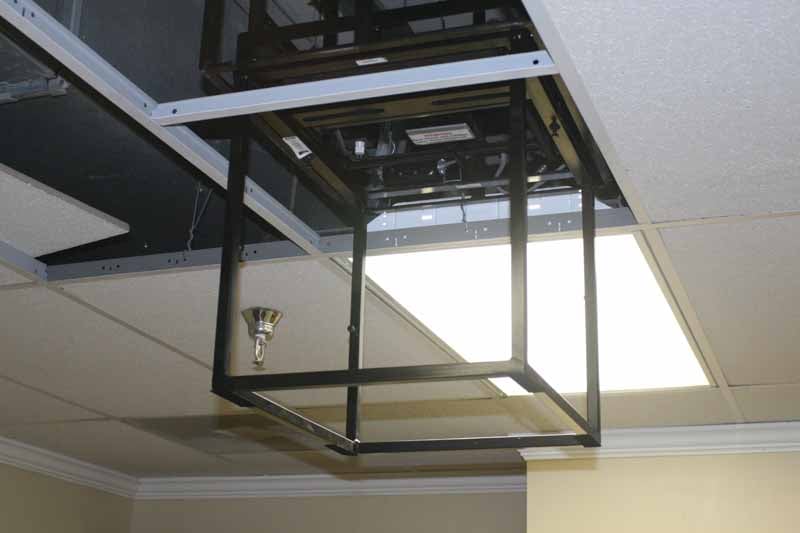
Due to the build quality, it did make things a bit cumbersome when trying to hold the unit in place and mount it. This was being installed in a business conference room with a suspended, drop-ceiling. So not only did we have to manage holding this in midair, we also had to maneuver around the ceiling grid. Even with the weight of the lift and the ceiling grid, it was a very nice fit. The dimensions of the lift seem to be well thought out, as it would have worked between residential ceiling rafters, and it also fit well in the 24 x 24 ceiling grid.
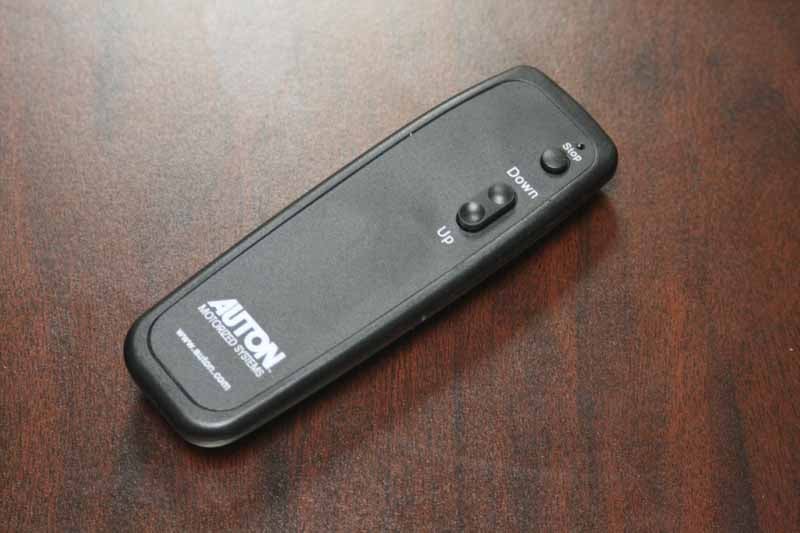
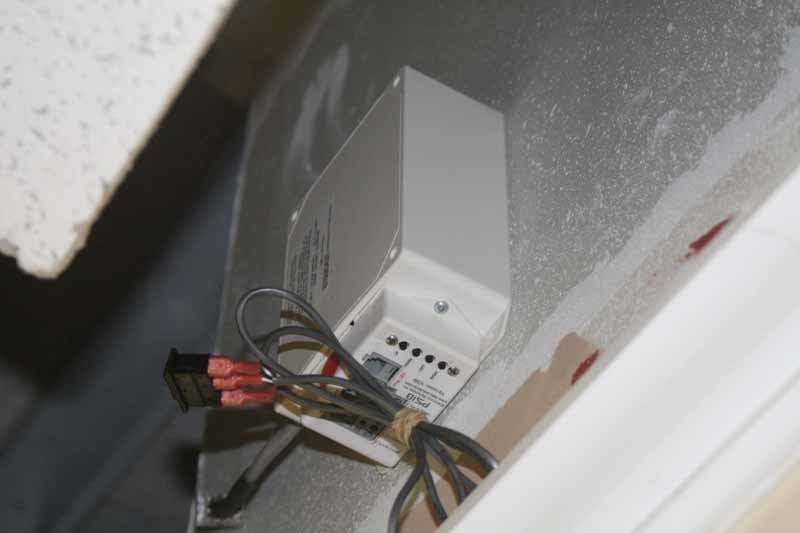
There were several controls included with our lift. One was a typical IR remote with a rocker switch for Up or Down, and a separate button for Stop. Also included was the system control box with Up, Down and Stop buttons attached as well. Lastly, there is a rocker switch that is hardwired into the control box, with several feet of wire to enable remote mounting.

In addition to the lift we reviewed, Auton also makes lifts for anything from small appliances to large flat-screen TVs. They can even lift a safe. Optional features are also available on many of their models; features such as a swivel base, smart motor operation, and multiple remote capabilities.
Installation
 This is where some of the "real" work began. Hanging this well-built cage above a drop-ceiling and fastening it into concrete overhead was not an easy task. There were no instructions included for installation, likely due to the almost limitless possibilities which exist. After all, this product is made for experienced installers (don't try this at home, kids). Despite this, with some simple measuring and a good once-over, we were well on our way. Well, at least we were on our way towards thinking about how it should be done. So, with our fingers at work, we quickly found ourselves Googling for the best concrete anchors. Afterwards, it was off to The Home Depot.
 We decided the best scenario for installing the unit was to mount 1" angle to the concrete ceiling, using "Sleeve Anchors" made for concrete. Then, we would use 1" flat-bar bolted to the angle, and bolt the other end to the lift. This would suspend the lift from the concrete ceiling at a distance of several inches, but still leave room for it to be concealed by the drop-ceiling. Walking into the 'can't spend less than a Franklin' store, the time was 8:45 PM. We were able to find all the hardware needed for around $50 (flatbar, angle, strap, bolts, nuts, lock-washers, washers, concrete drill bit, metal bit, and sleeve anchors).
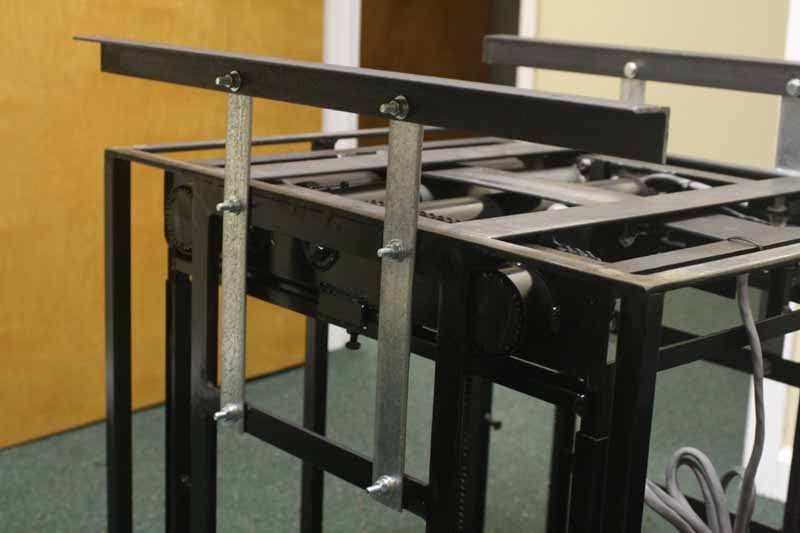
Now the fun began - we actually had to put the plan into practice. We made our measurements and marked the ceiling. I drilled the four holes for mounting the sleeve anchors, and only hit re-bar on every other hole (50/50, not bad). We adjusted, pushed the anchors into the completed holes and two of us carried the lift up the ladder. Yes, one ladder, two of us. What?! Hey, that's why there are steps on both sides. Anyway, with a little engineering and a lot of sweat, we got the lift positioned and anchored into the concrete ceiling. Very sturdy too, I might add.
Once mounted, the wiring was very easy and self-explanatory. The control box was mounted to the wall, above the suspended ceiling, and the grounded plug was plugged into the outlet. We won't discuss the well thought-out procedure to get the 110V outlet in the attic space. (Let's just say that there are electricians pliers that are no longer of good use.) We then trimmed down one of the ceiling squares, so it would fit through the grid. Using industrial hook & loop (Velcro), we fastened the smaller ceiling tile to the lift cage. Plugging the male/female controller wires together, it was time for testing.
Functionality Conclusion
 Now that the lift was securely anchored in and all the plugs were safely connected, it was time to play "Let's see what this button does". One push of the "Down" button revealed the lift magically dropping from the ceiling. Looking at the mechanisms driving the cage (very industrial, as earlier mentioned), I expected a not-so-pleasant sound when in use. I was surprised to hear a very slight hum when in motion. The cage dropped to its full "down" position and stopped. Pressing the Up button had the same positive results. Now we moved on to the fine adjustments.
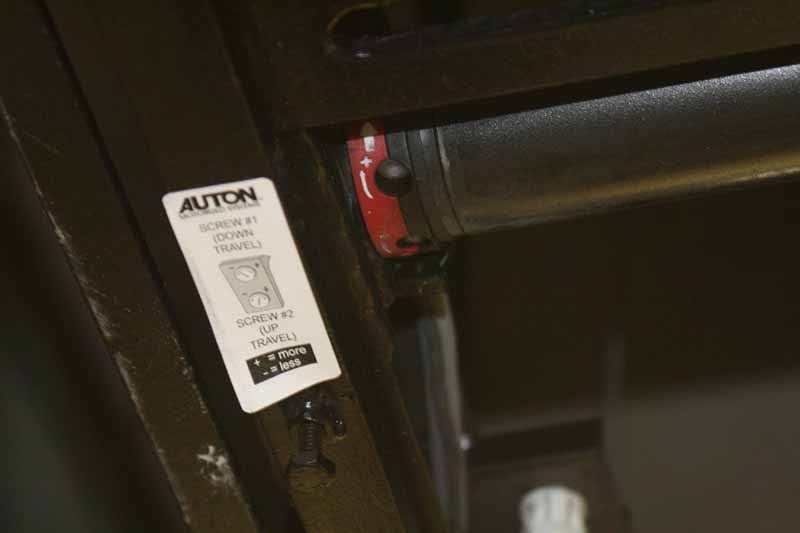
There are manual and electrical adjustments for the drop of the cage. We did not need to use the manual adjustments, which only require loosening a 7/16" bolt on each leg of the cage. The included hex-wrench was used to make the adjustments on the electric motor. With a few twists of the wrench, the travel of the lift was dialed in perfectly. It really didn't take too much back and forth and we were able to get exactly thr height we needed. With the ceiling tile attached to the lift, when the cage reaches the top, you could never tell that there was 100 lbs. sitting over your head.
Now that the cage was dialed in, it was time to install the projector for testing. Using our existing projector and mount, it easily bolted into the sliding mount on the cage. The only parts needed were two 1/4" x 1" bolts with 1/4" nuts and washers. Included on the cage were two outlets to supply the required 110V. Plugging the projector in, we fastened the wire to the cage securely with zip-ties. We then connected the wires from our source, in this case, VGA from a laptop. Everything worked flawlessly.
Conclusion
 Whether you are needing to circumvent a fight between you and your wife about hanging a pole from the ceiling (not for dancing purposes), or for concealing a business tool when not in use. Auton has the product for you.
Sure, there is some hard work and thinking involved, but it is well worth the time and energy spent. In fact, we'd go so far as to say it's well worth hiring a professional custom installer to put it in for you. It's not only a well-functioning, solid-built tool; it is also a very nice conversation piece. Your clients will be very impressed when they enter your conference room, and at your command (and touch of a hidden remote) the projector drops, ever so quietly, from the ceiling.
The price may be out of reach for personal use, but for commercial installations it's simply a no-brainer and will add tremendous value to any conference of board room. With the appeal of the aesthetics, and teamed with the robust functionality; this makes for a definite recommendation in my book.
About Auton Motorized Systems
Since 1955, AUTON Motorized Systems has been manufacturing the world's finest rack and pinion systems that are used to hide, reveal, and automate a wide variety of products including plasma and LCD televisions, traditional television sets, speakers, paintings and art panels, and are used in customized furniture designs. AUTON Motorized Systems services the world's leading architects, designers, builders, fine-furniture makers, and audio/visual integrators.
The Score Card
The scoring below is based on each piece of equipment doing the duty it is designed for. The numbers are weighed heavily with respect to the individual cost of each unit, thus giving a rating roughly equal to:
Performance × Price Factor/Value = Rating
Audioholics.com note: The ratings indicated below are based on subjective listening and objective testing of the product in question. The rating scale is based on performance/value ratio. If you notice better performing products in future reviews that have lower numbers in certain areas, be aware that the value factor is most likely the culprit. Other Audioholics reviewers may rate products solely based on performance, and each reviewer has his/her own system for ratings.
Audioholics Rating Scale
 — Excellent
- — Very Good
- — Good
- — Fair
- — Poor
| Metric | Rating |
|---|---|
| Performance | |
| Build Quality | |
| Ergonomics & Usability | |
| Ease of Setup/Programming/Integration | |
| Features | |
| Remote Control | |
| Performance | |
| Value |