
How To Install a Dolby Atmos, DTS:X, and Auro-3D Speaker Setup
We tackle the setting up next generation immersive audio
Back in 2015, I profiled relative newcomer Beale Street Audio’s architectural in-ceiling subwoofers with their Sonic Vortex technology. Beale Street’s patented technology maintains high-quality audio in a small enclosure by wrapping the speaker’s port around an internal cavity. This Sonic Vortex reduces cabinet vibrations, and as a consequence, you can mount Beale Street’s in-ceiling subwoofers into regular drywall without any special bracing or back boxes.
In talking with Beale Street as part of that initial profile here at Audioholics, we were all impressed with what we saw at that time. Our Audioholics team continued conversing with Beale Street with an aim towards getting a hands-on experience with their Sonic Vortex speakers. Our curiosity was piqued even more with what we saw from Beale Street at CEDIA 2015.
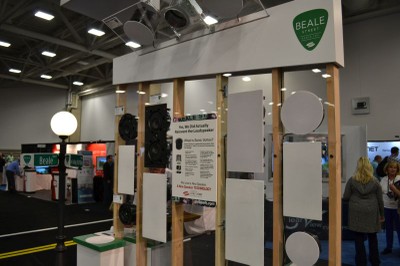
Close up Look of Beale Street Audio PF-BB and IPLCR4-BB pancake speakers @ CEDIA 2015.
One conversation led to another. After a few months, we decided we’d go full-on with an installation of a complete, multi-zone system powered by Beale Street Audio.
That setup would have four distinct goals:
- Design and install a setup that would support all major immersive audio formats announced to the market as of today: Dolby Atmos, DTS:X, and Auro-3D.
- Install a complete, in-ceiling 7.1 home theater setup to test out a scenario where a home theater lover might be limited by aesthetics or physical/architectural challenges.
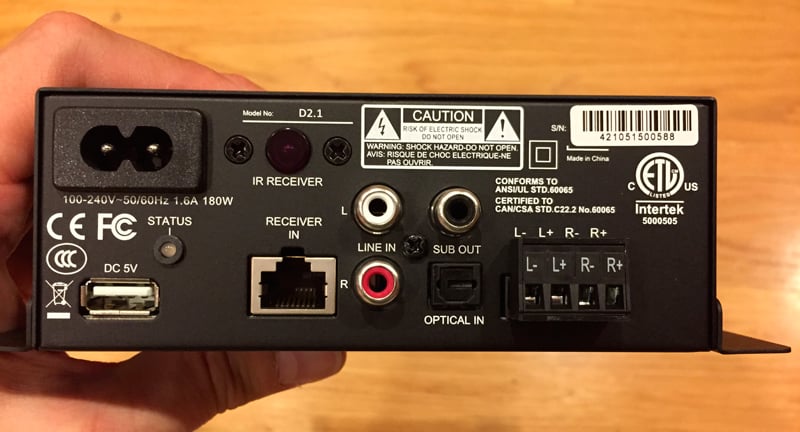
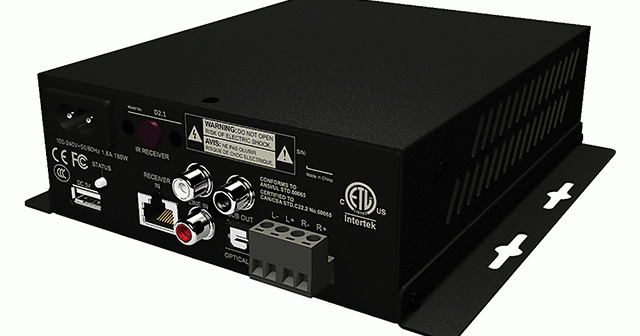
- Install a second stereo zone utilizing Beale Street’s new D2.1 amplifier. This second zone would be able to function independently or as a mirror to the Main Zone.
- Test out an in-ceiling-only Dolby Atmos setup to see if that is a viable option for users who cannot install floor-level speakers but don’t wish to settle for anything less than the latest audio advancements.
Beale Street Audio's D2.1 Amplifier would serve audio to Zone 2.
We all quickly saw that such a potential undertaking could have tremendous value to the wider Audioholics community. In talking with Gene DellaSala, Audioholics’ President, we decided that instead of simply reviewing a Beale Street Audio speaker setup (which we’re in the process of completing), we’d also chronicle elements of this experience since many of our readers are now looking at incorporating immersive audio setups centered around Dolby Atmos, DTS:X, and Auro-3D. We also get frequent questions about situations where speaker placement in a home becomes an issue.
We felt that this was an opportunity to talk about some options and tradeoffs when home theater enthusiasts need to resort to architectural solutions for their audio setups. Therefore, we decided to go for it. Before getting started, however, I’d be remiss if I didn’t publicly (and profusely) thank my wonderful wife, Clio, who consented to the notion of having 15+ holes cut into our basement ceiling and more cutting work done in our kitchen ceiling. For that and constantly putting up with the madness that comes with reviewing audiophile and home theater gear, a big thanks.
Planning The Setup for the Main Home Theater
Any good audio setup requires planning. No matter how excited you may be to jump into a new setup, don’t rush. Take the time to plan it out carefully. You’ll thank me for that advice.
Because immersive audio setups are relatively new to both users and installers alike, it’s good idea to do some extra planning. In my case, I decided to configure a Dolby Atmos 7.1.4 system, an Auro 3-D 13.4 system, and a 7.1 in-ceiling surround solution—at least as much as we could given physical limitations. Given what we knew at the time, we were confident that DTS:X would overlap one or both of these speaker configurations.
For the Dolby Atmos setup, I followed Dolby’s Atmos Home Theater April 2015 Installation Guidelines (PDF is available here).
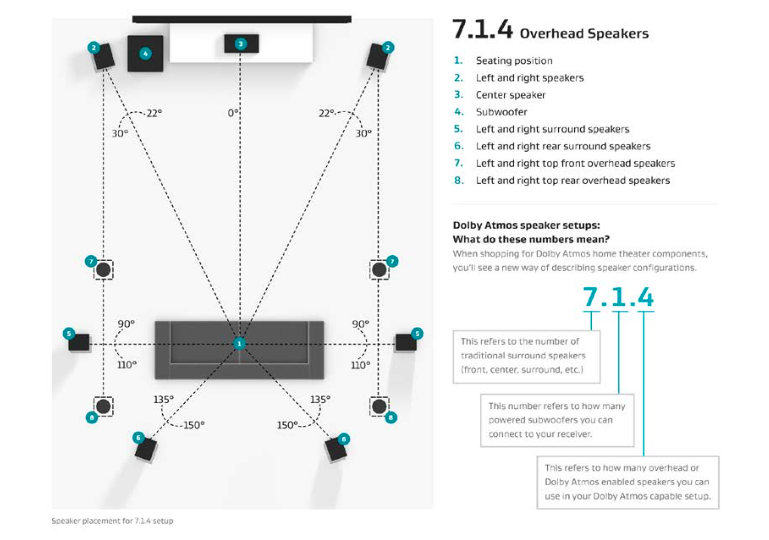
We tried to follow a Dolby Atmos 7.1.4 installation with discrete speakers.
For Auro-3D, I followed Auro’s 13.1 configuration setup. For our all in-ceiling 7.1 system, we tried to overlap this with the Auro-3D installation since (sans the overhead voice of God speaker) the in-ceiling speaker arrangement is identical.
Following some technical design conversations with the Beale Street team, for the main in-ceiling speakers we decided to use Beale Street’s angled 6.5-inch speakers (IC6A-BB) so that I could better direct the sound towards the listening position. For the Dolby Atmos speakers, we decided to use Beale Street Audio’s traditional, down-firing 6.5-inch speakers (IC6-BB). The IC6A and IC6 feature titanium dome tweeters. Both Beale Street’s angled and downward-firing speakers feature positionable tweeter housings to fine-tune the setup. All totaled, that amounted to 11 in-ceiling speakers (and we hadn't gotten to the subs yet).
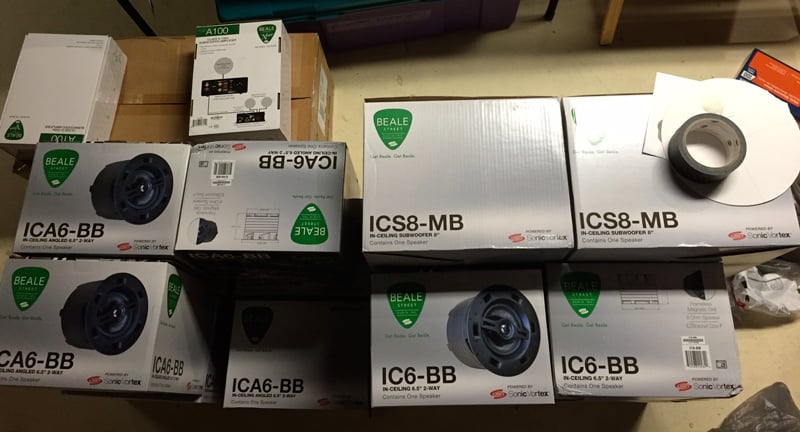
Lots of boxes. The Beale Street Audio in-ceiling speakers, in-ceiling subwoofers, and subwoofer amplifiers awaiting installation.
We identified my basement as the logical place for this new setup. The designated area was physically large (approximately 25 feet long by 13.5 feet wide) and part of a larger basement area. There was already a finished ceiling in that space. Because it was located underneath the sunken living room, headroom was flirting with the bare minimum recommended by Atmos at just shy of seven feet. We said this was real-world and we weren't kidding. The listening area has a left side wall but the right side and rear are open to the rest of the basement.
While my wife gave me pretty much free reign, (within reason, of course), I had another challenge. I needed to think about the installation with flexible seating in mind. In other words, there may be times when we’d need to remove the seating completely or add an extra row if we had more people. Therefore, I had to think about those scenarios when designing speaker placement.
How Many Subwoofers?
Having settled on 11 in-ceiling speakers, it was now time to tackle where to put the ICS8-MB in-ceiling Beale Street subwoofers. My basement space is semi-sectioned off. But it is open to the rest of the basement, making it a really large volume of space to adequately fill with sound. Not only that, but I wouldn't have the luxury of being able to move the in-ceiling subs post-installation and my installation locations would be confined by the ceiling bays. Simply put, I needed a solution that would give me the smoothest response across all seats and address potential room modes before any room correction.
Given the pioneering research done at Harman on subwoofer placement by Todd Welti (you can read-up on Todd's research here), we know that the ideal way to address bass nulls and peaks and smooth out bass response in a room is to have more than one subwoofer. Harman’s research indicates the ideal number is four subs for symmetric shaped rooms. We all felt that the best placement would be the 1/4W Subwoofer Placement. This is also one of the three main subwoofer configurations that we've previously advocated for in our Multiple Subwoofer Set-Up and Calibration Guide.

We followed the 1/4W placement guide to install the four in-ceiling Beale Street Subs.
Note: Due to physical constraints, the subwoofers had to be further into the space than we would do with floor-standing subs.
We reached out to Todd Welti to confirm our subwoofer placement and give him room photos, sketches and other data. Based on that (and the physical limitations of the space in my setup), we decided that the 1/4 and 3/4 mark along the front and back “walls” made the most sense for subwoofer locations. I use the term “walls” loosely here because the rear of the listening area in my basement is open another 12 feet and the right side of the listening area is open to another nearly 10 feet of space. A big thanks to Todd Welti and we promise that we won't hold him accountable for the results (unless they are good, of course).
Like many architectural subwoofers, Beale Street’s subs are passive and require external amplification. Each subwoofer would therefore be independently powered by Beale’s A 100, which is a 100W Class D amplifier. The A 100 amplifier for the Beale Street subs did not supply any EQ. EQ would be left to the Denon AVR-X7200WA AV Receiver, which would serve as the heart of the system.
Planning for Zone 2
 While the Main zone would be dedicated to immersive audio, the second zone in the kitchen would serve as a switched zone that could either mirror the content played in the main zone or play audio independently from another source. The primary purpose of the second zone would be background music. I could therefore be doing something in the kitchen and still hear what was happening in the main zone without missing anything.
For the kitchen speakers, I chose Beale Street Audio’s 8-inch speaker, the IC8-BB, since there really wasn’t the room (or the rationale) to install in-ceiling subwoofers in the kitchen. The larger 8" woofer should provide more bass output to compensate for the lack of a separate sub. Because any and all receivers on the market today supporting full immersive audio setups cannot simultaneously power a second zone, I added Beale Street Audio’s new Class D D2.1 integrated amplifier to tackle that duty.
The D2.1 integrated two-channel amplifier is really an ingenious little amp. It’s physically tiny (only about 5.5 inches x 6.5 inches x 2 inches), light, and perfect for a secondary zone and for custom installations. You can wall mount it or ceiling mount it with ease. Rated for 40 WPC, this stereo power amplifier functions as a traditional power amplifier with screw-based speaker terminals. It turns on automatically after sensing an audio input signal and powers off automatically after it’s received no signal after a few minutes.
What’s more, this amplifier has a Toslink audio input and a subwoofer output, in essence functioning as a stripped-down integrated amplifier. Therefore, if you wanted to add high quality external speakers to your HDTV and didn’t want the hassle or expense of a receiver, you could just plug in the Toslink optical out from your TV right into this amplifier. You could then control the volume of the amplifier directly from the TV or from the included amplifier remote. You could run a serious 2.1 system using this low-profile powerhouse.
Lots of Speakers Require Lots and Lots of Cabling
After marking the locations of the in-ceiling speakers, identifying the wiring paths, and measuring home runs from each location, I estimated that I’d need somewhere in the neighborhood of about 650 feet of speaker cabling for just the basement in-ceiling speakers plus I’d need another 100 feet or so to home run all the floor standing speakers when testing the system as a traditional Dolby Atmos or Auro-3D installation.
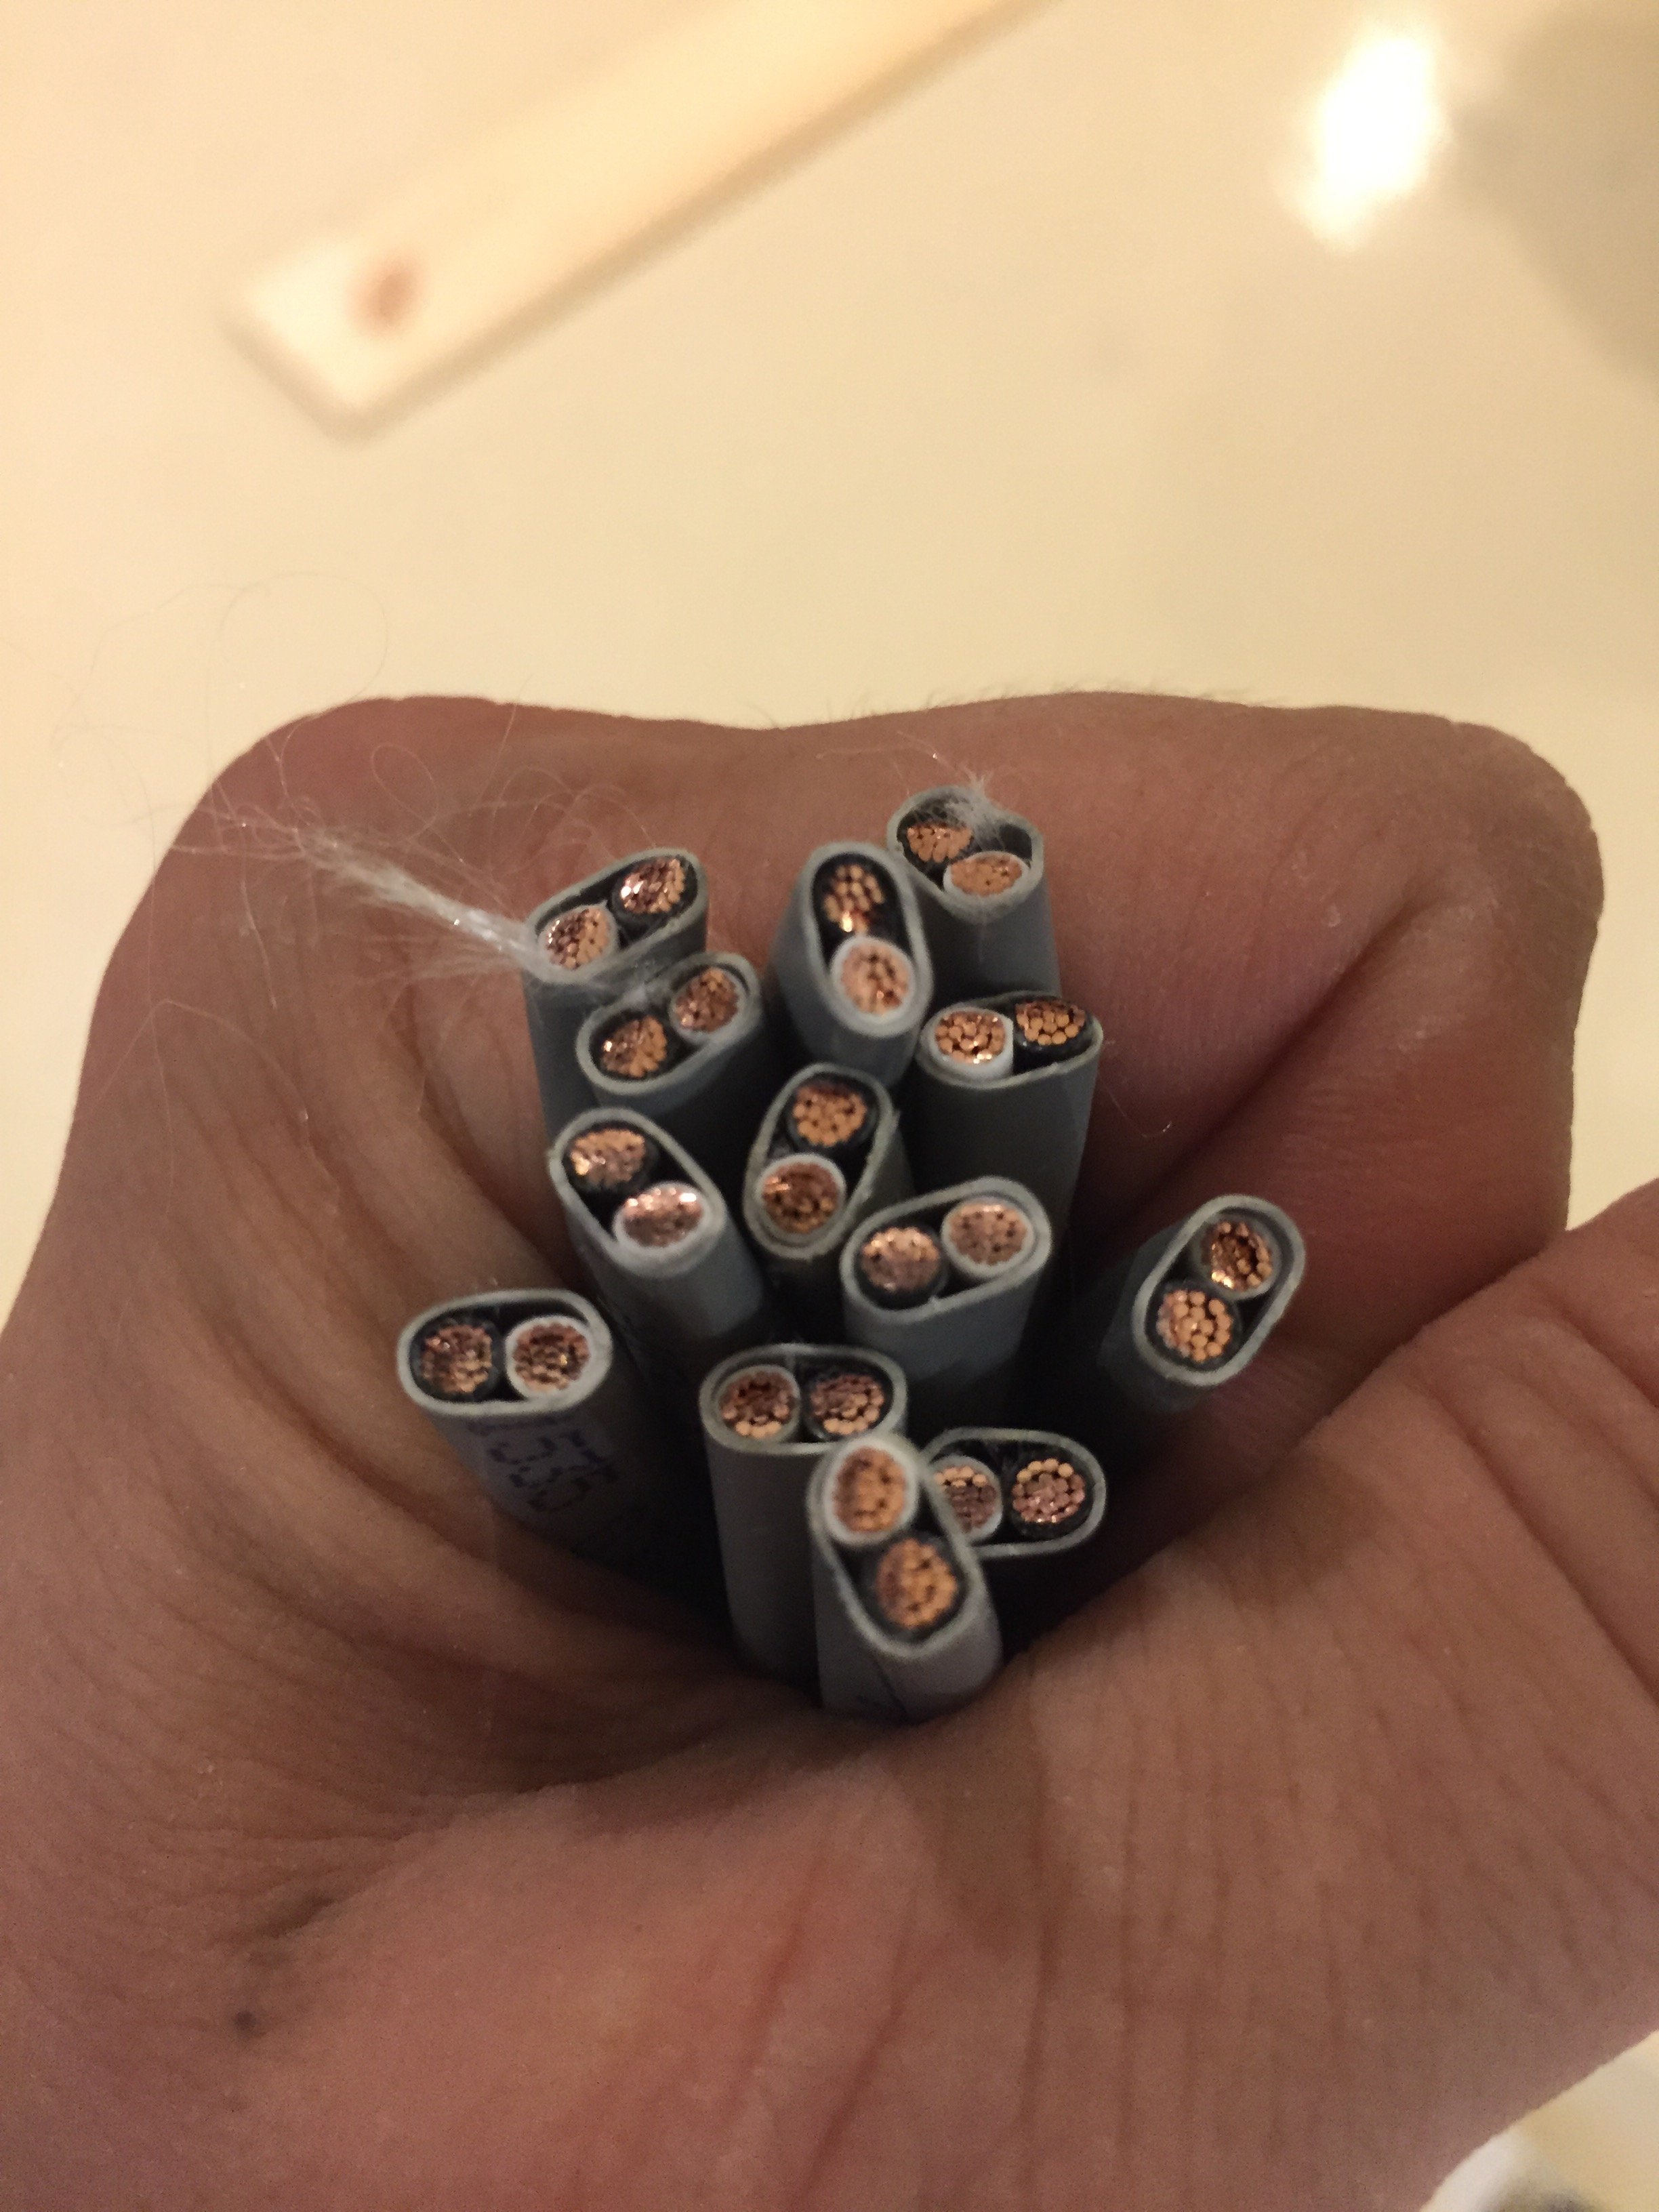
Nearly 750 feet of Blue Jeans Belden 5000UE 12 AWG speaker wiring.
As you can see, the Blue Jeans cabling is high quality and thick.
No matter how you look at it, 750 feet is a lot of speaker wiring. While I’ve owned some expensive speaker cables in the past, I swear by BlueJeans Cables. I ended up ordering their Belden 5000UE 12 AWG speaker cabling of the entire installation. The Belden 5000UE cabling is CL3R rated for in-wall and in-ceiling use. I terminated the Blue Jeans speaker cabling with their locking banana connectors on the receiver side.
I’ve been around the block enough times to know that you should never assume that the wire gauge you use with your floor standing speakers will fit into your in-ceiling speakers. In fact, looking at the terminals on the Beale Street speakers, I initially had a bit of a scare that they wouldn’t accommodate speaker wiring larger than 14AWG. Thankfully, it wasn’t a problem. The BlueJeans cabling fit like a charm, but needed careful threading.
Some Sage Advice: Plan for the Future
Having gone over the installation and scoped out the areas, I felt pretty good going into it. But don’t let anyone kid you. There’s no such thing as a simple installation—even when it looks easy. For that reason, I did a series of run throughs.
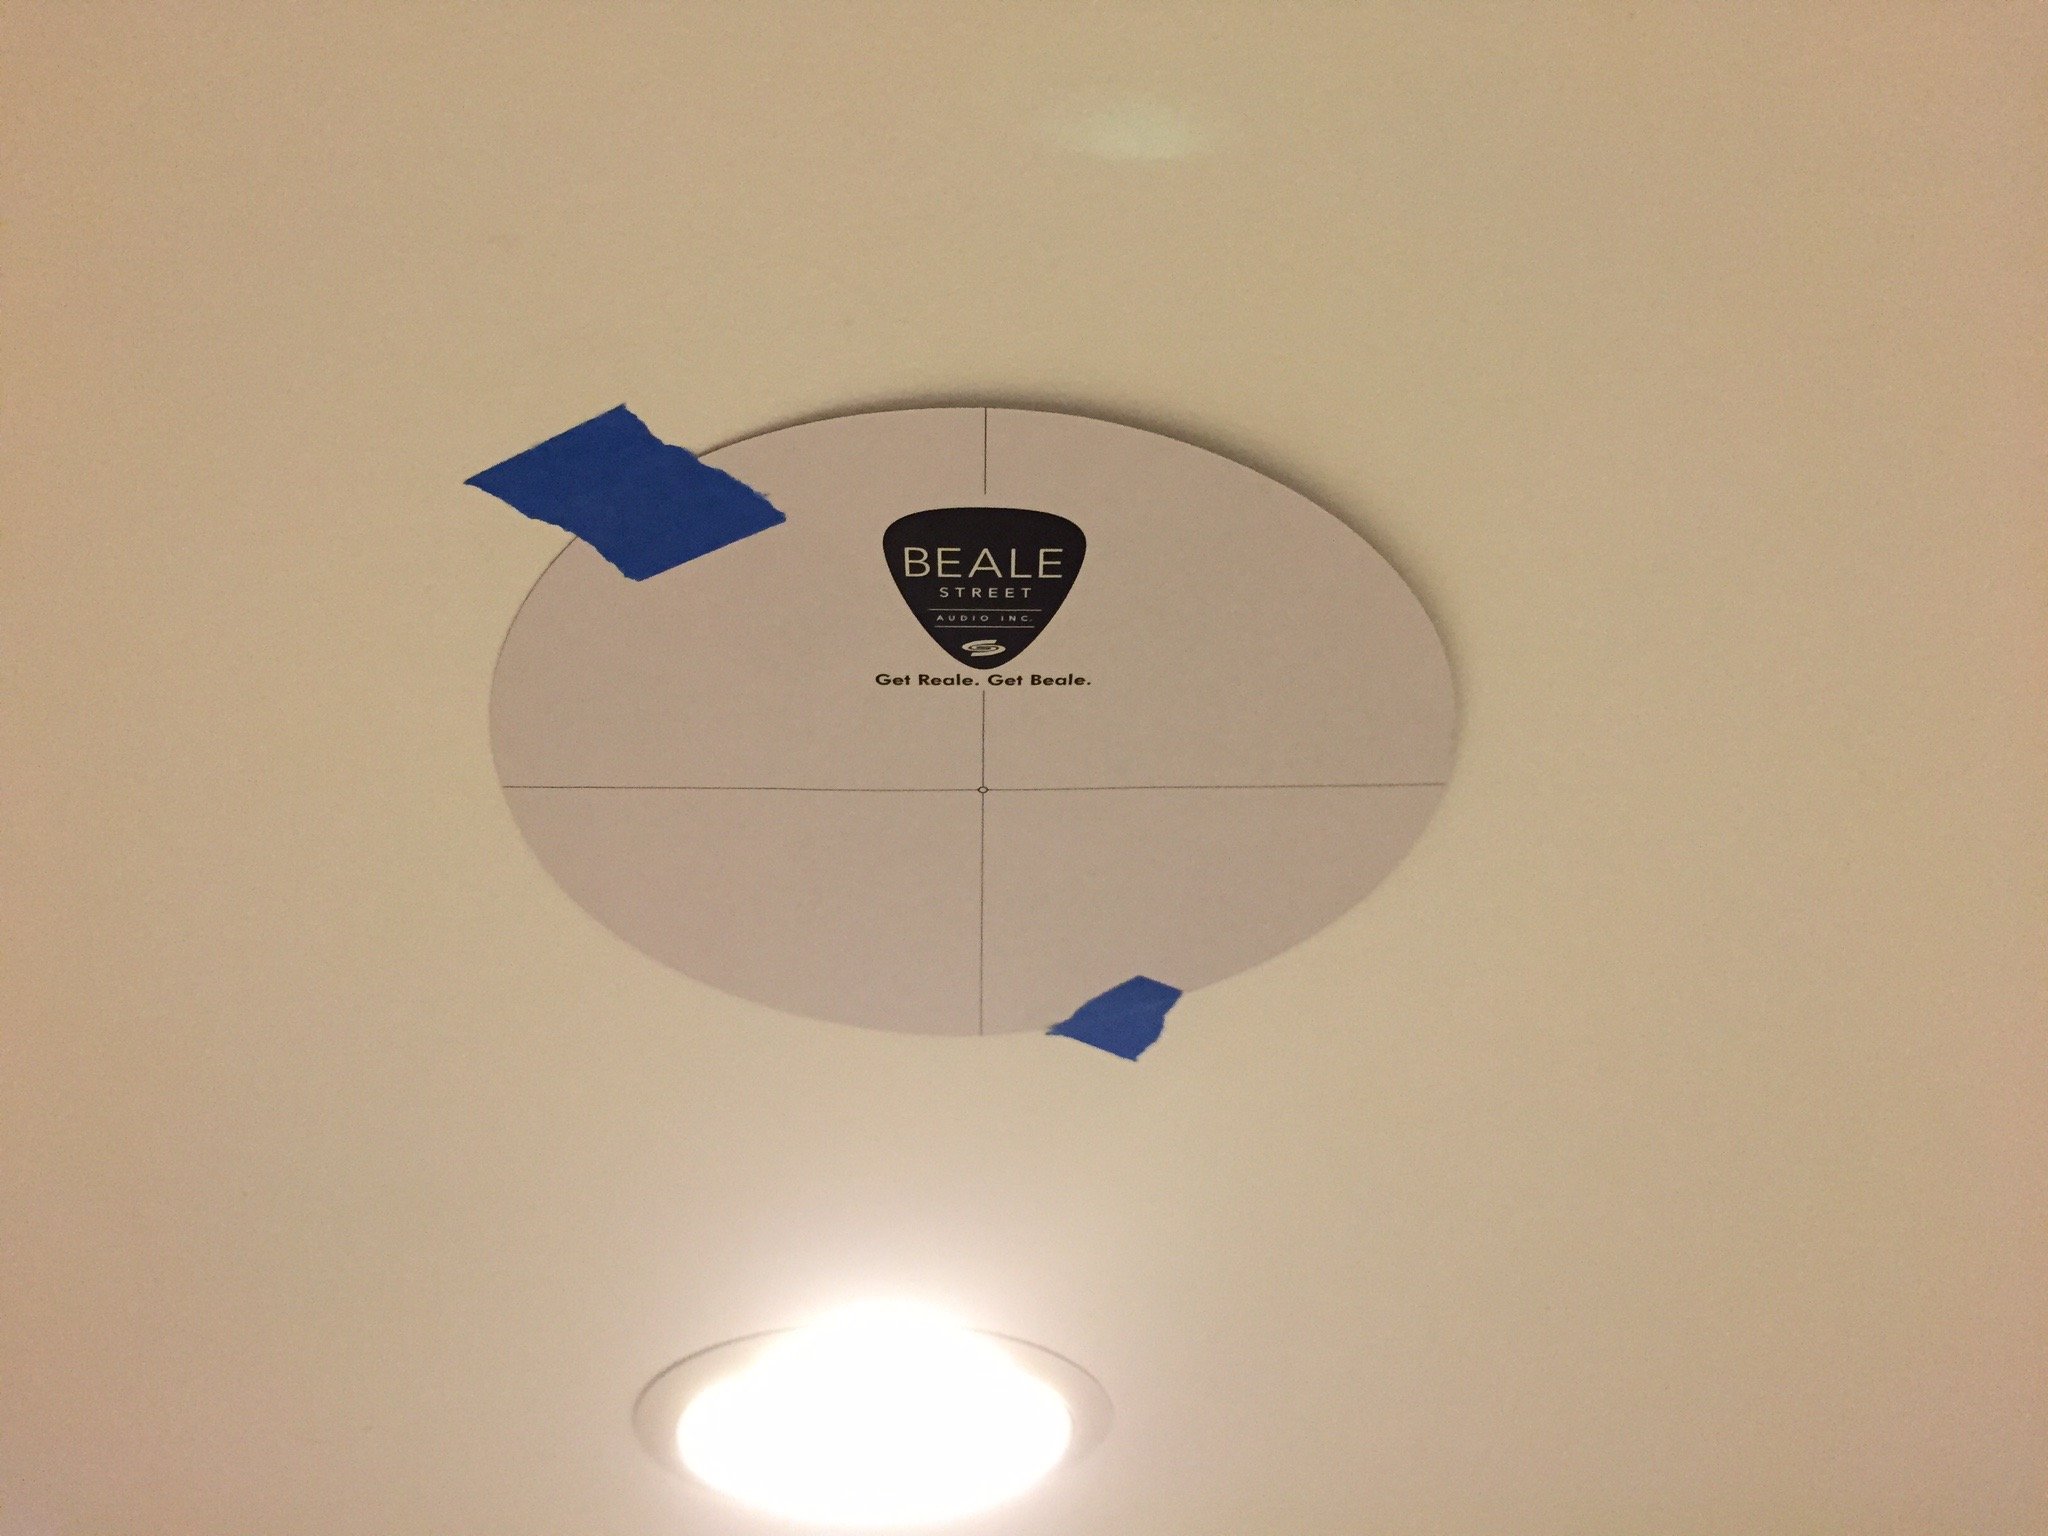
Beale Street's template make it easy to trace the proper speaker cut out diameter.
I’ve overseen a number of complex data and sound installations across the country in my day including a very difficult job on two turn-of-the-century brownstones in Manhattan encompassing 12 floors across two buildings. I know first-hand how important planning out your wiring runs can be.
I’ve also learned another lesson over the years: never wire for today’s needs only. Wire for tomorrow. The cost is nominal to run extra cabling today when everything is open. It could be very costly or cost-prohibitive to do new wiring later. For that very reason, I decided to do a few added items.
First, as a general rule of thumb, never cut your cabling to the exact distances. Speaker and data cabling are relatively inexpensive per foot. However, if you’re short for whatever reason, you’re in trouble. You don’t want to try and extend the speaker wiring. You’ll need to re-do the entire run.
On the other hand, if you add a bit extra to your runs, you can always cut back as needed. I decided to run about 5-6 extra feet per run for exactly that purpose. I also planned to put my half-height equipment rack on casters and needed to have enough cabling slack for that purpose.
Second, run extra cables whenever you can. I decided to run two high-speed HDMI cables in-ceiling so that I could plan for future growth and installations of the theater area. As a course of habit, I run two cables in case one ever goes bad. I also did this because I have equipment coming in and out for review on a regular basis and having multiple HDMI cables would make my life much easier.
The Blue Jeans Cabling was run and clearly labeled on either end for easy matching later on.
Third, think of other kinds of cabling types you may need. I chose to run multiple pairs of Category 6 data cabling at different points in the home theater area. I want to emphasize that running data cabling is absolutely essential—not only for having wired ethernet access but also because one of the main ways to extend HDMI is with Ethernet cabling via HD-BaseT transceivers. These transceivers can require up to two Ethernet cables; one for the signal and the other for HDCP. In all the pro installations I’ve done over the past 20 years, this type of thinking has served me very well in dealing with curve balls and technology changes that have arisen years later. When it comes to data cabling my opinion is that you should never install anything less than Category 6 cabling. Category 5e, which has been a standard for a long time, isn’t going to have enough bandwidth for what’s coming down the pike in the future.
Running Cabling and Overcoming Challenges
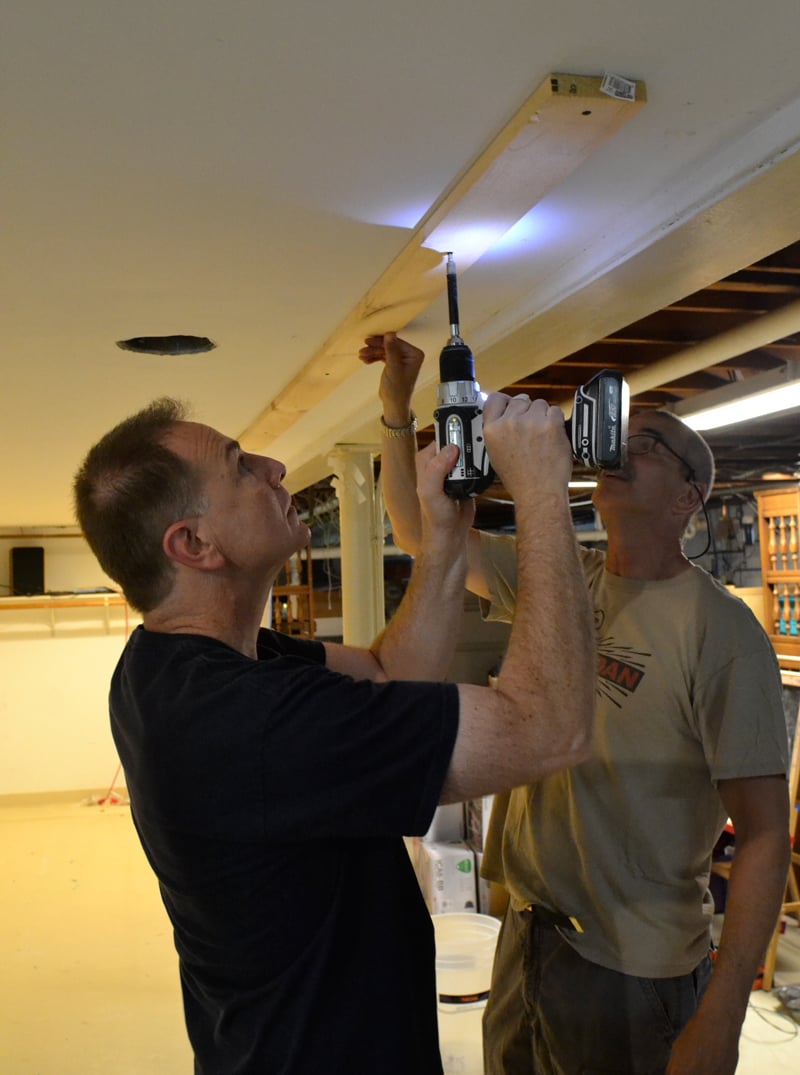
Because things are never as easy as they look, I made sure that I had lots of people over to lend a hand. Thanks to Kevin, Steven, John, Elia, and Peter for their help. My friend Kevin in particular has extensive experience with construction. We walked through the basement and kitchen spaces together to scope them out prior to attempting the installation. The first challenge we had to tackle was how on earth we were going to get hundreds of feet of cabling to all these speaker locations with minimal demolition.
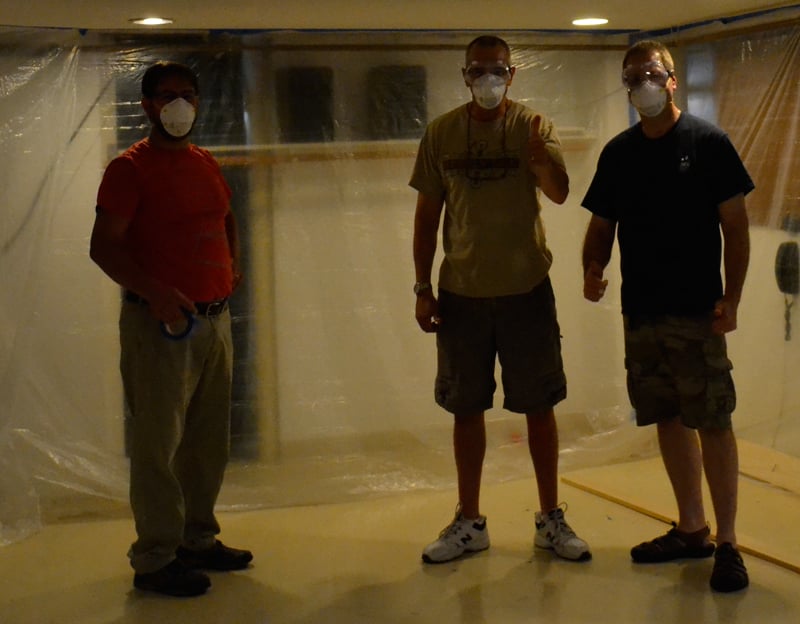
Who are those masked men? John, Steven, and Kevin during one of the initial weekends of the installation.
While the part of the basement ceiling we would be working with was covered by sheet rock, the rest of the basement ceiling is unfinished with exposed beams. It was therefore very easy to see the orientation of the ceiling beams and if there were any other features we needed to be aware of. Other than the fact that the beams were oversized, things looked fairly normal.
We decided the best course to lay out the speaker wiring was to cut a channel the entire length of the right side home theater area, we’d then drill between the beams to pass the cabling; then we could feed the speaker wiring down the bays.
To cut the nearly 24 foot wiring trench, we screwed a 1” x 4” x 8’ board into the sheetrock and then cut alongside of it with a motorized tool.
Since we’d be talking about a cut of nearly nearly 24 feet, Kevin came up with a brilliant idea. He suggested that we screw a 1” x 4” x 8’ board into the sheetrock and then cut alongside of it with a motorized tool. We would complete this process three times in eight-foot sections. We could then detach the sheet rock section as a complete piece without it breaking. After we had run the wiring, we could then screw the original pieces back up or I could fit a board and paint it so that I could access that wiring area with far greater ease in the future.
When it came time to put this plan into action, I had Kevin, Steven, John, Elia, and Peter over on a Sunday afternoon. Needless to say, Kevin’s plan worked like a charm. To make sure we didn’t have any obstacles, I put a video scope into the channels. Everything was clear! Or at least that’s how it looked. That’s when things got a bit interesting.
Little did we know that about 1/2 to 2/3 of the way down the channel, there were horizontal pieces of wood between each beam. So, instead of seeing a clear bay through the video scope (like we thought), we were only seeing up until the horizontal piece of wood!
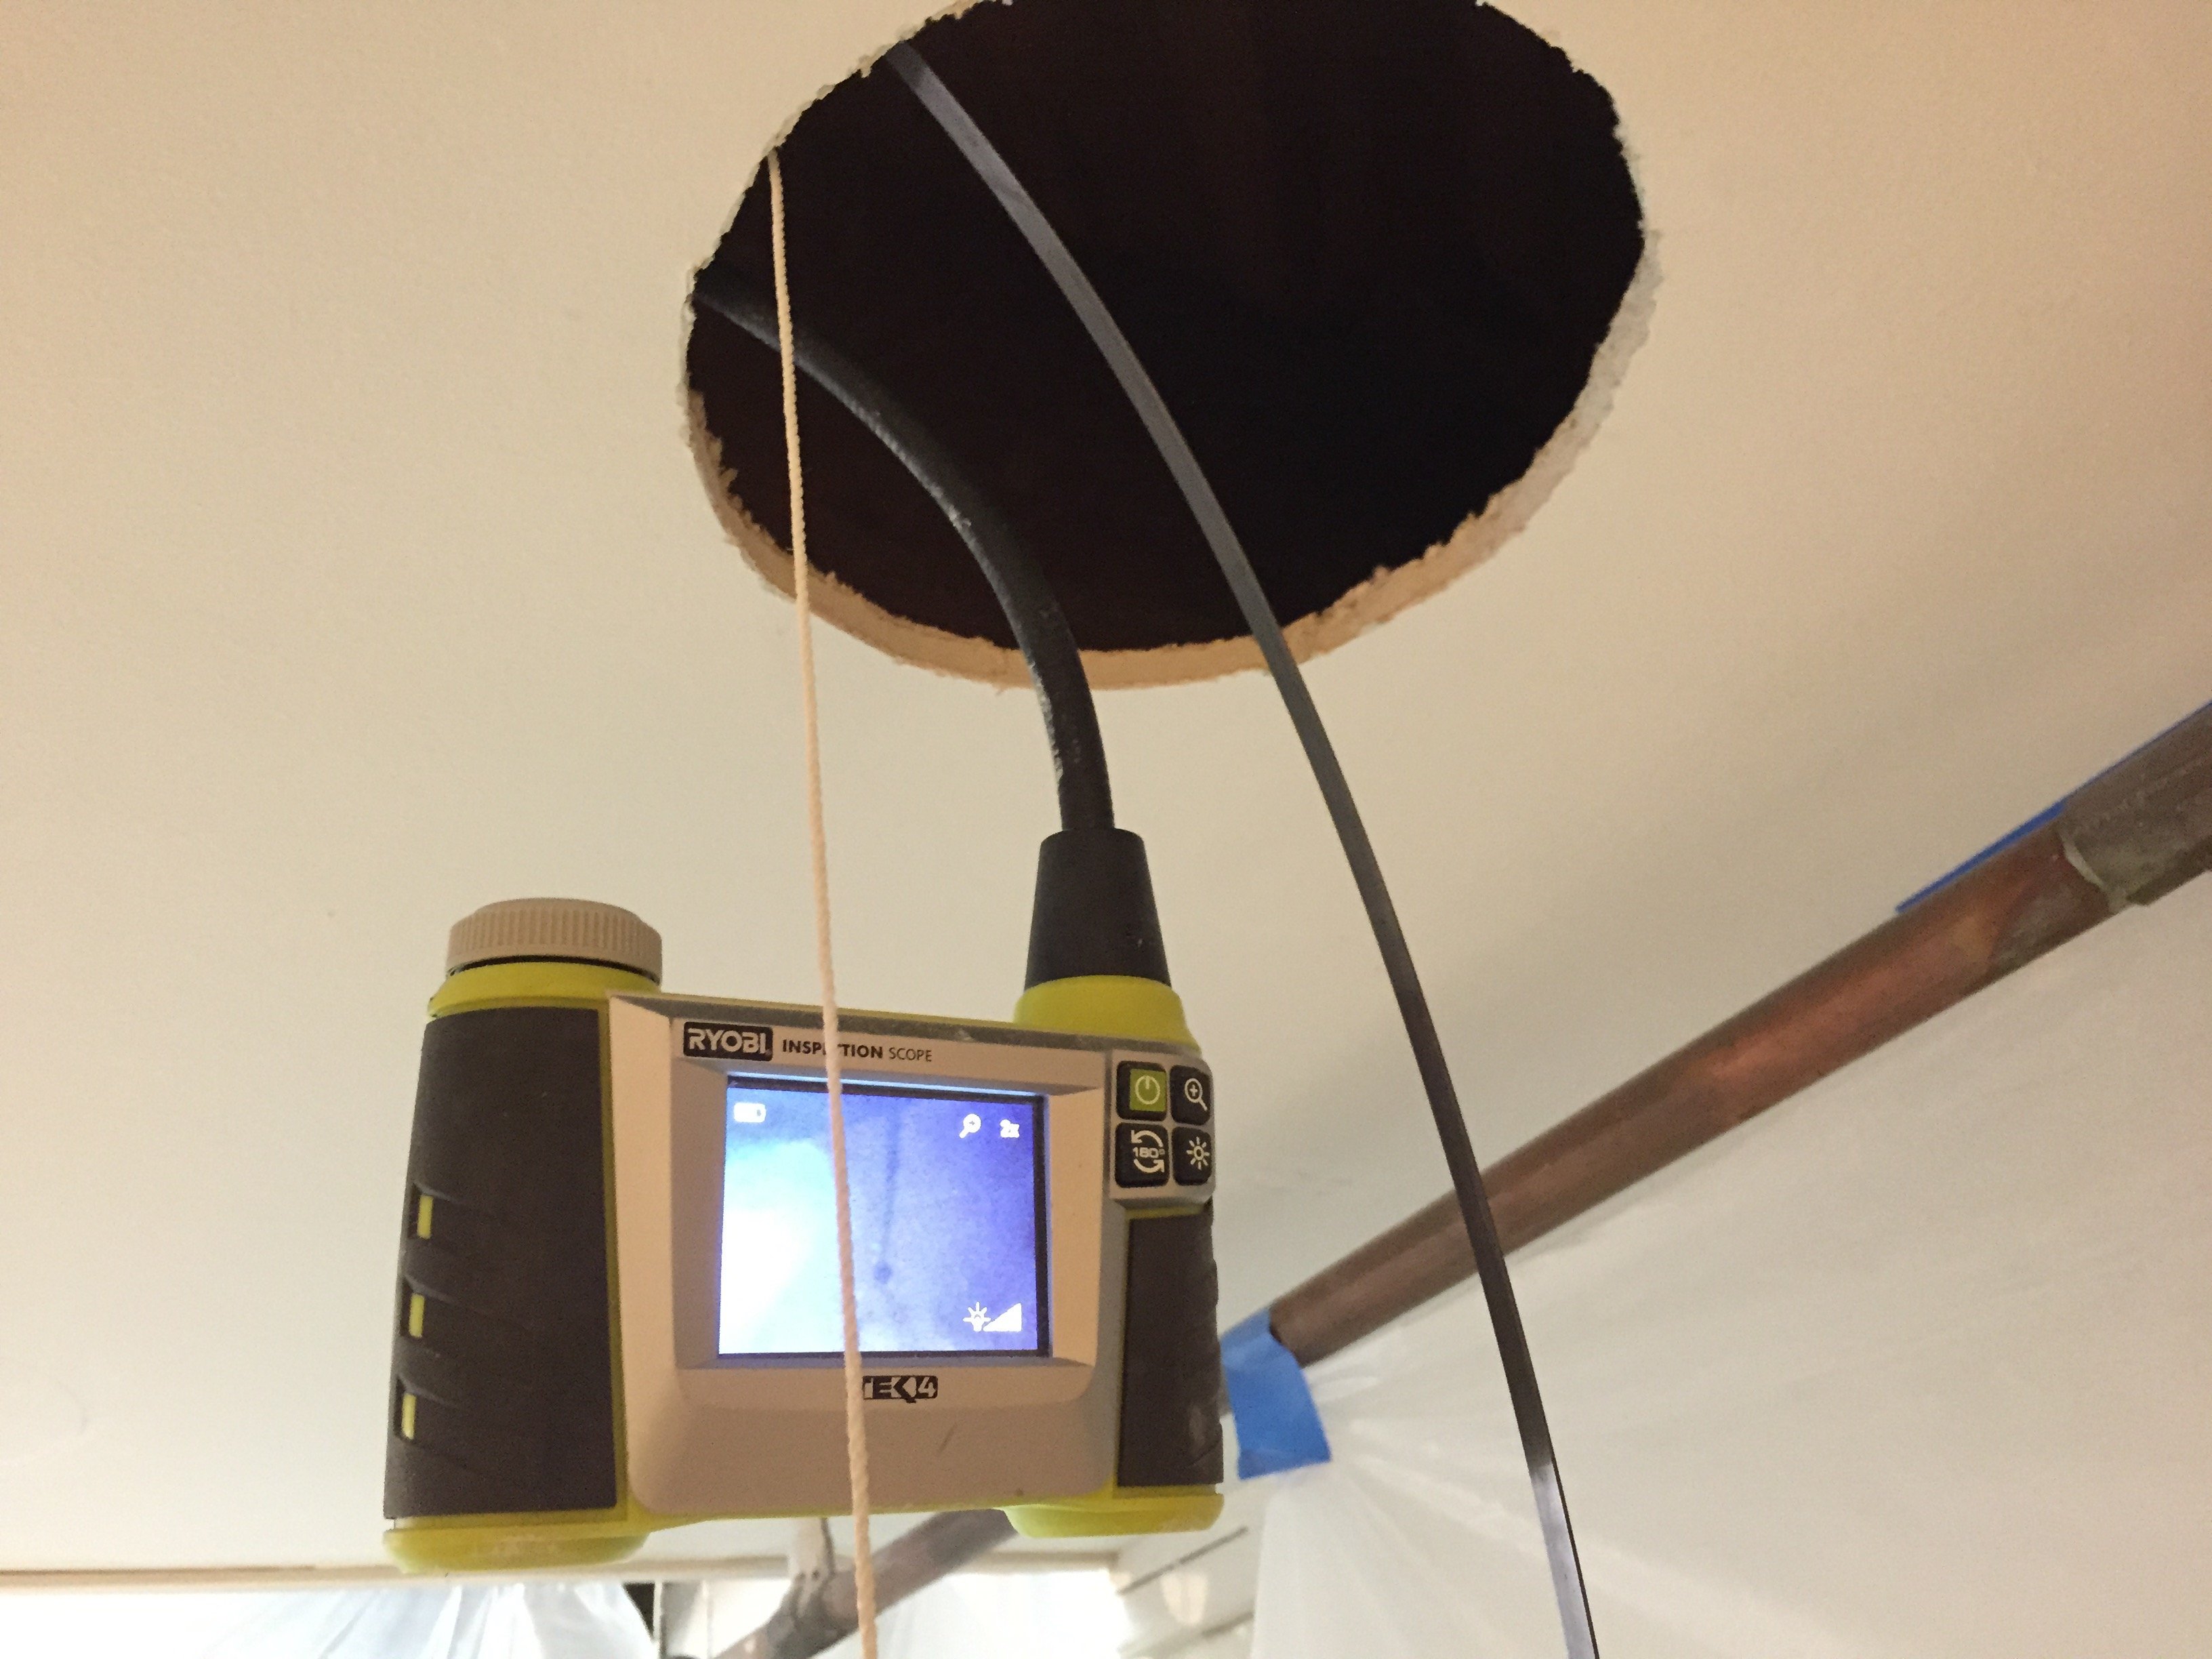
Using the video scope in the ceiling we thought we had a clear bay.
Little did we know that there was a full board about half way down blocking things.
I only found this out during the cutouts of the top center channels. When I cut the hole for the front center channel in-ceiling speaker and the Auro-3D voice of God top speaker, I was so close to one of the center beams that I only had about 1/2 inch to spare! For feeding speaker wiring on the right side of the room next to the channel, things were easy. But getting wiring onto the left side of the room was more of a challenge.
I really didn’t want to do any further demolition or cutting of the ceiling sheet rock. So, instead of cutting another 24-foot channel down the other side of the ceiling, I decided to drill through those horizontal boards with two drill bit extenders. It was time-consuming work but I got the job done.
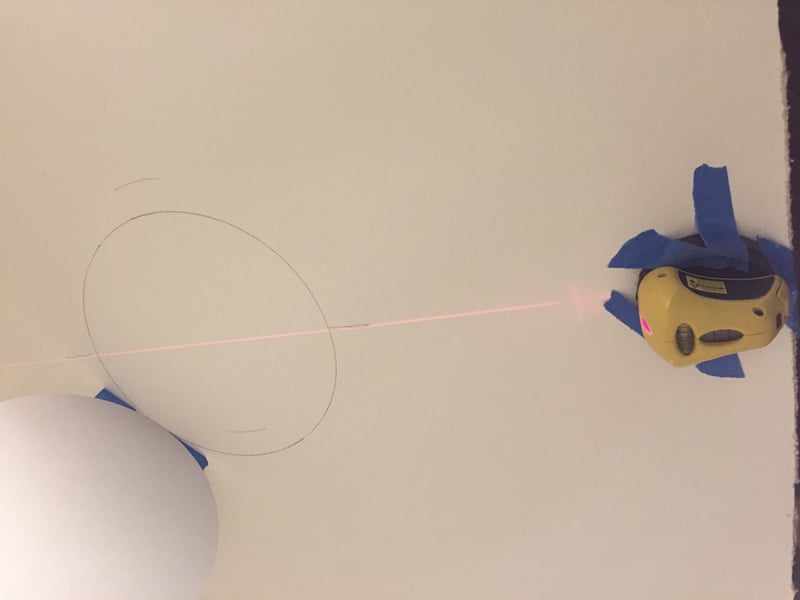
I used a laser level to align all the speakers.
Other, more subtle challenges also presented themselves, namely the specific locations of the ceiling beams and existing recessed lights. The ceiling beams obviously dictated where I could and couldn’t place the Beale Street Audio speakers and the recessed lights eliminated certain bays as potential options.
I also faced exposed hot water heating pipes running in certain areas of the basement ceiling (specifically the left side and front). This limited my placement options. I didn’t want to install a speaker directly over a heating pipe (even if I could somehow manage to fit it there). The hot water pipes forced me to move the in-ceiling side surround speakers closer to the listening position than I wanted.
In my initial thought process, I wanted to have the in-ceiling left and right side surrounds further out than the Dobly Atmos in-ceiling height speakers. One of the main reasons for this was so that I could have clear separation of the height and side surround speakers for the all in-ceiling immersive audio test. If the speakers were all too close together in a single line, there wouldn't be an opportunity to distinguish the surround and height information clearly and it would bleed together.
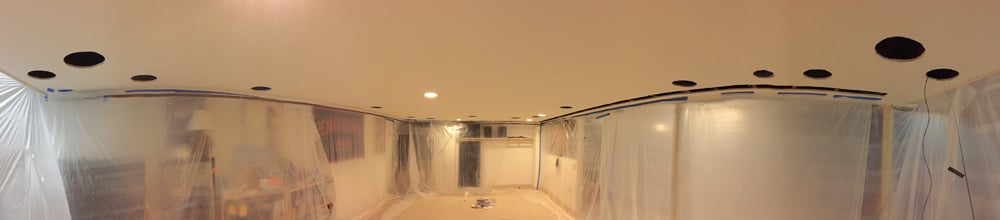
Panoramic view of the in-ceiling installation from the rear of the theater area.
Due to physical constraints it was impossible to move the side surround speakers further out to either side.
This is one of those situations where ideal and practical just didn't come together. I couldn't do it. Because of physical constraints the left and right surrounds protruded out only slightly more than the Dolby Atmos speakers. I felt this compromise was just fine for all the configurations except for the all in-ceiling 7.1.4 Atmos setup. Regardless, oftentimes you just need to do the best you can given the limitations you’re dealt.
The bottom line here is that this was a very real-world installation where we had to make some adjustments based on what the structure gave us. There’s rarely such a thing as a perfect installation and there’s an art as well as a science in choosing which tradeoffs to make.
Installing the Beale Street Speakers
The Beale Street Audio Speakers were absolute beasts. I loved the way they felt in my hands. It was one of those times where you’re holding something and you say to yourself, “Yup, this has really solid build quality.”
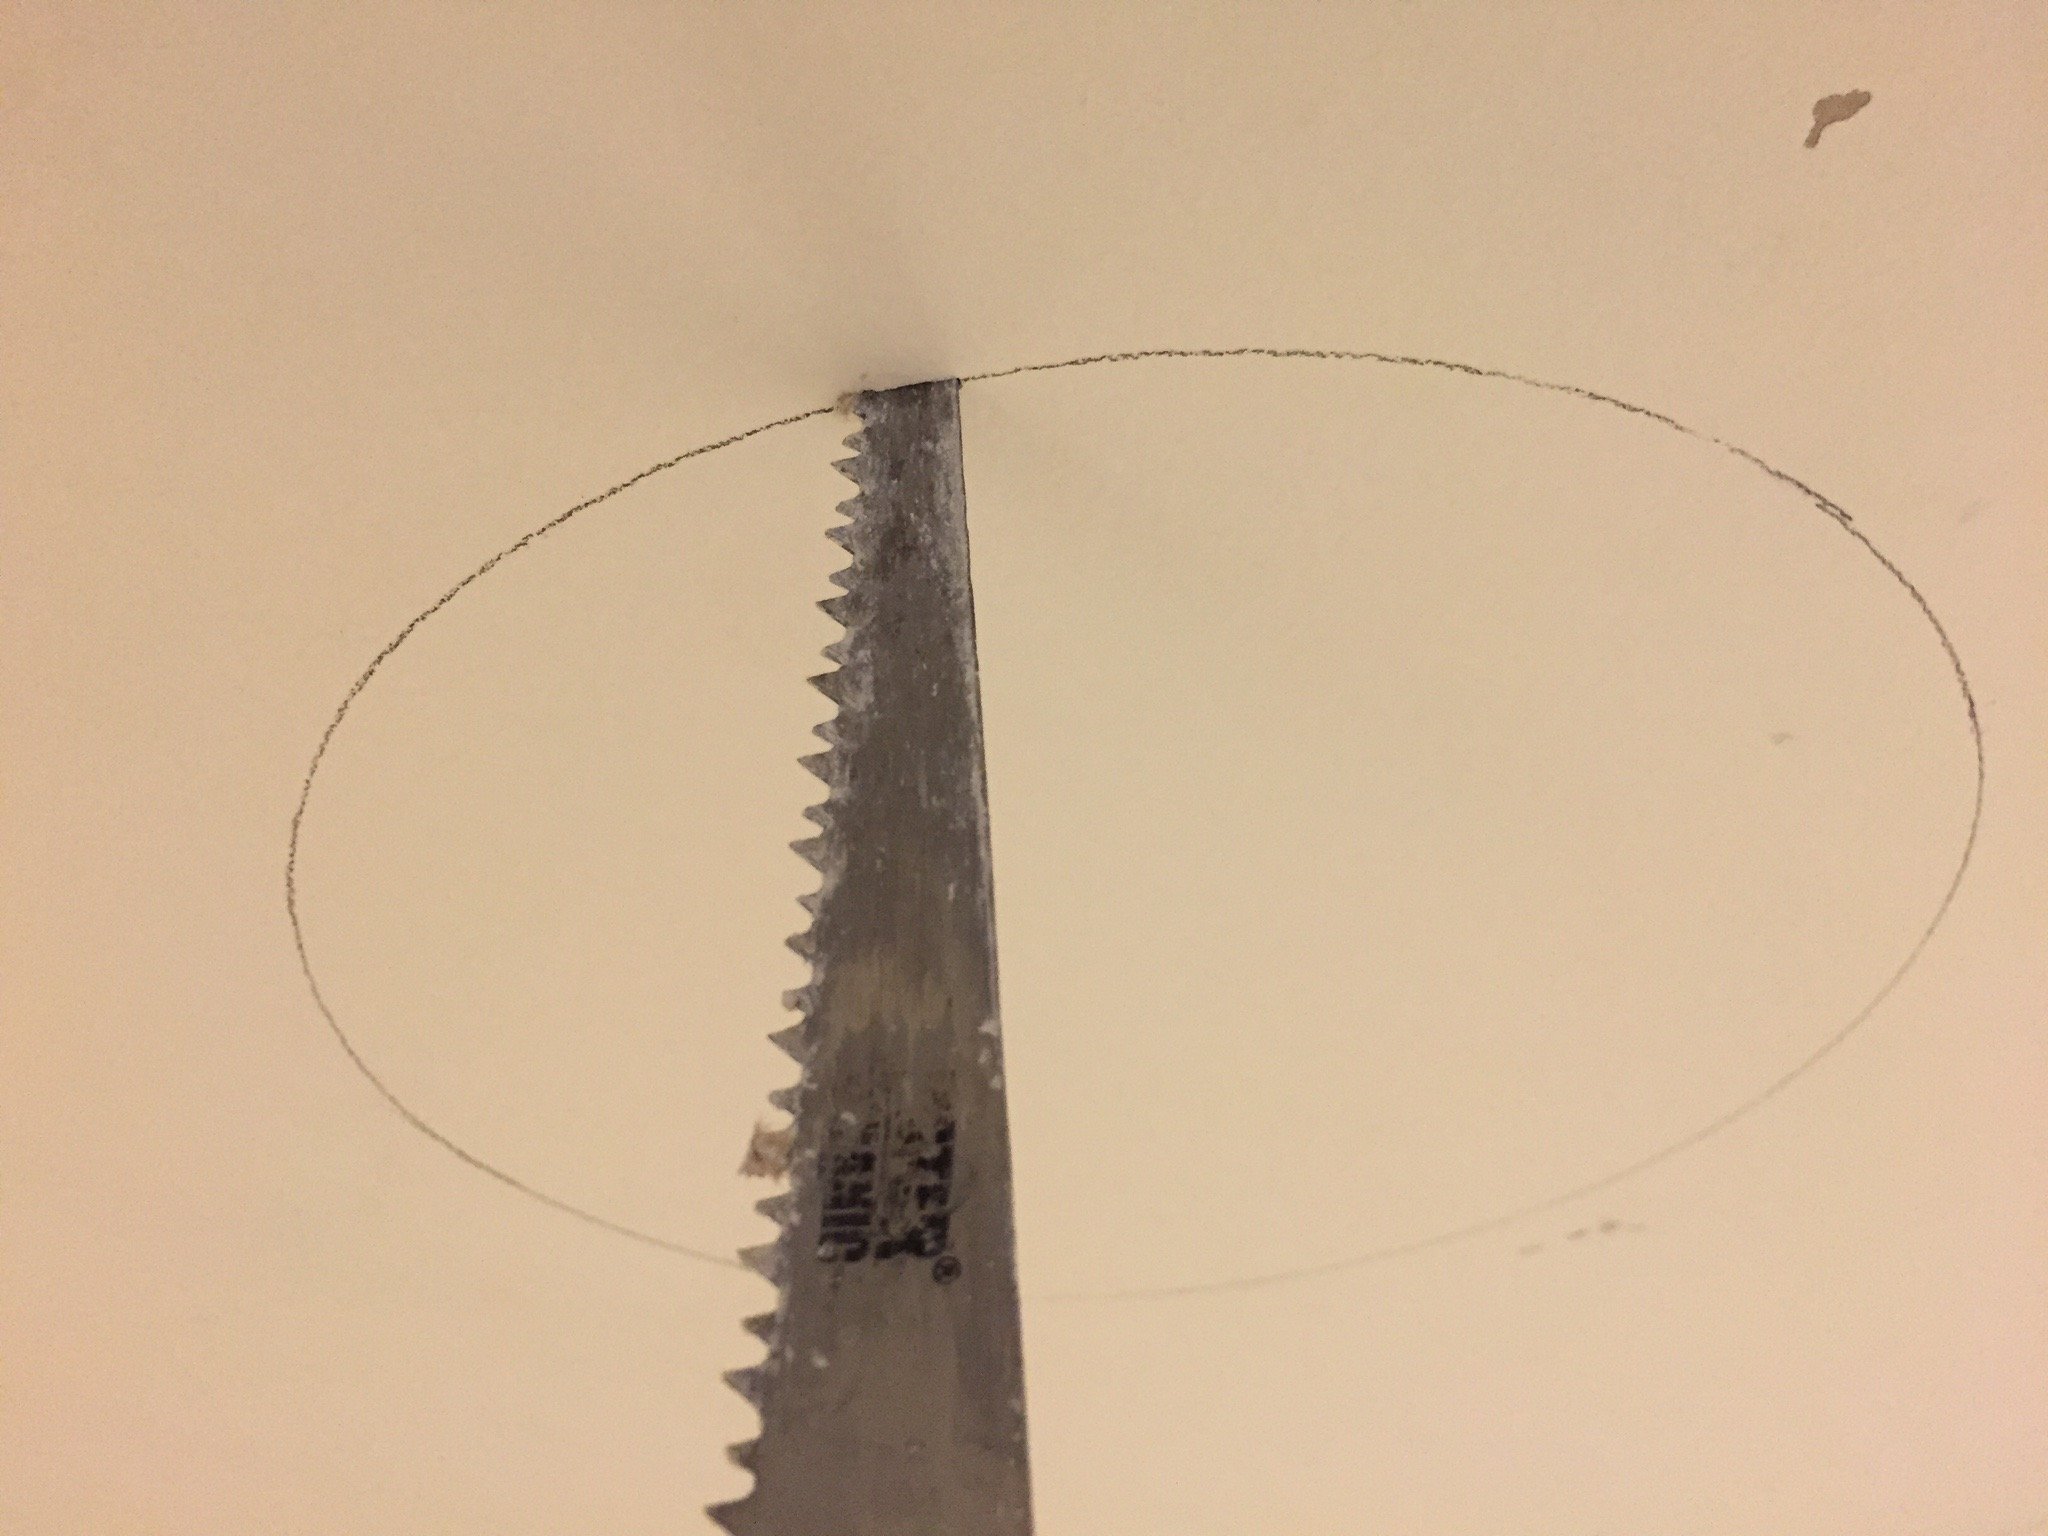
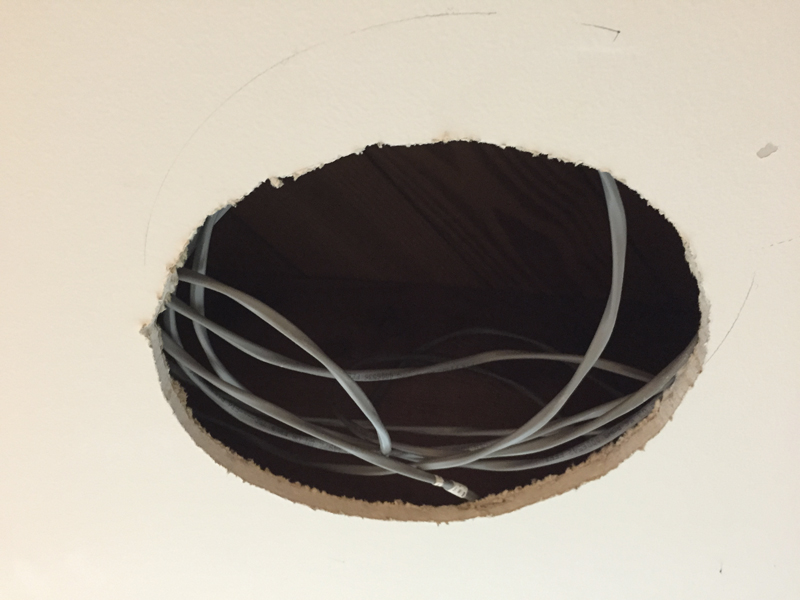
I traced each speaker with the included template and then cut out the speaker holes.
The Beale Street speakers are a closed-back design due to the Sonic Vortex for extended bass response. The additional benefit is that the Sonic Vortex design gives them a completely rigid feel. I was installing the Beale Street speakers into completely empty cavities so the closed back designs really came in handy to provide the much needed isolation. At this initial point in the setup, I did not put any kind of insulation or other dampening into the ceiling. I will likely do this down the road, but I wanted to try and mimic what may be a typical installation here. I asked about the insulation or dampening to be sure and the Beale street team said it wasn’t a requirement since they already had a closed back.
If you’ve ever installed in-ceiling or in-wall speakers, then you’ll find installing the Beale Street speakers uneventful. There was an included template with each speaker that I used to mark the location of each speaker. I then traced and cut out the sheet rock.
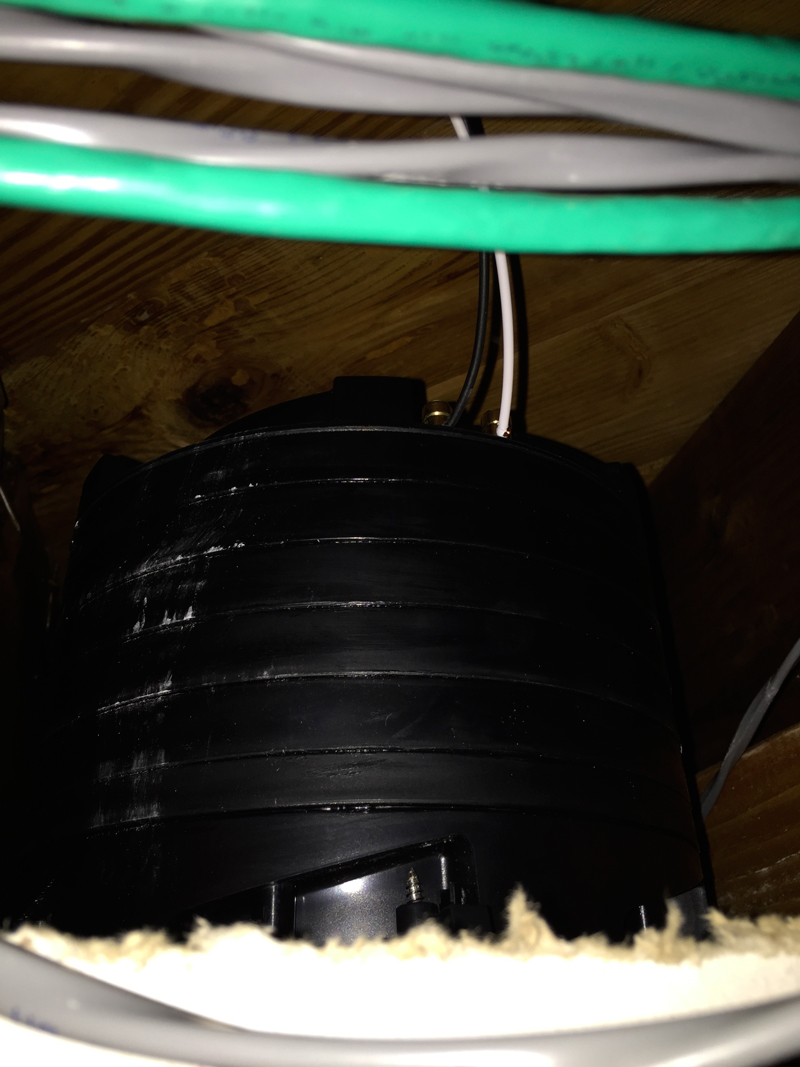
A side view of one of the installed Beale Street Speakers shows how massive the Sonic Vortex back box is.
The Beale Street speakers and subs use traditional dog-ears. I made sure that they were folded back to the speaker body, then after connecting the speaker wiring I put each speaker into the ceiling and carefully unlocked each dog-ear bracket into place.
With the last speaker installed, it was simple and easy to snap on the grill covers. Each Beale Street Audio speaker comes standard with magnetic grills. In a matter of seconds, I was ready to roll.
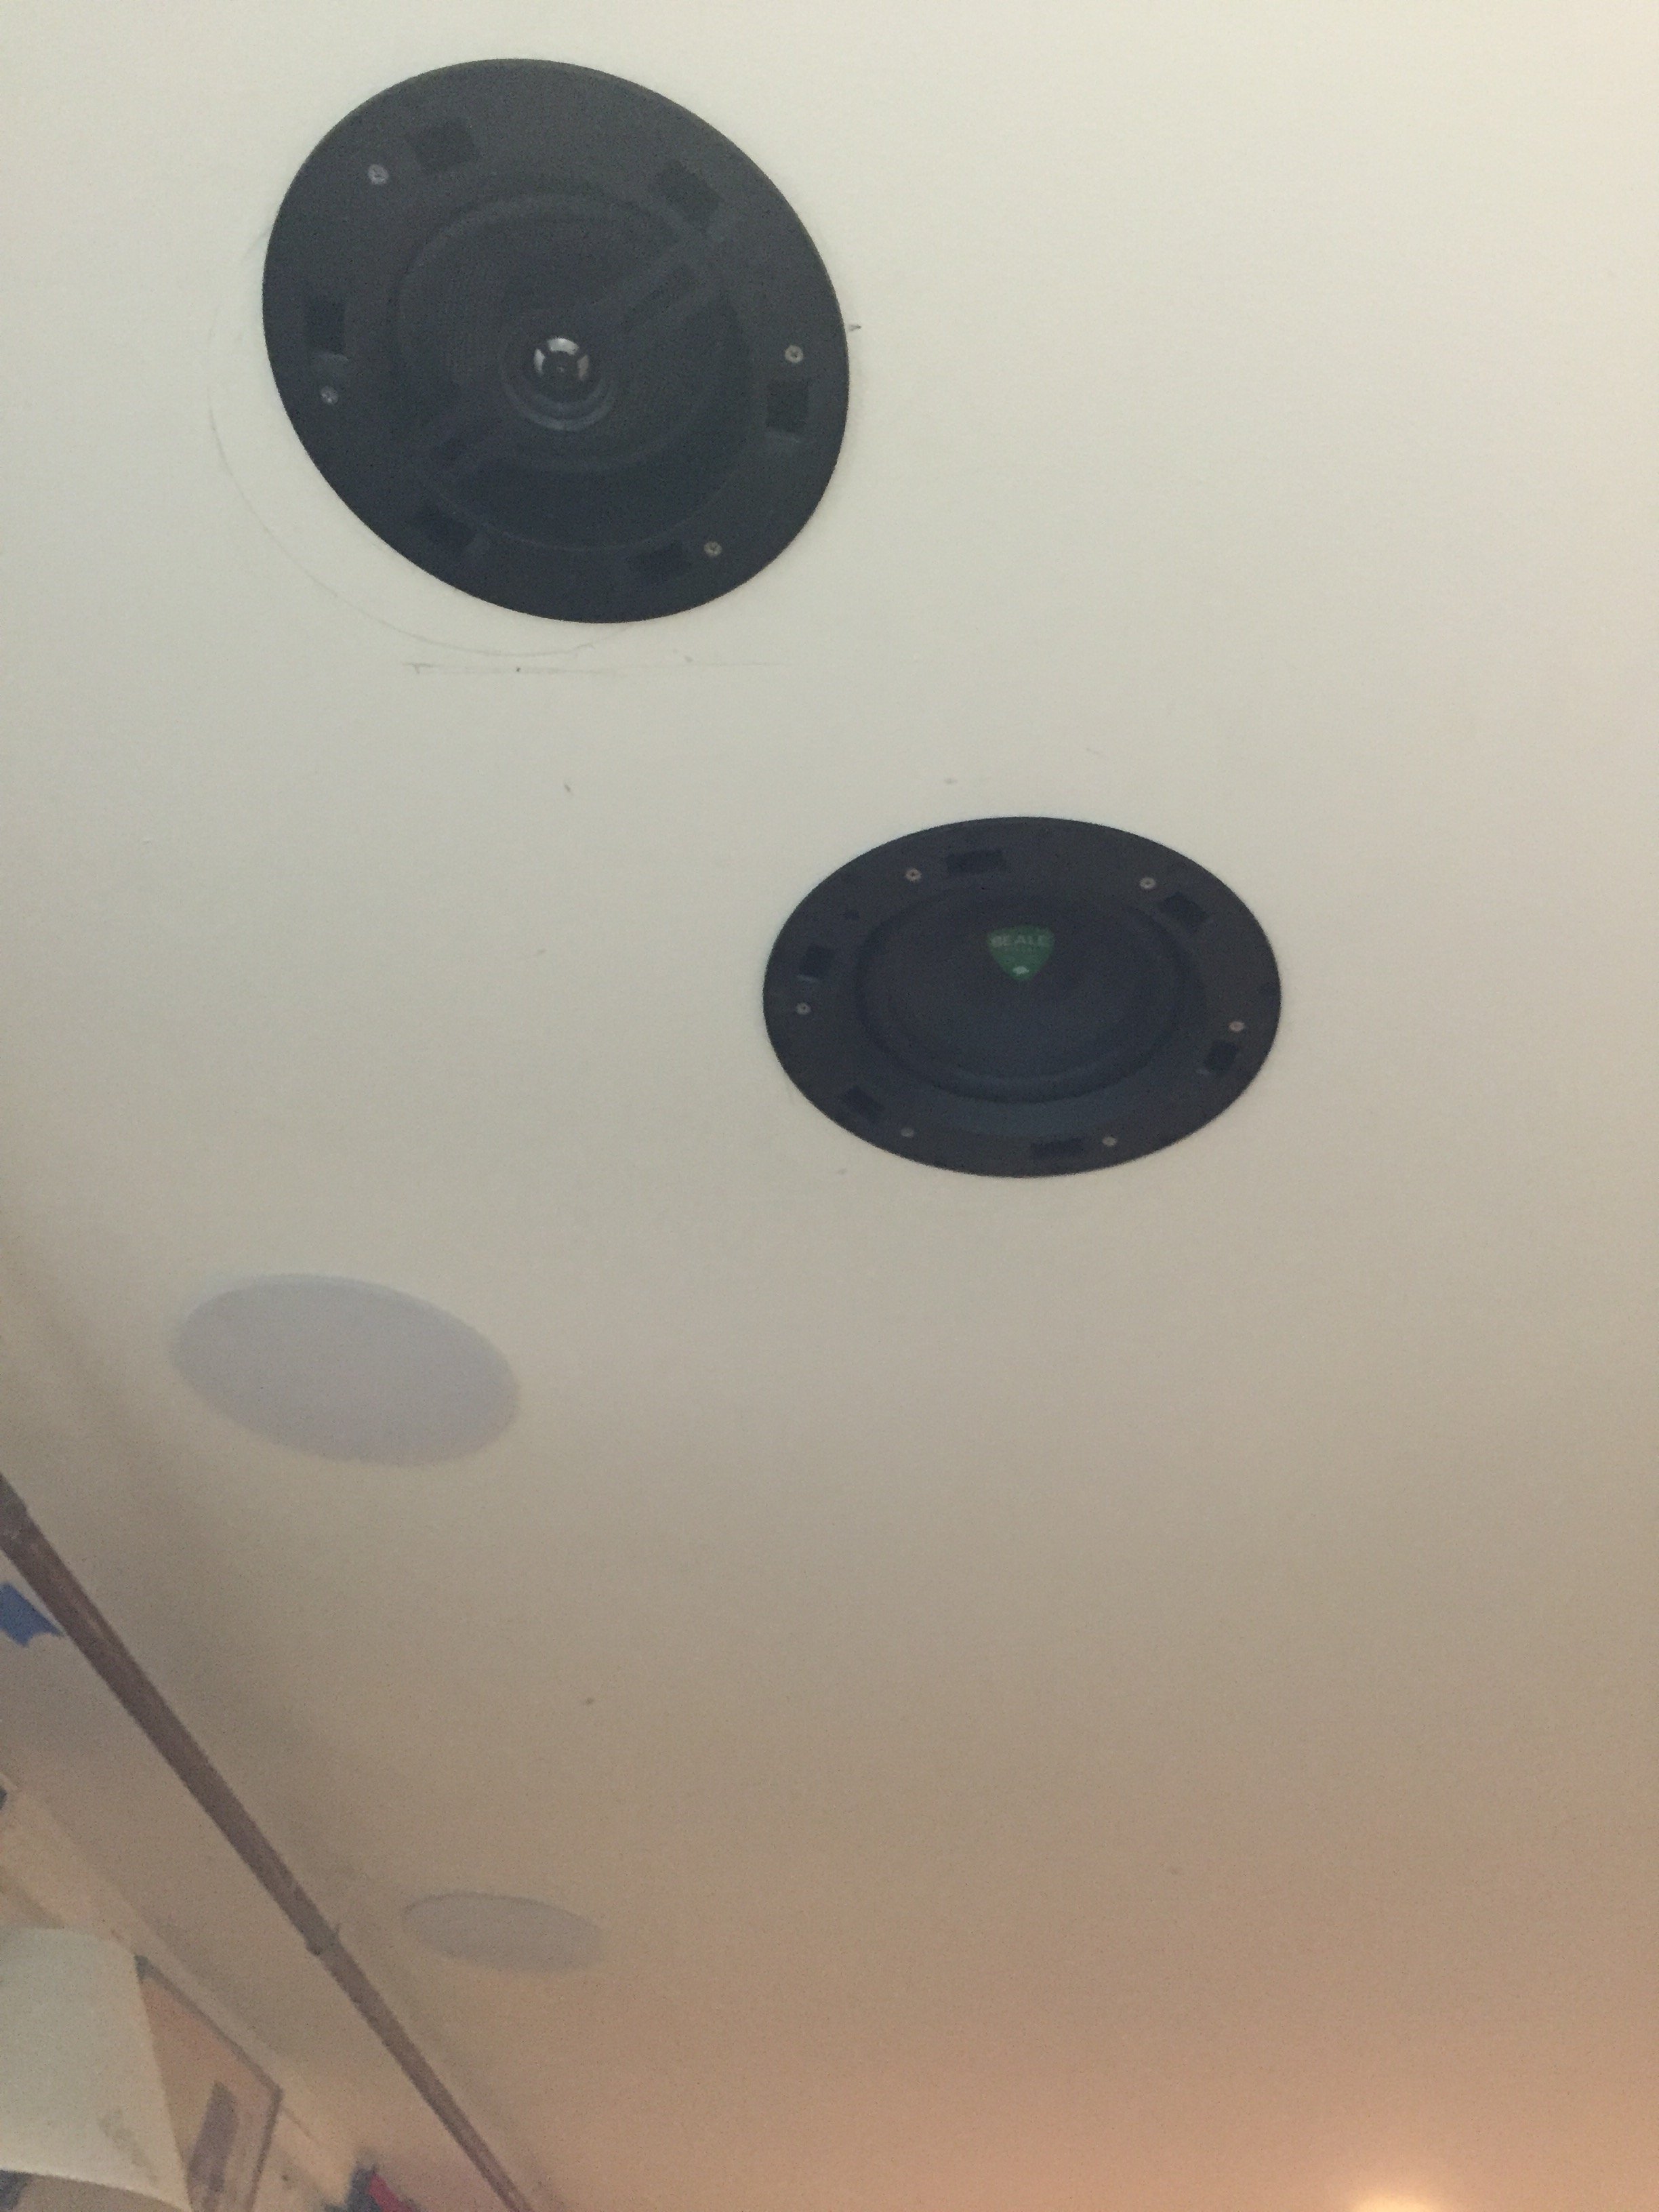
Attaching the grilles to the Beale Street speakers was a piece of cake. They are magnetic and snapped into place.
Up Next…
Check out how it all sounded in our DTS:X Listening Evaluation. We'll also be covering the different immersive audio configurations, Dolby Atmos, DTS:X, Auro-3D as well as the all in-ceiling 7.4 set up and how they performed. Finally, in the third part of this series, we'll be doing a more in-depth review of the Beale Street Audio speakers and hardware used in this setup. Until then, we hope you found this article useful when planning a new immersive surround home theater or retrofitting an old one to incorporate height channels.
Theo Nicolakis has been reviewing high end audio, video, home theater, headphone, and portable music products. His reviews have appeared here on Audioholics as well as Techhive.com, and more. His reviews span high end two-channel and home theater systems, AVRs and immersive audio processors, room correction technologies, headphones, DACs, DAPs, music servers, sound bars, and display technologies. His breadth and depth of experience encompasses mi
View full profile