
Tips for a Clean HDTV Installation
HDTV on-wall
We have reached a marvelous time where HDTV is not only affordable, but also low profile enough to get the green light from our wives to hang on a wall in the comforts of our own bedrooms. This article provides useful tips on how to hide cabling connected to your HDTV to ensure the cleanest looking install possible. It's assumed the reader knows how to install the proper mounting bracket for their display and hence this is not covered in this article.
When my house was built, I prewired three of the rooms for home theater, one of which just happened to be our master bedroom. It was my wife's desire and my goal to have no A/V gear in our bedroom other than the Verizon FIOS box and a wall hung HDTV display. Thus I installed all in-wall speakers and in-wall subwoofers and had all of the appropriate connections run back to the main theater room on the second floor. For the most part this has worked out well except when the wife wants to watch a Blu-ray disc in bed and I have to trot upstairs to put one in the player. Hey it’s a small inconvenience to keep the gear clutter out of our room and it gets me some extra exercise to counter the hours of vegging in bed watching a movie.
See: In-wall Speaker Installation Tips
Located behind the area where the bedroom TV was to be hung, I ran 6 COAX and 1 RJ45 to my theater room, 2 COAX and 1 RJ45 to my central data area in the laundry room. What I didn’t account for at the time was how to route the various cables to the FIOS box which was too big to simply mount on a wall and too far away from the TV to adequately hide the cabling. Don't forget with a cable/satellite box you need to hide a power cable, HDMI cable, COAX for the TV service and COAX for the digital audio to get 5.1. In some cases you can get away without the digital coax if you're using the HDMI cable to pass digital audio but since I didn't run HDMI from my bedroom to my theater room, COAX was needed.
What this left me was a dangling HDMI, a power cord, and 2 COAX cables between the TV and the FIOS box sitting on top of the bedroom dresser. To make matters worse, these cables were in the direct path of the center channel. Something had to be done as this was not a very spousal or even an Audioholic solution. One option would have been to run conduit down the wall and paint it the same color to conceal it. I was contemplating doing this until one night while I was watching House MD drill a hole into a patients head to relieve fibromyalgia syndrome. It occurred to me that I could do similar to my drywall to hide all the cables, only I needed a slightly bigger drill bit. In this case I needed a 2" circular hole saw bit. This size hole was plenty big to snake through all of my cables. I preferred this solution over adding another wallplate and extra termination points which lead to additional signal loss especially with HDMI runs.
Note this procedure is only recommended for interior walls. If this is to be attempted on an exterior wall, care must be taken to properly re-seal the holes to avoid loss of the insulation barrier. Outlined below is a procedure I used for a successful installation.
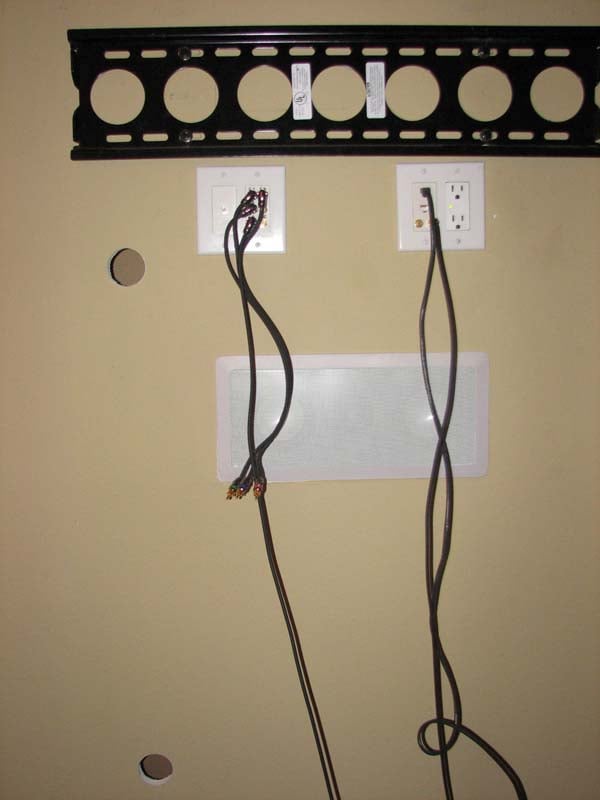
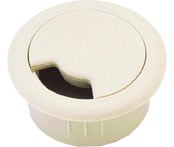
Dangling Cables (left pic) Optional Grommet Hole Cover (right pic)
Step 1: Determine
where to drill the holes
The idea
here is you don't want to see the drywall holes after the job is done. Use a stud finder to ensure you are drilling
into drywall and not a stud. I drilled
the top hole behind where the TV was to be installed as close to the wall
connections as possible. I then lined up
where the second hole was to be drilled which was a few feet below the top of
the dresser. It's important to vertically line these holes as closely as
possible to ensure the easiest cable routing.
Once these positions are marked off, drill the holes. You can finish off the job by inserting 2"
grommet holes in them for a cleaner install and to ensure less chances of
drywall chipping or flaking over time.
Since these holes are not accessible in my situation and the cables
won't be moving, I elected not to take this added step.
Step 2: Determine the necessary cable lengths
The
component cable from the wallplate to my display needed to be only one foot
long. Since my FIOS box was 3 feet below
the TV, I figured I needed roughly 2.5 times that length to provide enough
slack to route the cabling behind the drywall.
I needed custom cable lengths to really ensure a clean install. Make sure you don't skimp on cable length
here as it's never a good idea to keep cables under tension that are too short
for the job. I used all Planet Waves
DIY self terminating cables. I can't
recommend these cables highly enough not just because they are easy to cut to
desired length and terminate, but because they work well and are very flexible
and easy to route behind drywall or tight spaces. When routing the HDMI cable, be extra careful
to not bend the cable or damage the connector during the routing. I used Cables
to Go Sonicwave HDMI cable which comes with a protective covering shell on each connector which is a
great idea to leave on while running the cable through the drywall.
Step 3: Run your
cables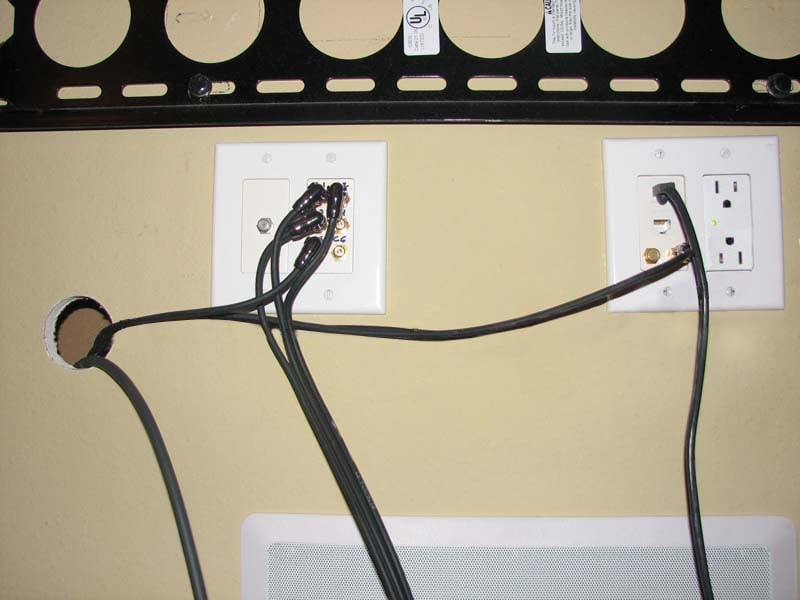 Before giving
into the urge of running your FIOS box power cable through the drywall, I am
obligated to point out that it’s a safety violation. It is recommended that you instead route the
FIOS power cable to another outlet location near the floor using an extension
cord if necessary. I ran each cable
through the drywall one at a time with a finger in the bottom hole to catch the
falling cable. After all of the cables
were routed, I made my connections to the wall plate and FIOS box. I used bread ties to group the cables and
provide strain relief.
Before giving
into the urge of running your FIOS box power cable through the drywall, I am
obligated to point out that it’s a safety violation. It is recommended that you instead route the
FIOS power cable to another outlet location near the floor using an extension
cord if necessary. I ran each cable
through the drywall one at a time with a finger in the bottom hole to catch the
falling cable. After all of the cables
were routed, I made my connections to the wall plate and FIOS box. I used bread ties to group the cables and
provide strain relief.
If the holes in the wall bother you, you can either use grommet holes like I recommended earlier, or re-install the drywall pieces you cut out by slicing them to make room for the cables and then using drywall spackle to rejoin the pieces back to the wall. You can finish off by using some touch up paint to better conceal the repair though unless you have people looking behind your dresser or TV, they will never notice these holes.
Step 4: Hang your HDTV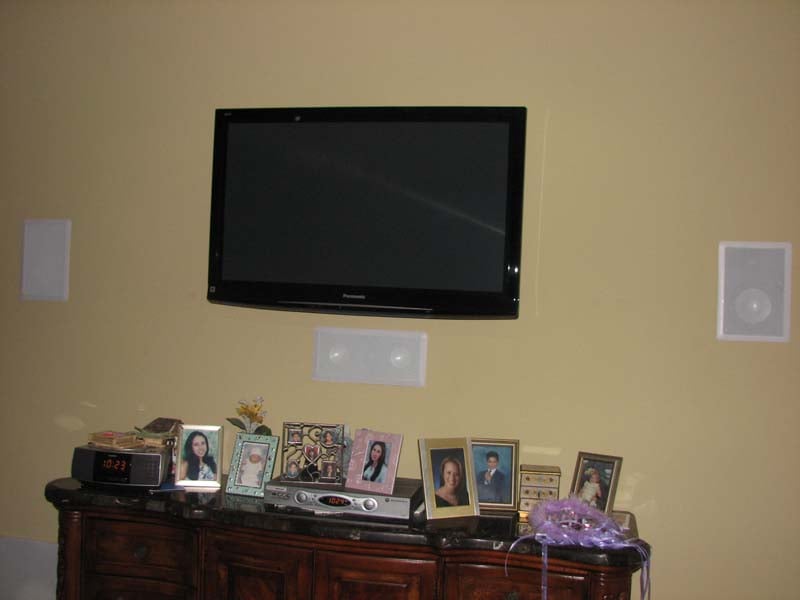 Personally
I like to use swivel mounts not only because they provide more flexible viewing
options but also because you can pivot the TV up while making all of your A/V
connections. I used a few more bread ties
to secure the heavy power cord from my Panasonic Plasma to ensure it would
never come loose and dangle below the display.
Personally
I like to use swivel mounts not only because they provide more flexible viewing
options but also because you can pivot the TV up while making all of your A/V
connections. I used a few more bread ties
to secure the heavy power cord from my Panasonic Plasma to ensure it would
never come loose and dangle below the display.
So there you have it. A clean HDTV install with no visible cables, or box speakers or subwoofers in the room. The wife is happy with the aesthetics and I am thrilled with the sonics and video aspects of the system. Now if only we could both stay awake to watch a full featured film lying down in bed.
Gene manages this organization, establishes relations with manufacturers and keeps Audioholics a well oiled machine. His goal is to educate about home theater and develop more standards in the industry to eliminate consumer confusion clouded by industry snake oil.
View full profile