
Ready Acoustics Chameleon Bass Trap Review
Ready Acoustics Chameleon Bass Trap
- Product Name: Chameleon Bass Trap
- Manufacturer: Ready Acoustics
- Performance Rating:

- Value Rating:

- Review Date: August 03, 2007 07:20
- MSRP: $ 129.99
- Panel Dimensions: 48"x24"x4"
- Frame Color Options: Black, Gray, White, Sand, Blue, Red
- Fabric Color Options: Black, Burgundy, Tan, Sand, White, Blue, Red
- Weight: Fully assembled using OC 703 - 15lbs, frame alone - 5.33 lbs
Pros
- Much improved aesthetics over standard panels
- Easy to put together/install
- Able to customize to your particular décor by using own fabric
- They work
Cons
- None
Ready Acoustics Chameleon Bass Trap Introduction
Rigid fiberglass board and mineral fiber board, especially Owens-Corning 703 or 705, has been used in the construction of bass traps and acoustical panels since… well for as long as I can remember. The fact is - it works. There is science behind it. There are measurements. We know how well it absorbs, at what frequencies, and in what locations. It isn't exactly rocket science. So when Ready Acoustics contacted me about reviewing their Chameleon Bass Traps, my first thought was "Why?"
A perusal of their website will quickly give you the "why". It seems that, unbeknownst to me, there has been this force for good in the universe helping out DIY acoustical panel builders. They offer raw Owens-Corning rigid fiberglass board by the box, they sell "bags" for you to put your mineral fiber boards into with straps upon which to mount them to your wall. They sell mounts for your bag wrapped panels. They have oodles of videos on how to wrap, hang, and just about everything else to your panels. And now they offer a "frame" to dress up said panels so that your wife will actually let you have them. Where was this when I was trying to track down a supplier of mineral fiber for my DIY panel article?
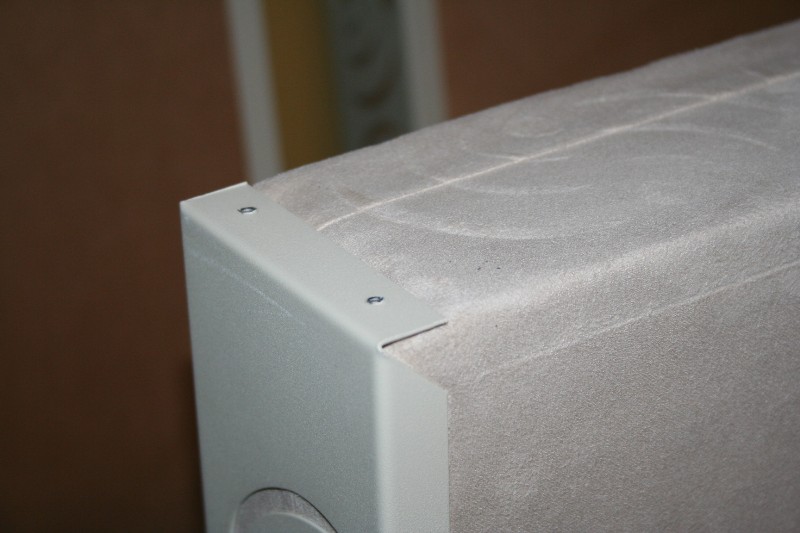
Build Quality
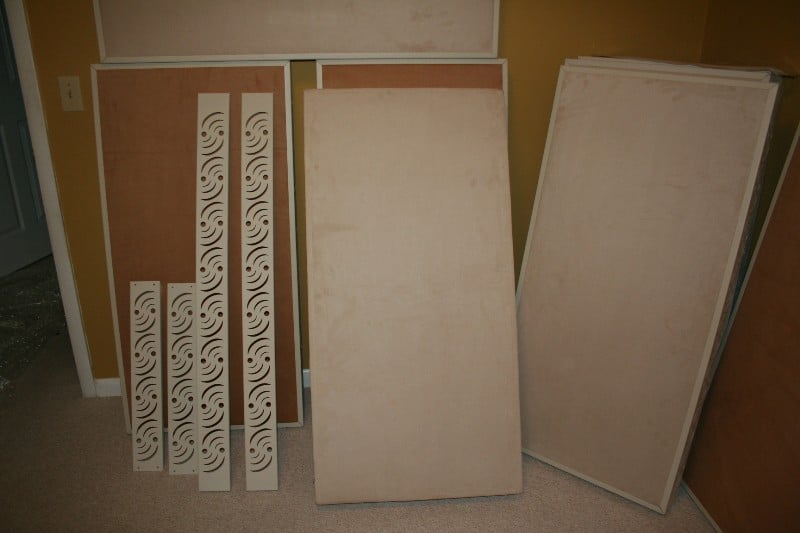 The distinctive feature of the Chameleon Bass Traps
is the frame. Constructed of 100% cold rolled steel, the frame comes in six
colors (Black, Gray, White, Sand, Blue, and Red) the most popular of
which has to be black. I don't imagine it would be all the difficult to grab a
can of spray paint if you really wanted to customize the frames yourself or you
could take them to a professional if you are really worried about getting the
perfect finish. There is definitely a front side and a back side to the frames,
the back has the keyhole openings (used for mounting). You'll want to make sure
you have the keyholes on the side that has the hanging straps (if you are using
the bags) or just on the back if you are covering them yourself. There are
cutouts down the sides in a nifty little pattern which have three purposes,
first they allow sound to pass through to the absorptive sides, they reduce
weight, and they are essentially the Ready Acoustics logo. At 5.88 lbs, the
frames themselves aren't light (then entire trap is 15 lbs) so you'll need
something a little sturdier than a small picture hanger. Once constructed, the
frame is completely rigid and immobile. You don't have to worry about it
deforming on you as you move it around during the hanging process. The only
difficult parts are getting the frames over the mineral fiber as it is
extremely tight (this is a necessary evil) and making sure the fabric is pulled
tight. Both of these are minor hassles at best and after you put together one
panel, you'll learn all the tricks you'll need to put together perfect looking
panels.
The distinctive feature of the Chameleon Bass Traps
is the frame. Constructed of 100% cold rolled steel, the frame comes in six
colors (Black, Gray, White, Sand, Blue, and Red) the most popular of
which has to be black. I don't imagine it would be all the difficult to grab a
can of spray paint if you really wanted to customize the frames yourself or you
could take them to a professional if you are really worried about getting the
perfect finish. There is definitely a front side and a back side to the frames,
the back has the keyhole openings (used for mounting). You'll want to make sure
you have the keyholes on the side that has the hanging straps (if you are using
the bags) or just on the back if you are covering them yourself. There are
cutouts down the sides in a nifty little pattern which have three purposes,
first they allow sound to pass through to the absorptive sides, they reduce
weight, and they are essentially the Ready Acoustics logo. At 5.88 lbs, the
frames themselves aren't light (then entire trap is 15 lbs) so you'll need
something a little sturdier than a small picture hanger. Once constructed, the
frame is completely rigid and immobile. You don't have to worry about it
deforming on you as you move it around during the hanging process. The only
difficult parts are getting the frames over the mineral fiber as it is
extremely tight (this is a necessary evil) and making sure the fabric is pulled
tight. Both of these are minor hassles at best and after you put together one
panel, you'll learn all the tricks you'll need to put together perfect looking
panels.
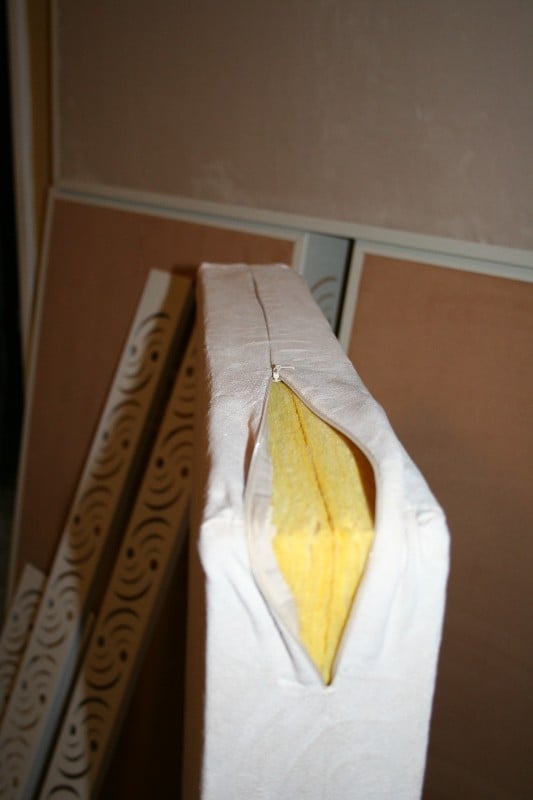 The Ready
Acoustics Ready Bags are open at the top (or bottom depending on how you hold
the bag) and are closed with a small zipper (think the one your wife always
asks you to zip on the back of her dress). The Ready Bags come with peel and
stick corner pieces (to keep your mineral fiber board corners from being
crushed (not used with the Chameleon Frames). The bags used with the Chameleon
Panels accommodate four inches of board (two 2" boards). Packing the bags
couldn't be easier with the included instructions (and online
demo) - simply sandwich the mineral fiber between two pieces of cardboard,
roll the bag up, and remove the cardboard before zipping it up. The cardboard
is really the critical part as it both makes finagling the bag up easier and
protects the mineral fiber as you do so. The bags have a "suede" type
finish that you can run your hand across to create patterns. It is very soft
and supple to the touch though the suede finish does pick up fingerprints and
scuffs pretty easily (all you have to do is wipe them down).
The Ready
Acoustics Ready Bags are open at the top (or bottom depending on how you hold
the bag) and are closed with a small zipper (think the one your wife always
asks you to zip on the back of her dress). The Ready Bags come with peel and
stick corner pieces (to keep your mineral fiber board corners from being
crushed (not used with the Chameleon Frames). The bags used with the Chameleon
Panels accommodate four inches of board (two 2" boards). Packing the bags
couldn't be easier with the included instructions (and online
demo) - simply sandwich the mineral fiber between two pieces of cardboard,
roll the bag up, and remove the cardboard before zipping it up. The cardboard
is really the critical part as it both makes finagling the bag up easier and
protects the mineral fiber as you do so. The bags have a "suede" type
finish that you can run your hand across to create patterns. It is very soft
and supple to the touch though the suede finish does pick up fingerprints and
scuffs pretty easily (all you have to do is wipe them down).
 The back of
the bags have three "handles" used for mounting (mostly used without
the Chameleon Frames). These are sown directly into the fabric of the bag.
Personally, I'd be concerned about the fabric slowly stretching which would make
the placement of the bags a non-exact science. As the bags without the frames
are much lighter, this might not be an issue. The keyhole openings in the
frames makes hanging a bit easier to deal with but if you are going the bag
only route, you'll have little other choices.
The back of
the bags have three "handles" used for mounting (mostly used without
the Chameleon Frames). These are sown directly into the fabric of the bag.
Personally, I'd be concerned about the fabric slowly stretching which would make
the placement of the bags a non-exact science. As the bags without the frames
are much lighter, this might not be an issue. The keyhole openings in the
frames makes hanging a bit easier to deal with but if you are going the bag
only route, you'll have little other choices.
At this point, you've met the players but you haven't heard all the options. The Chameleon frames run $34.99 a pop, the Ready Bags run $29.99 each, and Ready Acoustics will sell you a box of 6 slabs of Owens-Corning 703 for $79.99 ($26.66 for each panel for the math impaired) and 705 (much heavier than the 703) for $129.99 ($43.33 a panel). Now, let's do the math here - if you buy everything separately, you'll pay $91.64 for 703 (which is what the Chameleon Panels are made out of). So, what's with the $129.99 price tag? They'll sell you them one at a time and when they assemble them for you, they rivet the edges instead of using screws. This works great if you don't want to buy panels 3 at a time (which is how you have to buy the mineral fiber). But it also gives you the option of switching out whichever of the pieces you have or won't want.
For example, what if you have a particular décor or look you're going for? Skip the bag and just order the frames and the mineral fiber. The frames will hold any fabric you want in place and you can use the keyhole slots for mounting. Or if you have your own source for mineral fiber board, you can just buy the bags and the frames. You can see where I'm going with this. You've got all the power. You aren't hamstringed by Ready Acoustics in any way. A pretty nice arrangement that will fit the needs of a number of different types of customers.
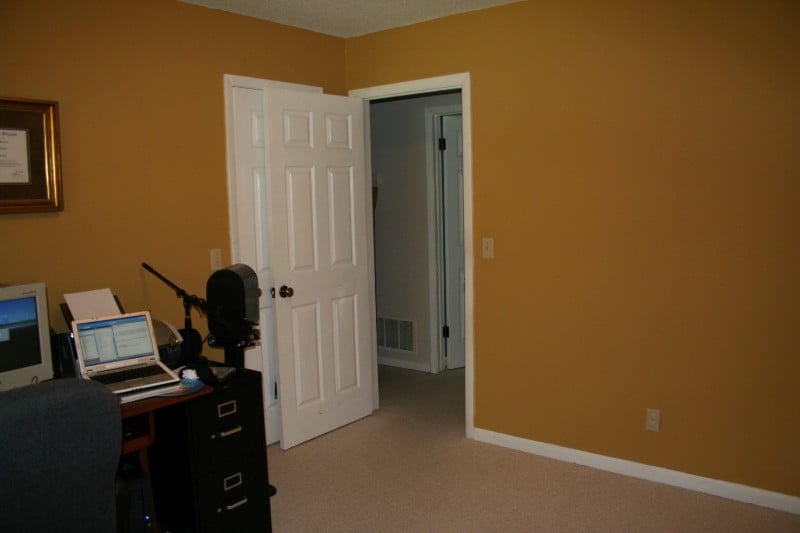
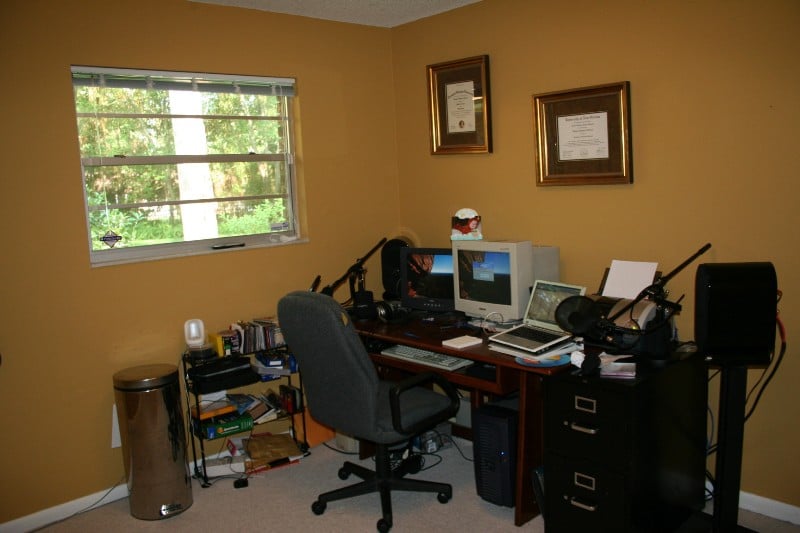
Before Treatment
Setup
So I'm reviewing panels, I stick them in my home theater right? Well, YOU do. I already have panels in my home theater. I don't really need to replace them any time soon. What I do need is to deaden my office. Why? AVRant of course. For those of you that haven't heard, Audioholics and the Home Theater Alliance got together and said, "We want a Podcast." They decided that they wanted someone opinionated, egomaniacal, and just a little sarcastic so they looked no further than yours truly. Any Podcast associated with Audioholics just has to have good audio quality so the purchase of decent equipment and the outfitting of good rooms was first and foremost on our list. Decent equipment is easy to obtain, you just buy it. But for recording what you need is a dead room. And by dead, I mean DEAD.
Zombie dead.
Night of the Living Dead.
Oh my God why won't my ears pop dead.
Enter Ready Acoustics. I modeled my room with Google Sketchup (a funky little program that was actually pretty fun after I watched the training videos) and discussed the options with Joel DuBay the President of Ready Acoustics. The short version is that I have an office that is about 10 feet by 11 feet by 8 feet high and I've got 19 Chameleon Bass Traps in there. How dead is that? You can almost hear the blood coursing in your veins dead. But it did give me the opportunity to test out the myriad of ways that these panels can be set up.
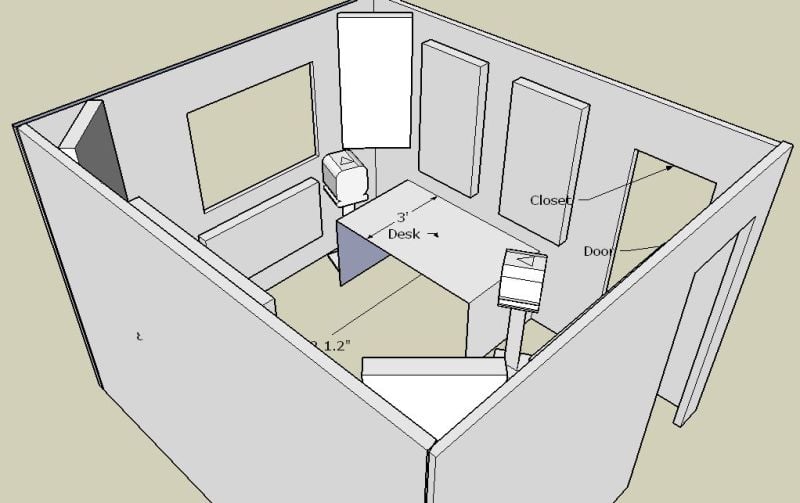
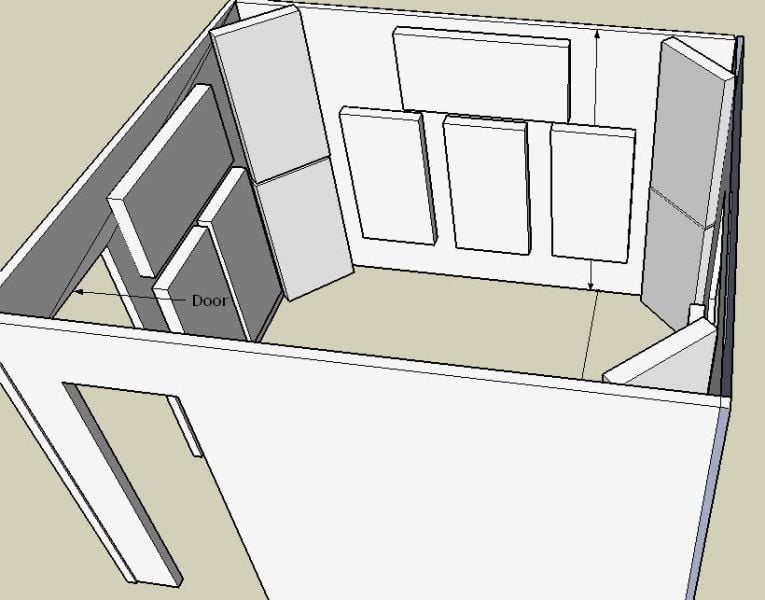
Planning Stage
Hanging the Ready Acoustics Chameleon Bass Traps
Corner mounting
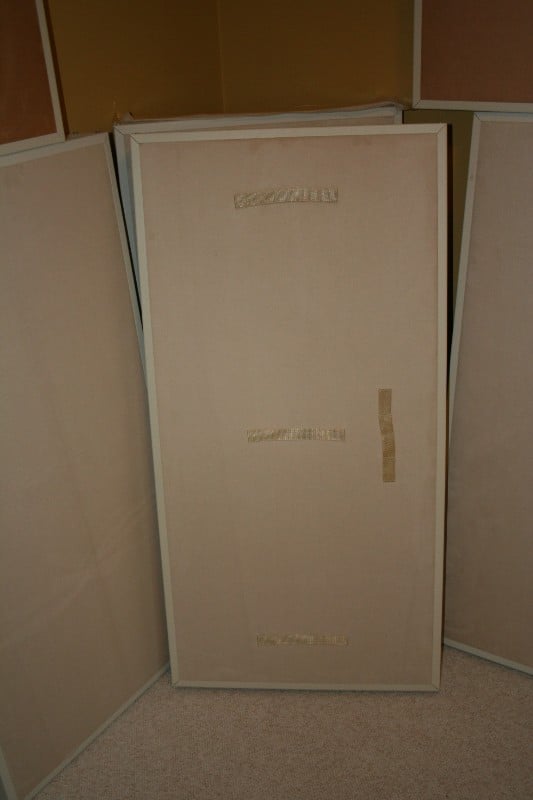
 For reasons
that only the shipping company can truly comprehend, the panels and the
mounting hardware came in separate shipments (for the most part - I did get a
couple of hooks and odds and ends) so I had to wait… or did I? Well, I had huge
boxes filled with panels all over the house and the wife was giving me the,
"You better do something about this and quick, mister," look so I
decided to start unpacking them. It wasn't like I had to hang them right? Well, once I got everything but the ceiling
panels unpacked (those are white I didn't really want grubby little kid hands
mucking them up before I hung them) I started thinking. The corner panels
shouldn't be too hard to mount right?
For reasons
that only the shipping company can truly comprehend, the panels and the
mounting hardware came in separate shipments (for the most part - I did get a
couple of hooks and odds and ends) so I had to wait… or did I? Well, I had huge
boxes filled with panels all over the house and the wife was giving me the,
"You better do something about this and quick, mister," look so I
decided to start unpacking them. It wasn't like I had to hang them right? Well, once I got everything but the ceiling
panels unpacked (those are white I didn't really want grubby little kid hands
mucking them up before I hung them) I started thinking. The corner panels
shouldn't be too hard to mount right?
 Off I went to the Ready Acoustics website to look at
a couple of videos. They have a bunch of suggestions on how to hang their
panels using their mounting equipment or your own stuff. A lot of it suggested
things that I didn't have readily available (like bungee cords) so I started to
improvise. I had the hooks, a drill, but no way to really connect the panels to
the hook. Not only that, but the panels are just a hair over 4 feet tall and my
wall is just a hair under 8 feet tall so my initial thought that I could just
"shove" them in there and let friction hold them in place wasn't
going to work (not that I didn't try). Want to know how strong the Chameleon
frames are? The ceiling of my room bowed up without so much as a shiver down
the spine of the frame. Strong? Oh yeah.
Off I went to the Ready Acoustics website to look at
a couple of videos. They have a bunch of suggestions on how to hang their
panels using their mounting equipment or your own stuff. A lot of it suggested
things that I didn't have readily available (like bungee cords) so I started to
improvise. I had the hooks, a drill, but no way to really connect the panels to
the hook. Not only that, but the panels are just a hair over 4 feet tall and my
wall is just a hair under 8 feet tall so my initial thought that I could just
"shove" them in there and let friction hold them in place wasn't
going to work (not that I didn't try). Want to know how strong the Chameleon
frames are? The ceiling of my room bowed up without so much as a shiver down
the spine of the frame. Strong? Oh yeah.
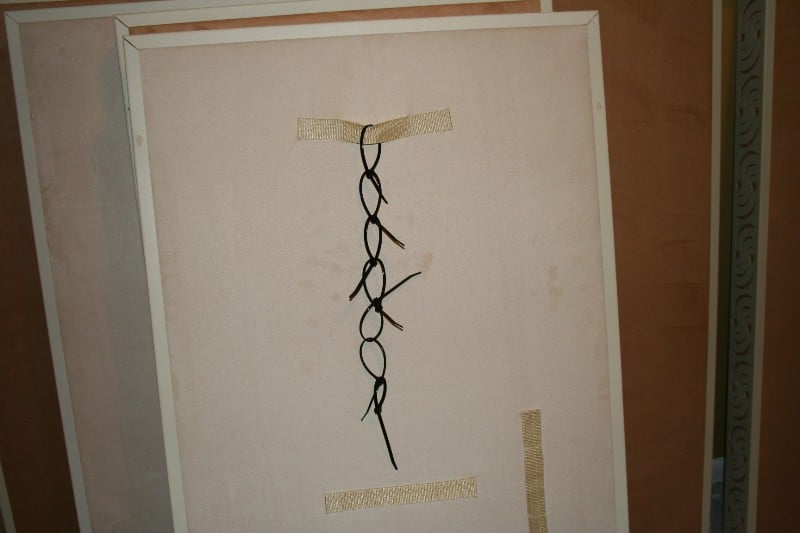
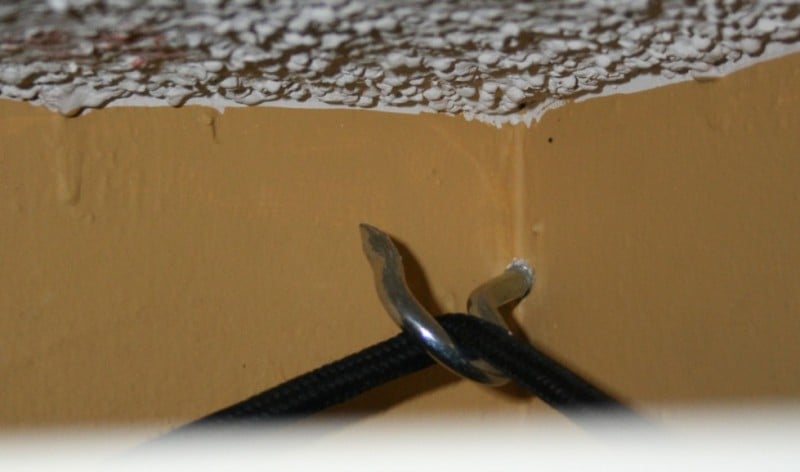
 So what to do? Well, way back in the day when I was
running wires in the attic (well, Jimmy ran the wires but I offered a lot of
moral support) I bought a bunch of cable ties. Of course, they only come in
packages of 100 and I needed like 10 so I had a few extras. The kids play with
them but mostly they just take up shelf space. Like my father, his father, and
all the other Andry men, I keep them around because "you never know"
when you'll need them (I'm sure you've said something similar many, many
times). In a stroke of non-WAF brilliance, I linked them up like a chain making
sure to keep the loops large. I put the panel in place and pulled the link
chain as taunt as I could and slipped it over the hook. Once I released the
panel, it of course sagged forward a bit. The next step (and this is the brilliant
part) is I reached back there and tightened up one link after another until the
panel was in the proper placement. I let the panel settle for about a day and
then I went behind it again and tightened it up one more time. After a week, I
tighten them again. Now, if I ever want to get the panel down I'll have to cut
the ties but since I still have like 75 of them left I should be OK.
So what to do? Well, way back in the day when I was
running wires in the attic (well, Jimmy ran the wires but I offered a lot of
moral support) I bought a bunch of cable ties. Of course, they only come in
packages of 100 and I needed like 10 so I had a few extras. The kids play with
them but mostly they just take up shelf space. Like my father, his father, and
all the other Andry men, I keep them around because "you never know"
when you'll need them (I'm sure you've said something similar many, many
times). In a stroke of non-WAF brilliance, I linked them up like a chain making
sure to keep the loops large. I put the panel in place and pulled the link
chain as taunt as I could and slipped it over the hook. Once I released the
panel, it of course sagged forward a bit. The next step (and this is the brilliant
part) is I reached back there and tightened up one link after another until the
panel was in the proper placement. I let the panel settle for about a day and
then I went behind it again and tightened it up one more time. After a week, I
tighten them again. Now, if I ever want to get the panel down I'll have to cut
the ties but since I still have like 75 of them left I should be OK.
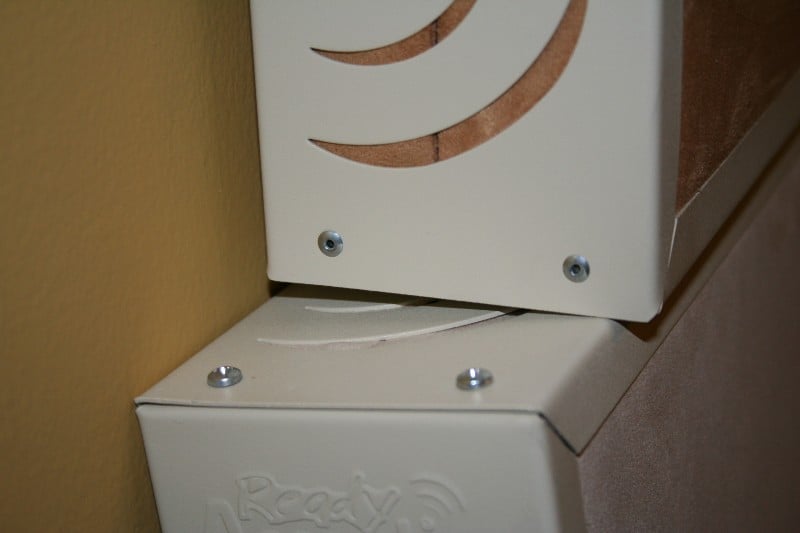
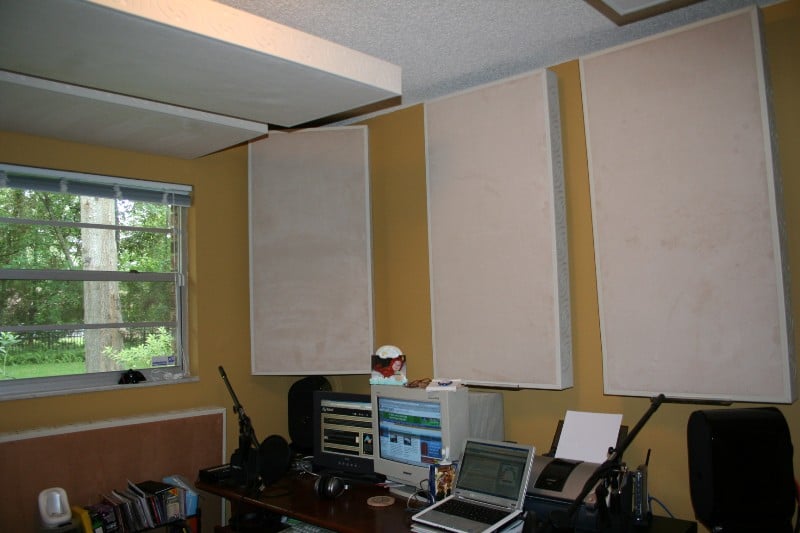
 This worked fine for the "leaning" corner
panels that were supported by a bottom panel but Scott from Ready Acoustics
came by and suggested that I use a bungee stretched between the keyhole mounts for
the free hanging panel as the straps aren't designed to hold that sort of
weight on their own. Switching out the ties for a bungee took 3 guys about 30
minutes to do as the panel was inconveniently placed above my desk and very
close to the ceiling. In order to get the panel to stay in the proper place we
needed the bungee to be very tight but getting the bungee around the hook took
a lot of leverage. Eventually we got it with a minimum of damage to my wall.
The bungee was in many ways superior to my makeshift approach (another in a
long line of reasons why not receiving the hanging hardware for this review was
a huge issue) especially in placement. The bungee would hold the panel in place
even if I moved it up or down. Once or twice it slid out of place but for the
most part, once I positioned it, it stayed put.
This worked fine for the "leaning" corner
panels that were supported by a bottom panel but Scott from Ready Acoustics
came by and suggested that I use a bungee stretched between the keyhole mounts for
the free hanging panel as the straps aren't designed to hold that sort of
weight on their own. Switching out the ties for a bungee took 3 guys about 30
minutes to do as the panel was inconveniently placed above my desk and very
close to the ceiling. In order to get the panel to stay in the proper place we
needed the bungee to be very tight but getting the bungee around the hook took
a lot of leverage. Eventually we got it with a minimum of damage to my wall.
The bungee was in many ways superior to my makeshift approach (another in a
long line of reasons why not receiving the hanging hardware for this review was
a huge issue) especially in placement. The bungee would hold the panel in place
even if I moved it up or down. Once or twice it slid out of place but for the
most part, once I positioned it, it stayed put.
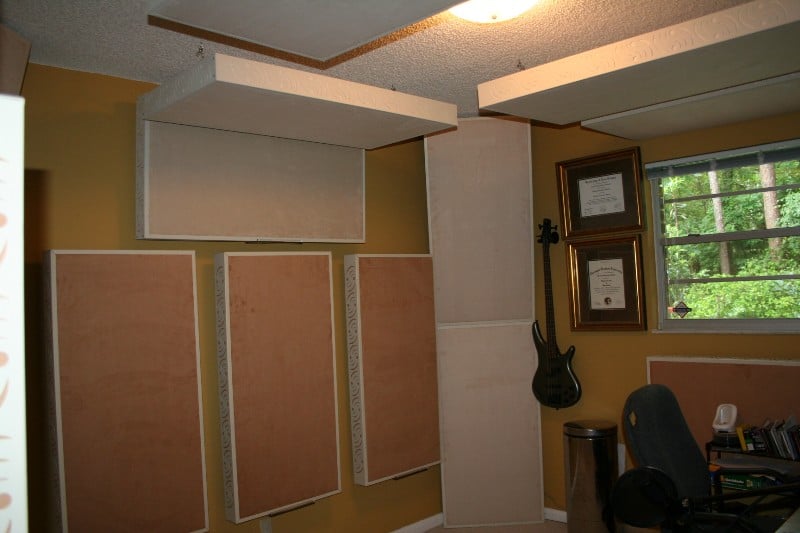
The non-WAF part of this equation was with the "leaning" panels. From around the corner, you can see the cable ties. With the flush mounted corner panels, this wasn't a problem. My solution? More panels! Since this is my office and it isn't like WAF is a huge factor in here (obviously) I just made sure that the wall mounted panel covered up as much as that sight line as possible. Honestly, I don't think bungies or any other cord would have looked much better.
Ceiling Mounting
When planning out this room (I LOVE the planning stage, everything comes out so perfectly!) I decided to make sure I hung the ceiling panels early in the process. They'd be the hardest and could potentially have a major impact on the placement of the higher wall mounted panels. The initial plan was to mount six panels on the ceiling. I knew that the critical placement would be the panel between the light and the AC vent. There is little room there and that panel would seriously affect the other placements.
My first thought was how to hang the panels without risking serious injury or equipment damage. While I'm generally OK with using drywall anchors and have used them successfully in the past, I just knew I was going to stress over having 15 pounds of panel relying on a bit of plastic and a couple of hooks so I decided to go the route of finding and using only studs. The problem with this method is that it limits the locations you can place the panels. As such, I was only able to mount four of the panels rather than the six I had originally hoped (so my room is only mostly an anechoic chamber).
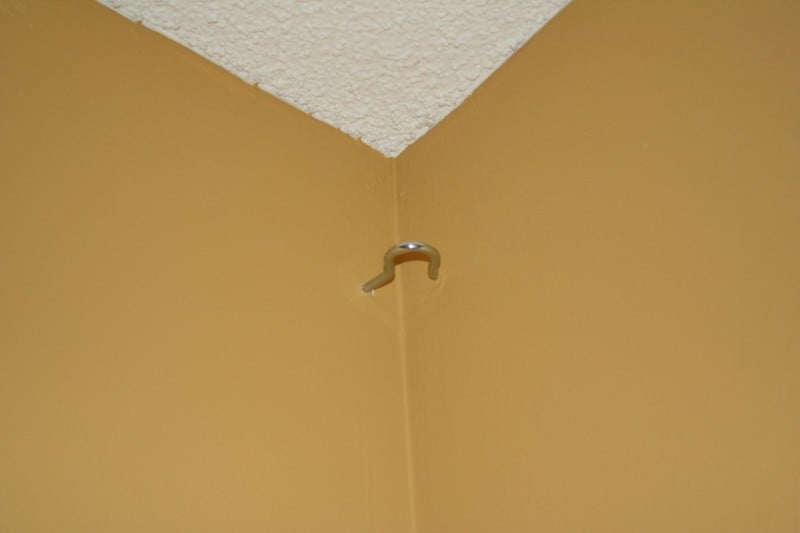
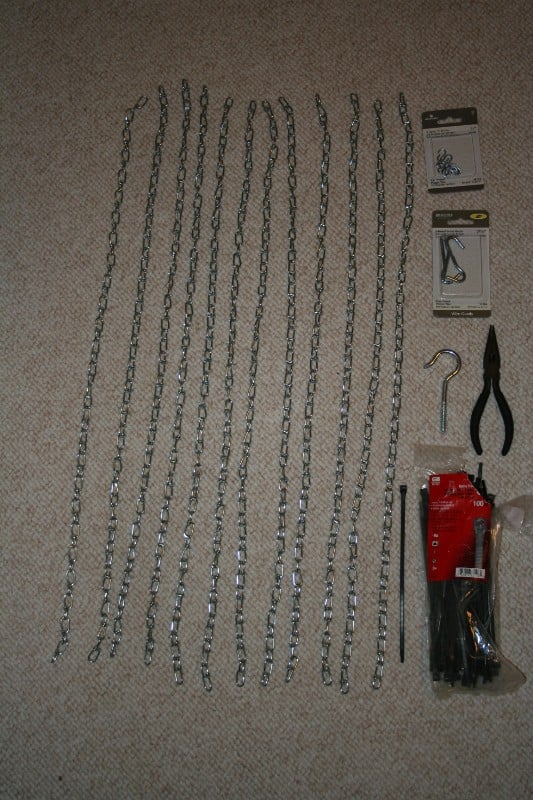 Ready Acoustics has some really nifty hanging wire
that looks really nice… but I didn't get it or any of the other mounting
hardware because of the stupid shipping company. So I decided that I'd run out
to Lowe's and pick up some chain. The chain I got is rated to hold something
like 90 pounds so I wasn't all that worried about it breaking. I also picked up
so S-links to use to connect the chain to the frames. Because I LOVE to make
multiple trips to Lowe's, I realized that the wire cutters were not going to
make the grade so I prepared to head back… until I realized I could take two
sets of pliers and just twist a link to death. I measured off a length that was
a little larger than the width of the panel and cut a bunch of chains to match.
Really, I found out later that this was a mistake. Since it is chain, you can't
get it tight enough so that it doesn't hang down a little and when you add in
the distance the hook is from the ceiling you pretty much want that chain to be
as snug as possible.
Ready Acoustics has some really nifty hanging wire
that looks really nice… but I didn't get it or any of the other mounting
hardware because of the stupid shipping company. So I decided that I'd run out
to Lowe's and pick up some chain. The chain I got is rated to hold something
like 90 pounds so I wasn't all that worried about it breaking. I also picked up
so S-links to use to connect the chain to the frames. Because I LOVE to make
multiple trips to Lowe's, I realized that the wire cutters were not going to
make the grade so I prepared to head back… until I realized I could take two
sets of pliers and just twist a link to death. I measured off a length that was
a little larger than the width of the panel and cut a bunch of chains to match.
Really, I found out later that this was a mistake. Since it is chain, you can't
get it tight enough so that it doesn't hang down a little and when you add in
the distance the hook is from the ceiling you pretty much want that chain to be
as snug as possible.
 After I hung the first panel, it became abundantly
clear that I was going to have a problem. While I had the room to run two
panels end to end, the front of the office (near the desk) didn't have the
width (because the first panel couldn't be centered in the room) and the back
of the office had the "leaning" corner panels which decreased the
length too much. So, I basically just shoved up as many as I could in as
aesthetically pleasing a way as possible. Finding the first stud was a bit of a
chore (I had to use the "deep scan" setting on the finder) but once I
did, it was easy enough to measure over 24 inches to the next on. I drilled
pilot holes for each of the screws and set them in by hand, tightening them
with a screwdriver set through the eye of the hook for leverage when necessary.
After I hung the first panel, it became abundantly
clear that I was going to have a problem. While I had the room to run two
panels end to end, the front of the office (near the desk) didn't have the
width (because the first panel couldn't be centered in the room) and the back
of the office had the "leaning" corner panels which decreased the
length too much. So, I basically just shoved up as many as I could in as
aesthetically pleasing a way as possible. Finding the first stud was a bit of a
chore (I had to use the "deep scan" setting on the finder) but once I
did, it was easy enough to measure over 24 inches to the next on. I drilled
pilot holes for each of the screws and set them in by hand, tightening them
with a screwdriver set through the eye of the hook for leverage when necessary.
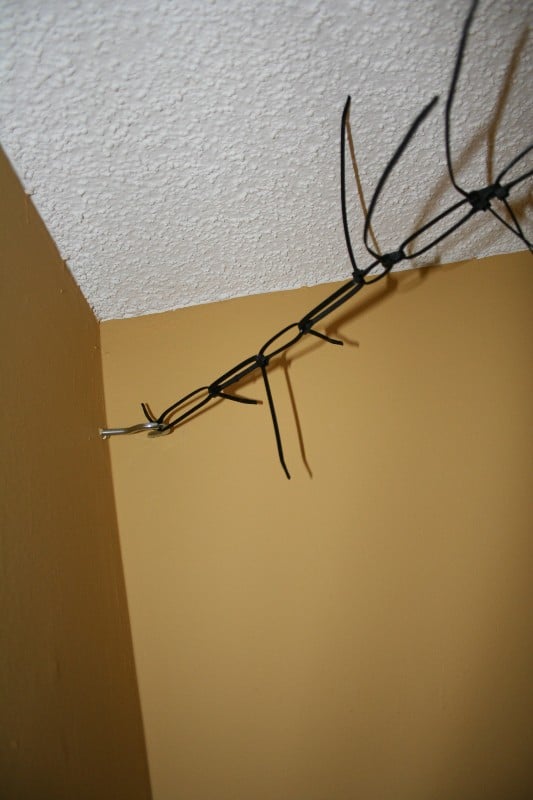
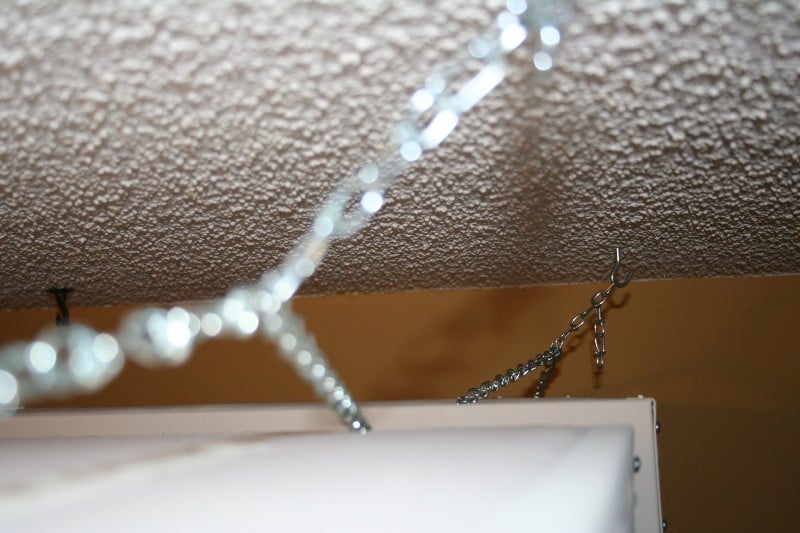 As I said
before, the chain needs to be tight as it will sag naturally. But when your
studs are 24 inches apart, you'll need a bit more extension than I originally
thought (the keyhole slots are inset 5 inches from the end). What I ended up
doing was to add a bit of chain with an S-hook to the middle of each chain and
ran that to the hook. This had two advantages, first I KNEW that the panel was
hanging true because the extension was in the middle of each of the chains.
That way I didn't just have the chain strung over the hook and have to try to
even up both sides. Also, I had the additional bonus of being able to adjust
the height of the panel by choosing which of the links I used. This became
important later on as I hung more panels. Even when I hung one panel on the
length of the stud (meaning I could connect the hooks wherever I wanted) I used
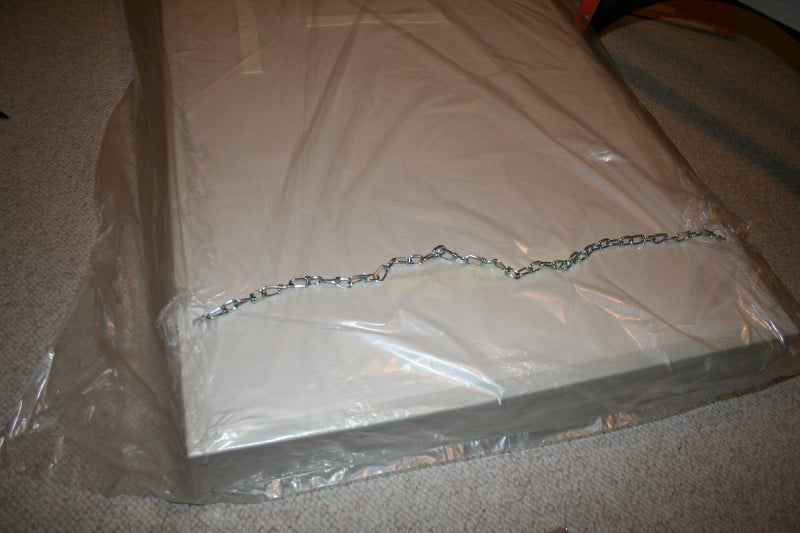
the extension for all the above reasons. Lastly, because these panels were
white, I actually hung them with the plastic still on them (keeps my grubby
hands off them) and I cut the plastic off after they were hung. Scott from
Ready Acoustics looked over this mounting scheme and gave it his seal of
approval. He particularly liked using the extension to center the panel though
using the drywall anchors that I never received or plant hangers would have
been a good way to hang them as well..
As I said
before, the chain needs to be tight as it will sag naturally. But when your
studs are 24 inches apart, you'll need a bit more extension than I originally
thought (the keyhole slots are inset 5 inches from the end). What I ended up
doing was to add a bit of chain with an S-hook to the middle of each chain and
ran that to the hook. This had two advantages, first I KNEW that the panel was
hanging true because the extension was in the middle of each of the chains.
That way I didn't just have the chain strung over the hook and have to try to
even up both sides. Also, I had the additional bonus of being able to adjust
the height of the panel by choosing which of the links I used. This became
important later on as I hung more panels. Even when I hung one panel on the
length of the stud (meaning I could connect the hooks wherever I wanted) I used
the extension for all the above reasons. Lastly, because these panels were
white, I actually hung them with the plastic still on them (keeps my grubby
hands off them) and I cut the plastic off after they were hung. Scott from
Ready Acoustics looked over this mounting scheme and gave it his seal of
approval. He particularly liked using the extension to center the panel though
using the drywall anchors that I never received or plant hangers would have
been a good way to hang them as well..
Wall Mounting
 Thanks to
the wonders of our modern shipping companies, the first shipment of wall mounts
never arrived. Not wanting to wait, I decided that I'd try to rig something up
myself (a common theme in this "redneck" review). My first idea was
to try to use a length of picture hanging wire through the keyhole openings in
the panel frames - that was a disaster. The wire snapped the minute I tried to
pick the panel up. Maybe if I had doubled up the wire it would have worked. Not
to mention that the wire oxidized immediately and got all over my hands and the
bag (not a good thing). Luckily before I got too crazy, the wall mounts came.
Thanks to
the wonders of our modern shipping companies, the first shipment of wall mounts
never arrived. Not wanting to wait, I decided that I'd try to rig something up
myself (a common theme in this "redneck" review). My first idea was
to try to use a length of picture hanging wire through the keyhole openings in
the panel frames - that was a disaster. The wire snapped the minute I tried to
pick the panel up. Maybe if I had doubled up the wire it would have worked. Not
to mention that the wire oxidized immediately and got all over my hands and the
bag (not a good thing). Luckily before I got too crazy, the wall mounts came.
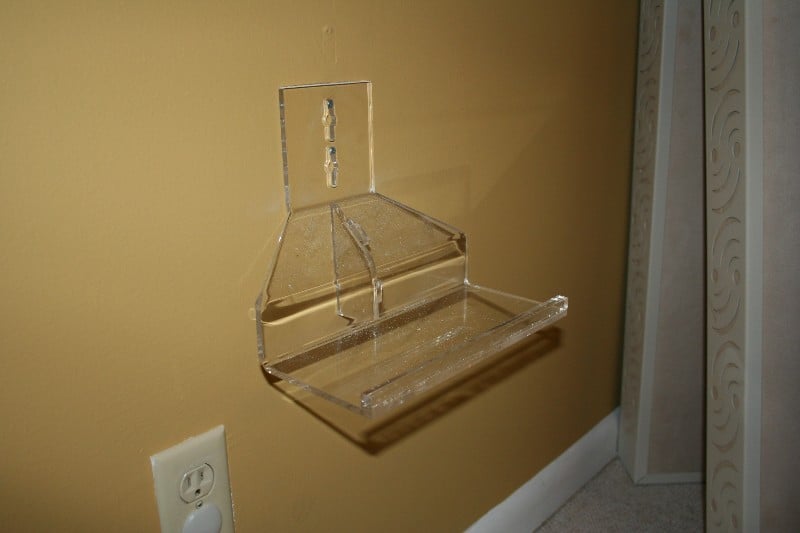
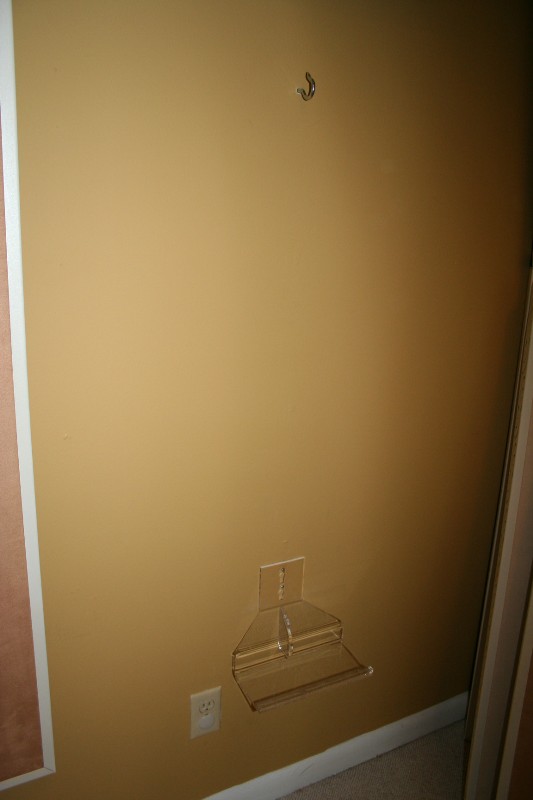
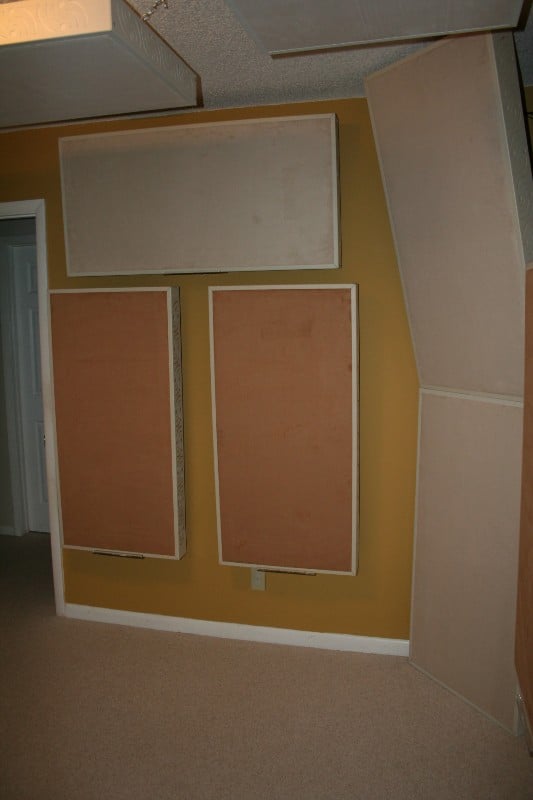
So, off I went to the Ready Acoustics website to view the tutorial - and really it seems pretty straightforward. The wall mounts are basically a clear plastic tray that the panel sits on. The mount holds the panel about 2-2.5 inches off the wall. There is a little plastic piece that stabilizes the back of the mount that you need to attach separately (and it tends to fall off when you set it down so make sure it is still attached before you screw anything into anything). I decided that I'd work from the bottom up mostly because I care more about covering the power outlets than getting too close to the ceiling. I checked and double checked my measurements and choose 17 inches off the ground to the bottom of the panel. Enough room for access to the outlet and plenty of room for the top panel.
 At first I
tried to use the drywall anchors that were provided (the only mounting hardware
that came with the wall mounts) but had little luck. I'm sure they would work
fine for others but I kept stripping the heads off the plastic anchor inserts
or pushing them though the drywall as I inserted the screw. Personally, I think
I have a problem with the drywall in this room. So I just gave up and broke out
my trusty stud finder and attached all of the panels into studs. Personally,
this gives me a little more piece of mind in that I KNOW those panels are there
to stay. Once I attached the wall mounts, I drilled a pilot hole for a wall
hook and attached the top bag handle (as instructed by the tutorial). While the
tutorial was designed for hanging the bags, the Chameleon trap is being
supported by the wall mount so the strap isn't taking the full weight of the
panel. Again, Scott thought this was an acceptable mounting solution. When
deciding to use studs rather than wall anchors, I did sort of screw up my
ability to hang the panels evenly spaced across the length of the wall. While
if I was just hanging a handful of panels this might not be that much of an
issue, when you're trying to shove 19 panels into a 10x11x8 foot room, you can
easy see the difference so choose wisely. One of the big issues was that I
mounted one of the ceiling panels in the middle of the room but I couldn't hang
the wall mounted one in the same place… well I COULD have but I didn't notice
that they weren't lining up until it was WAY too late. Oh, well, it's my office
right?
At first I
tried to use the drywall anchors that were provided (the only mounting hardware
that came with the wall mounts) but had little luck. I'm sure they would work
fine for others but I kept stripping the heads off the plastic anchor inserts
or pushing them though the drywall as I inserted the screw. Personally, I think
I have a problem with the drywall in this room. So I just gave up and broke out
my trusty stud finder and attached all of the panels into studs. Personally,
this gives me a little more piece of mind in that I KNOW those panels are there
to stay. Once I attached the wall mounts, I drilled a pilot hole for a wall
hook and attached the top bag handle (as instructed by the tutorial). While the
tutorial was designed for hanging the bags, the Chameleon trap is being
supported by the wall mount so the strap isn't taking the full weight of the
panel. Again, Scott thought this was an acceptable mounting solution. When
deciding to use studs rather than wall anchors, I did sort of screw up my
ability to hang the panels evenly spaced across the length of the wall. While
if I was just hanging a handful of panels this might not be that much of an
issue, when you're trying to shove 19 panels into a 10x11x8 foot room, you can
easy see the difference so choose wisely. One of the big issues was that I
mounted one of the ceiling panels in the middle of the room but I couldn't hang
the wall mounted one in the same place… well I COULD have but I didn't notice
that they weren't lining up until it was WAY too late. Oh, well, it's my office
right?
For the most part, this worked very well for me. The wall mounts worked exactly as advertised and I had little problems attaching them to the wall. The only real problem I had was getting the top of the bag to hang equidistance off the wall with the bottom. The solution is to lower the hook slightly from even with the handle or to get a REALLY TIGHT bungee cord across the two keyholes. Regardless, I suggest you hang your first panel in a place where you can drill a number of holes without irritating your wife too much. Trial and error yourself into the perfect placement and measure where everything is. That way, you can use that one for a template for all the rest of your placements.
Grab the Paint
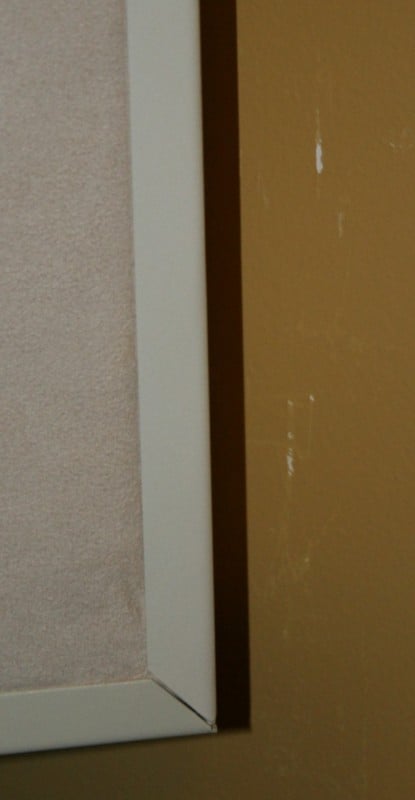 Remember,
the Chameleon frames are metal, large, and fairly heavy. You're going to hit a
wall - especially with the corner placed panels. Hopefully you weren't crazy
enough to use anything but flat paint for your home theater (why oh WHY?!) so
you're going to want to keep a little bit on hand for touchups. For the most
part the "damage" would be hidden by the panel itself but sometimes
(especially for the corner panels) there are plenty of scratches that'll need a
dab of paint here and there.
Remember,
the Chameleon frames are metal, large, and fairly heavy. You're going to hit a
wall - especially with the corner placed panels. Hopefully you weren't crazy
enough to use anything but flat paint for your home theater (why oh WHY?!) so
you're going to want to keep a little bit on hand for touchups. For the most
part the "damage" would be hidden by the panel itself but sometimes
(especially for the corner panels) there are plenty of scratches that'll need a
dab of paint here and there.
Ready Acoustics Chameleon Bass Traps - Listening Tests and Conclusion
Honestly, I'm pretty happy with the results as long as I don't let my latent OCD pay too much attention to things not being lined up perfectly. I'd say that out of 19 panels I placed in the room, probably 2 or 3 are hanging in a way or in a location I'd wished I changed. Planning is everything and hopefully some of the issues I uncovered will help you ensure that every one of your panels hangs straight and true with a minimum of fuss.
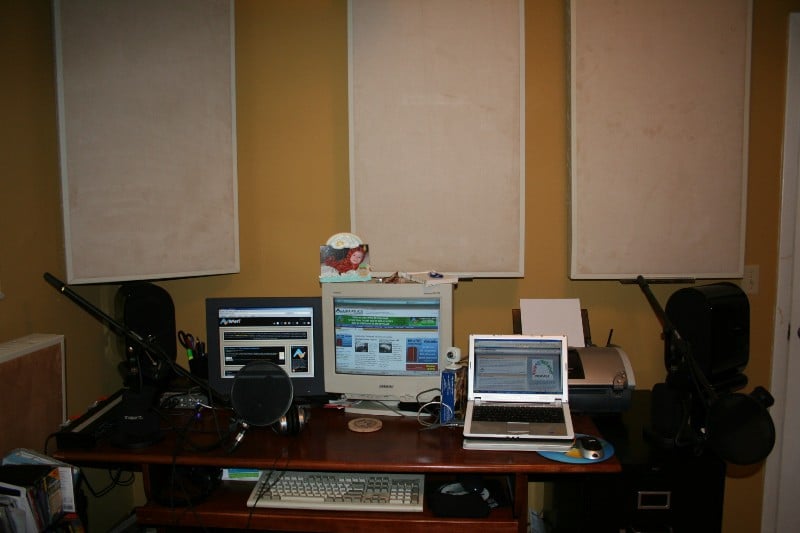
After Treatments
Listening Tests
While this would be the point in the review where I'd talk about increased bass output and a more even frequency response in my home theater, remember, this is a Podcast room. Once I mounted all 19 panels in my itty-bitty office, it was so dead and sounded so weird that people (other than me) don't like being in my office. This, of course, is a HUGE plus. Just get out. Don't touch anything and get out. This is my land, it is mine, it is beautiful and it is mine. Go away.
But it isn't like I don't listen to music in my office. I do. All the time. In fact, while I was moving in the panels and mounting them I could hear an audible change in the music. Of course, the first change was that the bass tightened up. That was really clear. But as I moved in more panels I started to notice an increased separation of the music. As if each of the speakers were becoming isolated from each other. While I could maintain a decent soundstage with the proper seat position (i.e. - equidistant from each speaker), all I needed to do was move a hair closer to one speaker to hear that one more prominently. Good for music playback? Not so much, but GREAT for mixing audio.
Recommendations
The Chameleon Bass Traps have a lot going for them especially if you put them together yourself and buy them in bulk. They are a little heavy and I'd personally give up a bit of their stability for a weight decrease though I'm not sure this would significantly affect the ease in hanging. I'd like to see some sort of top mount for the wall mounts that will ensure the proper distance from the wall without having to rely on the strap or a bungee.
Conclusion
One of my big pet peeves is people that say, "I can't get room treatments because my spouse will hate them." Bull. You're not trying, you spineless wimp. There are so many options out there that are both effective and aesthetically pleasing that I can't believe room treatments aren't the FIRST thing people do. You can't swing a dead cat on HGTV and not hit a wall that's had a couple of blue boxes painted on it "for effect." Switch out the paint for a panel and you're golden. Now, Ready Acoustics is giving you the option to customize your panels however you want. Really, this review should be entitled "How NOT to set up panels in your Home Theater." You definitely don't want this much absorption in a true listening environment. It feels weird, it sounds weird, and overall, it is weird. But it is great for recording. The Ready Acoustics Chameleon Bass Traps worked as advertised. They are great to look at, the absorb sound as promised, and they are easy to hang. If you're a DIY'er or want to have them arrive fully assembled, Ready Acoustics will accommodate.
Chameleon Bass Traps
$129.99 each
Ready Acoustics LLC
PO Box 626
Elk River , MN 55330
Phone: 612-817-8844
Fax: 866-320-1800
http://www.readyacoustics.com/
About Ready Acoustics
Ready Acoustics is based in Minnesota and President,
Joel DuBay Sr., is a professional, (hard to please) musician. It is his
extremely cost conscious, high quality attitude that realized the need for an
acoustic product that would look great, sound amazing and cost far less than
any comparable solution. With years of recording music for CD and film, Joel
wanted to provide a perfect acoustical solution for those who were cost
conscious, but were wary of products that were "cheap". In the end,
Ready Traps have become known for their super high quality, effectiveness, elegant
looks and ability to help those who need a complete, "turn-key"
solution or who want to do part of the work themselves, anywhere in the World.
The Score Card
The scoring below is based on each piece of equipment doing the duty it is designed for. The numbers are weighed heavily with respect to the individual cost of each unit, thus giving a rating roughly equal to:
Performance × Price Factor/Value = Rating
Audioholics.com note: The ratings indicated below are based on subjective listening and objective testing of the product in question. The rating scale is based on performance/value ratio. If you notice better performing products in future reviews that have lower numbers in certain areas, be aware that the value factor is most likely the culprit. Other Audioholics reviewers may rate products solely based on performance, and each reviewer has his/her own system for ratings.
Audioholics Rating Scale
 — Excellent
- — Very Good
- — Good
- — Fair
- — Poor
| Metric | Rating |
|---|---|
| Ease of Setup | |
| Performance | |
| Versatility | |
| Build Quality | |
| Ergonomics & Usability | |
| Fit and Finish | |
| Performance | |
| Value |
As Associate Editor at Audioholics, Tom promises to the best of his ability to give each review the same amount of attention, consideration, and thoughtfulness as possible and keep his writings free from undue bias and preconceptions. Any indication, either internally or from another, that bias has entered into his review will be immediately investigated. Substantiation of mistakes or bias will be immediately corrected regardless of personal stake, feelings, or ego.
View full profile