
RF Universal Remote Control Review: TX-1000 Medius
- Product Name: TX-1000 Medius RF Remote
- Manufacturer: Universal Remote Control
- Performance Rating:


- Value Rating:
- Review Date: August 18, 2006 20:00
- MSRP: $ 499 + $99 for MRF-250 Base Station
TX-1000 Medius
Frequency : 418 MHZ
Memory : 8 MB of Flash Memory (for user configuration)
Range
: RF - Up to 100 feet when used with MRF-250 or MRF-300 RF Base
stations, IR (line of sight) - Up to 50 feet, depending upon environment
Capability : Macro - Up to 255 steps each, however nesting is allowed, Learning - Standard frequencies (15kHz to 460kHz)
Power Source : Four (4) AA batteries (included)
Dimensions : 6.46 " x 5.39 " x 1.66 " (H x W x D)
Weight : 31.4oz (with batteries)
Warranty : 1 year parts & labor when purchased from an authorized dealer
MRF-250
Frequency: 418 MHz
Range:
RF - Up to 100 feet, IR (line of sight) - Up to 60 feet with the front
IR blaster ON Approximate range will vary depending upon operational
and environmental conditions
Power Supply: 9V 300mA/110V 60Hz (included)
Dimensions: 5.125" x 3.5" x 1.25" (4.5" with antenna up)
Weight: 4 oz (Mounting bracket and six emitter/flashers included)
Warranty: 1 year parts & labor when purchased from an authorized dealer
Pros
- Exceptionally cool
- Works well
- After training, easy to modify
Cons
- Big and Bulky
- Pricy
- Requires some training
TX-1000 Medius Build Quality
 When I was asked if I would be interested in reviewing a universal remote, I said what I always say, "Sure, send it."
But honestly, I had mixed feelings. There is something empowering in having
a pile of remotes that only you can decipher. It is somehow satisfying to have your wife call you on the
cell and being able to fix the problem with a few words. There is a sense of serenity in knowing your
in-laws won't be able to control your system without you so you don't have to worry about
them hogging your home theater for an
I Love Lucy
marathon. On the other side, a universal
remote is really the ultimate in cool. If you want to impress your friends and they've already seen
your 65"
plasma, a fully configured universal remote controlling everything via RF is the way to
go. You'll be able to change the channel from the garage. You'll be able to press one button
and have all the appropriate equipment turn on, all the rest turn off, the lights dim, and the popcorn
maker start...
well maybe not that last thing but the rest舰
When I was asked if I would be interested in reviewing a universal remote, I said what I always say, "Sure, send it."
But honestly, I had mixed feelings. There is something empowering in having
a pile of remotes that only you can decipher. It is somehow satisfying to have your wife call you on the
cell and being able to fix the problem with a few words. There is a sense of serenity in knowing your
in-laws won't be able to control your system without you so you don't have to worry about
them hogging your home theater for an
I Love Lucy
marathon. On the other side, a universal
remote is really the ultimate in cool. If you want to impress your friends and they've already seen
your 65"
plasma, a fully configured universal remote controlling everything via RF is the way to
go. You'll be able to change the channel from the garage. You'll be able to press one button
and have all the appropriate equipment turn on, all the rest turn off, the lights dim, and the popcorn
maker start...
well maybe not that last thing but the rest舰
Build Quality
The TX-1000 Medius is a substantial remote 舑 in both shape and weight. You could hold it with one hand but you probably won't. Even if you did, the main arrow buttons are in the middle at the bottom and not exactly within reach. Plus the remote is top heavy so you will probably prefer to hold it from the sides. The Channel and Volume buttons are easily accessible as is the Light button. The Listen and Watch
buttons are also easily accessible with one hand. For the most part, I ended up either with the remote on the armrest or chair next to me or it was on my lap. While it is heavy and large, it feels well made. There is a light grey molding that offsets the two-tone black and dark grey color scheme I find to be extremely attractive.
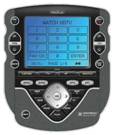
The large screen on the unit is an LCD touch screen. Technically, it is 12 little touch panels. Each of these 12 areas can be programmed and labeled with up to 6 characters. The screen itself is defaulted to a blue backlighting. That backlighting can be modified by changing the levels of red, green, and blue to the user's desire. You can change the color of the screen globally or you can specify the color for each device individually. The touchpad is sensitive enough that one doesn't feel the need to jam at it but it doesn't activate at a stiff breeze.
The MRF-250 is very light. It has six IR blaster outputs at the back and an antenna. The bottom is removable allowing it to be attached to a wall. Under the bottom plate is a little rotating switch that is used to change the address of the unit (more on this later). There are six IR emitters provided on 10 foot cables. The front of the unit is an IR blaster as well. The entire URC system operates at 418 MHz so it's well away from your 2.4GHz cordless phone and 802.11x wireless network frequencies.
TX-1000 Medius Setup
The Medius is both an IR (infrared) and an RF (radio frequency) remote. The beauty of an RF remote is that you no longer need line of sight. Heck, you don't need to be in the same room. All you need is an RF base station (like the MRF-250 supplied for this review) and a number of IR emitters and you are good to go. The way this works (in general) is that the remote is programmed with all the IR codes of all your equipment. It transforms these codes into an RF signal which is sent to the base station. The base station sends out the proper IR code to the proper equipment via the emitter which is attached (by an adhesive) directly in front of the IR receiver on your component. So, when you press the button the on the universal remote, you'll actually see the emitter flash (it uses a visible IR spectrum) at the front of your equipment. Or maybe you won't. At this point, you could put all your equipment in a different room and never have to see it again.
The first thing you'll want to do is call an installer. The Medius is a powerful tool and like almost all powerful tools, it has a bit of a learning curve. I can say that once you've gone through a little bit of training, you will not be reliant upon the installer for each and every chang... well, at least I wasn't. The programming of the remote is all fairly intuitive and logical. My background in database creation and management (I think) increased the speed at which I picked everything up. If you are fairly computer literate, I think you should be able to go in and make fairly complex changes without having to call anyone for help. Even if your solutions wouldn't be as elegant or as sleek as an installer's would be, they will still work. And that is what is most important.
Setting up the remote isn't nearly as hard I as thought it would be. Universal Remote Control keeps a database of most all of the remotes out there. When you buy a consumer level remote (or most any mid-fi component for that matter), there are usually some programmable functions. You usually need to press a few buttons and then enter a code. Suddenly, your receiver remote can now control your DVD player and TV. Those codes are no different from the codes used by the Medius except for one thing OEM remote codes are stored internally on your remote. That means that those codes are up to date only at the creation of the remote. You can never update them. The Medius connects to the Universal Remote Control IR database online and can get new codes as they are released. That means that your Medius can potentially be used forever.
The Medius is basically programmed by you on your computer. You'll need to connect a USB cable to the unit (for me, it is the same cable as the one for my digital camera) and install some software. If you have a laptop, I highly recommend you install the software there. I find it to be much easier to have the computer nearby when I want to make changes. This allows you to make more changes on a whim than you probably would if you had to go to a different room for every change. An alternative is to keep a pad of paper handy to list changes as you come across them. Either way, you'll find yourself interacting with this remote far more than you'll expect during the initial programming stages.
At the top of the user interface is the program menu. Basically, what you'll want to do is follow those steps in the order that they are presented. I've listed them with a brief description of each below:
- Create and name devices - This is where you specify the devices you have in your system as well as the layout for your macros and device control. This is just the grand list. You can be as specific or general as you want. All that is really important is that you understand what each of the labels mean.
- IR Database - Here, you connect your devices to the specific IR code. For each device, you'll pick from a list the type, brand, and model. The database will then download all the appropriate keys to your remote for each device. It's mostly intuitive except that Universal Remote Control opted to condense lots of items into a category called AUX rather than entertain countless categories.
- Edit buttons - As there are only 12 places on the LCD touch screen to program, the buttons may be spread out over a few pages. Depending on the complexity of the devices this can be quite a few (the Denon 3805 had five pages of codes). Here, you can rearrange the buttons on the pages, change the names of the LCD buttons, or assign functions to the physical buttons on the remote.
- Learn - Like all universal remotes, the Medius is a learning remote. If you have a piece of equipment that you'd like to have access to but can't find the codes in the database, you can have the Medius learn those codes like any other learning remote.
- Macro - This is the true power of the universal remote. A macro basically executes a number of commands in a specified order. This is how the remote knows to turn on the receiver, turn on the DVD player, turn on the TV, and dim the lights all with one button press.
- Punch through - If you'd like some of the physical buttons in one device to be used for another device, you can set the Punch through so that you don't have to reprogram every page. For example, if you'd always like the volume and mute buttons to control the receiver, you can punch them through so that when you hit "Mute" you'll be controlling the receiver from each device page.
- Backlight on time - This sets the time the backlight is on (I hate obtuse labels). You can manually turn the backlight off by hitting the Light button a second time.
- RF control - This tells the remote which of the six connectors on the back of the base station each of the components is connected. That way, it knows how to direct your commands.
Whew! That's a lot! But not really. Let's take a look at some of the more involved steps starting with step three.
Edit buttons
You're going to find yourself on this screen more than you'll expect. Editing the buttons is the single most important step in the process of setting up this remote. The better thought out your button layouts are, the more enjoyment you'll get out of your remote. You want to remember of a few things:
- What are the most important functions that are NOT included in the physical buttons on the remote?
- What are the most often used functions that are NOT included in the physical buttons on the remote?
- Where within the area of the LCD display is the most intuitive place for each button for you?
- How are the buttons interrelated? Is there any grouping that makes sense?
What you'll want to do is make sure you have a page (or more) of buttons laid out exactly as you want them. Check to make sure that each of the physical buttons are used (they'll have a little red dot on them if they are programmed). You may be able to place some functions that you use often on those buttons. For example, I found that the chapter forward/back is often mapped to the Channel up/down buttons. Personally, I prefer them mapped to the skip +/- buttons which are down by all the other playback controls. You'll only know to make some of these changes once you've lived with the remote for a while
Macros
Macros are at the heart and soul of a universal remote. They are what make spending the extra money on one worthwhile. A macro is simply a set of commands, linked to a button, that execute in a specified order. While not a hard to understand in concept, I've never personally used one... until now. What I like about the Medius computer interface is that everything is right there laid out for you. All you need to do is find the button, click on it, then hit "record" in the macro window. Every button you press from that point on will be part of the macro. For example, on my Watch splash page, I have eight buttons programmed, six of which are labeled. Three are labeled (in this order from left to right) Watch DVD Movie and the other three are labeled Watch Cable TV . Each of the three DVD buttons are programmed to turn on the TV, turn on the receiver, select the correct input for the TV, select the correct input for the receiver, turn on the DVD player, select the correct processing mode on the receiver. There is also a pause built in there to give the receiver and the TV time to turn on before sending the next code. I have something similar set up for the cable TV.
But why three buttons for each? Remember the six character limit? Well, I wanted to make sure that whoever picked up the remote knew what they were pressing. I could have just macroed the buttons under the words Cable and DVD but I just knew someone would complain that the remote wasn't working when they hit the word Watch or TV . I had the extra space as I don't have that many sources to watch at this time. If you had multiple DVD players, game players, etc... that might not be the case.
Author's Note: Discrete power buttons
Your regular remote may have one button that turns power on and off. That does not mean that there are not discrete On and Off codes that will be available to program into a universal remote. Since your remote has no way of knowing what the current state of your component is, having discrete On and Off codes is extremely important. If the same code turns on and off a unit, it could seriously hamper the effectiveness of your macros (you'll always want to attempt to discover a workaround which can be used to help identify the component state).
Wait... didn't I say I had macros for eight buttons? I only talked about the six with labels. True. I macroed two buttons that lead directly to the TV and Receiver menus specifically. These buttons are protected from use by unqualified people (ie everyone else in my house) in two ways - 1) They are unlabeled so people are unlikely to press them and 2) there is a 2 second hold time before the remote will bring up the appropriate screen. Actually, any button can be programmed with two macros - one on an initial press and one after a held press (held presses can be as short as 1 second and as long as 5). I've implemented this in my remote because it is far too easy to accidentally press the Watch or Listen buttons and kick yourself off the correct screen. I added a 2 second hold macro to take me to the DVD or Cable screen directly without all the switching on of all the components.
I've skipped the learning function because it is just like every other learning remote. You set the two remotes IR transmitter to IR transmitter and tell the Medius (via the computer interface) where you want the learned code to be stored and then hit the button on the sending remote. The interface will tell you if the remote has learned the code or not. In fact, the only real difference with using the Medius to learn a code and other learning remotes is the remote needs to be connected to the computer. In actuality, you can access the learning function from one of the services menus but it is a lot easier when hooked up to your computer.
RF Control
The last part of setting up the remote is connecting the IR
emitters. Each of these 10 foot cables have what looks to be a teardrop
shaped piece of plastic on the end. The cables connect to the base
station in one of the six supplied slots. You'll connect the cable to
the base station and then run it to each piece of equipment. There is a
little piece of paper on the end that you can remove to reveal an
adhesive. You want to place that directly over the IR receiver on each
piece of equipment. Now, don't fear, your normal remote will work as
well so you aren't
blocking
the receiver. If you don't know where the receiver is, take a
flashlight and shine it into the faceplate. You should be able to
locate it. If you miss the receiver, you'll know as the component will
either be completely unresponsive or will respond only intermittently.
I had this problem and was able to remove the emitter and reattach it
successfully. These emitters are not designed to be removed once set so
you may not be as fortunate as me. Luckily, they provide six emitters
with six extra adhesive pads with the MRF-250 base station. This should
keep you good and set up for a while.
There are some tips that you should know when positioning the emitters. First, it is vitally important that you record where you plugged in the emitter for each component. The last step is to tell the remote where each of the components are attached. If you have an HTPC which handles multiple functions, you can assign the same emitter to different sources. If at all possible, you should try to run the emitter line over the top of your component and hang it down to the IR receiver. Make sure you put a good bend in the line as it comes over the edge. This way, if the adhesive fails, the emitter may still function if it retains its position.
TX-1000 Medius Use and Conclusion
If you have a device that you use for multiple functions - an HTPC, media server, universal player, or the like, there are two ways to set up the remote. You can either make multiple pages with a bunch of macros or you can import the same device multiple times. For example, say you have a universal disc player. You may want to set the player up in the Watch section for movies and the Listen section under CD, SACD, and DVD-A. You could set up a number of macros and some sort of page that has all the stuff you'll need for DVD, CD, SACD, and DVD-A playback. Or you could just import the same DVD player four times and set up function-specific pages. While there is no right way to do it, I'd highly recommend the latter.
The unit defaults to a blue backlight for the LCD screen. Fortunately, you can modify that to your liking. All you need to do is right click on the input (DVD, Cable, etc) and change the saturation of the Red, Green and Blue. There are 17 different gradations of each (which works out to be just south of 5000 color options). Not all of these combinations are pleasing to the eye nor are they all significantly different from each other but they are available. I enjoyed giving all the different screens their own color.
In some of the more complicated components (like most AV receivers) you'll have pages of codes to wade through. Obviously, you won't want to have all those visible. The fix to this is to right click on the pages you don't need access to and select Hide. This eliminates the need to feed my almost psychotic desire to reorganize each device so that the most important pages are up front. Instead, you can pick the page(s) that already have most of the button you want and modify them. Then you hide the rest.
Under the RF control menu you'll notice that you have the option of setting each device for IR, RF, or both. While I can't think of a single reason you'd choose "both," you may have need for the IR portion. While the majority of your equipment should be controlled via RF, you may have a specific piece - maybe something that is housed too far away from the base station for the emitters to reach that you'd prefer to control via IR. In my case, I often have equipment in for review. While more often than not, I'll need to use the remote for the review, I may want to program a few of the functions into the remote. On and Off immediately come to mind as does input selection. It is just make life a little easier for me.
Which brings up another good point: Once you've set your remote up the way you like, you save your settings on your computer. If you want an alternative setup - say one for when guests are over. You just create a new one (or modify your own) and save it under a different name. What does this get you? Well, if you want to have easy access to a number of functionalities, you configure the remote one way. If you want to limit the access of your guests, you configure it a different way. Sure, you can work both into the same configuration, but it may be something that works for you.
While six inputs may be more than enough for most people, it is conceivable that for some, it won't be enough. It may also be that someone may want to use the same remote for multiple rooms. As I mentioned earlier, there is a switch on the bottom of the MRF-250. There are 15 different positions. This means that you can control up to 15 different base stations with the same remote. Set on up in every room in the house. That way, with a push of a button you can let the kids know it is time for bed.
The things to remember and focus on when setting up this remote is proper placement of the emitters and thinking out and testing the macros beforehand. If I had to make one suggestion, I'd suggest that you work with and use the remote alone for a few days before you ever hand it over to your significant other. Such a substantial remote is going to be met with skepticism at first so the better polished the functionality is, the quicker your significant other is going to be to accept it. Plus, they'll be so curious about it after a day or two, they'll be itching to get their hands on it.
Using the Remote
I've talked a lot about how to program and set up the remote, but I haven't talked about actually using it. Some people have described using an RF remote as 舠 life changing. "While that may be a bit strong, it does significantly change the way you interact with your home theater" for the better! I went from using between 3 and 5 remotes at any given time to using one. That is a big change. No matter how well an IR remote works, it will never work as well as RF. The IR always needs some sort of line of sight. With the RF, you are never worried that your kid is jumping up and down in front of the receiver so you can't turn down the music they've recently bumped up to "Skull Shattering." Actually, while I am writing this, I am sitting in my office controlling the HTPC in my HT (skipping songs I don't like). That is something I could never do before.
The biggest change is getting used to navigating the different screens. The Listen and Watch buttons really help with this. Everyone can understand them. If you clearly list the choices (using multiple buttons when applicable like I did) then you'll rarely have a person complain that they can't get your system to work. Limiting the number of buttons per page and making sure the first page they see is the one with the most oft used buttons will also endear even the most skeptical user to your new remote.
I was (and am) a bit concerned about the durability of the Medius. It is big and heavy. Remotes are constantly getting knocked off couches and tossed around... it is the lot in the life of a remote. The Medius' size and weight make such bumps and jostles even more significant. The unit feels solid enough but I personally would be concerned if the unit were to be dropped on anything other than fairly thick carpet. Of course, the large size also means that you have virtually no fear of the Medius disappearing into your couch.
Placing the base station is a very important task. You'll find that RF interference will quickly become the bane of your existence. I'd only wall mount the MRF-250 if I was absolutely sure the location was free from RF interference. Luckily, there is an easy way to tell. Plug in the base station, temporarily switch the channel assignment dial on the bottom to 0, and watch to see if the red light on the right lights up. When that light is lit, the unit is receiving an RF signal. If you are not pressing a button on the remote... this is bad. Like placing subwoofers, inches matter. I found that my proximity to the base station will sometimes increase or decrease the amount of interference. You'll want to place the base station then step away. Plasmas are also a source of interference. I've found that thunderstorms (not at all uncommon here in Florida during the summer) also increase the amount of interference. If you think you've found a good spot for the base station where it can be wall mounted, let it live there for a while before you drill any holes. Just a suggestion.
The unit is powered by four AA batteries. After some of the battery eating remotes I've had experience with in the past, my first question to Universal Remote Control Inc was, "So, what, they last about a month or so?" Their response was a little more than surprising, "The remote is designed to last a year with normal use." My jaw hit the ground. Now, I'm not sure exactly what constitutes normal use but if it lasts half that, I'd be more than thrilled.
I'll end this section with this... This remote is cool. My concerns about the size and shape aside, no one looks at it and just says, "Huh, that's a funny looking remote." They have to pick it up, turn everything on and off. Switch sources. Take it to another room to see if it really works from behind a wall. Some of the more traditional universal remotes just look like big, long remotes with LCD readouts. This looks different. Totally different. And when you want your home theater to stand out, different is good.
Suggestions and Recommendations
There is very little not to like about this remote. Still, I've a few suggestions:
- Changing the color of the LCD display is a pain. You have to change it on the computer, upload it to the remote, and then find the page to see what it looks like. The color on the interface and the one on the remote are generally not at all similar. There should be a way that either the color on the remote changes in real time as you make changes on the interface or change each screen individually on the remote itself. There is a color modification function in the service menu but it is global, not screen specific.
- It would also be nice to have some preset color buttons (standard Windows color chooser would be fine) available. While you can get a lot more variation by adjusting red, green, and blue manually, having a couple of preset colors to choose from would be nice as well.
- I understand the decision to use 12 different small touchscreens within the LCD display. I personally find the six character limit to be too, well, limiting. I'd like to see some way of overlaying a display on top of the touch areas. That way, if a word is longer than six characters it just runs over into the next touch area.
Conclusions and Overall Perceptions
Do I have problems recommending a $200 universal remote that can never be updated with new IR codes? Yes. Do I have a problem recommending a $500 remote that will never be obsolete? Not at all. Sure, you may get upgraditis and decide to switch to the newest, fanciest remote. But if you are switching from the TX-1000 Medius, you surely didn't need too. I have no idea how someone could outgrow this remote. It simply has too much functionality, too much expandability, too much... everything. Not to mention the cool factor. This is unlike any remote I'd venture to guess any of your friends have seen. Of course, you're not going to make any friends with this remote. I've already got a guy mad at me because his wife took one look at the Medius, thought back to the six remotes at home (with colored tape on them identifying the component), and started yelling. Life changing? Yeah, in a lot of ways. I'll tell you what; I'll never go back to an IR remote, that's for sure.
Special thanks to Glenn Gentilin from Universal Remote Control, Inc. for his help in giving us an overview of the URC Complete Control system and pointers on RF remote and macro programming.
The Score Card
The scoring below is based on each piece of equipment doing the duty it is designed for. The numbers are weighed heavily with respect to the individual cost of each unit, thus giving a rating roughly equal to:
Performance × Price Factor/Value = Rating
Audioholics.com note: The ratings indicated below are based on subjective listening and objective testing of the product in question. The rating scale is based on performance/value ratio. If you notice better performing products in future reviews that have lower numbers in certain areas, be aware that the value factor is most likely the culprit. Other Audioholics reviewers may rate products solely based on performance, and each reviewer has his/her own system for ratings.
Audioholics Rating Scale
 — Excellent
- — Very Good
- — Good
- — Fair
- — Poor
| Metric | Rating |
|---|---|
| Build Quality | |
| Ergonomics & Usability | |
| Ease of Setup/Programming/Integration | |
| Features | |
| Performance | |
| Value |
As Associate Editor at Audioholics, Tom promises to the best of his ability to give each review the same amount of attention, consideration, and thoughtfulness as possible and keep his writings free from undue bias and preconceptions. Any indication, either internally or from another, that bias has entered into his review will be immediately investigated. Substantiation of mistakes or bias will be immediately corrected regardless of personal stake, feelings, or ego.
View full profile