
Seymour AV Fixed Frame AT Screen with AT Masking Panels Review
Seymour AV Fixed Frame AT Screen with AT Masking Panels
- Product Name: Fixed Frame AT Screen with AT Masking Panels
- Manufacturer: Seymour AV
- Performance Rating:

- Value Rating:
- Review Date: November 08, 2012 10:00
- MSRP: $ 2016 as configured
- Center Stage XD acoustically transparent screen with Black Backing
- 2.40:1 custom aspect ratio (typically 2.35:1, no extra cost for the change)
- Image Gain: 1.2
- Audio attenuation: 1.5dB above 8K, .5dB for black backing, total 2.0dB
- Weave rotated to eliminate moiré
- 1500 holes per square inch
- Fidelio Velvet border: 99.7% light absorbing, 3.3” wide
- Screen Dimensions:
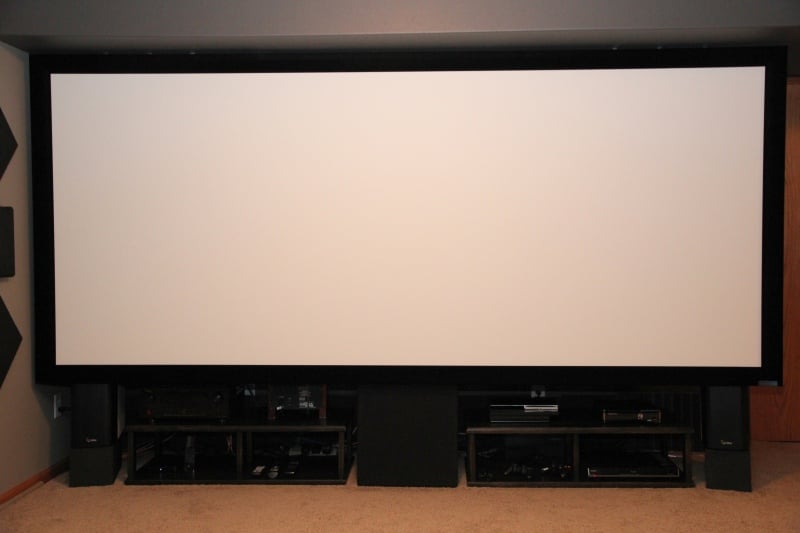
- Image Dimensions no Panels: 130”w x 54.2”h (140.8” diagonal)
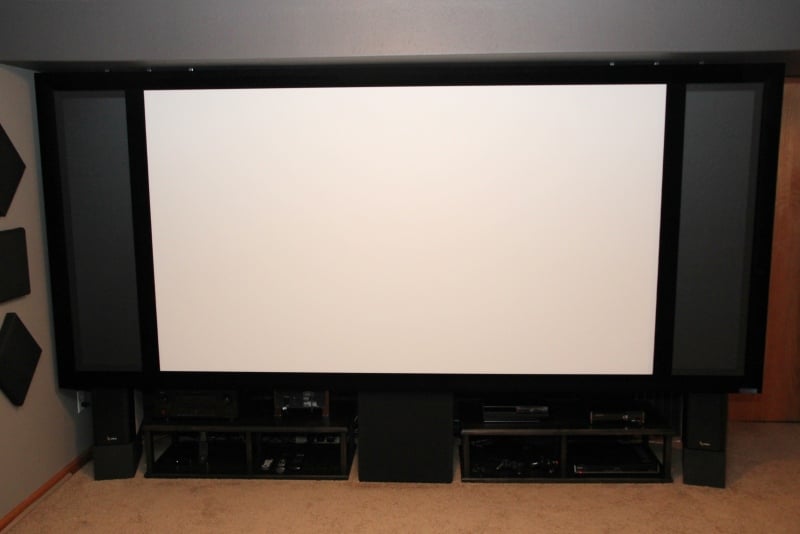
- Image Dimension with panels: 96.4”w x 54.2”h (110.6” diagonal)
Pros
- Acoustically Transparent
- Extremely Neutral White Color
- Perfectly Black Borders
- Magnetic Removable Side panels
Cons
- Visible weave when sitting very closely
- Larger screens can be pricy
Seymour AV Screen Build Quality & Assembly
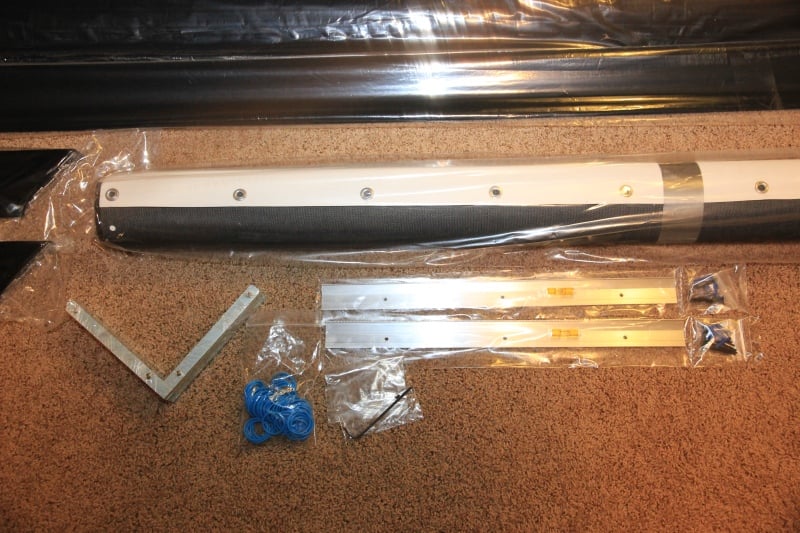
One’s perception of the product always starts with unboxing. I personally live 40 minutes from the Seymour AV factory, so I opted to pick the screen up instead paying for shipping. While there, I did see other screens in boxes, and they seem very well packed! Thick foam ends, heavy walled cardboard boxes, and Chris informed that FedEx is the preferred shipper here in the US. Considering the famous YouTube video of FedEx chucking a TV over a tall fence, I would consider this screen quite a bit safer for shipment due to the lack of glass and good quality packing. None the less, I didn’t ask for an eight foot drop test. The screen and border do come all wrapped in thick plastic and bubble wrap to protect them from factory or shipping damage should the box rip open and sand or dirt gets inside. Four Sides, eight corner brackets, the screen – two layers in my configuration, blue rubber o-rings, mounting rails and hardware are all included.
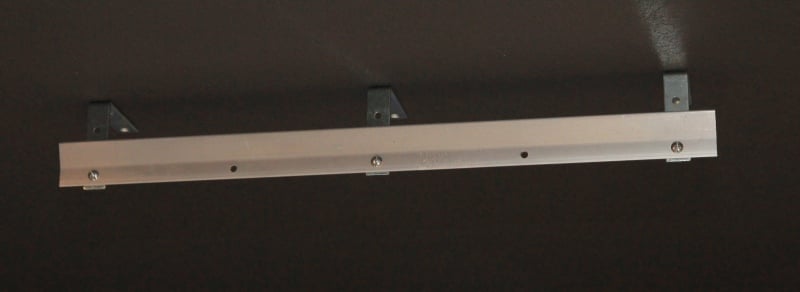
My particular screen installation was probably a bit different than the average person as I wanted the screen to hang down directly from the ceiling instead of against a wall. I was able to add 6 L-brackets and some bolts from my local hardware store and still use the mounting rails supplied. Also, since the screen was going to be several feet from the back wall, I opted for the Black Backing layer so there would be virtually no shadow of an image for viewers positioned far to the side. Typically, the included brackets should be mounted at about the 1/6 and 5/6 image width locations. Making sure they are both the same height and mostly level isn’t too time consuming, but please note that at least one hole in both brackets should hit a wall stud and that an uneven ceiling may affect how square the screen looks once it is hung. There needs to be a small margin of space above the brackets for the screen to hang on as well.
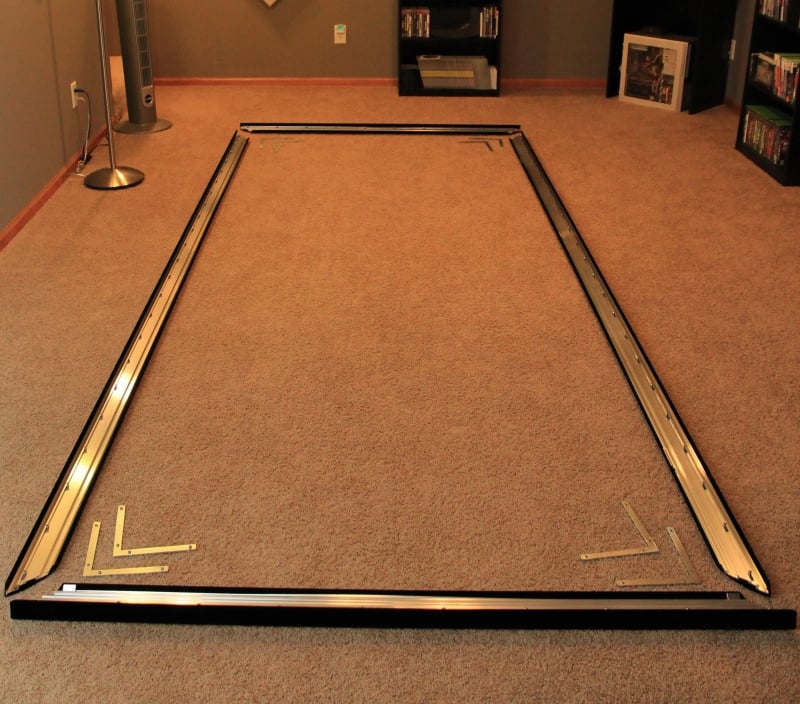
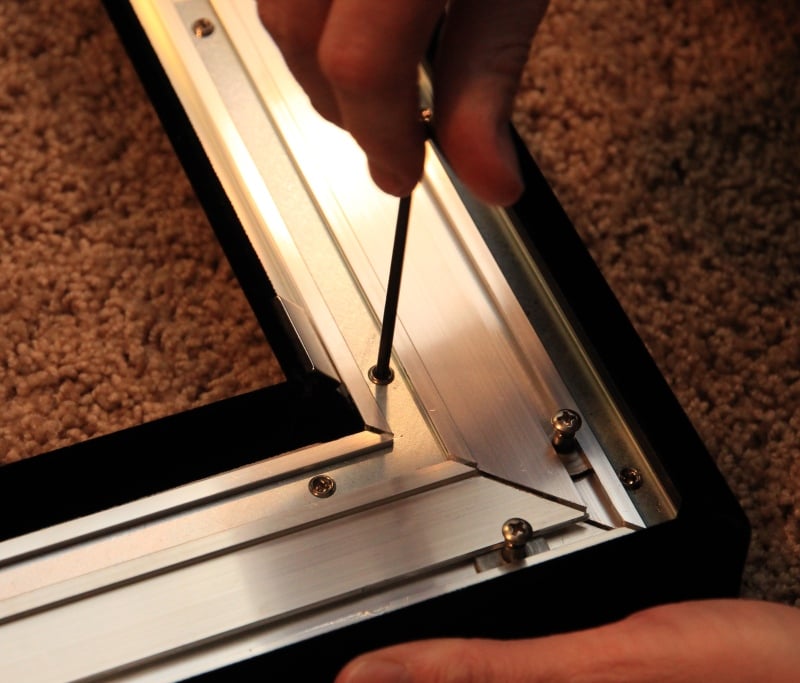
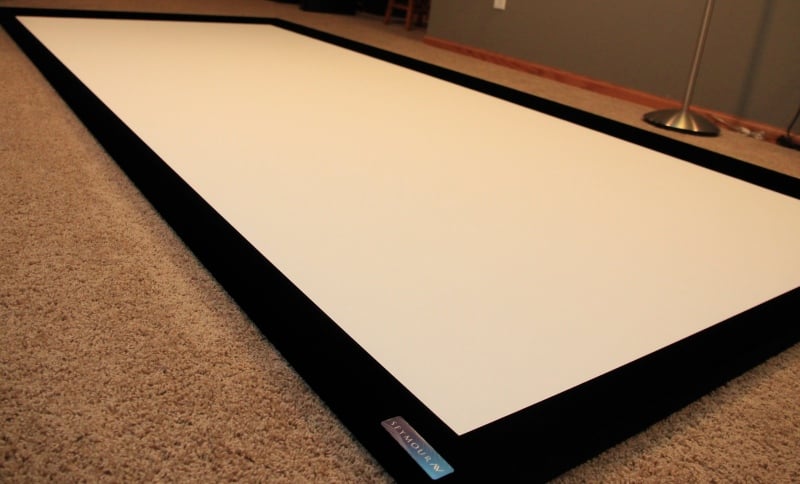
 Once the hanging rails were in place, assembly began! The screen I ordered was 130” wide so I was a bit skeptical about the screen coming out perfectly square on the corners. My fears were unfounded as there were two 3/16” thick steel brackets for each corner that tightened down with 4 locking screws each. Sliding the brackets in was quick, but the corners need to be held together while tightening the screws. The included hex wrench made it easy, and even if I didn’t hold the corner super tight, there was still no visible gap on the front side due to the thick black border wrapping around the edges. There is also some adjustability in the corners in case I needed the height to be a little tighter or looser for the panels to fit perfectly. I didn’t do this initially and we’ll discuss the panel fit later on.
With the frame now assembled upside down the floor, it was time to unroll the screen. Some silver looking tape held the screen roll shut, but it wasn’t duct tape. It peeled off perfectly leaving no residue at all. The black backing was rolled up with the screen material, so it was obvious which side of screen faced out. While both sides of the screen material measure the same, it’s recommended that the inside surface of the roll be used for the image side since that is the side inspected for blemishes. Some may prefer the look of the “alternative” side, so you can use that if you prefer or if for some reason you blemish the other side later on.
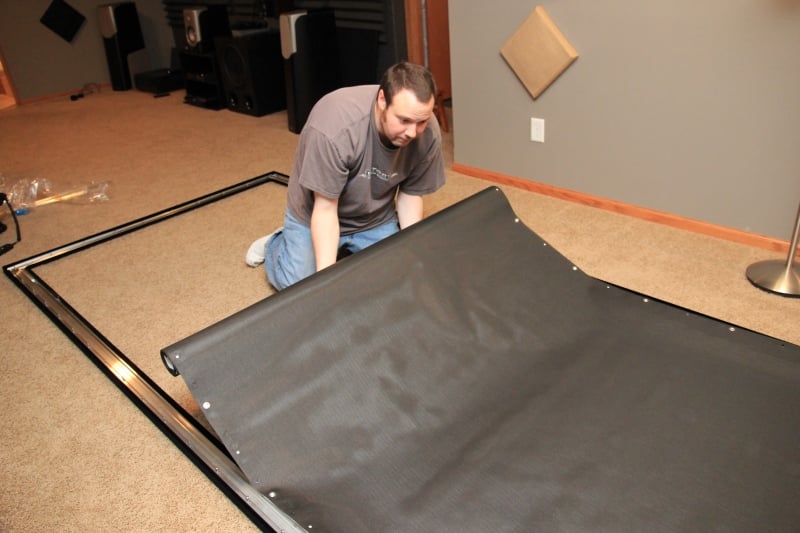
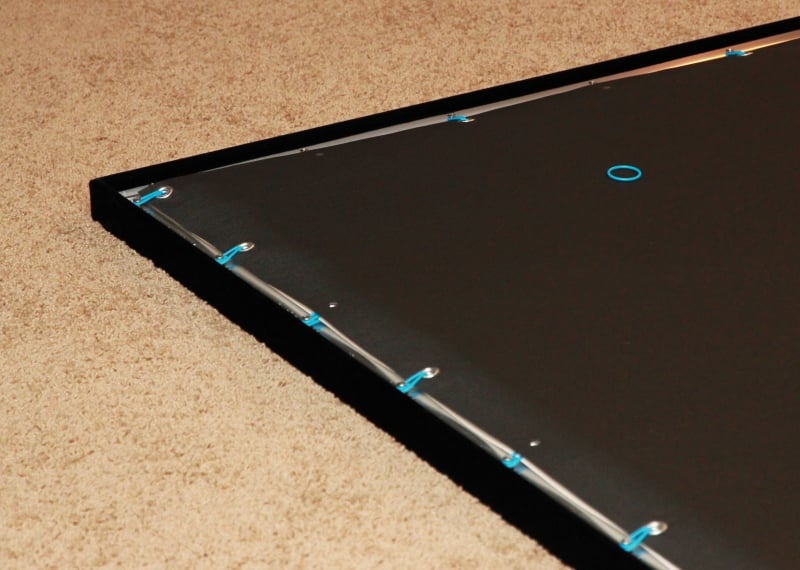
Once unrolled, there was a bit of the silver clean tape over the grommets at one end to protect the grommets from marking the screen. At this point, the blue rubber o-rings were looped around the grommets on all sides to attach and stretch the screen. It didn’t seem to matter which order I added them, but I did notice that the black backing only had grommets for every other hole instead of every hole like the actual screen material. I assume this saves a little cost on the end of SeymourAV, but also keeps the majority of the tension on the all-important screen layer. Once fully banded, the black backing had just a few minor waves, but when lifted to the vertical position, the front of the screen was perfectly smooth and even.
The entire mount and build process took around 2 hours, but I was taking photos with my wife and examining all the little details for the review. I think if I were to build one again, it would be an hour or less with a normal wall hanging, even if I had had no assistance at all. With the impressive and sturdy corners, the very flat screen surface, and included mounting hardware make for an easy install and tough screen! I do have to note that even though I didn’t personally try it, the Seymour AV website has a video of Chris Seymour’s daughter jumping up and down on the screen material, so it should be able to withstand the likes of children on your walls.
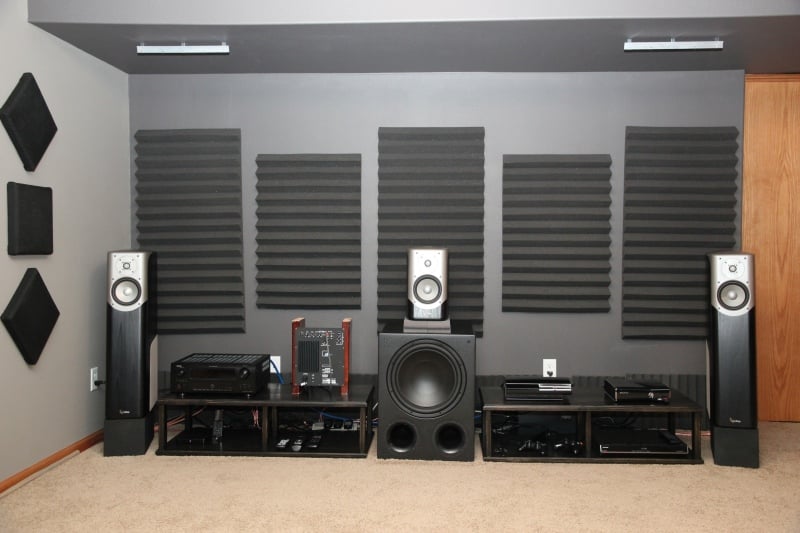 My personal install required the help of a friend to lift and hang the screen due to its size. I personally wanted the largest screen I could fit in the space, and it hung in front of all 3 of my speakers. I ordered a 2.4:1 ratio screen instead of the 2.35:1 screen listed on the site, but the price was the same with the minor ratio change. Also, because of hanging in front of all 3 front speakers, I wanted to have some side masking panels for normal 16:9 video, but they had to be acoustically transparent as well due to my speaker placement. They came boxed separately from the screen due to their shape and no assembly was required. After the screen was hung, you simply insert the bottom edge of the panel with the placement pick in between the screen and the frame, push the panel up and it just snaps into place via very firm magnetic force. Neodymium magnets on the sides of the panel and screen frame hold the top, bottom, and side in place and there was a pretty cool Seymour AV guitar pick screwed onto the bottom of the panel along with a sticker on the back side so you know which panel to place on which side. A small amount of force was needed to snap them back out and they side nicely at the side of the room when we watch full cinemascope movies. I should mention that not even my behemoth Elemental Designs subwoofer causes them to rattle while hung.

Seymour AV Screen Viewing Tests & Conclusion
I tried to be very thorough for my testing, but honestly, it was in vain. Everything I tried to test seemed like so minimal of a difference that it’s hardly worth mentioning. Of course, as an audioholic I must mention even the small details for the perfectionists such as myself. I used a Panasonic AE-4000U projector set at 6500K for the bulk of video testing and calibration along with CAL MAN v4, the Sencore OTC-1000 colorimeter and Minolta LS-100 light meter. Testing the color temperature of my reference material measured as 6498K, and the Seymour AV screen material measured at 6544K. That, my friends, is less than 1% off of perfect for color shift. Needless to say, I went ahead and ran through the Calman calibration process on the screen only to achieve the best possible image and was extremely impressed with the image quality and contrast. This is more of a testament of the Panasonic projector and the Calman software, but there didn’t seem to be any major issues adjusting any one of the colors vs. the others, meaning the Seymour AV screen was a very balanced white and exhibited uniform gain characteristics across the color spectrum. One other good thing to note here is the tilted fabric weave which is standard for their fixed frame screens. No moiré was present at any zoom level of the projector. Shifting back and forth between 2.40:1 and 16:9 modes also showed no moiré in the transition. The black borders were always virtually black, even if I overscanned a 100% white field onto them. It was still too dark for my meters to measure correctly. No overscan during actual use was noticeable at all.
Using the trusty old Radio Shack SPL meter and an audio test disk revealed that there wasn’t more than about 3db of change to any frequency I tested for the speakers alone, with the screen, or even with the screen, secondary black backing layer AND masking panels. Of course, the accuracy of my meter has an error of margin and is not as accurate as I wanted, but my ears heard no objections during music listening and movie watching as noted below.
General Usage
How hard is it to use a screen? You just watch or listen, right? The perfectionist in me was busy basking in the glory of the giant beauty hanging on the wall. The geek in me was tickled pink with how well the calibration and sound testing went. I have already achieved virtual visual and aural nirvana according to the numbers, but the proof lies far beyond the technical.
Movies
Tron Legacy and Thor are two of my favorite recent movies for their special effects, good sound effects, and various aural and visual delights. Running both with my projector zoomed up to a full 2.40:1 aspect ratio left me in complete and utter awe! Many audioholics have known for years that better sound than the average theater is well within reach for the home theater, but then to have the screen consume the entire wall and be completely engrossed in the imagery while still enjoying the superior sound, it’s just spectacular! Sorry Cinemark, I haven’t returned to your venue since I bought this screen. It’s just so much better at home with my own actual theater! Picture so good it almost makes you giddy.
I only evaluated the 2D version since I’ve yet to step up to 3D. At any size or gain, you would need a projector that can scale its output up to three to four times its normal 2D output to maintain a properly lit image. Sure, you could step up into higher gain screens but that also elevates the 2D light output, black levels and may introduce tradeoffs such as uniformity and viewing angle. The current crop of 3D projectors seem to be plenty bright in 2D for this near-unity gain screen, but until they improve scalability I’d recommend going for plenty of lumens with this screen at this size in 3D.
Games
Gears of War 3, FEAR 3, Halo Reach, and some good old Borderlands graced my screen in 16:9 ratio after my masking panels were hung. The colors popped, the blacks were very good, and the sound is clear and directional with no perceptible volume shift between the center speaker and the L and R speakers behind the extra layer of AT masking. However, while playing some 4 player games, I have a tendency to scoot forward from my 12 foot seating position to about 6 feet for my one quarter image size (yes, spoiled), and you can just barely detect a hint of the screen weave at that distance. It’s not really distracting because the gaming is so fast paced, but I wanted to mention it if some seats are very close.
Music
Rani Arbo & Daisy Mayhem, Sarah Jarosz, The Civil Wars, and Ingrid Michaelson are among some of my favorite test disc artists due to the clean vocals, soulful lyrics, and a range of very interesting instruments. For my listening sessions, I removed the masking panels just to have less layers of material between me and my audio perfection. After hours of listening, I can honestly say that I can perceive no change in quality with the screen in place as I did when it was absent. For the most critical listener, it may seem like the difference between having your speaker grill on vs. having it off, but my silver ear hasn’t graduated to the golden level yet. If two channel listening is high on your priorities and listening sensitivity, then Seymour AV also offers a retractable version of their AT screens which can be completely removed from the sound field. Note the cost is a bit higher, but may be worth it.
Conclusion
The Seymour AV screen has not only proved itself visually, but also audibly in the testing and usage above. Screens are made to order, so you can customize to something smaller or larger than offered on SeymourAV.com. With options like Black Backing for mid ceiling installations and magnetic masking panels, it’s impossible to beat the quality of the product. The prices start just below $1000 for smaller 16:9 screens and are a bit higher than competing midrange non-AT screens. In our particular configuration with all the bells and whistle, a larger screen can be a bit pricier and perhaps out of the budget for some. There is still an excellent value to be had here, but it’s not for the entry level price conscious customer, unless you buy the XD fabric directly from Seymour AV and build your own frame. For me, the perfectly square corners, the ease of installation, and the awesome masking panels seal the deal. The Seymour AV Center Stage screen will be a long treasured addition to my home theater.

The Score Card
The scoring below is based on each piece of equipment doing the duty it is designed for. The numbers are weighed heavily with respect to the individual cost of each unit, thus giving a rating roughly equal to:
Performance × Price Factor/Value = Rating
Audioholics.com note: The ratings indicated below are based on subjective listening and objective testing of the product in question. The rating scale is based on performance/value ratio. If you notice better performing products in future reviews that have lower numbers in certain areas, be aware that the value factor is most likely the culprit. Other Audioholics reviewers may rate products solely based on performance, and each reviewer has his/her own system for ratings.
Audioholics Rating Scale
 — Excellent
- — Very Good
- — Good
- — Fair
- — Poor
| Metric | Rating |
|---|---|
| Color Reproduction | |
| Build Quality | |
| Ease of Setup | |
| Fit and Finish | |
| Performance | |
| Value |