
AV Receiver Set Up Guide: Setting Crossover, Distance, Level, and EQ
Want to know how to set up your A/V receiver?
Hopefully, you’ve already taken a look at our Speaker Positioning video that guides you through the setup of where to physically put your home theater speakers. If not, click the link to take a peek, or visit our YouTube channel to find it and other great videos.
For this video, we’re going to explain the importance of setting Crossover, Distance, and Level for your speakers. We’ll also discuss the Equalization (aka EQ) features of modern Audio/Video Receivers.
How to Set Up your A/V Receiver
There are two ways to make these adjustments. These days, most people will utilize an auto-calibration of some sort, i.e. Audyssey MultEQ or Yamaha’s YPAO. However, some entry level and older equipment will require manual setup.
If you have a modern A/V receiver, it probably came with a little microphone allows the system to automatically adjust all of these settings. By plugging it in and following the instructions in the user’s manual, the receiver will recommend a crossover setting, automatically compensate for distance, and adjust the level of individual speakers. More advanced receivers may also apply automatic EQ, such as models utilizing the aforementioned Audyssey MultiEQ or Yamaha’s YPAO, to speakers and subwoofers in an attempt to make them sound as similar and accurate as possible.
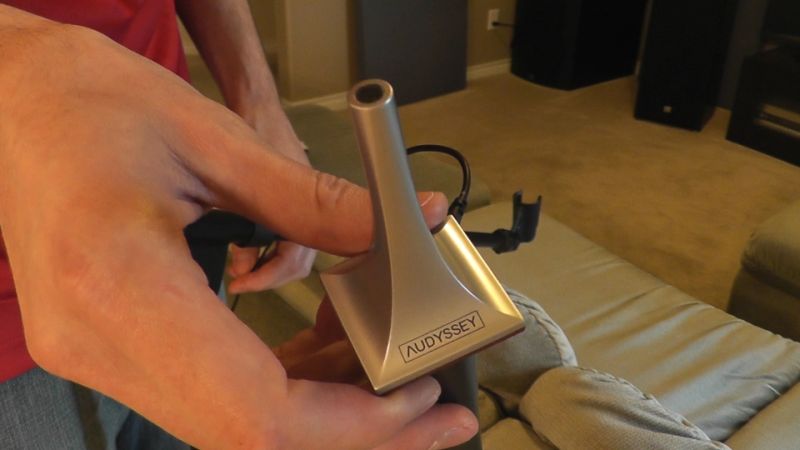
Audyssey's standard auto-setup microphone.
For best results, the microphone should be placed on a tripod in the main seating location, away from any surfaces, and you should step out of the room while the system is running.
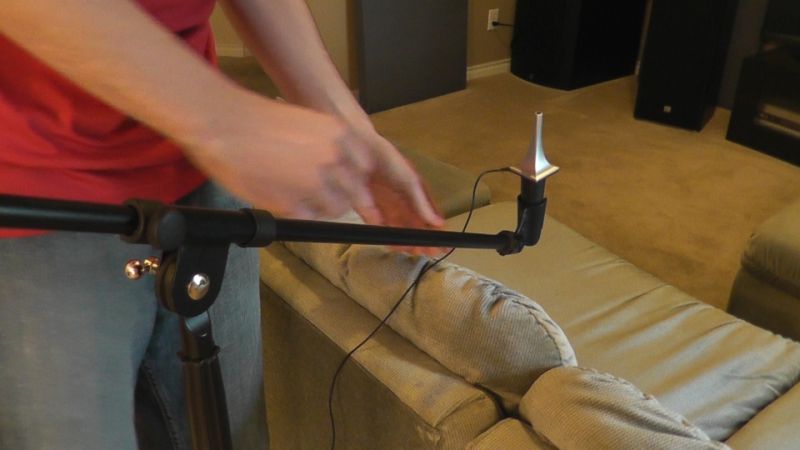
For best results, the microphone from your A/V receiver should be placed on a tripod.
If you have an older receiver, one without an automatic setup system you’ll need a tape measure for distance and an SPL, or Sound Pressure Level meter, for volume level. There are SPL meter applications that you can download for a smartphone, and these will work, but they will likely be much less accurate than consumer-level SPL meter, like the Galaxy Audio CM-130, especially with subwoofers. Of course even if your receiver does have an auto-setup system, we recommend that after running the calibration routine that you follow up with a common sense double check of each setting, provided you already have a tape measure and SPL meter. We’ve found auto-setups do a consistently good job setting up distance and level, but don’t always choose the ideal settings for crossover/bass-management or EQ.
First, in most cases, you should have all speakers set to “small”, not “large.” When set to large, a speaker plays all frequencies, even low bass that is usually best reserved for your subwoofer(s). If you don’t have a subwoofer, or if your speaker has a built in subwoofer, then you can use the large setting for the main front left/right channels.
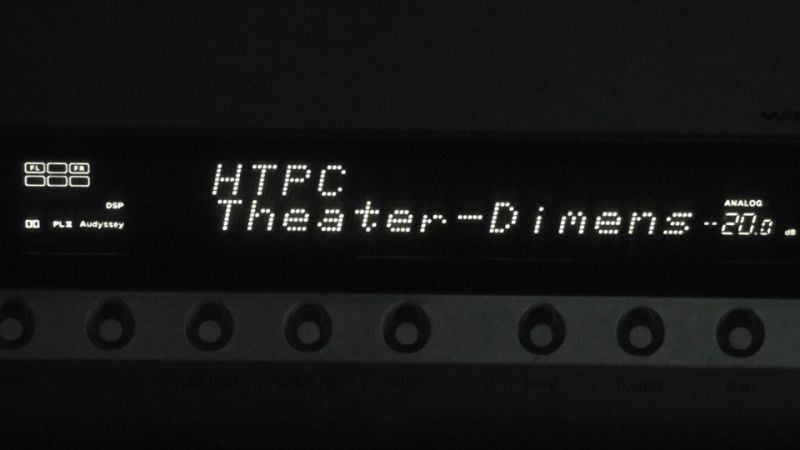
The next thing to check on is the crossover; this is the point at which low-frequencies are redirected to your subwoofer instead of your other speakers. 80 Hz is a commonly recommended crossover setting because this is the generally accepted point at which it becomes difficult for humans to localize a sound. However, it takes a big driver, or lots of smaller drivers, to produce big bass. If your speakers are not able to reproduce frequencies down to 80Hz at the listening level, you may need to raise the frequency at which the crossover operates.
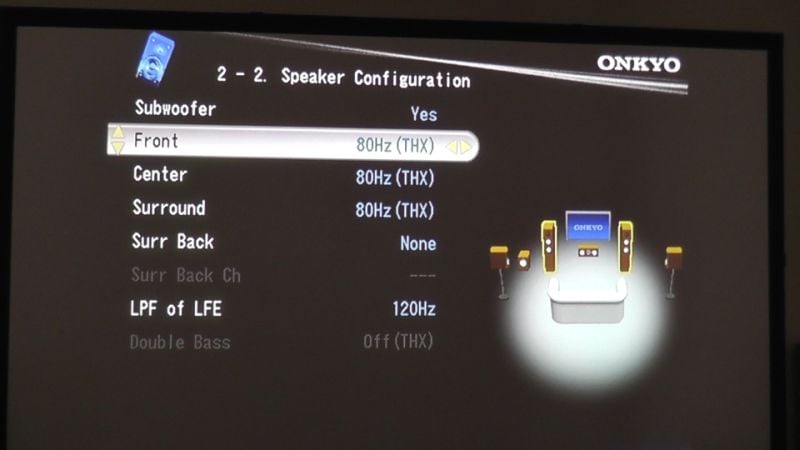
The crossover adjustment screen in an Onkyo A/V receiver.
Your crossover should be set no lower than the lowest manufacturers’ rated speaker response at +/- 3dB. You can find this in your users’ manual or on the manufacturers’ website. If you can’t find this specification anywhere, you can guesstimate based on the diameter of the largest driver in your speaker. For a 6” or larger driver, use 80Hz. For 4-6”, use 100-120Hz, and for smaller than 4”, use 150-200Hz.
The distance of your speakers, relative to one another, is also important. This is because it takes time for the sound to get from the speaker to your ears. It’s not much time, about 1 millisecond per foot, but it still takes time. With two or more speakers playing sound designed to get to your ears at the same time, if one speaker is farther away than the other, it will take longer for the sound to arrive. This will result in a “smeared” sound making short, intense sounds like a gunshot or whip crack less detailed, and speech harder to understand.
Don’t worry if you absolutely can’t get all your speakers the same physical distance from one another. Most of us can’t, and you can adjust for this delay in your receiver. For distance, simply measure the distance from each speaker’s tweeter to your nose, and then follow the instructions in your receiver’s manual for setting individual speaker distance.
One note: the distance of your powered subwoofer may have been identified by your automatic setup as being further away than it physically is. This is to compensate for what’s called phase matching with your other speakers. Even if the physical distance is closer than the setup microphone identified, it is not advisable to change the subwoofer distance unless something really doesn’t sound right.
You will also want the volume level of your individual speakers to be equal. A number of things can make one speaker louder than another. It might be designed to be more sensitive, which means it will play louder than a speaker with lower sensitivity when both speakers are fed the same amount of voltage. Also, placing a speaker in a corner or near a wall can make some frequencies louder, as can placing a speaker closer to a listener.
For level, you need to play wide-band pink-noise test tones which may be built into your receiver, or which you can download here by doing an internet search for “Pink Noise Test Tones”.
First, set up your SPL meter. If your SPL meter offers speed, compensation, or range adjustment, use these settings: slow, c-weighted, and a range that encompasses 75dB. Set the tip of the microphone at the point between where your ears would be if you were sitting in the center seat. Aim it up towards your ceiling. Play the test tones through each speaker one at a time, and set the level of each speaker so that it reads approximately 75db on the meter. You may need to increase the master volume level of your receiver to reach 75dB. Try not to make all the individual speaker adjustments by only boosting or cutting. For example: instead of setting just your center channel to +10dB, set it to +5dB, and each of your other speakers to -5dB keeping them in the middle of their adjustment range. Some listeners also prefer to boost the center channel level by 1-2 dB to make movie dialogue a little easier to hear amongst all the blockbuster action.
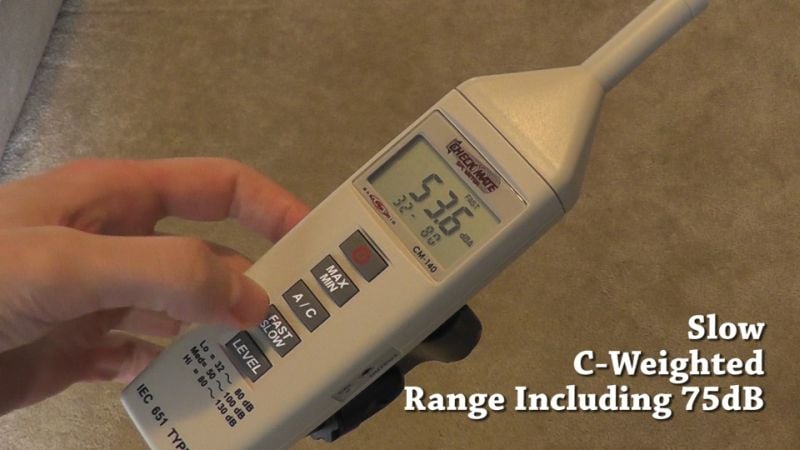
SPL meters are invaluable tools for the A/V enthusiast.
Whether you determine your levels with the auto-setup, or by hand, write down your initial settings before making any changes. This way, you can experiment and still be able to go back to your original settings if you don’t like the results. Writing down settings will also save you frustration if a guest or child accidentally changes your settings. In fact, some receivers offer the option of “locking” the settings menu to prevent such a disaster.
Lastly, different speaker models, or the same speaker model at different positions in the room, may have a different tonal response. By applying equalization to individual speakers, you can make them sound more similar to one another, helping them to blend together. Just be careful not to get carried away with your EQ. It’s easy to boost certain frequencies which may sound good on some material, but not others. Also, it’s possible to damage drivers if too much gain is added to certain frequencies. When it comes to EQ, auto or manual, trust your ears. Listen to familiar material while switching the EQ on and off. If you don’t like the results, leave it off.
You are almost done, but there are a few last considerations:
- First – You might notice that your receiver has different sound modes, called DSPs, possibly labeled “music” or “movie”; these can drastically alter the sound of your system and should be used wisely. You might even have a night listening mode. Every receiver is different, so read through your manual to see what differences DSPs are offered and what they do.
- Second – most new receivers have a “power on” volume you can set, so every time you turn on the receiver, it is at the same volume level. This means that you never have to worry about turning on your system and get blown out of your house.
- Third – Have a read through your manual to become familiar with the receiver. Often times, there are settings buried in the menu that can dramatically affect sound quality, but you need to read the manual to find out what they are.
Read about what DSP modes your A/V receiver offers in its manual.
Conclusion
By following these steps, you will have setup your receiver to perform at its best, and you’ll be rewarded with more a realistic, theater-like sound. For more guides and tips on getting the most out of your system, along with news and reviews of the latest equipment, be sure to visit audioholics.com, subscribe to our YouTube channel, follow us on Google Plus, and “Like” us on Facebook.
Marshall is an Educator by trade, and currently lives in Oregon. He was lucky enough to grow up in a musical household, and though the AV equipment wasn't the greatest, it was always on. His dad introduced him to Queen, Paul Simon, and Sgt. Pepper's, and his mom played Lionel Richie and Disney Soundtracks. When Marshall was 14, his uncle passed down a pair of JBL towers and Marshall finally had his own system. Having enjoyed podcasting and video production over the past 10 years, Marshall is happy to be contributing at Audioholics.
View full profile