
Building a Multifunction Home Theater Seat Riser
As a home theater enthusiast, there can be nothing more exciting than planning out your theater room. It’s more than just a place to indulge in sonic and visual bliss. It’s a sanctuary - a place to escape the real world, at least temporarily. You’ve got your whole dream theater planned out. You know exactly what gear you want to use, where it will be located, the wiring, etc. But what about the most important part of the theater? The one that is almost always forgotten, or put on the sidelines during your planning - the chairs. After all, if you aren’t comfortable while sitting, what good is it? After experiencing the awesome comfort of Continental Seating theater chairs, my advice to prospective theater builders is DON’T forget to allow sufficient budget for quality seating.
Most medium-sized theater rooms require at least two rows of seating. But the problem with a second row is it can be visually blocked from the display screen by the front row if it isn’t properly elevated. Because of this, it’s essential to place the second row of seats on a slightly elevated plane from the first row. Unless your room is already constructed in such a fashion, you will need to build a riser platform. But why limit the functionality of your riser to simple chair elevation? I say kill two birds with one stone and make it an integral part of the theater experience.
Auralex to the Rescue
I wanted my riser to not only elevate my seats, but to help smooth out bass response and increase tactile response for all of the seats residing on it. With that in mind, I called our friends at Auralex - our official acoustics sponsor of the primary theater room in the Audioholics Showcase home.
They provided me a basic design for a riser that would serve the following functionality:
-
Elevate second row of seating 9 inches
-
Act as a wide band absorber
-
Increase tactile response
Auralex prepared a basic design sketch for me to follow and it was up to me now to determine how big I needed to make this riser.
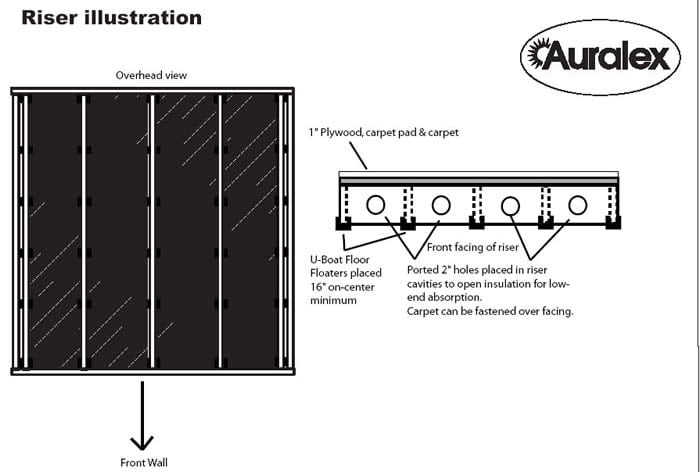
The above diagram shows the basic structural layout and design. Notice the front ports which I actually doubled up on (more on this later) and the Auralex U-boats which are used to mechanically isolate the riser from the rest of the flooring.
Determining the Riser Size
In order to accommodate the width (95”) and depth (61” reclined) of my 3 theater chairs, I needed to make the riser about 105” wide to have 5” of margin on each side (we don’t want people falling off their chairs). I decided on making the riser 7’ deep to allow plenty of leg room up front. I allowed for about 3’ of space between the back of the front row and the front of the second row (this is especially important when folks in the front row are reclined) with sufficient rear space so that the listener isn’t placed directly against the back wall when reclined.
It’s important to consider the placement of the riser before construction, or you will be in for a world of hurt if you later decide to move it. Placement is strictly a function of where the best location of your seating area is in relation to the soundfield. Since I am using RBH Sound 66-SE/R dipole/bipole side channels with RBH Sound SI-740SI/R direct radiator back channels, I had to choose seating locations for the two rows of seats that would work best with this speaker topology and placement. I decided to place the front row about 2’ in front of the 66-SE/Rs and the back row 2’ behind the 66-SE/Rs. Ideally you don’t want to seat the listener behind the null of dipole type speakers, but the RBH’ speakers work better than most in this regard since only the tweeters are wired out of phase. Coupled with the direct radiating rear SI-740SI/Rs, it filled out the surround field nicely, causing the second row to actually become my favorite row to listen to multi-channel music or movies.
Riser Design Notes
In discussing the riser design with Auralex, I took some notes as to how to best maximize its design effectiveness:
-
Make the volume as large as possible. If there is a choice between 2x6 or 2x8 joists, go with the 2x8s.
-
Make the front openings as large as possible, while still retaining the structural integrity of the riser. In a riser constructed with 2x8s, for example, make the holes between each pair of joists (preferable - between every other pair at a minimum) as wide and as tall as possible. Shape is not really a big deal so much as size.
-
The U-Boats shown in the illustration are critical. These will not only "float" the riser, but even the addition of the small airspace under the joists which will decouple the riser from the main floor and improve bass definition.
-
Select dense top materials for added rigidity and minimization of mechanical noise during resonance. MDF is much better than plywood in this regard.
-
Fill each cavity with roughly 75% mineral fiber. The more you fill, the less tactile response you will feel, the less you fill, the more resonance will be perceived. I found around 75% to be ideal but certainly some experimenting is open for debate if you have the desire for the trial and error process.
Editorial Note On Riser Height by Jeff Szymanski
It is more natural for people to step up 6” to 7” as opposed to the 9” created by 2x8s and covering carpet. Acoustically, more volume is better. But we all know how ergonomics win out sometimes. For more information on the design of stairs and risers, see Small Things Considered: Why there is no perfect design” by Henry Petroski, Chapter 18, “Design Rising”.
The riser is partitioned into individual cavities via 2 x 8 beams separated 16” on center. Each of the 2 x 8s form quasi internal bulkheads, partitioning the internal volume of the riser into individual, semi sealed chambers. Each chamber is 75% filled with Auralex Mineral Fiber leaving a 25% air gap between fiber material and riser flooring. Each chamber is tuned by its respective pair of 1 1/2” ducts functioning as a Helmholtz resonator. Based on the individual size of the chambers, they act as narrow band absorbers in the lower frequency range (below 30Hz) but aren’t 100% effective at this task since each chamber isn’t completely sealed off from each other. The U-Boats leave about a 1” air gap between chambers. It was necessary to decouple the riser from the floor using the U-boats to increase tactile response. I felt the trade off of better tactile response vs. more effective broadband absorption in the 20-30Hz range was a good compromise especially since I was using multiple subs with active Audyssey equalization to smooth out bass response in all listening seats.
Editorial Note on Riser Bandwidth by Jeff Szymanski
The “loose” coupling between the chambers, combined with the absorptive fill makes the riser more wideband. Think of a cola bottle. Blow over the opening and you hear a tone. A whole collection of similar bottles will absorb a significant amount of sound at a narrow band around that frequency. If you loosely fill the bottles with “fuzz,” the center frequency stays more or less the same, but the overall absorption decreases and the frequency range increases.An illustration of this behavior can be found in Jeff Cooper’s book, Building a Recording Studio. See Figure 4-7.
Riser Materials List
|
Quantity |
Description |
|
9 |
2x8s (7 feet long each) |
|
2 |
2x8s (9 feet long each) |
|
150 |
1-¾” screws |
|
150 |
4” screws |
|
150 |
1-¼” nails |
|
3 |
2’x4’x¾” MDF |
|
3 |
2’x4’x½” sheet plywood |
|
35 ft |
Rope Lighting |
|
20 |
Strapping Plates |
|
3 |
8’ of 1-½” trim molding |
|
3 |
Various 8’ trim molding |
|
12 |
2” thick 2’x4’ Auralex Mineral Fiber |
Multifunction Seat Riser - Construction Procedure
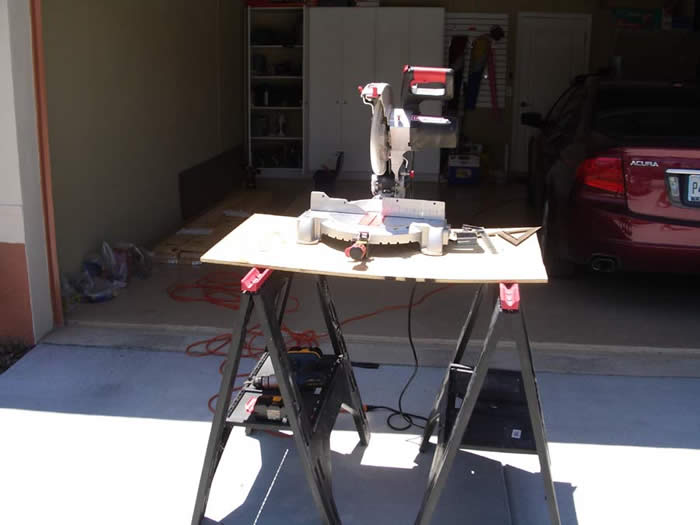
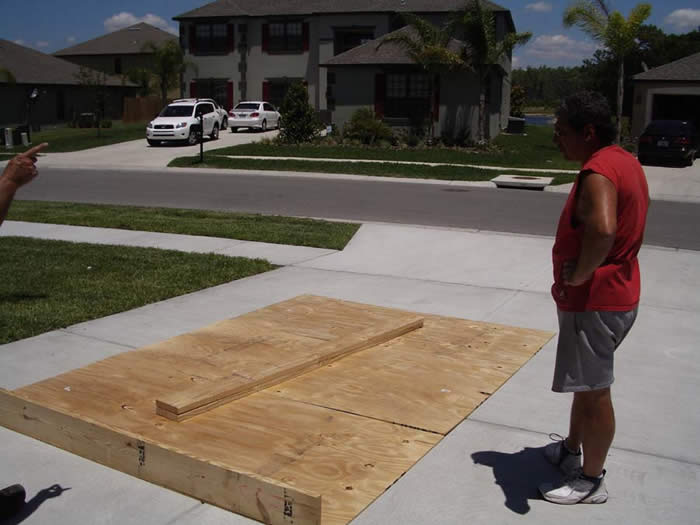
Step 1: Lay out all of your materials in a big open area and begin planning where to make your cuts.
Since the width of my riser is bigger than two 2’ x 4’ sheets of plywood, I had to determine the best place for placing the extra oddball piece which was roughly 9” in width. I placed it between the two 2’ x 4’ sheets which happened to perfectly line up with one of my 2’ x 8’ joists. Placing this piece on the extreme side of the riser is not advised as you risk compromised structural integrity, especially as someone steps off the riser platform.
Step 2: Layout the plywood base in your theater room, strap it together and begin framing the joist structure.
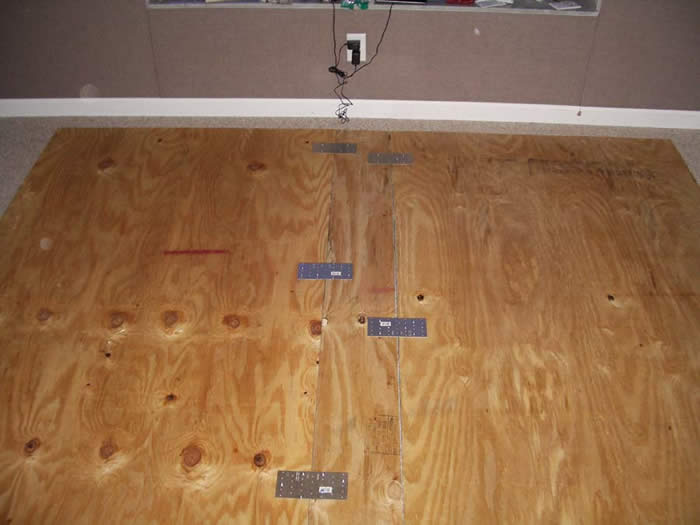
We used hurricane straps with small nails to secure the particle board base sheets together. We then framed out the riser in my theater room. I’d advise you do it here rather than another location as the finished structure will be big and heavy and most difficult to transport, especially if your theater room is on the second floor like mine.
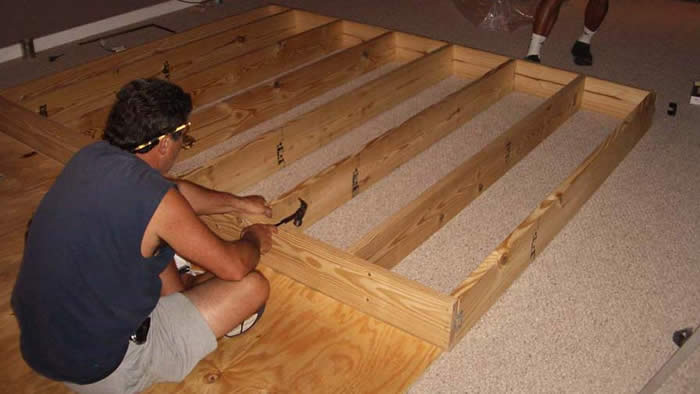
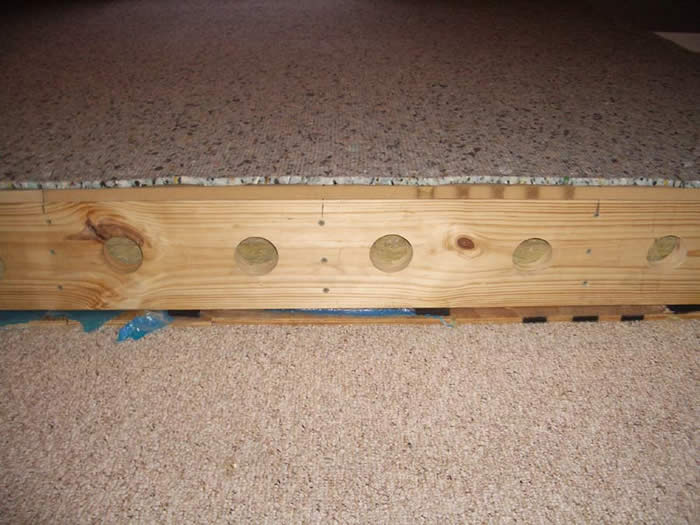
Step 3: Fasten the structure and drill the ports
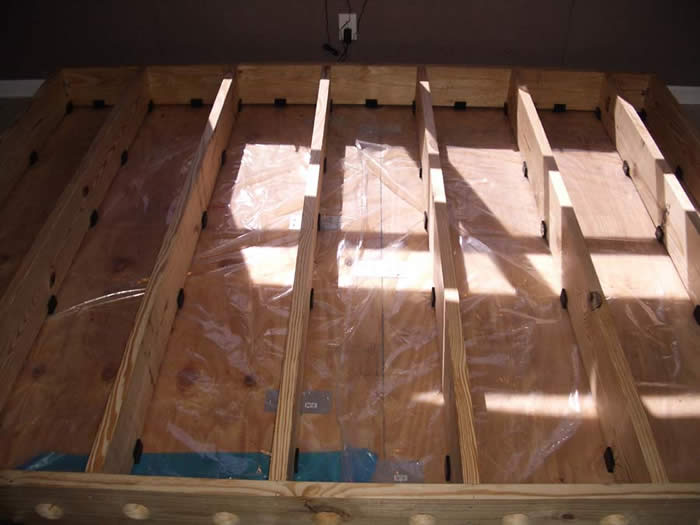
Before setting down the joist structure on top of the plywood flooring, I suggest placing plastic on top of the plywood. This will make your life much easier when inserting the Auralex mineral fiber and prevent fibers from seeping out of the riser. I used 4” screws to join each 2 x 8 joist member in addition to wood clips on the edges to firmly secure and square the structure.
Once the framing was completed, we drilled out the two 1-1/2” ports using a hole saw. This deviated a bit from the Auralex plan of 2” holes, but I felt the greater volume of air flow would be beneficial while also maintaining excellent structural integrity of the front face plate by not drilling overly large holes. A word to the wise, use an electric drill as most non-professional battery powered drills will discharge after drilling one or two of these holes into a 2 x 8.
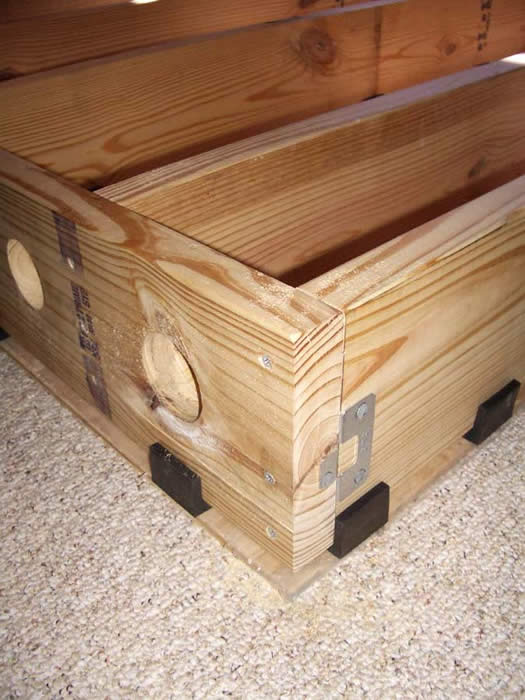
Step 4: Install the U-Boats and Cut to Finish
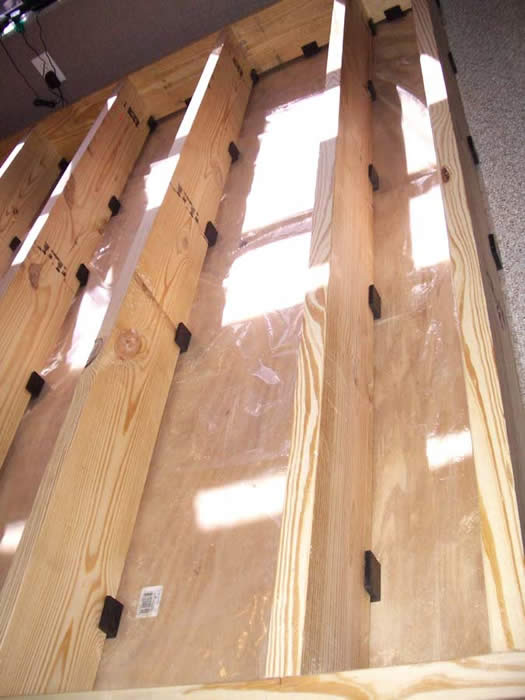
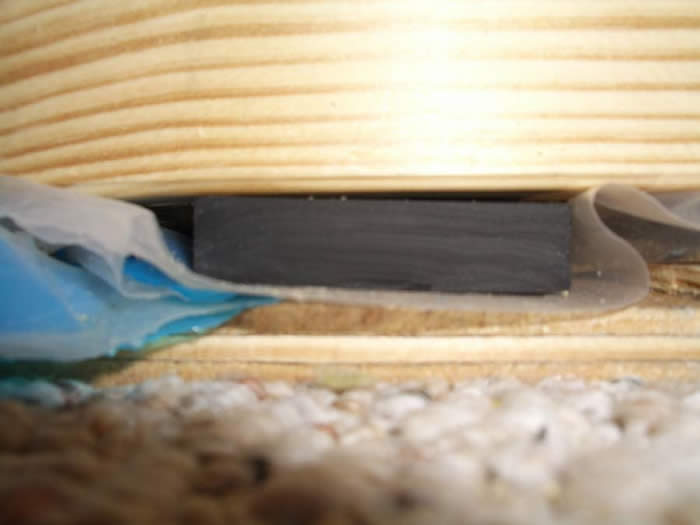
The best method I found was to stand the joist structure up on its face and place the U-Boats on each joist every 16” or so. Then carefully set the structure down back on the plywood flooring. You may find some of the U-Boats will shift or fall off while doing this which is why it’s a good idea to have a friend or two handy to help you lift this heavy structure to reset them in place.
After you have your U-Boats positioned, you will need to cut the front face off each of them around the entire perimeter of the structure so that you can flush-mount the carpet during the final finish stage. I used a razor knife to cut them since the rubber is fairly pliable.
What are Auralex U-Boats?
 Made of a specially-formulated rubber
compound, U-Boat Floor Floaters are Auralex’s proprietary U-shaped channels
used to support framing members and float (isolate and decouple) them from the
surrounding structure.
Made of a specially-formulated rubber
compound, U-Boat Floor Floaters are Auralex’s proprietary U-shaped channels
used to support framing members and float (isolate and decouple) them from the
surrounding structure.
Size: 2 1/8" wide x 1 1/2" high x 2" long
Color: Black
Thickness: sides=5/16" and base=1/2"
Box Quantity: Available in lots of 50 or more
What is Auralex Mineral Fiber?
 A very dense insulation type material specifically designs for acoustical
usage. It yields better bass trapping, overall absorption, thermal
characteristics, moisture absorption and sound transmission loss (isolation)
than the typical “pink stuff” insulation.
A very dense insulation type material specifically designs for acoustical
usage. It yields better bass trapping, overall absorption, thermal
characteristics, moisture absorption and sound transmission loss (isolation)
than the typical “pink stuff” insulation.
NRC: 1.00 (2" and 4")
Qty. Per Box: 2" - 6 (48 sq. ft.); 4" - 3 (24 sq. ft.);
Flame Retardancy: Class A
Step 5: Cut the Mineral Fiber and Stuff the Riser
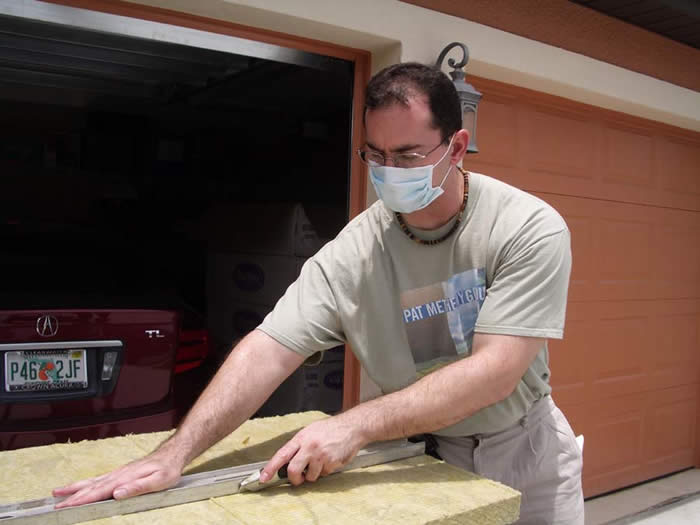
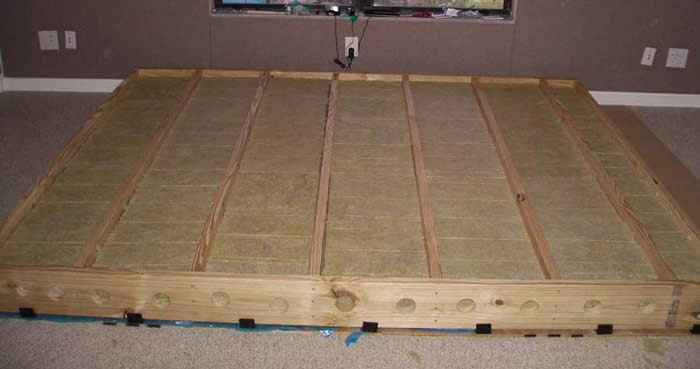
Yea I know the face mask I am wearing looks cheesy, but it’s better than inhaling strands of mineral fiber which can cause Fibrosis of your lungs and eventual Emphysema. The mineral fiber allegedly puts off 90% less airborne particles than traditional fiberglass but I play it on the safe side when it comes to health. I used my handy razor knife again to cut the sheets of mineral fiber to fill each cavity of the riser. Note the spacing left between the top of the mineral fiber and the edge of the raiser framing. Once we place our MDF flooring down, we will have the necessary air gap required to create the tactile response.
Multifunction Seat Riser - Conclusion
Step 6: Install the Riser flooring and throw down carpet padding
We again cut the MDF
sheets the same size as the plywood base and oriented them in a similar manner
as in step 2. We left a tiny gap between each sheet to allow for
expansion and securely screwed the MDF into
the joists. We used a 6lb carpet pad to not make the flooring too plush
thus diminishing the tactile response of the riser.
Editorial Note for Maximum Effectiveness
Shortly after building this riser platform, we realized it may have been a more effective bass trap if the ports were placed towards the rear of the room to serve in a pressure maximum area rather than a velocity maximum area like they currently serve. I would encourage someone building this platform to measure both ways to determine what works best in their room. If the rear placement is ideal, do NOT cover the ports with carpet.
Step 7: Secure the carpet and trim molding
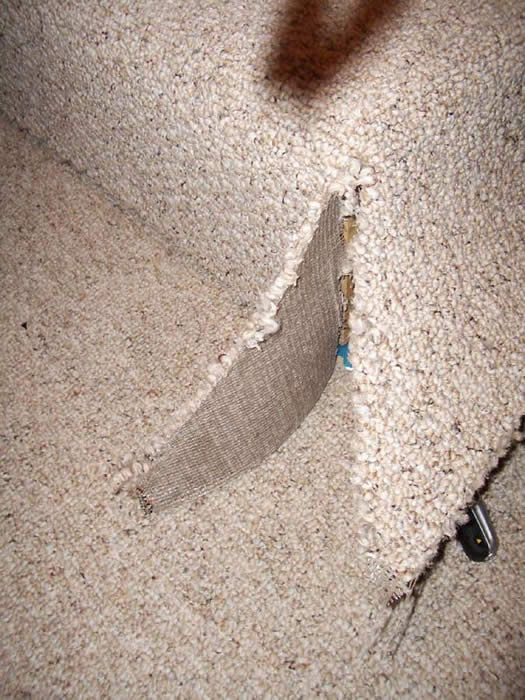
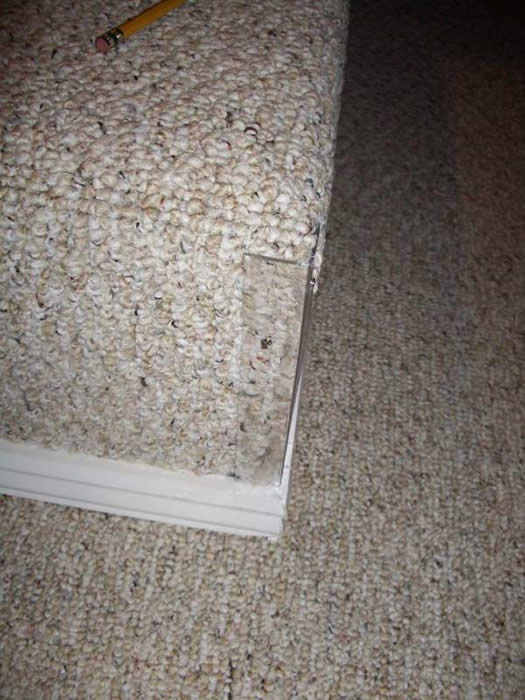
I selected the exact same carpet used on my flooring for a perfect match. We secured the carpet to the riser with nails. This is definitely a 2 person job - one to nail and the other to stretch the carpet. Finishing off the corners was a bit tricky. We carefully slit the carpet at the corner, and nailed it to the riser. Afterwards we picked up some 1-1/2” trim molding, painted it white and cut it to fit the riser dimensions. The trim molding was nailed to the riser and we used a plastic corner molding to finish off the corners. We cut it about 1/2” below the riser floor to ensure nobody would scrape against it when exiting the riser.
Step 8: Install the Rope Lighting and Finish Molding
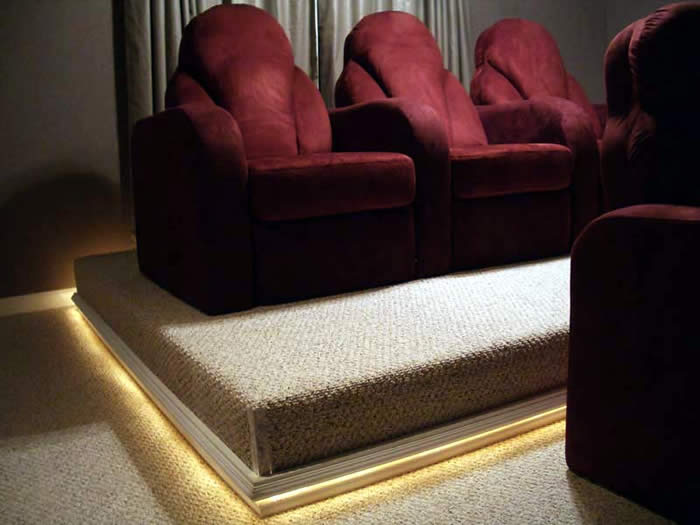
Initially I thought I could get away with placing the rope lighting on the bottom molding, but later found excessive light emanation was hampering the picture quality. At this point, I had two options: install a dimmer or encase the rope lighting in another layer of molding. I chose the latter as I felt cosmetically it would look better. I called upon the help of my local neighbor who is a skilled carpenter to custom build me trim molding (right pic) to encase the riser and deflect the light to the floor where it should be.
For the final finishing touch, I connected the rope lighting to an RF remote controlled outlet accessory. When I get around to updating my RTI universal RF remote control, I plan on adding a macro to automatically turn on the lighting each time I use my theater system.
The End Result
 Now it was time to enjoy the fruits of my labor. Did all of this
construction pay off? I’d sure hope so, else at best case I’d have a
costly, elaborate and labor-intensive riser platform to simply elevate my
second row seating position.
Now it was time to enjoy the fruits of my labor. Did all of this
construction pay off? I’d sure hope so, else at best case I’d have a
costly, elaborate and labor-intensive riser platform to simply elevate my
second row seating position.
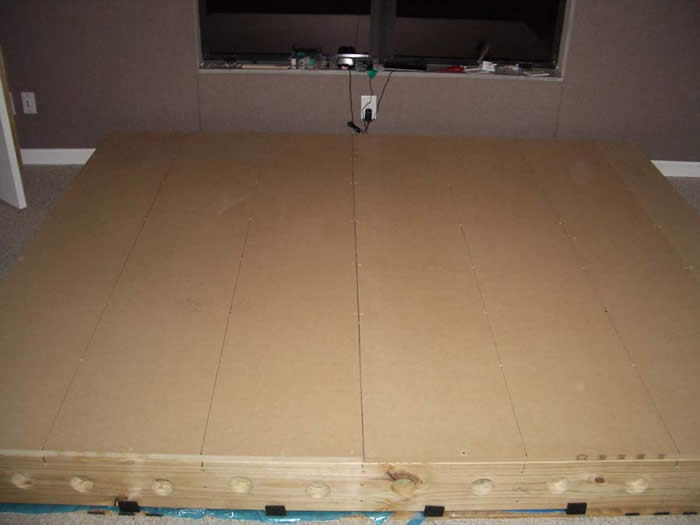
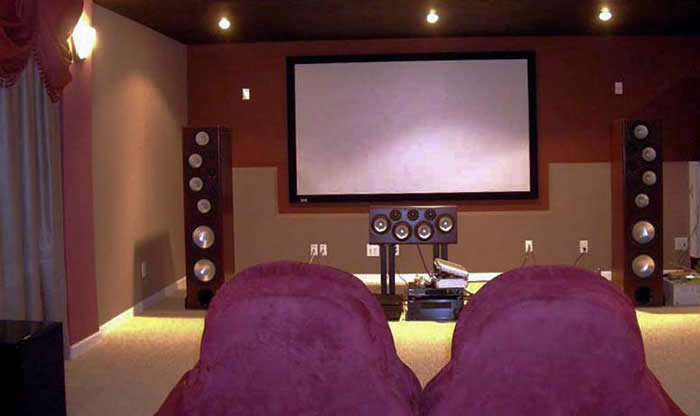
As you can see in the picture taken from the second row, the riser provides just enough elevation to preserve a direct viewing path to the screen while at the same time not vertically offsetting the listeners from the acoustic center of the front speakers.
The proof however is in the pudding, so I loaded up some bass-intense music to gauge the effectiveness of the riser’s ability add tactile response to the experience.
I started with a killer jazz SACD I picked up from the Jazz Depot. A particular favorite of mine is from High Note records kinda JAZZY kinda FUNKY which is a compilation of soul jazz that just gets your foot tapping. Track #7 “Peach Cobbler” by Bill Heid is my favorite on the disc. The combo of Bill’s B-3 organ and Joe Magnarelli’s trumpets sent tingles down my spine the first time I heard it. Despite the fact that it’s only a 2CH recording, the soundstage is larger than life and the trumpets sound so real that I soon found myself in an audio nirvana coma that I didn’t come out of until the 7+ minute song was over. The bass was extended and clean and I was enamored by the tactile response the riser platform extended to my chairs. It truly brought a new level of enjoyment to my listening experience. I’ve never been a huge fan of tactile transducers because they always seems artificial to me, especially for music playback. But the tactile response I was feeling from my riser was a whole different experience. It felt like a natural and integral part of the music. I was amazed at how well the bass maintained its composure despite it had a new level of tactile energy I didn’t experience in the front row. Never did I find the bass one-notey or overpowering. Instead, I longed for the more intimate connection to my music that the riser was allocating.
I next fired up the opening battle scene from Star Wars Episode III: Revenge of the Sith and was soon dazzled by the cannon pounding of the capital ships engaged in battle. Anytime I switched between the front and second row seating, I found myself favoring the latter, especially for multi-channel music and movie listening. It was ironic to me that I tweaked my whole theater system to perform optimally in the front row, yet in almost every circumstance I found myself preferring the second row which I am certain the riser had a lot to do with.
About the only thing I can criticize is I sometimes find a very slight lag in tactile response vs bass impact which is an inevitable result of mechanical vibration build up inside the riser. If you wish to minimize this phenomenon, you can stuff the riser with more insulation at the penalty of losing some tactile response. Personally I prefer the way it is now, especially when I have my bare feet planted on the surface of the riser. If you find the experience to be a bit too overwhelming, simply reclining in your chair and getting your feet off the riser floor will likely resolve this for you.
Anytime I have a visitor to the Audioholics Showcase home, I almost always seat them in the second row to get the most WOW effect possible. While every seat in this theater sounds great, there is simply no denying the added level of enjoyment of having a properly engineered tactile riser. If hearing great bass response is one thing, then feeling it is the icing on the cake. If you are contemplating building a riser for your theater room, I highly recommend you make it a dual purpose device such as I have done here. Auralex has provided an excellent blueprint which I neatly laid out the “how to” for in this article. All it takes now is some elbow grease, ingenuity, the proper tools, and a friend or two to help you out. Their reward, of course, is being among the first to experience the finished product. If they are bass heads like me, it will surely pay them dividends.
For more information:
Visit: www.auralexelite.com
Auralex Acoustics, Inc.
6853 Hillsdale Court
Indianapolis, IN 46250
317.842.2600
Gene manages this organization, establishes relations with manufacturers and keeps Audioholics a well oiled machine. His goal is to educate about home theater and develop more standards in the industry to eliminate consumer confusion clouded by industry snake oil.
View full profile