
Optoma H31 Projector Review
Optoma H31 DLP Projector
- Product Name: H31 DLP Projector
- Manufacturer: Optoma
- Performance Rating:

- Value Rating:
- Review Date: April 19, 2005 20:00
- MSRP: $ 1299
|
Display Technology: Single 0.54-inch 12-degree DarkChip2 DLP Technology from Texas Instruments |
Deinterlacing: Pixelworks PW1231 |
Pros
- * Good contrast
- Deep black levels
- Eye-popping color saturation
- Versatile inputs (including DVI-HDCP)
- 5 presets available per input
- Inexpensive unit with high overall performance
Cons
- Lower resolution means a longer seat-to-screen distance
- No physical lens shift
- May be awkward to use as a tabletop unit due to rather high projection angle
- Manual focus
Optoma H31 Features & Favorites
We get asked fairly regularly to review more budget-minded products for our readers. In particular, everyone seems fascinated by the influx of lower-priced front projection systems that are competing for a large financial portion of the home theater display market. These front projection systems promise large viewing screens with an almost unbeatable price point. Compare, for example, a 92" front projection DLP system vs. a DLP-based rear projection unit and you are talking a potential savings of over 60-70%! It doesn't take a Nobel Lauriat to figure out where the bargain is. Sure there are trade-offs, mostly in terms of ambient light management and viewing distance, but if you can overcome these obstacles then you are looking at a tremendous opportunity.
DLP Projector Strengths
The strengths of the DLP format, at least in its current iterations, include good black levels, phenomenal color saturation, great lamp life (for the format) and full digital readiness with HDCP-compatible HD M I or DVI being readily available on most contemporary models. The format has an easier time with black levels than typical LCD-based systems due to the way the D M D (digital micromirror device) is able to turn away from the lamp and deny light to the screen. Recent advances have produced HD2+ technology (dubbed DarkChip2) which reduced the gap between mirrors, removed the dimple where each mirror is attached to its post, and provided a light-absorbing coating on the back of the micromirrors which together allows for better contrast ratios and black levels. In fact, this new technology is supposed to offer a 20-25% improvement in overall contrast ratio - with the most gain being in the more difficult-to-achieve black levels. Couple this with a 6-segment color wheel spinning at 7200RP M (4x) you have a nice projector that gets the job done with a minimum of compromises.
Features and Favorites
The Optoma H31 has a host of excellent features and functions that makes it a tremendously configurable entry-level home theater projector as well as an adaptable one. Here are a few of my particular favorites that stood out on initial use and inspection:
- 5 Calibration Modes per Input
Each of five modes, selectable by the User, are able to be calibrated for each input. This means that you could choose to setup up different settings for Day and Night viewing in addition to a special setup for, say, daytime sporting events that require the maximum brightness and color saturation at the expense of contrast. You could also set up a fourth mode for black and white movies, with a color temperature approaching 5500K for a more realistic presentation. The fifth mode - pure gravy. And this is per each input! - DarkChip2 Technology
The ability for this projector to reproduce deep black levels was impressive for a digital display. We were able to get decent real-world contrast ratios out of the H31 as well as produce compelling scene details on darker theatrical scenes. - Fully Backlit Remote Control
With only a few minor suggestions, this could be the greatest projector remote in existence. While you will probably not use it very often, unless you are unfortunate enough not to have a great universal remote control, the wireless remote that accompanies the Optoma projector is as ergonomic as it is attractive.
We'll expand on these features later, but Optoma's attention to detail (down to a convenient carry-bag that comes with the H31) makes this system a very compelling argument in the face of the choices one has in entry-level front projectors.
Optoma H31 Setup & Installation
This projector is a bit difficult to mount using a tabletop, due to its unusually high projection angle. However, if you are ceiling mounting it you will only need to concern yourself with the distance required to correctly fill your screen. For this review we utilized a Carada Criterion Series 92" diagonal screen (with Brilliant White material). This is a nice high quality screen and is optimized for excellent white levels while allowing for deep, rich blacks in a light-controlled room. For those considering the Optoma H31 in their home theater room, take a look at the 16:9 throw chart:
Throw Chart for Distancing the Projector from the Projection Screen
|
Screen Size |
Size (Inches) |
Distance (Feet) |
||
|
|
width |
height |
wide |
tele |
|
30 |
26.1 |
14.7 |
3.81 |
4.62 |
|
40 |
34.9 |
19.6 |
5.08 |
6.16 |
|
60 |
52.3 |
29.4 |
7.63 |
9.24 |
|
70 |
61.0 |
34.3 |
8.90 |
10.8 |
|
80 |
69.7 |
39.2 |
10.2 |
12.3 |
|
90 |
78.4 |
44.1 |
11.4 |
13.9 |
|
100 |
87.2 |
49.0 |
12.7 |
15.4 |
|
110 |
95.9 |
53.9 |
14.0 |
16.9 |
|
120 |
104.6 |
58.8 |
15.3 |
18.5 |
|
130 |
113.3 |
63.7 |
16.5 |
20.0 |
|
150 |
130.7 |
73.5 |
19.1 |
23.1 |
|
170 |
148.2 |
83.3 |
21.6 |
26.2 |
|
200 |
174.3 |
98.1 |
25.4 |
30.8 |
The Carada Brilliant White screen we utilized is the 92" diagonal 16:9 version with a Criterion frame. This screen is an excellent fit with this projector due to its closer adherence to color and white field uniformity. We are not fans of gray screens unless you have a projector and room combination that makes the compromise a better alternative (for example: projectors with very poor black levels or a room that cannot be fully darkened). This screen material has a gain of 1.4 meaning that on-axis it is about 40% brighter than standard matte white surface materials. It supports practical viewing angles of up to 160 degrees - very good for home theater use and one of the widest possible viewing angles for front projection screens.
We positioned the projector in a temporary, but workable location. It was centered horizontally with the screen and set back about 12' 4" - towards the minimum of the throw distance range. The projector had to be mounted rather low in order for the high projection angle to hit the bottom of our screen without keystoning. By low, we mean that with the projector mounted on a 20" tall table (putting the center of the lens at a height of about 22") the bottom of the projected image is approximately 39" from the ground. To get the image to align with the bottom of our screen, we had to remove the table and position the projector a couple inches lower. Ergonomically, the projector is a bit off for tabletop use, but for a ceiling installation this will hardly matter as you would make the installation and screen fit the projector's requirements.
Keep in mind that, as handy as it is, keystoning in a fixed pixel display results in loss of resolution and detail and should be avoided at all costs. Always try to relocate the projector before giving in to the +/- 16 degree digital vertical keystone adjustment. I personally would accept a slightly off-axis picture rather than engage keystoning. To understand the significance, simply place an image on the screen that possesses crisp detail or text. Then stand up close to the screen (you can see it from the seated position, but up close is even more obvious) and toggle keystoning on and off. You will immediately see the text/detail blur when keystone is in any position but the default. The keystoning feature is probably here to stay, compensating for extreme scenarios, but those who know better leave it alone.
We ran two different cables to the projector for our tests. A well-shielded component video cable was supplied by DVIGear and gave us an excellent analogue connection from the Denon DVD-3910 player's component outputs. A well-built HDMI cable (also supplied by DVIGear) enabled us to compare the digital video connection from the Denon DVD player as well. We wanted to use the HDMI to DVI converter supplied with the projector, but our sample lacked it so we chose a converter from Gefen, Inc which did quite nicely.
When setting up and using the projector, make sure you have the Full Screen Mode set to "Normal ". This feature is handy to use as an option down the road, but for the best video performance it needs to be in the default position (more on this later). Also ensure that your Lens Shift Preset and Edge Mask are "Off". At this point you will most certainly be aware that the Menu only stays active for about 10 seconds (we timed it). This is absurdly short and results in repeatedly returning to the menu to make adjustments when you are in the course of setting up color, contrast, etc. It's a rather small problem with what is otherwise a delightfully simple menu interface.
Connections
You can connect an array of devices to the Optoma H31 projector, including DVI (w/HDCP), component, s-vide and composite. An RS-232 breakout cable is provided and there are both front and rear IR receivers, allowing for flexible mounting options.
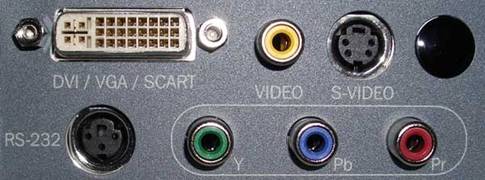
As previously mentioned, we utilized the component video inputs (YPbPr) as well as the HDCP-enabled DVI input for our tests. We sent interlaced signal from the Denon DVD-3910 to the Optoma projector and allowed the onboard PixelWorks PW1231 to convert the signal to progressive scan, performing all deinterlacing functions as well as 2:3 pulldown. The connections are very nicely spaced out and are much easier to utilize than some other projectors I've worked with. The DVI input is odd in a market quickly being dominated by HDMI, however the DVI connection offers a much more secure connection. For video, the two formats are nearly interchangeable and the included adapter should help take care of any mismatches you may have.
When asked, Optoma quickly noted that the advantage of DVI-I (in additional to more secure connection we mentioned) is that it provides additional support for analog or digital RGB signal from either the VGA or DVI port of a computer. H31's good color and contrast makes it an excellent tool for displaying digital photos or video from computers. As the H31 is a very lightweight projector, this makes it an excellent choice to double as a presentation product (and thus potential business write-off - but don't tell your accountant I said so).
Remote Control
The remote control that comes with the Optoma H31 is elegant and ergonomic. I loved the button layout and the feel of the remote in general. The unit is completely backlit, though the lighting is a bit uneven across all of the buttons, making some brighter than others. Overall I found everything to be legible in the dark, save for the centrally-located Keystone and Image Shift buttons, which we recommend avoiding anyway.
The remote has a rather neat effect whereby the backlight slowly fades away after about 6-7 seconds as opposed to just turning off immediately. This is just a nice touch to an already successful remote control. The commonly-activated video mode buttons (for changing between 4:3 and 16:9 content) are easily reachable, as are the directional buttons that control menu functions. The available inputs are directly accessible on the bottom of the remote (great for programming universal remotes with macro functions) and the top of the remote adds buttons for free-frame, re-sync, and even engaging the "Hide" mode which blacks out the current image. Even Brightness and Contrast buttons are easily accessible, though I'm not certain this is necessarily a good thing. Conspicuously absent (in my opinion) are direct access buttons to the 5 handy user settings that can be configured for each input. It would be nice to have direct access to these functions, however the menu button puts this feature just four clicks away for the user.
The Menu System
As I mentioned earlier, the Optoma H31's User Menu is concise, yet entirely adequate. It is divided into four main areas represented by somewhat vague icons: Picture, Image, System and Display. Picture and Display seem to be intertwined and I didn't see a practical distinction, but they were possibly separated for aesthetic reasons.
The Picture Menu allows adjustment of Contrast (white level), Brightness (black level), Color, Tint, Sharpness & Gamma. It's also the place to go to select one of the 5 picture modes (memory settings) available to the user. The Color and Tint settings, unfortunately, are not available when using the DVI input.
The Image menu continues picture adjustments by making available settings for White Peaking (setting the max white level from the DMD chip) and Color Temperature (selectable as Film/Video/Graphics/PC). An Advanced Adjustment submenu gives the user access to much needed RGB bias/drive adjustments (labeled as RGB for Contrast and Brightness).
The System menu handles more universal controls and settings such as Language, Lamp Hour Reset, and Auto Shutdown. A Source Lock option determines whether the unit will stay on an input that loses input or automatically search for an active input.
The Display menu allows for setting the unit up as front or rear projection, including ceiling or desktop mounting. It also gives the user access to setting whether incoming source material is to be presented as 4:3 or 16:9 material (most will set this to 16:9). The available Keystone option, as we mentioned should be left off and the Zoom and Full Screen modes can be used in various scenarios where you wish to maximize the viewing image size (see Editor's Note). I tended to use some of these settings when watching various cableTV programming that had letterboxed content. When changing modes from 16:9 to 4:3 you will enable additional options for scaling the formats. 4:3 mode allows for 3 scaling settings: 1 (picture is shown in 4:3 aspect ratio, 2 (picture is stretched to fit a 16:9 screen, and 3 (image is zoomed in). If you feed the projector a 1080i signal via DVI while in 16:9 mode, an option will appear for 1) scaling the image normally, or 2) displaying the image at 540p with 6.25% overscan (which minimizes the scaling error for a 1080i source).
Editor's Note
Zoom and Full Screen modes will result in a loss of resolution for SD content. However, if the input was an HD source, H31 will actually scale the image directly from the HD source rather than upscaling a 480p image. In effect, the extra pixel detail available from an HD source (720p or 1080i) can be visible when the picture is zoomed in or displayed at one of the full screen modes.This is especially useful if the HD source has an aspect ratio wider than 16:9. M ore pixels are put into real use instead of generating black bars when zoomed in. For this reason, it may be wise to set your HD sources to higher than the 480p resolution of the Optoma H31 in cases where you wish to engage the zoom modes.
Optoma H31 Calibration & Bench Testing
Calibration - Get Those Black Levels Right!
It is very important to set the black and white levels (Brightness and Contrast) in order to get the most out of this DLP projector. Forsake this and you might as well keep the lights on in the room. Utilizing the Datacolor ColorFacts CF6500 I tweaked the brightness (black level), contrast (white level), saturation (color/chroma), sharpness, and hue (tint) to accurate levels in the user menu. Before I performed the ISF calibration I reset the projector and took some measurements. The biggest adjustment we made was in the black level setting which was set much too high in the default settings. Once we adjusted black level, all of our ramps looked much better and viewing images on the H31 started to really produce impressive results.
The Datacolor ColorFacts CIE Chart is used to display the colors for the Optoma H31's HDTV color reference, as well as the gamut of colors that it is capable of creating. Here you can see the projector reproduces excellent greens, but has some issues getting into deep blues and reds. Bringing up images on the display showed only pleasing results with no lack of saturation apparent in real world film content.
Here are some of the before and after measurements as shown by the Milori ColorFacts Professional 5.5 software:
Audioholics/HQV Bench Testing Summary of Test Results
Perfect Score is 130
Optoma H31 Benchmark Score: 49 (room for improvement, but this is still an excellent performer)
|
Test |
Max |
Component |
Component |
|
Color Bar |
10 |
10 |
Pass |
|
Jaggies #1 |
5 |
3 |
Pass |
|
Jaggies #2 |
5 |
0 |
Fail** |
|
Flag |
10 |
5 |
Pass |
|
Detail |
10 |
10 |
Pass |
|
Noise |
10 |
3 |
Pass |
|
Motion adaptive Noise Reduction |
10 |
3 |
Pass |
|
Film Detail |
10 |
10 |
Pass |
|
Cadence 2:2 Video |
5 |
0 |
Fail |
|
Cadence 2:2:2:4 DV Cam |
5 |
0 |
Fail |
|
Cadence 2:3:3:2 DV Cam |
5 |
0 |
Fail |
|
Cadence 3:2:3:2:2 Vari-speed |
5 |
0 |
Fail |
|
Cadence 5:5 Animation |
5 |
0 |
Fail |
|
Cadence 6:4 Animation |
5 |
0 |
Fail |
|
Cadence 8:7 animation |
5 |
0 |
Fail |
|
Cadence 3:2 24fps film |
5 |
5 |
Pass |
|
Scrolling Horizontal |
10 |
0 |
Fail |
|
Scrolling Rolling |
10 |
0 |
Fail |
|
Total Points |
130 |
49 |
|
*Testing was done via component video inputs with a reference source set to 480i.
Comments on HQV Testing
Running the HQV tests on the Optoma H31 allowed us to see how well the projector's video processing did in a variety of tests. Overall, we were pleased with the results, though the internal deinterlacer could benefit from some better processing for dealing with multiple 3:2 events that are layered with either video effects or highly detailed scenes. Noise reduction on this unit was minimal with lots of noticeable noise making its way past the processing and into the picture. Of note, the rather difficult Film Detail test was passed with no trouble at all - this test tripped up more than a few players we have encountered. Overall, we would probably recommend using a high quality progressive scan DVD player with the Optoma projector to achieve the best results. If you have a mediocre player, then you may want to experiment with the Optoma's deinterlacing versus the player's to see which is better. New budget DVD players on the market with HDMI or DVI should be used with this digital connection for best results.
Optoma H31 Viewing Evaluations & Conclusion
The bang-for-the-buck factor is certainly here with respect to the Optoma H31's sub-$1300 price point. For movies, we chose a selection of modern and old clips and really attempted to explore the various characteristics of this player. From color accuracy, to black levels, to saturation - we constantly walked away impressed and pleased with the level of performance being produced by this entry-level projector.
DVD: The Great Escape
I wanted to get a good example of an older movie with less than pristine transfer quality. Sometimes this gives you a real world swag at how the display will function when less than optimal material is sent to it (like most television or standard definition content, for example). M y expectations were low, but the Optoma took what it was given and represented it cleanly and with excellent color saturation. The Great Escape, arguably one of the best "guy" movies of all time, served as viewing fodder for us to see how well the H31 reproduced detail and black levels from a picture that really showed its age. I could not have asked for much more and took great note of the smooth gradients and detail present in the buildings and grounds.
DVD: PlasmaScapes
We put in PlasmaScapes, the DVD "screensaver" that presents some really cool content on your widescreen display. While the resolution on these looping motion backgrounds isn't necessarily HD, there is a lot of detail and natural lines which show off a display's deinterlacing ability as well as the color and noise reduction potential of the projector.

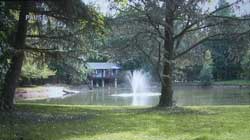
Some of these scenes are just gorgeous and I found myself being swept away to a different place as the water lapped up against the shore or a distant fountain spilled into a serene lake. If you haven't yet checked out these DVDs, they make excellent tools for showing off your new widescreen display when company is over. Whether your taste is fish tanks, beach scenes, cityscapes, or even fractal loops and lava lamps, PlasmaScapes is a neat toy to have on hand.
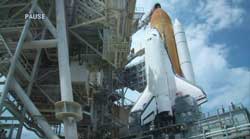
DVD: JKP Space Shuttle Scenes
I felt the space shuttle scenes in Joe Kane Productions' Digital Video Essentials really helped show off this projector's attention to detail and overall resolution. Provided you are farther back than the projector itself, the 480p resolution is solid. The pixelation disappeared into the background and the image took on a completely seamless look. When you are in that "viewing zone", the H31 really shines. Its vivid picture quality makes for a seriously engaging experience. It won't take long for you to forget it's only 480p and get lost in the action.

DVD: Ghost in the Shell 2: Innocence
I had such high hopes for Ghost in the Shell when I finally got around to renting it on DVD. So many people had praised it for its uniqueness and style. Rubbish. Its incomplete story line and rather uninteresting animation lend it to be a complete waste of time in my opinion. The sequel, however, is a different story. Using a healthy combination of 2D and 3D technology this time around, the animation team behind this film is producing some truly intoxicating material that is nothing short of eye-candy. On the DTS Surround .9 demo DVD, the convenience store scene will absolutely dazzle viewers on a good screen. The H31 brings this sequence to life with realistic shadow detail, rich colors and fine detail on the environmental textures. Animation in general really looked great on this projector, with its excellent color saturation maxing out its potential and creating a very impressive experience.
Conclusion
The Optoma H31 is a budget projector that, while not having the resolution of its bigger brothers, provides enough oomph to present a truly compelling reason to save some money and be satisfied with a 480p projection solution. I would never have thought that 480p could look so good, but then again resolution is not as big of a deal when the viewing distance is correctly matched to compensate. You'll want to calibrate this unit out of the box (and for each input I might add). Once you have done so you will be impressed with its features, its form, its color accuracy and detail. While it scored middle-of-the-road on our HQV bench tests, its real world performance was impressive and showed that bench tests should certainly not be the sole deciding factor when choosing a display. If you're looking for a budget display to get you into the big screen home theater experience, look no further than the Optoma H31. In addition, this unit doubles as a great portable unit for presentations or those needing some measure of portability. We have no reservations about giving out our hearty recommendation for this projector.
Optoma H31 DLP Projector
MSRP: $1299
Optoma Corp
715 Sycamore Drive
Milpitas, CA 95035 USA
(888) 289-6786
http://www.optomausa.com
About Optoma
Optoma Technology , Inc., a subsidiary of Coretronic Corporation, is a global manufacturer of high-resolution digital and home entertainment projectors for consumers, businesses, education, professional audio video (Pro AV), and CEDIA (Custom Electronic Design and Installation Association) channels. Headquartered in the heart of Silicon Valley , Optoma Technology, Inc. was founded in 1991 and has quickly become an industry leader in high-resolution projection and digital display products.
The Score Card
The scoring below is based on each piece of equipment doing the duty it is designed for. The numbers are weighed heavily with respect to the individual cost of each unit, thus giving a rating roughly equal to:
Performance × Price Factor/Value = Rating
Audioholics.com note: The ratings indicated below are based on subjective listening and objective testing of the product in question. The rating scale is based on performance/value ratio. If you notice better performing products in future reviews that have lower numbers in certain areas, be aware that the value factor is most likely the culprit. Other Audioholics reviewers may rate products solely based on performance, and each reviewer has his/her own system for ratings.
Audioholics Rating Scale
 — Excellent
- — Very Good
- — Good
- — Fair
- — Poor
| Metric | Rating |
|---|---|
| Detail and Resolution | |
| Deinterlacing & Scaling | |
| Contrast and Black Levels | |
| Color Reproduction | |
| Noise Reduction | |
| Calibration Options | |
| Build Quality | |
| Ergonomics & Usability | |
| Ease of Setup | |
| Features | |
| Remote Control | |
| Performance | |
| Value |
Clint Deboer was terminated from Audioholics for misconduct on April 4th, 2014. He no longer represents Audioholics in any fashion.
View full profile