
VApex 120" Tensioned Electric Projector Screen Review
VApex 120" Tensioned Electric Projector Screen
- Product Name: VApex 120" Tensioned Electric Projector Screen
- Manufacturer: Visual Apex
- Performance Rating:


- Value Rating:
- Review Date: November 09, 2011 11:00
- MSRP: $ 699-$899
- Screen material: 1.1 gain CinemaWhite
- Format: 16:9
- Case Material: Black aluminum
- Remote: RF w/laser pointer
- RS485 (RS232C-compatible) control
- Size: 120" diagonal
- Viewable size: 104" x 59"
- Includes: Block & stud wall mounting hardware
Pros
- Super easy to install
- RF remote w/laser pointer
- 12V wireless trigger included!
- Quiet operation
- 18" black drop
- 3-way wall switch included
- Removable power cable
- Vertical limit setting
Cons
- None at this price
VAPex Tensioned Electric Features & Build Quality
It's a very compelling thing to argue that the largest screen size for the money is to be had by using a front projection system. Where it gets dicey is when you factor in the cost of a decent quality screen. If you want a tab-tensioned model on top of that, you're looking at even more and the cost benefits become less and less obvious. Visual Apex' new VApex screens (Visual Apex = VApex, get it?) are moving towards eliminating everything we know about what a projector screen should cost. The VApex line comes in three lines: Fixed Frame, Standard Electric, and Tensioned Electric. For this review we checked out the Tensioned Electric in their largest size: 120" diagonal. To say we were "stunned" by what we got for the money would be an understatement. So let's just come right out and say it: if you don't take at least a long, hard look at Visual Apex' new VApex screens, you're potentially spending a lot more money for no good reason.
Features and Favorites
Right off the bat you get a host of features with the VApex screens that you typically don't find in competitive models - even ones that cost two and three times as much. Let's run through several of our favorites and then move on to our impressions of how this screen is made and how easily it installs.
- RF Remote
RF remotes are where it's at. This is made even more impressive by the fact that VApex' includes a laser pointer and works right out of the box with no configuration (they even ship you batteries). There's nothing magical - it's up, down, and stop - and really, that's all you need or should want for most applications. - Installation Options
VApex screens come with hardware to mount them to the ceiling or wall and they take into account custom installations into both block and stud materials. You just need to bring the drill, drill bits and drivers. - Wireless RF Trigger
This is one of the coolest features of VApex electric screens - they come with wireless RF triggers. That means that you can get your 12V trigger-enabled projector to activate the screen automatically on power up and power down. Once configured, you can more or less throw away that remote control. - 18" Black Drop
While most electric screens allow you the option of setting the rise/fall amount, the VApex also gives you a full 18" of black at the top so that you can send the screen lower in order to avoid any keystoning effects on ceiling-mounted projectors with a large vertical offset. - Tab Tensioning System
Tensioned screens are nothing new, but a tensioned screen that comes in under $1000 is unheard of. Visual Apex' VApex screens are creating a whole new category of screen here and it's something the competition will be noticing.
Build Quality
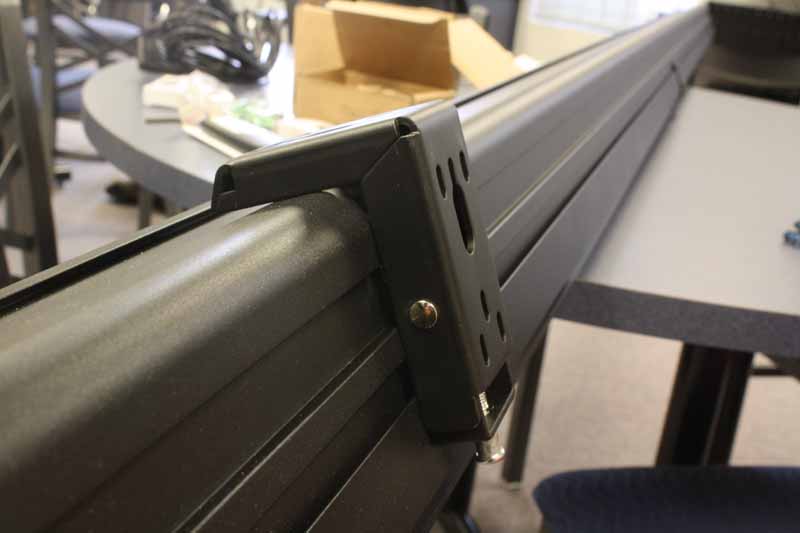 The VApex Tensioned Screen came in a well-padded box. There was no shipping damage, despite the fact that the screen was over 11 feet long. Opening it up, we quickly took in the black aluminum casing and noted the rear rails that allowed for easier flexibility of placement. We've seen screens that had very restricted bracket positioning, but the VApex allows you to take advantage of nearly any nearby stud or fastening location to get it mounted. The wall/ceiling brackets were made well and had a unique system to allow the screen to be mounted and positioned prior to locking down the clamps and preventing any shifting of the screen enclosure.
When we examined the 1.1 gain CinemaWhite screen (something we did after installation) we found it to be a very neutral white color and of a material that appeared to be easily cleaned. It wasn't the thickest screen material we've seen, but it didn't look like something that would degrade over time either. Accessories came in their own box and were well-packed, allowing us to sort out the various pieces required to get everything up and running.
The 120" VApex Electric Tensioned Projection Screen includes:
- RF remote control with laser pointer
- Wireless RF 12V trigger system
- 3-way wall switch
- Removable power cord
- Sliding L brackets
- Vertical limit adjustment tool
- Wireless 12V trigger tool
- Allen wrench for adjusting tension
- Mounting hardware for stud & masonry walls

The available sizes for the VApex Electric Tensioned Screen line include 120", 106", 100" and 92" diagonal screens.
VAPex Tensioned Electric Installation, Tests & Conclusion
Of course, when you pick up an electric tensioned screen, the first thing you'll want to do is mount it correctly so that your picture is perfectly square to the screen. IN our installation, we were driving through 1x3 furring strips into a concrete block wall. This was a commercial installation for a local inner-city ministry. The screen was going up in a classroom where after-school program teachers could use a projector to instruct a room of up to 35 kids. Here are the tools and supplies we utilized for the installation:
- Six Tapcon screws of sufficient depth (not included)
- Four steel washers (not included)
- Level (torpedo or 2')
- Cordless hammer drill with Tapcon-specific drill bit and Philips bit
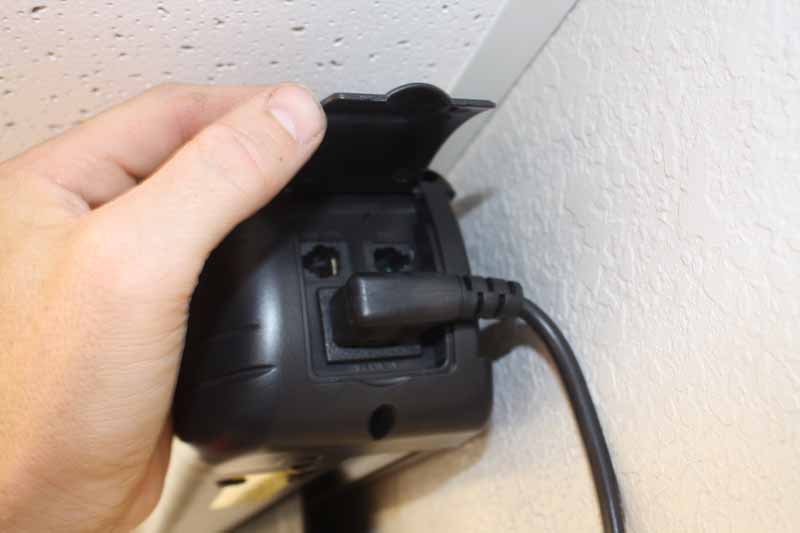 Our room already had power where we needed it, so the removable power cord was perfect for our application. For those with particular needs, you may want to order a shorter or longer cable online. Since it's removable, you can replace it with exactly the length you need. Having already decided on the location, we took some measurements and marked the center of the wall where we wanted the black aluminum case holding the screen to be positioned. This lined up the screen with the position of the classroom projector.
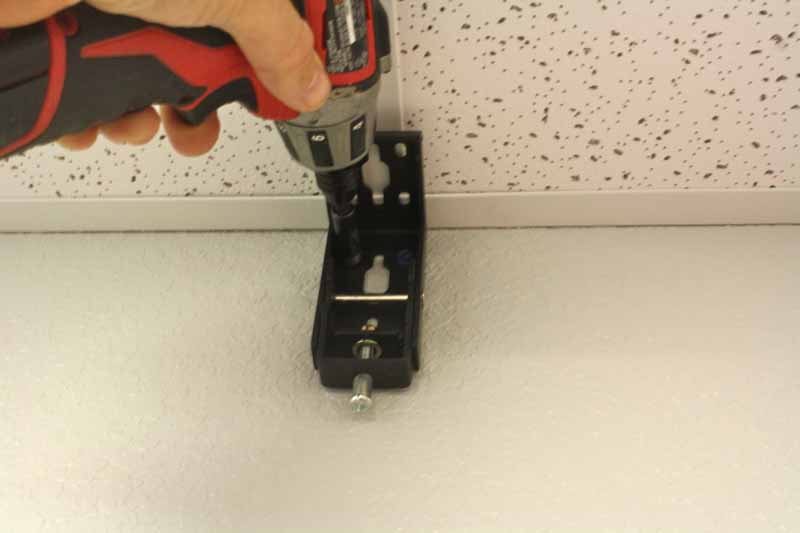 We next measured approximately 45" from the center to the right and left and marked where we wanted our L-brackets to be. Since this was a block construction, there was no need to locate a stud. We were using Tapcons to anchor the brackets to the wall and so all we needed to do was mark the top left and right holes along with the bottom center hole. Having done this, we went back with our Tapcon bit and used a hammer drill to pre-drill the holes. We then drove the Tapcons through the bracket into the wall, using steel washers to ensure we didn't create a situation where the screws could work themselves through the bracket over time.
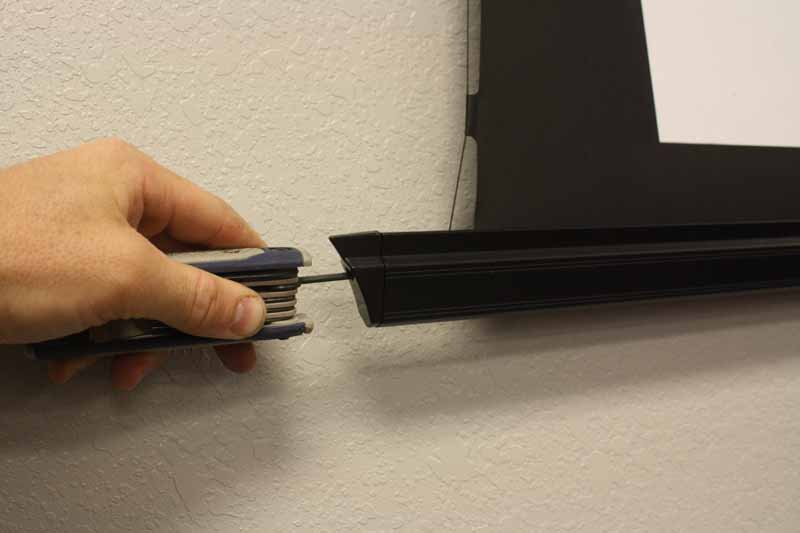
Before hanging the screen, the instructions told us to first unscrew the shipping braces located on the rear of the case. Our next move was to use two people to lift and set the screen onto the newly-mounted L-brackets. This didn't take long and, once in place, we were able to slide the screen left and right to the exact position we wanted. To get it absolutely perfect, we actually turned on the projector and lowered the screen for this part. We like to display the standard grid test pattern and use that when lining everything up. That didn't take very long and we were able to get everything squared up to the screen.

Now that we knew we could get everything hitting the screen perfectly, we fixed the drop limit position of the projector. This was done by lowering the projector screen all the way and then using the yellow adjustment wand to tweak it. Rotating the adjustment screw clockwise raises the screen stop height and counter-clockwise lowers it. Making adjustments and then repeatedly pressing the down button allowed us to set the drop limit perfectly. We kept the grid pattern up the entire time we did this, so we knew when we had nailed it perfectly.

At this point our screen was mounted, positioned, locked down and configured for perfect alignment with our projector. What we wanted now was to eliminate the need for the RF remote. With the VApex line of electric screens, that's made possibly by the included Wireless RF kit. There is a sync button on the right hand side of the screen underneath the hinged cover. A red light flashes to let you know it's in pairing mode. Using the small yellow wand Visual Apex includes with the RF kit, you press it into the hole in the back of the wireless 12V trigger remote. It will pair fairly quickly and the red light on the screen will stop blinking and remain on. All you have to do next is plug the wireless trigger transmitter into the 12V port located on the back of your projector and turn on the trigger using the projector's menu system. Most projectors have a compatible 12V trigger that can be used with this system, but if yours doesn't - remember, you can still use the RF remote and/or the included 3-button wall switch.
Screen Material & Viewing Tests
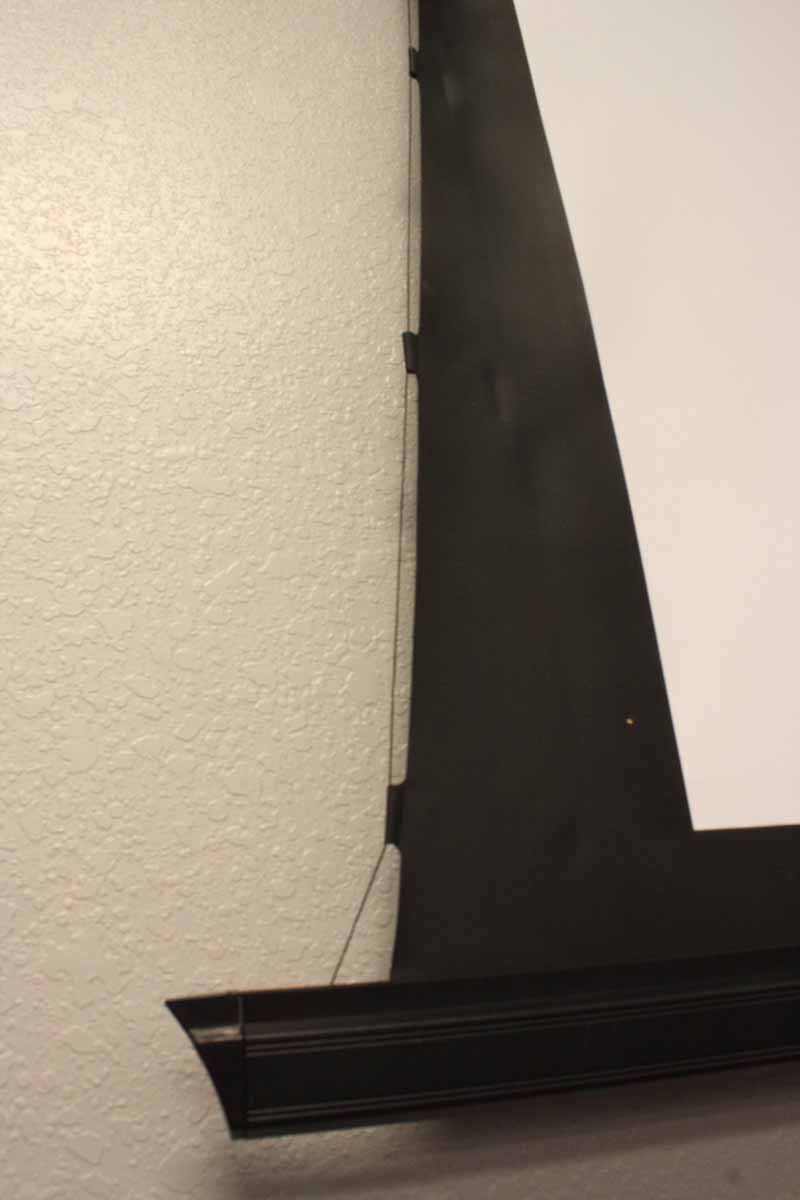 The screen stayed pretty rigid in our testing, thanks to the tensioning system. What's important to note is that the tensioning system itself is almost a let-down. It's a very thin string material that serves to pull slightly at the tabs built into the sides of the screen. What you need to know, however, is that it doesn't take much to ease the curling effects of the screen. You don't need wire - string will do fine. All tensioning needs to do is support the screen from an area other than the bottom. The string does this by gently pulling along the side tabs and eliminating the common "curl" found in standard electric drop screens. Tension can be adjusted by tightening the Allen screw located at the screen bottom. Oddly enough, the included Allen wrench was the wrong size, so we pulled out our own to complete the task.
As we alluded to above, the screen material appeared to be durable and it seemed like it would last a long time if not abused. The surface is washable with soapy water and a damp (not wet) cloth. The color is a pure white and it didn't seem like it would tint the image at all - in fact, everything we threw at it really came back as we intended. There was very little coloration and absolutely no hot spots. Since the screen only has a 1.1 gain, you're not really increasing light output, but the trade-off is that you don't have to worry about light drop-off (this means you can view the screen at equal contrast from just about anywhere in the room). We viewed several Blu-ray movies on this screen as well as PC-sourced content using an Optoma HD33 projector and really liked the color depth and contrast. Color accuracy was not a problem. Since the room we were using it in could be dimmed considerably, the contrast was excellent - and we found that the trick to high contrast was getting a decent projector with enough light output. The Optoma's 1800 lumens was plenty, though in calibrated mode the lumen output dropped considerably. For classroom use, we found that even when cranking up the light output, the screen still performed well - with good uniformity and no rippling.
Since the screen has a gain of 1.1, a brighter projector is absolutely critical when using it in a classroom or living area setting where the ambient light might be high. In a room where you can control light, then you'll find that this screen works well with any projector sporting a decent contrast ratio - light output isn't as much of a factor.
Conclusion
If you don't think Visual Apex' new VApex screens are a game-changer, you haven't been listening. Many will assume the quality of these screens are substandard and that they can't possibly compete with the big dogs. We honestly can't speak to longevity - we haven't used them for long enough to know how they will hold up to repeated use. What we can say is that the tubular motors are quiet, the screen is flat, and the features are plentiful. On top of that, these screens are impossible to beat in terms of price. The Value is through the roof. You can pick up a standard Electric Screen fro as little as $299 (92" diagonal), but upgrading to a Tensioned Electric is just $400 more. For some it will be worth it - for others, not so much. In either case, we're glad to see a new line of screens that will (or should) succeed at bringing a whole new generation of consumers to front projection. Welcome to our neck of the woods - pull up a chair and get comfortable.
The Score Card
The scoring below is based on each piece of equipment doing the duty it is designed for. The numbers are weighed heavily with respect to the individual cost of each unit, thus giving a rating roughly equal to:
Performance × Price Factor/Value = Rating
Audioholics.com note: The ratings indicated below are based on subjective listening and objective testing of the product in question. The rating scale is based on performance/value ratio. If you notice better performing products in future reviews that have lower numbers in certain areas, be aware that the value factor is most likely the culprit. Other Audioholics reviewers may rate products solely based on performance, and each reviewer has his/her own system for ratings.
Audioholics Rating Scale
 — Excellent
- — Very Good
- — Good
- — Fair
- — Poor
| Metric | Rating |
|---|---|
| Detail and Resolution | |
| Color Reproduction | |
| Build Quality | |
| Ergonomics & Usability | |
| Ease of Setup | |
| Features | |
| Remote Control | |
| Fit and Finish | |
| Performance | |
| Value |
Clint Deboer was terminated from Audioholics for misconduct on April 4th, 2014. He no longer represents Audioholics in any fashion.
View full profile