
Yamaha LPX-510 LCD Projector Review
LPX-510 LCD projector
- Product Name: LPX-510 LCD Projector
- Manufacturer: Yamaha
- Performance Rating:

- Value Rating:
- Review Date: August 11, 2004 20:00
- MSRP: $ 5495
|
Device: Three 0.7” HTPS TFT Engines Native Resolution : 1280 x 720 pixels
|
Video Inputs : RGBHV (2); HDMI, s-video, composite, D4 video
|
Pros
- Excellent contrast
- Deep black levels
- No screen door effect when seated 2x screen width from projector
- Versatile inputs (including HDMI)
Cons
- A bit noisy up close
- No VGA (HD-15) input (PC input is supported)
- Jumpy lens shift
LPX-510 Features, Setup and Installation
LCD vs. DLP Projectors
Nope. Not here - don't have the time. But suffice to say that this is a brand new 3-chip LCD projector and one that we had personally seen at CES 2004. To sum up the LCD vs. DLP competition (and yes there are other technologies as well) - it's "screen door" versus "rainbow effect". Both technologies can optimize to nearly overcome both problems but only the best are going to be able to go head to head as viable options in a high-performance system. Yamaha's new LPX-510 can easily be considered one of the best LCD projectors based on what we had seen prior to this review. Now we'll take a look at it in more detail to see if it can handle a much more intimate assessment.
Features and Favorites
The Yamaha LPX-510 had a host of excellent features and functions that made it a tremendously configurable projector as well as an adaptable one. Here are a few of my favorites that stood out on initial use and inspection:
Cinema & Cinema Black Picture Modes
We're so used to hearing fancy marketing terms for bad design ideas that when a good one comes along we really need to spend a lot of time with it before signing on. In the case of Yamaha Cinema and Cinema Black picture modes, the results are simply excellent. These modes adjust an optical filter that reduces green and blue levels while allowing the full dynamic range of the image to remain. Similar to how the new HD2+ systems have added an extra dark green segment to the DLP color wheel, Yamaha's Cinema filters serve to increase the contrast ratio of the picture and produce deeper, more realistic blacks without loss of detail. The Cinema Black filter takes this an extra step by adjusting the Iris down to 75%.
Faroudja DCDi FLI2300 Processing
We found the Genesis (Faroudja) chip to be as impressive as ever. The LPX-510 performed admirably with respect to catching edit errors and 2:3 pulldown and the deinterlacing and scaling performance was top notch according to our test discs.
Lens Shift
Need to place the projector slightly off center from the screen? No problem. The Yamaha LPX-510 allows you to adjust the image position using the Lens Shift function - up to a half screen width or full screen height.
We'll go into these in more detail but these features, and Yamaha-s implementation of them makes this projector really stand out among its peers.
Basic Setup and Installation
There are a couple of things you need to concern yourself with when purchasing a front projection system. First and foremost you'll need to determine the mounting position for the projector and, concurrently, what type and size of screen will be required for a good fit. For this review we utilized a Stewart StudioTek 130 screen, This is an ISF (Imaging Science Foundation) certified screen and is optimized for excellent white levels while allowing for deep, rich blacks in a light-controlled room. For those considering the Yamaha LPX-510 in their home theater room, take a look at the 16:9 throw chart:
Throw Chart for Distancing the Projector from a 16:9 Projection Screen
|
Screen Size
|
Size (Inches) |
Distance (Feet) |
Offset (inches) |
|||
|---|---|---|---|---|---|---|
|
|
width |
height |
wide |
tele |
min |
max |
|
30 |
26.1 |
14.7 |
2.85 |
4.36 |
-14.71 |
7.35 |
|
40 |
34.9 |
19.6 |
3.86 |
5.86 |
-19.61 |
9.81 |
|
60 |
52.3 |
29.4 |
5.86 |
8.85 |
-29.42 |
14.71 |
|
70 |
61.0 |
34.3 |
6.86 |
10.35 |
-34.32 |
17.16 |
|
80 |
69.7 |
39.2 |
7.86 |
11.85 |
-39.22 |
19.61 |
|
90 |
78.4 |
44.1 |
88.6 |
13.35 |
-44.12 |
22.06 |
|
100 |
87.2 |
49.0 |
9.86 |
14.84 |
-49.03 |
24.51 |
|
110 |
95.9 |
53.9 |
10.87 |
16.34 |
-53.93 |
26.96 |
|
120 |
104.6 |
58.8 |
11.87 |
17.84 |
-58.83 |
29.42 |
|
130 |
113.3 |
63.7 |
12.87 |
19.33 |
-63.73 |
31.87 |
|
150 |
130.7 |
73.5 |
14.87 |
22.33 |
-73.54 |
36.77 |
|
170 |
148.2 |
83.3 |
16.87 |
25.32 |
-83.34 |
41.67 |
|
200 |
174.3 |
98.1 |
19.88 |
29.82 |
-97.05 |
49.03 |
|
230 |
200.5 |
112.8 |
22.88 |
34.31 |
-112.76 |
56.38 |
|
300 |
261.5 |
147.1 |
29.89 |
44.79 |
-147.08 |
73.54 |
The Stewart StudioTek 130 screen we utilized is the 100" diagonal 16:9 version with a Luxus Deluxe Screenwall mount. This screen is an excellent fit with this projector due to its adherence to the strictest color and white field uniformity standards. This material has a gain of 1.3 meaning it is over 30% brighter than standard matte white surface materials. It supports viewing angles of up to 160 degrees - very good for home theater use and one of the widest possible viewing angles for front projection screens.
We positioned the projector in a temporary, but excellent location. It was centered horizontally with the screen and set back about 12' 10" right in the middle of the throw distance range. The projector was vertically oriented so that the lens was vertically aligned with the bottom of the screen - well within the lens shift range.
We ran two different cables to the projector for our tests. A rather robust and well-shielded component video cable was supplied by Cobalt Cable and gave us an excellent analogue connection from the Denon DVD-5900 player's BNC outputs. A well-built DVI-A to HDMI cable system was also supplied by Gefen, Inc . which enabled us to compare the digital video connection from the Denon DVD player as well.
If you plan on placing the projector in front of the screen on a level surface (as opposed to ceiling mounting the unit) keep in mind that you'll want to level the projector and utilize the Lens Shift knobs to make the final adjustments to align your picture. The lens shift knobs on the LPX-510 have a little bit of play in them, so you may have to finesse them a bit to get the picture perfectly aligned within the frame of your projection screen. Raising all the projector's feet to achieve a flat throw to the screen is essential to avoid keystoning the image onto the screen. Keystoning in a fixed pixel display will result in loss of resolution and should be avoided at all costs. Always try to relocate the projector before giving in to the +/- 15% Keystone adjustment.
LPX-510 Connections, Remote & Advanced Setup
You can connect an array of devices to the Yamaha LPX-510 projector, however the manual does warn against having more than one active input simultaneously. Apparently there is a potential for interference between the inputs which could bleed over into the projected image.
As previously mentioned, we utilized the component video inputs as well as the HDMI input for our tests. We sent 576i signal from the Denon DVD-5900 to the Yamaha projector and allowed the DCDi to convert the signal to progressive scan, performing all deinterlacing functions as well as 2:3 pulldown DVD picture display. I did not bother with the s-video input (or the D4 input for that matter), but did test out the composite input just to see how well the projector handled the input signal. I was also able to connect a laptop to the projector via an VGA (HD-15) to RGBHV breakout cable supplied by River Cable. This allowed up to 1280 x 768 resolution to be displayed on the screen with perfect clarity.
If you're going to spend $5500 on a projector you will probably be utilizing the component, RGBHV (RGB TV as Yamaha puts it) or HDMI inputs. I was surprised at the clarity found by using the composite connection, so in a pinch it could work out well.
Remote Control
I'm always criticizing
remotes for one thing or another -
probably due to some repressed tragic remote control incident
that affected me as a child. In either case, I was pleasantly surprised by the simplicity of both the
remote control and the GUI interface that controlled most of the functions of the LPX-510 LCD projector.
The thing that stood out to me the most was the
"light switch". Just like a wall-mounted
light switch, the LPX-510's remote has a center-mount switch that turns on the remote
control's lighted 5 buttons: power, Menu, Escape, Aspect and Input. Simply flip the switch up or
down and the buttons light up with a soft orange glow. I am not sure why
all
of the buttons
don't light up, but I'm certain that an engineer at Yamaha would look disapprovingly down
their nose at me and mutter something about not wanting to blind everyone in the room with a fully-lit
remote control face. In either case, the only buttons that aren't lit are likely ones that you
would never use
"on-the-fly"
except to demonstrate memory settings to your friends or perhaps
to switch between sources. There's also no laser pointer, found on many consumer models, but unless
you want to get into the light saber action with Darth Vader, you probably won't miss it. The 6
memory buttons on the bottom come in very handy and are well-placed. It would have been a travesty if
they were buried in the Setup menu somewhere instead of front and center where they belong.
Advanced Setup and Configuration
Once you have the LPX-510 set up and correctly projecting an image you can move on to a host of features, options and configurations that are at your fingertips. I'll attack these options while sidestepping anything having to do with calibration since I'll be addressing that separately.
Absolute Color Temperature
One of the
neatest and highly effective menu options of the LPX-510 is its ability to quickly adjust the absolute
color temperature. This is the color temperature that will represent neutral gray on the projector. For
ISF calibration you'll want this set to 6500K (this varies according to picture mode, but
we'll assume light-controlled room and cinema use for now). ISF isn't rigid in its use of
color temperature however, as even they realize that when used properly, color temperature can serve
useful purposes outside of the typical 6500K setting. For instance, let's pop in a nice black and
white movie, like The Longest Day -
one of my personal favorites, though not the greatest DVD
transfer:
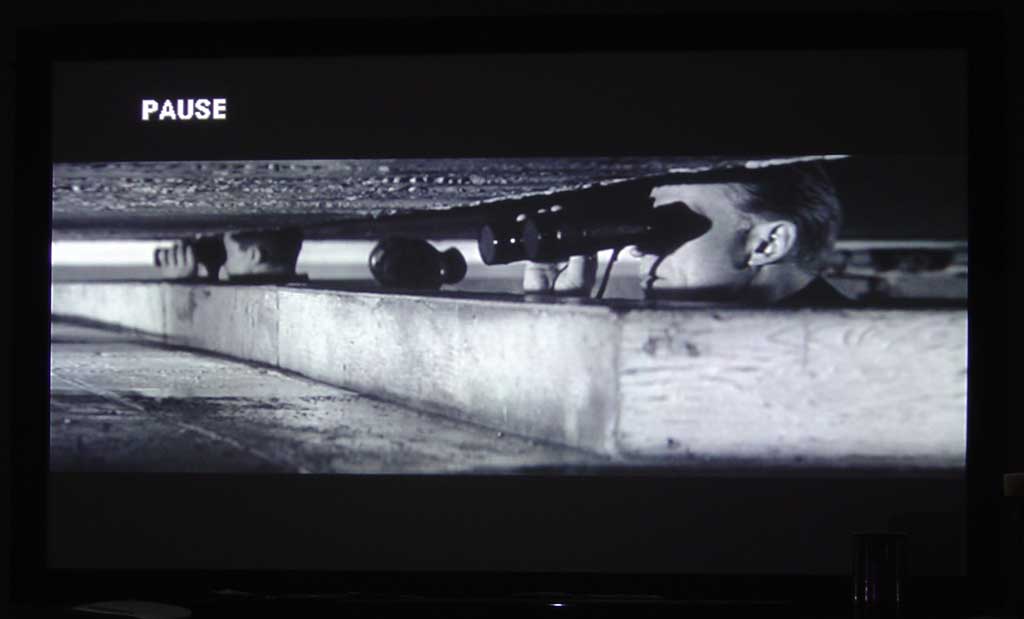
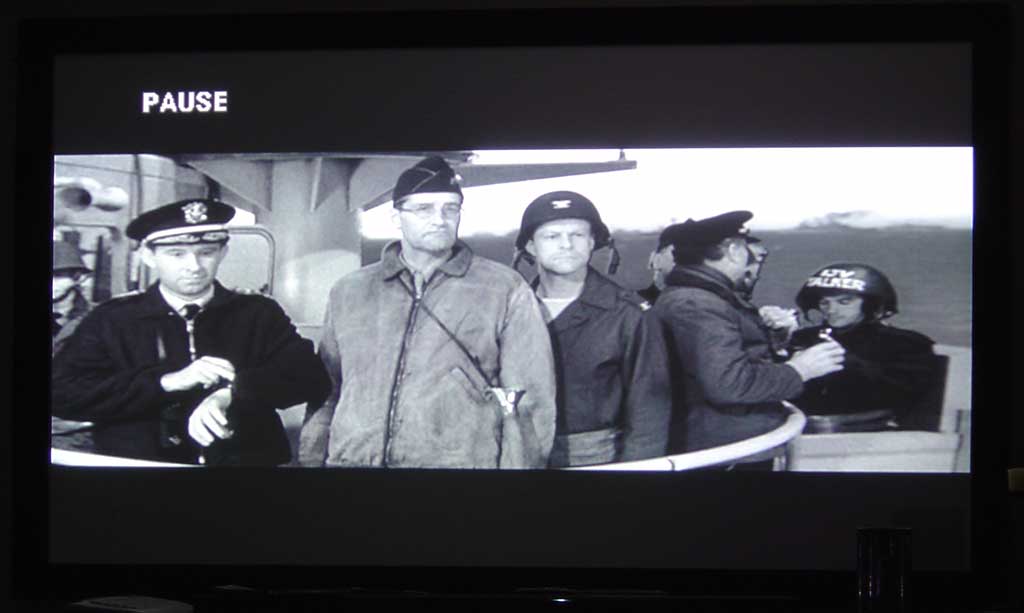
Looks good, right? There is a nice clean representation of the picture and excellent contrast ratio and black levels (for the transfer, anyway). The trouble is, projectors used back in the days of black and white film had bulbs that ran at 5400K. So watch what happens when we set a memory setting containing an Absolute Color Temperature of 5000K:
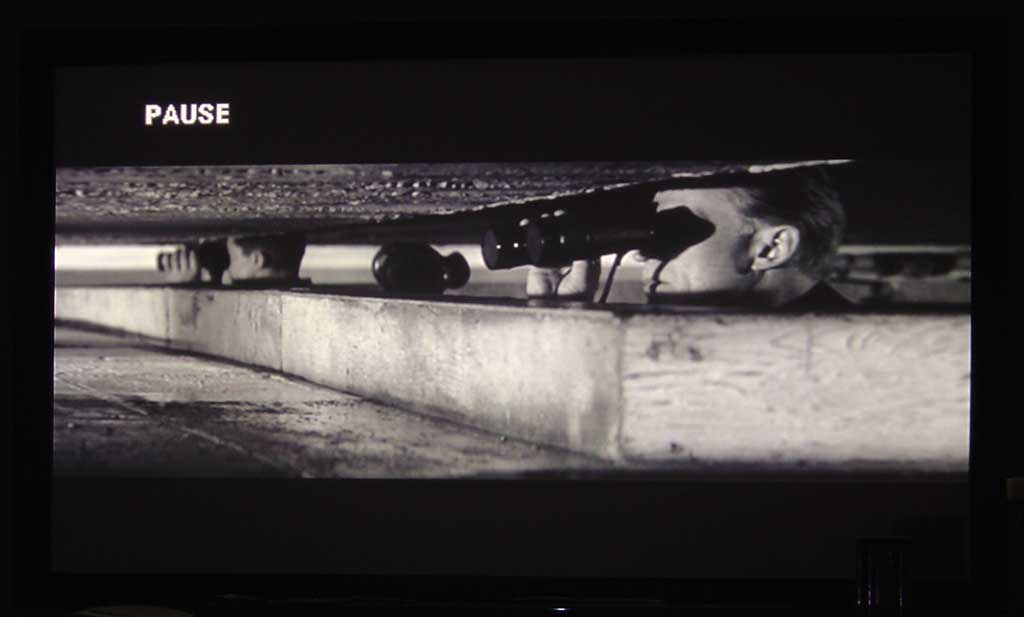

The picture goes from good to excellent . In addition to looking more accurate to its roots, the 5000K setting is much easier on the eyes and makes for a more pleasing movie experience. Once set it's easy to see just how blue the 6500K looks on black and white film. Try A-B'ing this setting with your friends during a showing of Casablanca or a good John Wayne western and you'll be sure to get some pleasantly surprised reactions. This is how black and white is supposed to be viewed.
Picture Modes
Yamaha provides 6
picture modes that work well with different room settings and intended uses of the projector. There is
Dynamic, Bright, Standard, Cinema, Cinema Black, and PC. This may sound confusing, but the way Yamaha
arrives at the default settings for these picture modes is quite simple -
and it makes
sense:
|
Mode |
Color Balance Filter |
Gamma |
Abs. Color temp |
Iris |
Flesh Tone |
Lamp Power |
|---|---|---|---|---|---|---|
|
Dynamic |
OFF |
- |
7000K |
100 |
5 |
100 |
|
Bright |
OFF |
- |
7000K |
100 |
5 |
100 |
|
Standard |
ON |
2.2X (basic) |
6500K |
100 |
3 |
75 |
|
Cinema |
ON |
- |
6500K |
100 |
3 |
75 |
|
Cinema Black |
ON |
- |
6500K |
75 |
3 |
75 |
|
PC |
ON |
2.2X (fixed) |
6500K |
100 |
3 |
75 |
In the Dynamic and Bright modes you are essentially setting up the projector to deliver maximum light output, so the lamp is at 100%, color temperature is set a bit "cooler" (towards blue), reds are enhanced, and the Iris is wide open. For all modes at Standard and below the projector is progressively optimized to produce a better image. Cinema and Cinema Black are both very excellent modes designed to get the best performance out of the LPX-510 and the two modes you'll want to use when watching DVDs or HDTV. If you do not have a light controlled environment you'll want to select Cinema over Cinema Black, however if you can get your room dark (or show movies at night like I do) then Cinema Black, with it's 75% Iris setting is the way to go for the most dynamic range and black detail. One of the neat things about the Color Balance filter is that it is an actual lens (you can hear it engage and disengage if you select a mode that doesn't use it). It extends black contrast by darkening greens and some blues (similar to the 7th segment on the newer HD2+ color wheels for DLP projectors). This is how Yamaha is able to eke out some additional contrast and black level detail.
Overscan
Overscan is becoming less and less
necessary as we move towards better equipment and digital technology, but for the most part Hollywood and
filmmakers are used to action-safe and so the default overscan for most systems is 92%. If you are using
a PC for input, you can set this to Full (100% display). In addition, the HDMI input will automatically
configure the overscan rate for you depending upon the input signal sensed (and it can be overridden if
required.)
Motion Detection
This feature has settings
from 1 to 5 and will basically alter the deinterlacer to work better with faster or slower moving images.
Here's an idea -
how about a setting that says
"best". We found it -
it's 3.
Memory Save
Boy is this a cool feature!
Located right on the remote (and duplicated on my MX-700, I might add) are 6 preset memory buttons that
will recall up to 6 color and picture settings for the projector. Remember that black and white trick we
set in the previous section -
I have that stored in position 6. Want to have a preset that changes
between PC and Cinema Black picture modes? This is the place. Pressing the Memory button results in a
temporary loss of picture (about 2 seconds) followed by the recalled preset -
much easier than
going through the menu each time you want to bounce back and forth between different modes.
Are there more features? Yes. Are they necessary for successful operation of the projector? Probably not - and to keep this review readable, we're going to stop there and say that if you want to play around with additional settings and configurations on your own, the LPX-510 makes it easy (and safe) to do so. Store at least one good configuration before venturing off into the unknown and playing with Noise Reduction , Progressive modes, Tracking and Sync. If you ever get lost, just recall your last configuration and you'll be in good shape.
LPX-510 Calibration & Viewing Distance
A Projector That Requires No Calibration?
Utilizing the Milori ColorFacts CF6500 I tweaked the brightness (black level), contrast (white level), saturation (color/chroma), sharpness, and hue (tint) to accurate levels in the user menu. Before I performed the ISF calibration I reset the projector and took some measurements. Here are some of the before and after measurements as shown by the Milori ColorFacts 5.5 software:
|
Before Calibration |
After Calibration |
|
|
Um, what's that you say? Pretty darn good for "out of the box". There's a bit of blue in the lower IRE levels, but that's not really a problem for any but the most demanding of viewers.
After calibrating the LPX-510, I was able to... hey, wait a minute that's the same photo! No, actually performing a full calibration from scratch netted me a nearly identical result. Yamaha swears my sample was "stock" but I have my doubts.
When the unit is stepped through levels of grey from 0 IRE to 100 IRE, the measurements hold a rather uniform luminance histogram.
No surprise here. After adjusting the set we have an equally uniform luminance performance.
CIE Chart - Color Reproduction & Saturation Potential
The Milori ColorFacts CIE Chart is used to display the colors for the Yamaha LPX-510's HDTV color reference, as well as the gamut of colors that it is capable of creating. Here you can see the LPX-510 reproduces excellent blues and reds. Please note that the AVIA test disc was utilized for this test, rather than a higher quality source such as a test generator. We did this so that we could calibrate the same inputs we would be running comparisons on later.
Viewing Evaluation - Where Do You Sit?
I was privileged to be able to view movies on the Yamaha LPX-510 over a period of two months, becoming very familiar and acclimated to its performance and picking up on the subtle nuances of how the unit performed and what its limitations were. First of all, here are some notes on LCD projectors and viewing distance. Sometime when you're at the movies, take a look at where you like to sit and compare that to the width of the projection screen. There is a ratio, different for each of us, that tells us just what we consider to be "big screen" - Here's the formula:
Distance from Screen / Screen Width = Desired Big Screen Effect
 Yes, that's pretty much it. A simple formula if there ever
was one. I have found that I like to sit 2 screen widths back from the projection screen (174"/
87"
= 2.0). This wasn't always the case, but as more and more movies take on the look and
feel of the
Normandy
Beach
scene from
Saving Private Ryan
it is nearly impossible for me to sit closer without
missing much of the action and nearly getting a headache. Most recently, I experienced this during
The Bourne Supremacy
, where we were sitting about 1.5 screen widths from the picture and found
the chase scenes to be a dizzying mess of confusion. Fight scenes were equally difficult to focus
on.
Yes, that's pretty much it. A simple formula if there ever
was one. I have found that I like to sit 2 screen widths back from the projection screen (174"/
87"
= 2.0). This wasn't always the case, but as more and more movies take on the look and
feel of the
Normandy
Beach
scene from
Saving Private Ryan
it is nearly impossible for me to sit closer without
missing much of the action and nearly getting a headache. Most recently, I experienced this during
The Bourne Supremacy
, where we were sitting about 1.5 screen widths from the picture and found
the chase scenes to be a dizzying mess of confusion. Fight scenes were equally difficult to focus
on.
With that said, I recommend a 1.75 to 2.0 ratio for the Yamaha LPX-510. If you have an 87" wide screen like mine, that would mean you'd want to sit about 12.5 to 14.5 feet away from the screen (see the preceding formula). If you sit closer than that, you may see some gaps between the LCD pixels during brighter areas of the picture. Most likely, however, if you sit at least 1.25 - 1.5 times the screen width away you will only occasionally see gaps during bright movement-filled scenes and almost never during medium to dark scenes - it's that good. With many other LCD projectors I've experienced, the "screen door effect" is a given and you'd need to be almost 3.0 times away to lose the gaps. Yamaha has given the LPX-510 some incredible Mojo, allowing an LCD system to perform more like a seamless film projector.
LPX-510 Viewing Evaluation & Conclusion
The movie-watching experience on a large front projection system simply cannot be beat. And once you have experienced it in your own home it will be difficult to once again enjoy movies on a smaller screen. The movies below were selected because they stood out in how they demonstrated the capabilities of the LPX-510.
DVD: The Fifth Element: Superbit
Edition
This disc is simply incredible -
and one of my
favorite movies of all time to boot. Some Superbit discs are not as good as they should be, but the
Superbit Fifth Element disc is an absolute superb specimen that should adorn the DVD rack of any serious
home theater aficionado. I snapped a few shots of the movie below with a Sony DSC-P92 still camera from
about 19'away (slight zoom was used, but the camera was completely stabilized on a tripod for each
shot). No flash was used and the camera was set to Night mode (slow shutter):

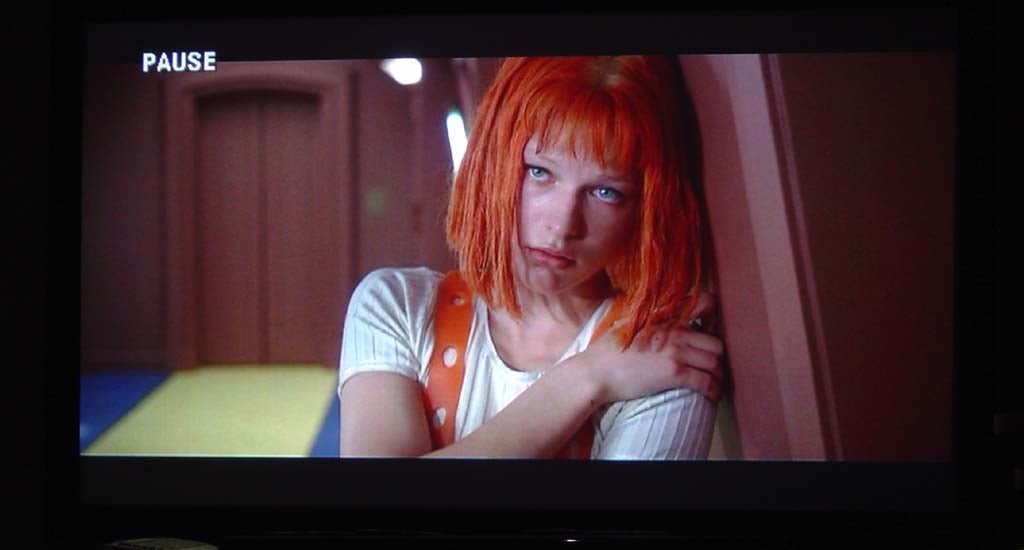

I hope these images can capture a small amount of the detail that is visible on the screen. The color richness and levels of black that can be seen in this movie is amazing. Yamaha's Cinema Black mode is by far the best setting to use when you are trying to get the most out of the LPX-510 projector. If you look closely at the close up of Bruce Willis you can really see the detail of his eyelashes and the subtle textures of his skin. In the 5 megapixel master shots you can zoom in all the way and simply not see any pixel breakup in the images, including the explosion.
DVD: The Lord of the Rings: The
Two Towers
I've
used this film quite a bit for showing off speaker systems and receivers; however it is equally
impressive for projection systems. While not as rich and vibrant as
The Fifth Element
, its
detailed scenery and dark imagery deliver much in terms of shadow detail and dynamic range. Here are some
shots of the movie -
and the pictures tell more than I ever could with pithy
descriptions:
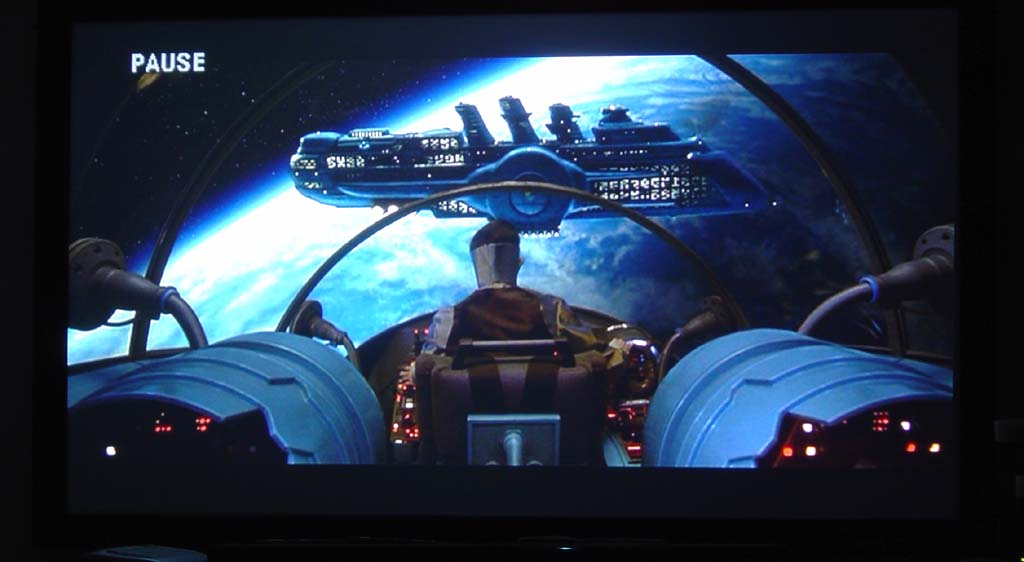
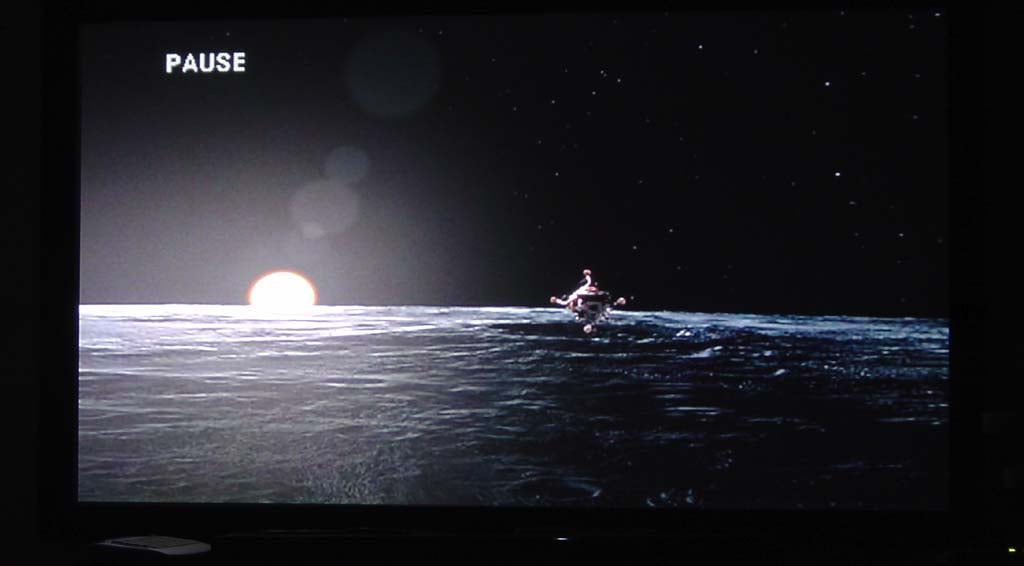
DVD: From the Earth to the Moon
By no means is this the best
DVD in terms of quality or transfer, however it is full of intensive computer models and excellent,
almost scholastic-level lighting and textures. It's also a great series that qualifies for my
"if you were trapped on a desert island what DVDs would you take with you"
list. The shots
below were much more impressive on the Yamaha LPX-510 than the last time I viewed the DVD, which was on a
32"
Toshiba CRT. There is something to be said for experiencing the Apollo missions on a truly
cinematic screen.

Conclusion
The Yamaha LPX-510 is a projector for home theater . It will allow you to truly configure a visual experience that will rival the local cinemas depending upon how far away from the screen you like to sit. In my experience using the unit for two months I found its performance to be absolutely exceptional. Setup was a breeze and the unit possesses an astounding amount of input and configuration options, making it fairly versatile for use in just about any controlled-lighting environment. Contrast levels on this projector are simply amazing - and not just for a front projection system, either. I could go on, but its movie night again and I've got people to entertain. Pass the popcorn.
Yamaha LPX-510 3-Chip LCD Projector Score Card
MSRP: $5495
(800) 492-6242
www.yamaha.com/yec
About Yamaha Electronics
Yamaha Electronics Corporation,
USA
, is based in
Buena Park
,
California
, and is a wholly owned subsidiary of Yamaha. YEC offers Home
Theater components and systems, featuring A/V Receivers, Amplifiers, DVD/CD Players
&
Recorders,
Speakers, Mini-Systems, Video Projection, as well as A/V
&
IT Convergence Products.
The Score Card
The scoring below is based on each piece of equipment doing the duty it is designed for. The numbers are weighed heavily with respect to the individual cost of each unit, thus giving a rating roughly equal to:
Performance × Price Factor/Value = Rating
Audioholics.com note: The ratings indicated below are based on subjective listening and objective testing of the product in question. The rating scale is based on performance/value ratio. If you notice better performing products in future reviews that have lower numbers in certain areas, be aware that the value factor is most likely the culprit. Other Audioholics reviewers may rate products solely based on performance, and each reviewer has his/her own system for ratings.
Audioholics Rating Scale
 — Excellent
- — Very Good
- — Good
- — Fair
- — Poor
| Metric | Rating |
|---|---|
| Detail and Resolution | |
| Deinterlacing & Scaling | |
| Contrast and Black Levels | |
| Color Reproduction | |
| Noise Reduction | |
| Calibration Options | |
| Build Quality | |
| Ergonomics & Usability | |
| Ease of Setup | |
| Features | |
| Remote Control | |
| Performance | |
| Value |
Clint Deboer was terminated from Audioholics for misconduct on April 4th, 2014. He no longer represents Audioholics in any fashion.
View full profile