
Mounting Your Flat Panel TV on Your Wall - Part One
Mounting Your Flat Panel TV on Your Wall
As many of you know, we are proud advocates for getting that flat panel off of your furniture and onto the wall. In our opinion, what's the point of having lightweight, flat televisions if you're not going to put them up on the wall. Suspending in the middle of a vast open space unlike anything previously possible with CRT-style TVs? I mean seriously, if I see one more person trying to jam that new 42-inch flat panel TV into their stupid 1980's-era wall unit I'm going to start knocking heads around. It's electronics sacrilege.... there should be a law... or something.
Anyway, we thought about it long and hard, and realized (fairly quickly) that if we're going to go all ranty about it, then we should at least make more of an effort to educate and inform consumers as to just how easy it is to mount these new flat panel TVs up on the wall. It's not rocket science and we can actually get you what you need and save you money in the process. Enough money, perhaps to make it a wash, or even put some coin in your pocket for the trouble.
What You Need
Let's start with a basic premise. First of all TV mounts are expensive, right? I mean a cursory look online shows that the cheapest flat panel mount for a 42-inch TV or larger at your local Best Buy is going to run you $79.99 (and honestly, it's nothing to write home about). On top of that you've got an HDMI cable - that's $24.99 for their house brand... and a component video cable of the same length is $49.99 (no we're not kidding). But wait, you still have to run power into the wall to do it right. I mean, as cool as they are, flat panel TVs don't run on solar. The cheapest solution for that will run you a cool $100. All told you're in it for around $255.
Now check this out... we dialed up MonoPrice and had them configure a system for us to do the same thing - except they went premium all the way, offering better quality components and higher rated cables, all for less money. Here's how their components and pricing broke down:
- Adjustable Tilting/Swiveling Wall Mount Bracket (32-60-inch) - $60.61
- Recessed Pro Power Kit - $48.18
- 12' HDMI 24AWG CL2 High Speed Cable - $10.34
- 12' 18AWG CL2 5-RCA AV Coaxial Cable - $19.84
Total: $138.97 + $29 shipping = $167.97
And did you note that the mount was a tilt/swivel model and that all cabling was CL2 (in-wall) rated? The NEC requires that signal cables like HDMI cables need to have at least a CL2 rating for installation within homes in the United States. This has to do with the cables not emitting toxic fumes in the event of a fire (and we all know how many fires have occurred where the firefighter walks out and says "I'm sorry, but it was the toxic fumes from the stereo wiring that killed them..." - but I digress).
Required Tools:
- Razor knife
- Wire strippers
- 12/2 electrical cable
- Electrical tape
- Level
- Screwdriver
- Screw gun
- 3/16-inch drill bit
OK, so you saved almost $100 - now let's get to work.
Installation
The big picture of what you're doing is this: you're taking your TV, mounting it to the wall, and running all cabling - both power and low voltage (HDMI, component, optical, coaxial cable, etc) through the wall, from the TV to the area just below where your AV equipment is. It's not a hugely difficult task, but it will take some time and you do need to do some basic things right in order to have a successful installation.
Start with the mount. You want to first decide on placement. We did this by sitting down and literally having a couple of guys hold the TV on the wall where we wanted it, then we marked the area and placed the mount in the center. Typically, you want a couple of guys holding up the TV, and the woman of the house sitting on the couch. Keep in mind, however, that despite the fact that the TV may look better centered in the wall, craning you neck up in the scenario where you have 10-foot ceilings is not recommended. You may need to go a little lower. Aesthetics can only take you so far.
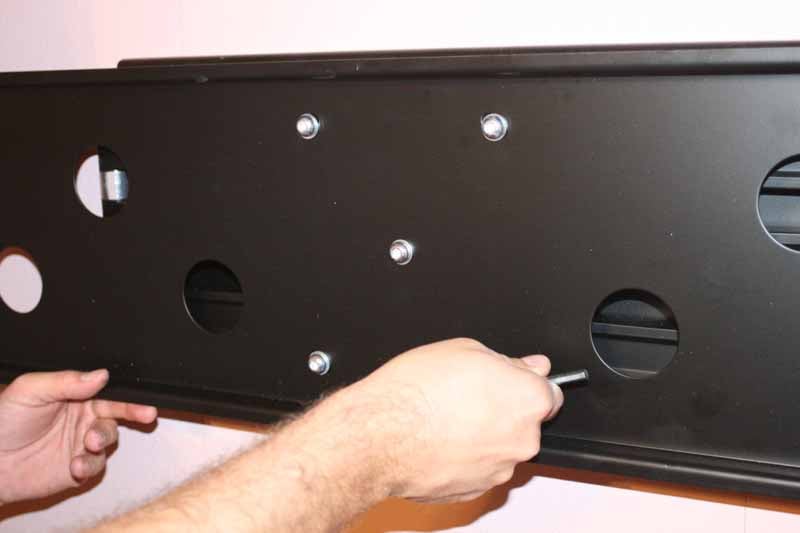
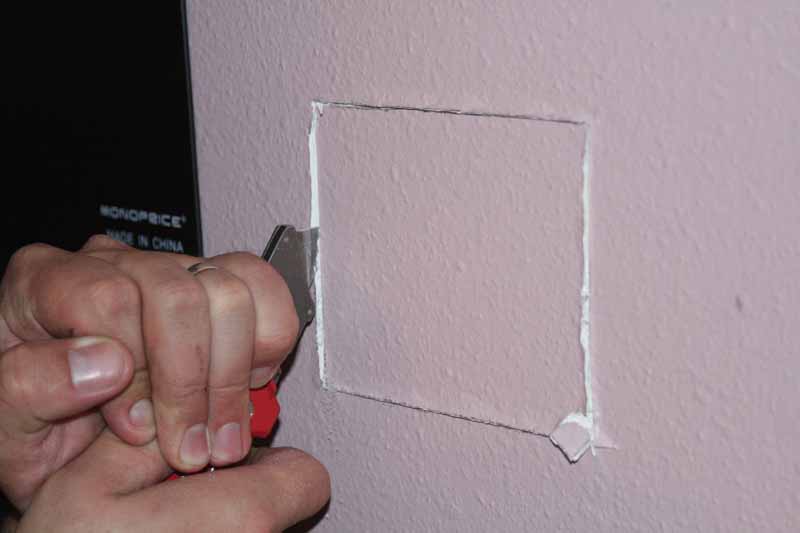
Once you have an idea where the mount will go, locate your studs. You can do this with a stud-finder, or you can knock around with your knuckles. In either case, we're not going to give you a lesson on how to find studs, just get 'er done and establish where those are. Another thing you can do, typically, is actually locate the position for your Recessed Pro Power Kit. Once you do this, and open up the hole, you can actually reach inside and feel around for where the studs are, measuring from the hole to each with a tape and marking them exactly so you are sure to secure the mount perfectly. Why do you want to hit the studs exactly? Well, for starters, this particular mount can support up to 175 pounds - but only if it's installed correctly. Get it mounted up right, and you can pretty much do pull-ups off it (no, we do not endorse this as a form of exercise).
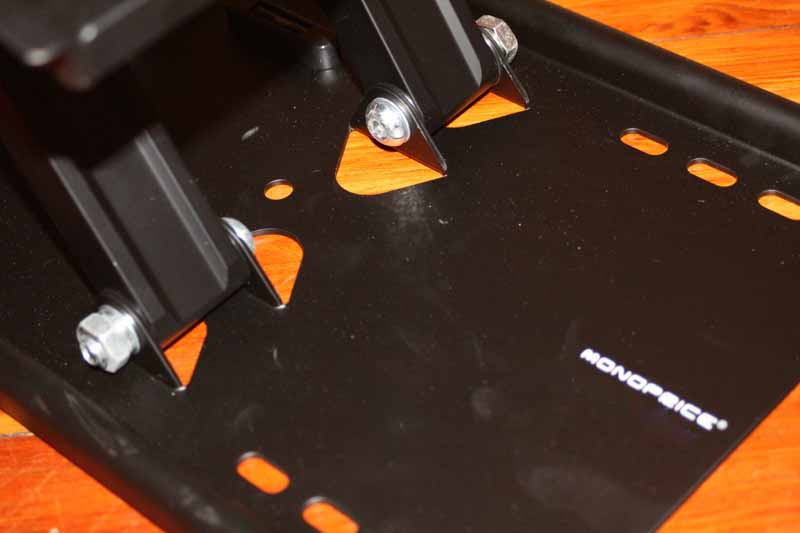
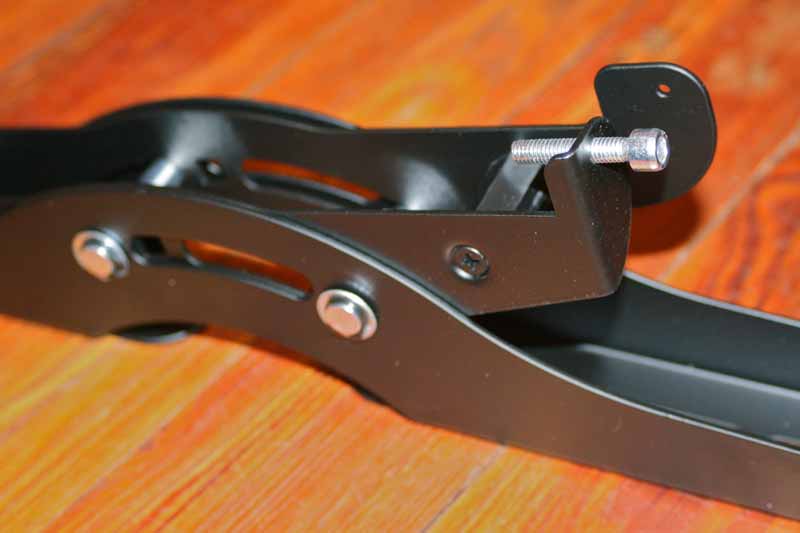 The mount itself is built like a tank. The arms are securely bolted to the frame and all of the fastening points were stamped steel, rather than welded, so there are hardly any points at which the mount suffers any weak spots. The tilting arms are also well-constructed, allowing for user adjustment of the tension amount, so that tilting can be rendered permanent, or loosened up to allow for continuous adjustment. An allen bolt is provided to secure the arms to the mount in s away that prevents the TV from sliding or tilting off of the mount itself. To aid in setting up the mount, a bubble level is integrated into the base of the mount, allowing you to get it leveled up as best as possible before mounting the TV. Once everything is marked, it's simply an issue of pre-drilling your holes and then driving the included bolts to secure the mount securely to the studs. You'll know when it's secure - it's a tight fit and you'll instantly feel confident about the mount's ability to hold even a larger-sized television.
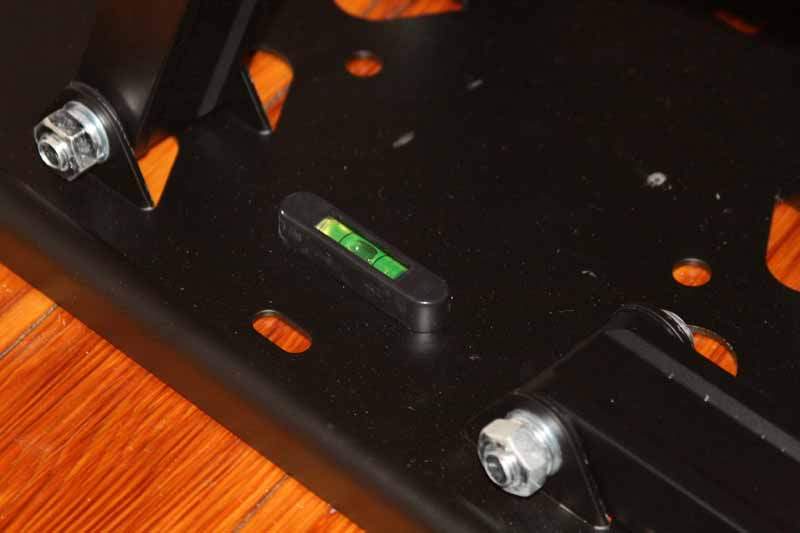
The thing about levels is, it doesn't mean you can perfectly align the mount regardless - unless there's a method of adjusting the rotation of the TV mount once it's mounted. In this case, there is. If you look at the front plate (removing the display if necessary), you will notice 5 bolts that hold the front plate to the arm assembly. The 4 outer bolts are in slotted holes. If you loosen them, you can rotate the front plate till it is level and then tighten the bolts back down to hold the plate securely in place.
 Once we had the mount in place, it was time to turn our attention to the Recessed Pro Power Kit. This would provide the real magic. It's the way we'd be able to hide all of the cabling and allow the mounting of the TV in a way that would cause it to appear to be "floating" on the wall. Because of our TV size and the location of the existing power outlets at the bottom of the wall, we decided to mount the Recessed Pro Power Kit just to the right of the mount. For some, the best choice may be to mount it over top of the display mount. Be sure to measure your display and anticipate where the physical dimensions of the TV will be as well as the cabling. Since we planned our install, we were able to keep everything within the same stud cavity - the preferred method of running the cabling since it involves a direct run.
After cutting our holes, we ran the 12/2 power cable through the included remodel box and the low voltage HDMI and component video cables (as well as our RF cableTV line) through the remaining opening. The source end of the Recessed Pro Power Kit comes with cable leads, rather than screw-down termination connections, so you'll need to use the included wire nuts to make your final connections. As for the low voltage runs, don’t forget to pull the cables through the opening before you run them up (or down) the wall to or from the TV.
Editor's Note: When using wire nuts, be sure to use electrical tape to secure the nuts to the wire and prevent an eventual short in the event that they would work themselves loose over time.
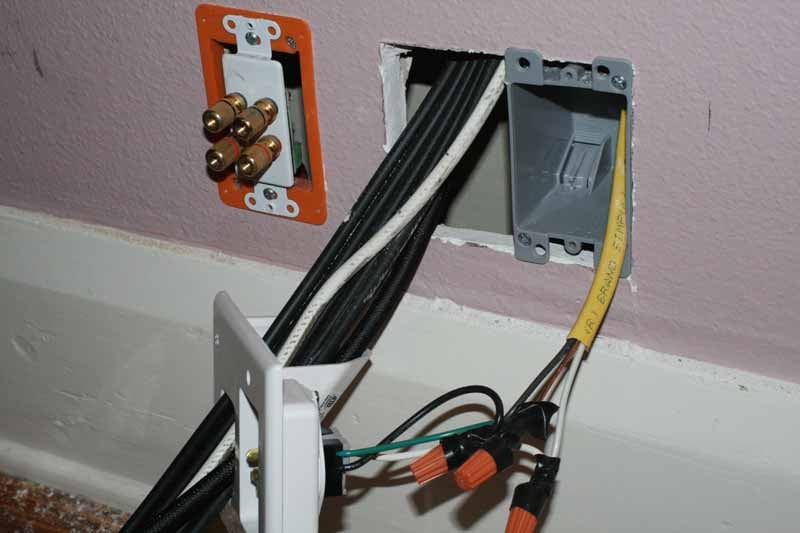
The finished wiring job presents itself as a very neat and tidy arrangement:
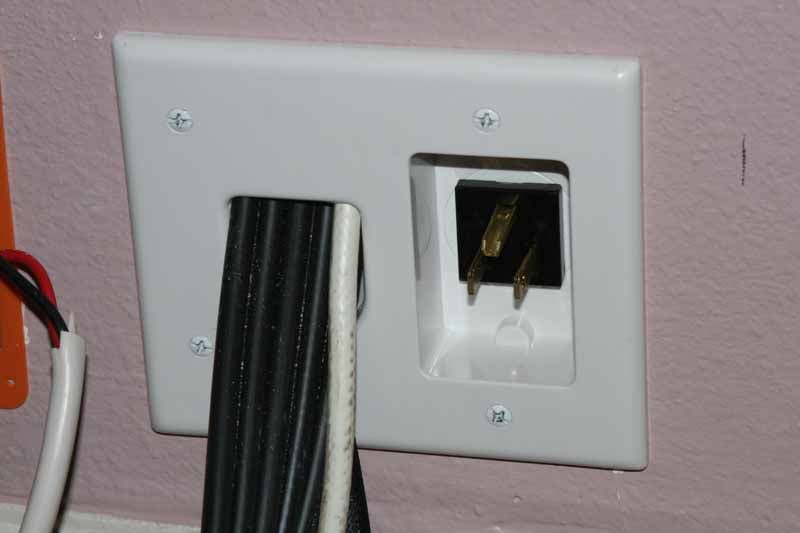
After this, all that's left is to mount the TV and run your cabling in a way that minimizes clutter and allows the mount to function unobstructed by the cabling's need to flex. In our case, we experimented with different methods before settling on passing the cables through one of the available mount holes and securing them to one of the arms. When we were done we had complete control over the mount, and could even bring the television out and point it towards the adjacent room (which happened to be the kitchen).

Conclusion
It's our desire to see every flat panel TV mounted on a wall. It's why they're flat and small. MonoPrice has provided a clear way for consumers to get the products they need to accomplish this goal - and save money doing it. Considering the astronomical prices some local retail chains are willing to charge consumers, purchasing these types of products online is one way to make this fantasy a reality. That high-end mounted TV look that you see on the home improvement shows isn't just for the rich and famous. Isn't it time you stepped out of the 80's and joined the revolution?
In our next article, we'll go over mounting a flat panel TV in a corner - another situation that many people shy away from , but which is proven to be rendered very doable by having the right products at your disposal.
Special thanks to MonoPrice.com for providing the products to make this installation article possible.
Clint Deboer was terminated from Audioholics for misconduct on April 4th, 2014. He no longer represents Audioholics in any fashion.
View full profile