
A Tale of 5 Installs Part 2 - Surfer Dude Gets Surround
"Joe" is a single guy who has youth group meetings at his home and watches movies with friends. He used to have a roommate who had a decent TV and speakers but now it's time to replace the system that "moved out". Joe is a bit of an enigma. He's actually quite "metro" and concerned with aesthetics - much like... well, your typical girl, particularly the kind that always seem to be married to the average audioholic. OK, that's enough Joe-bashing. The good news is that Joe already owns a Sony home theater-in-a-box, complete with subwoofer (bass module). The only thing left to do was make it actually be usable by buying ceiling mounts and wiring up the living area for a full 5.1 system.
Vital Statistics:
- Single with no prospects (just kidding)
- Concerned with aesthetics - doesn't want a big, bulky system
- Older home with attic
- Open room whose area is larger than the part dedicated to the theater space
- A/V Knowledge Level: "So will this take very long?"
You're Not a Chick If You Like Small Speakers… Technically Speaking
I quickly realize a few minutes after pulling up and checking out the living room that this install was going to be much different than the last one for a number of reasons. First, the owner (let's call him Joe - 'cause that's his name) was very concerned about a pair of Bose speakers. They were "too big for the room". Instead, he wanted to use his much smaller (dare I say dainty?) set of Sony satellite speakers. This was unfortunate, since this home could easily support a full 5.1 bookshelf system and even some floorstanding speakers. The second reason this install would be different was that I'd be going solo. Joe had to leave shortly for a meeting soon and I'd be fending for myself. Fine, I'd go ahead and install his "chick speakers" without him.
Glancing around I saw that the room, which was oriented to a corner-loaded position, could be quickly reconfigured so that the audio system could be placed against the East wall, giving us the ability to create a rectangular listening area. Of course, it meant that we had to leave a couch on the exposed front porch - but what's that in comparison to good sound? Fortunately, Joe said he wanted to toss the couch anyway… good riddance, better sound.
Once we decided on the configuration, we also settled on ceiling mounting the speakers. This was a very similar job to the last one and I was able to get started much more quickly. I also brought slightly less equipment, opting instead to go with plenty of wire, but not enough to drag a line across town.
I
Hate Old Houses.. OK, Not Really.
I located the place where I'd come down the wall and started drilling a hole into the plaster to form the beginning of what would house the electrical box and contain the banana connectors. With Murphy-inspired accuracy I drilled almost directly into the center of a stud (knock tests and stud sensors don't work so well on lath & plaster houses). It was close enough that I figured I could chisel the area out (not a load bearing wall) and access everything I needed. I was committed, so I plowed ahead and completed the box. It took way too long and I hated myself, but it got done. This is why people pay custom installers to wire these things up... but doing it yourself is certainly cheaper.
Into the Attic
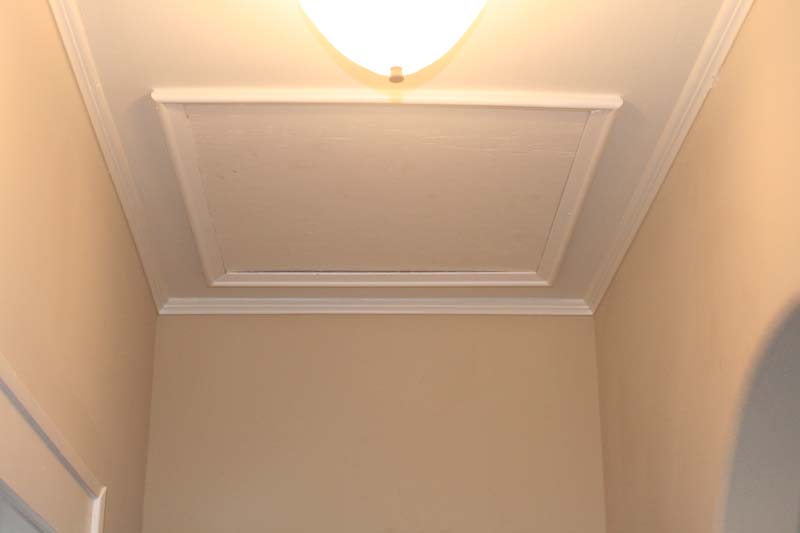 Attic
access was in the hallway adjacent to the listening room. I was actually able
to measure distance to the desired location for the drop into the wall cavity.
This was good since there wasn't a ton of other objects to help, save a power
outlet which typically drop next to a stud. I measured over 18 feet or so from
the opening and pulled myself up into the attic using a 5-foot ladder. As the
ceilings were 9 feet tall, this was no small feat.
Attic
access was in the hallway adjacent to the listening room. I was actually able
to measure distance to the desired location for the drop into the wall cavity.
This was good since there wasn't a ton of other objects to help, save a power
outlet which typically drop next to a stud. I measured over 18 feet or so from
the opening and pulled myself up into the attic using a 5-foot ladder. As the
ceilings were 9 feet tall, this was no small feat.
The attic was wired for light - very cool since the light extended over to my drilling locations - this saved a lot of headaches. I don't like headaches. I measured over to my point and checked for studs in the exposed header after pulling away the newspaper-based insulation (nifty, no scratching!) Finding the stud I needed, I went to the side having the most space and prepped to drill my holes.
It Sure Is Dark in There…
Pulling out my cordless Makita 18V drill (yeah, baby!) I slapped on a 3/4-inch spade bit and drilled my hole which would support all four speaker cables. The hole drilled easily enough and I peered inside. At this point I was curious as to why I didn't see any light coming from below (we did just cut out a large hole, you know.) Basically, when you drill into a header and have a hole in the wall below, you should be able to see some light if you kill the lights in the attic or cup your eyes over the drilled hole. I saw nothing. Nada. Zip. I was on the side of the stud I wanted to be on, so I quickly realized (because I'm smart like that) that there must be some kind of cross-brace in the wall. This was bad. Shining my headlamp LED light into the hole I just drilled I saw the culprit about 24 inches or so below the header. It was too far down for me to deal with - even using my drill bit extender.
Since my hole down below was straddling a 2x4, I jumped to the other side of the stud (after a brief time of quiet reflection and prayer) and drilled a new hole. Bingo - we had light. That was cool, because I'd hate to just randomly start drilling holes in the wall to find a cavity that wasn't covered by a random piece of wood. I widened my hole a tiny bit more and breathed a sigh of relief - thanking Murphy and his cursed law for having me cut a hole across a stud rather than on the wrong side entirely.
I forgot my cables, or rather, I wasn't prepared to run them just yet or didn't trust my hole. In either case I needed to head back down and pick up some wire.
Han "Solo" Had a Wookie…
I pulled myself back into the attic for some more fun. I measured and brought two rolls of wire, precut to the lengths I needed for the front speakers. I also brought my drill bit extender to use as a drop weight to get two of the ends down the wall. I hated not having a big enough ladder - next trip to Home Depot I committed myself to remedying that (this was not the first time I'd said this, but this time I really meant it).
Once I was in I sauntered over to the hole and used electrical tape to secure two runs to the drill extender (the extender, being a heavy but thin pole, pulled the cable down the wall without it tangling). It dropped down the wall easily enough and I could tell it had hit bottom by the sudden slack in the line. I don't have an assistant, so I had to go down (again) and pull it out myself.
Surfer Dude - Part 2
Medic!
I almost fell through the ceiling. Almost. I caught myself, but not before I heard and felt a strange sensation in my shoulder. For those who want the more comical, but extended version of the story, head on over to AVRant.com.
I managed to get down through the attic - I have no idea how other than I was sure the pain would be far greater once I stopped moving around (it was). I successfully pulled out the extension pole by grabbing onto it with a small piece of ground wire (from a length of romex) which I bent into a hook. I undid the tape holding both wires and grabbed my Makita for some ceiling drilling...
Things Are Looking Up - Literally
 I moved
the ladder over to the living room and marked off my four ceiling speaker
positions. Unfortunately, I hit a stud on the first hole (left front). Moving
over 2 inches I got a clean hole. I was using a bit that was just big enough to
get the wire through as I didn't want air escaping from the attic and would
like as clean a look as I could get (you can always caulk afterwards). Working
my way around the room I got the remaining holes drilled with little difficulty
(though there was lots of dust.) To
mark each position in the attic, I inserted a piece of electrical wire (either
hot, neutral or ground) from a short pierce of romex. To hold the wire in place
I simply bent the bottom end in a loop so that it caught in the hole when fully
inserted.
I moved
the ladder over to the living room and marked off my four ceiling speaker
positions. Unfortunately, I hit a stud on the first hole (left front). Moving
over 2 inches I got a clean hole. I was using a bit that was just big enough to
get the wire through as I didn't want air escaping from the attic and would
like as clean a look as I could get (you can always caulk afterwards). Working
my way around the room I got the remaining holes drilled with little difficulty
(though there was lots of dust.) To
mark each position in the attic, I inserted a piece of electrical wire (either
hot, neutral or ground) from a short pierce of romex. To hold the wire in place
I simply bent the bottom end in a loop so that it caught in the hole when fully
inserted.
Now that everything was in place I moved the ladder back and cut and rolled two more lengths of Impact Acoustics CL2-rated speaker wire. I dreaded the dead-lift I had to take into the attic, but I didn't have a second option if I wanted to finish - and by then I really wanted to finish.
Luke, You Switched Off Your Targeting Computer. What's Wrong?
Things were slowing down as I braced for the actual lift. I'd decided to just do whatever it took and get 'er done. I pulled up, which turned out to be not so bad and headed in to locate my positions, drop the other speaker cable pair and run all four ends through the holes.
Getting the other two pieces of wire into the hole along with the "weight" was a tight fit, in fact it was too tight. Aargh. I suddenly realized I had earned a bonus trip downstairs to retrieve my cordless drill and create a separate hole. At this point I knew my goal and so I was pretty much running on auto-pilot and ignoring my shoulder…
Back in the Saddle Again
It didn't take long to sling up my spade bit and get back into the attic. I moved over to my first hole and drilled another just like it. Looking in I saw the light at the bottom and the new cable assembly dropped down easily enough.
Rather than take another trip downstairs to pull it out I ran the other ends through the four holes positioned around the attic (I had already located and identified the four romex wires.) This was an easy process and it all looked to be going smoothly at this point. I fed the cables all the way through until there was no slack left in the attic - less to trip over.
The Home Stretch
 This
time I was out of the attic for good and I could see that the second drop was
in the right place to be easily extracted. All four pieces of Romex had fallen
to the floor, having been pushed out with the wire insertion. I had an average
of 3 feet too much cable in each spot - easily trimmed.
This
time I was out of the attic for good and I could see that the second drop was
in the right place to be easily extracted. All four pieces of Romex had fallen
to the floor, having been pushed out with the wire insertion. I had an average
of 3 feet too much cable in each spot - easily trimmed.
The final step for today was "pinning out" the wires and labeling them as I put on the wall plate. To do this I simply stripped the wires which were coming out of the ceiling, leaving about 18 inches. I connected the red and black wires to form a short (on purpose). Going back to my plate location where all four wires come together I used my voltmeter's audible short-tester mode to see which of the four cables was shorted. Once I found it, I labeled it accordingly. Rinse, repeat. I used a Rhino 3000 labeler (oh my goodness this thing is convenient) which was supplied with the C.I.T.S. kit and marked the physical cables in the event we had to go back and diagnose anything that might be amiss.
Clean Up
It would be Miller Time if I drank. Almost. As much as I would have loved to leave I still needed to clean up the dust and droppings left by my drill and the ceiling. When I came back, I planned to mount the speakers and tweak out the system.
Install 2, Day Two - Surfer Boy Gets a Home Theater
Ummm… Mounts!
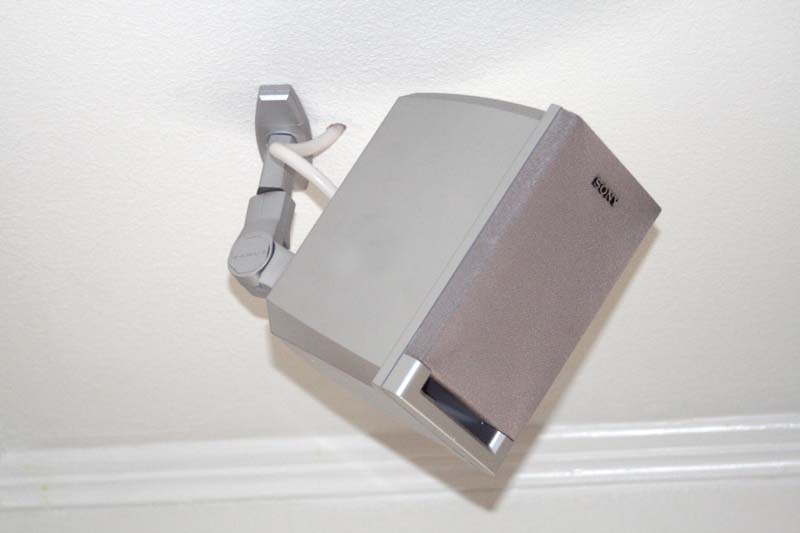
With all the hard work completed, I arrived at the home to mount the four speakers and place the center channel and subwoofer. Stripping the cables took me longer than I expected, but it was done quickly enough and I was ready to secure the mounts to the ceiling. We used a set of Sanus WMS5 mounts in silver which matched the Sony speakers we were installing and promised to be both flexible and secure enough to handle the satellites.
Mounting
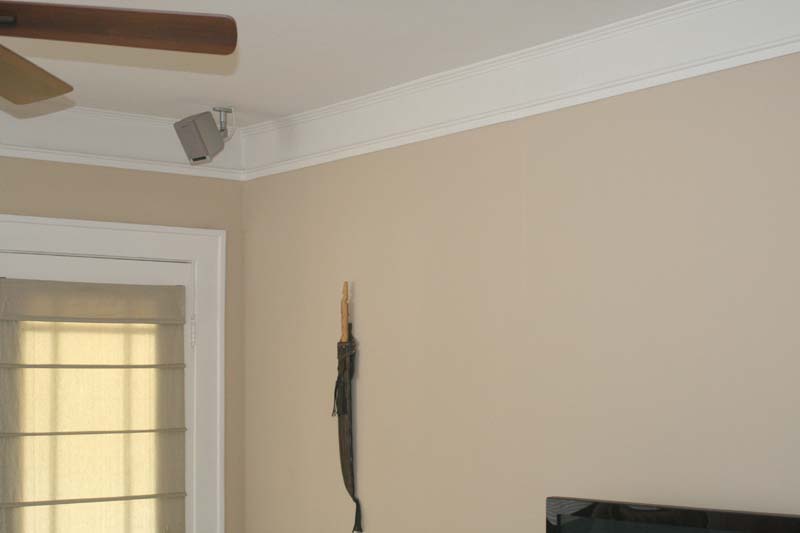 Once
each mount was mounted (we found studs for all 4 positions to ensure we wouldn't
have to worry about falling speakers) we then took each of the speakers and
secured the surface mount clips to the single threaded mounting socket of each.
This made mounting the final speaker easy as it simply entailed using an allen
wrench (provided) to secure the speaker to the ceiling bracket. We placed the
center channel directly underneath the display (now a Panasonic plasma display)
and the sub was located to the right of the display stand on the floor.
Once
each mount was mounted (we found studs for all 4 positions to ensure we wouldn't
have to worry about falling speakers) we then took each of the speakers and
secured the surface mount clips to the single threaded mounting socket of each.
This made mounting the final speaker easy as it simply entailed using an allen
wrench (provided) to secure the speaker to the ceiling bracket. We placed the
center channel directly underneath the display (now a Panasonic plasma display)
and the sub was located to the right of the display stand on the floor.
Conclusion, Calibration and Engage!
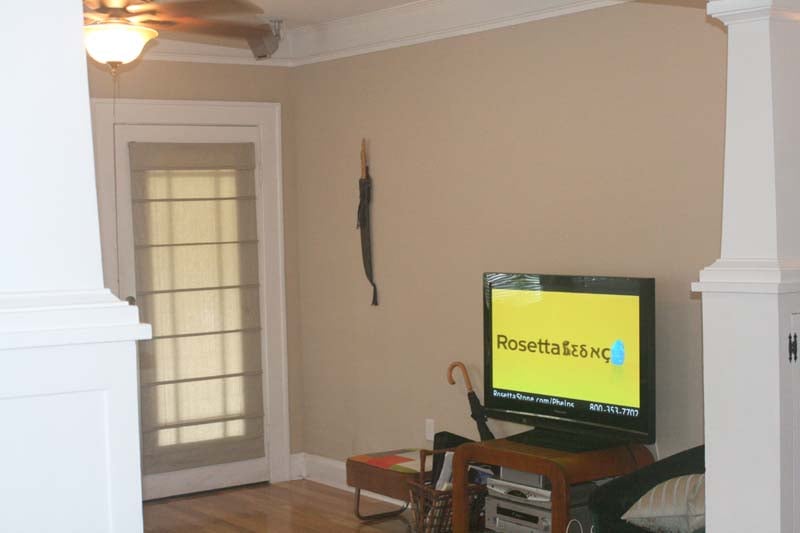 Wow, 44 minutes and we were ready for
calibration. I set up my SPL meter and navigated yet another awful Sony system
menu, setting levels and speaker sizes. Once everything was configured we
placed a little Saving Private Ryan
into the DVD player and I made sure everything was sounding as good as could
be. Overall, the system sounded pretty decent - a huge step up from the
television and miscellaneous speakers being used previously. Even if you don't
like big speakers you will do well to step up to any type of dedicated system
to improve the sound quality you'd get from a television. Let's call this job a
success and soon we'll move on to our next project which involves a stepped up
system and some different parameters.
Wow, 44 minutes and we were ready for
calibration. I set up my SPL meter and navigated yet another awful Sony system
menu, setting levels and speaker sizes. Once everything was configured we
placed a little Saving Private Ryan
into the DVD player and I made sure everything was sounding as good as could
be. Overall, the system sounded pretty decent - a huge step up from the
television and miscellaneous speakers being used previously. Even if you don't
like big speakers you will do well to step up to any type of dedicated system
to improve the sound quality you'd get from a television. Let's call this job a
success and soon we'll move on to our next project which involves a stepped up
system and some different parameters.
Clint Deboer was terminated from Audioholics for misconduct on April 4th, 2014. He no longer represents Audioholics in any fashion.
View full profile