
Home Acoustics Alliance Level II Workshop
Well it has been almost four years since I took the HAA Level I (we use roman numerals) training and certification and if you think I have just put my acoustic knowledge to the side, think again. I’ve been tweaking and adjusting here and there over the years but now I was given the opportunity to go to the HAA Level II Workshop. Being the audio geek that I am, I jumped at the chance to become the Level II Guru as the HAA phrases it.
The students that were in the workshop had all just finished the Level 1 training so all of the concepts were fresh in their minds. HAA does offer a refresher course but I spent the prior week reading over the Level 1 concepts to get me back up to speed.
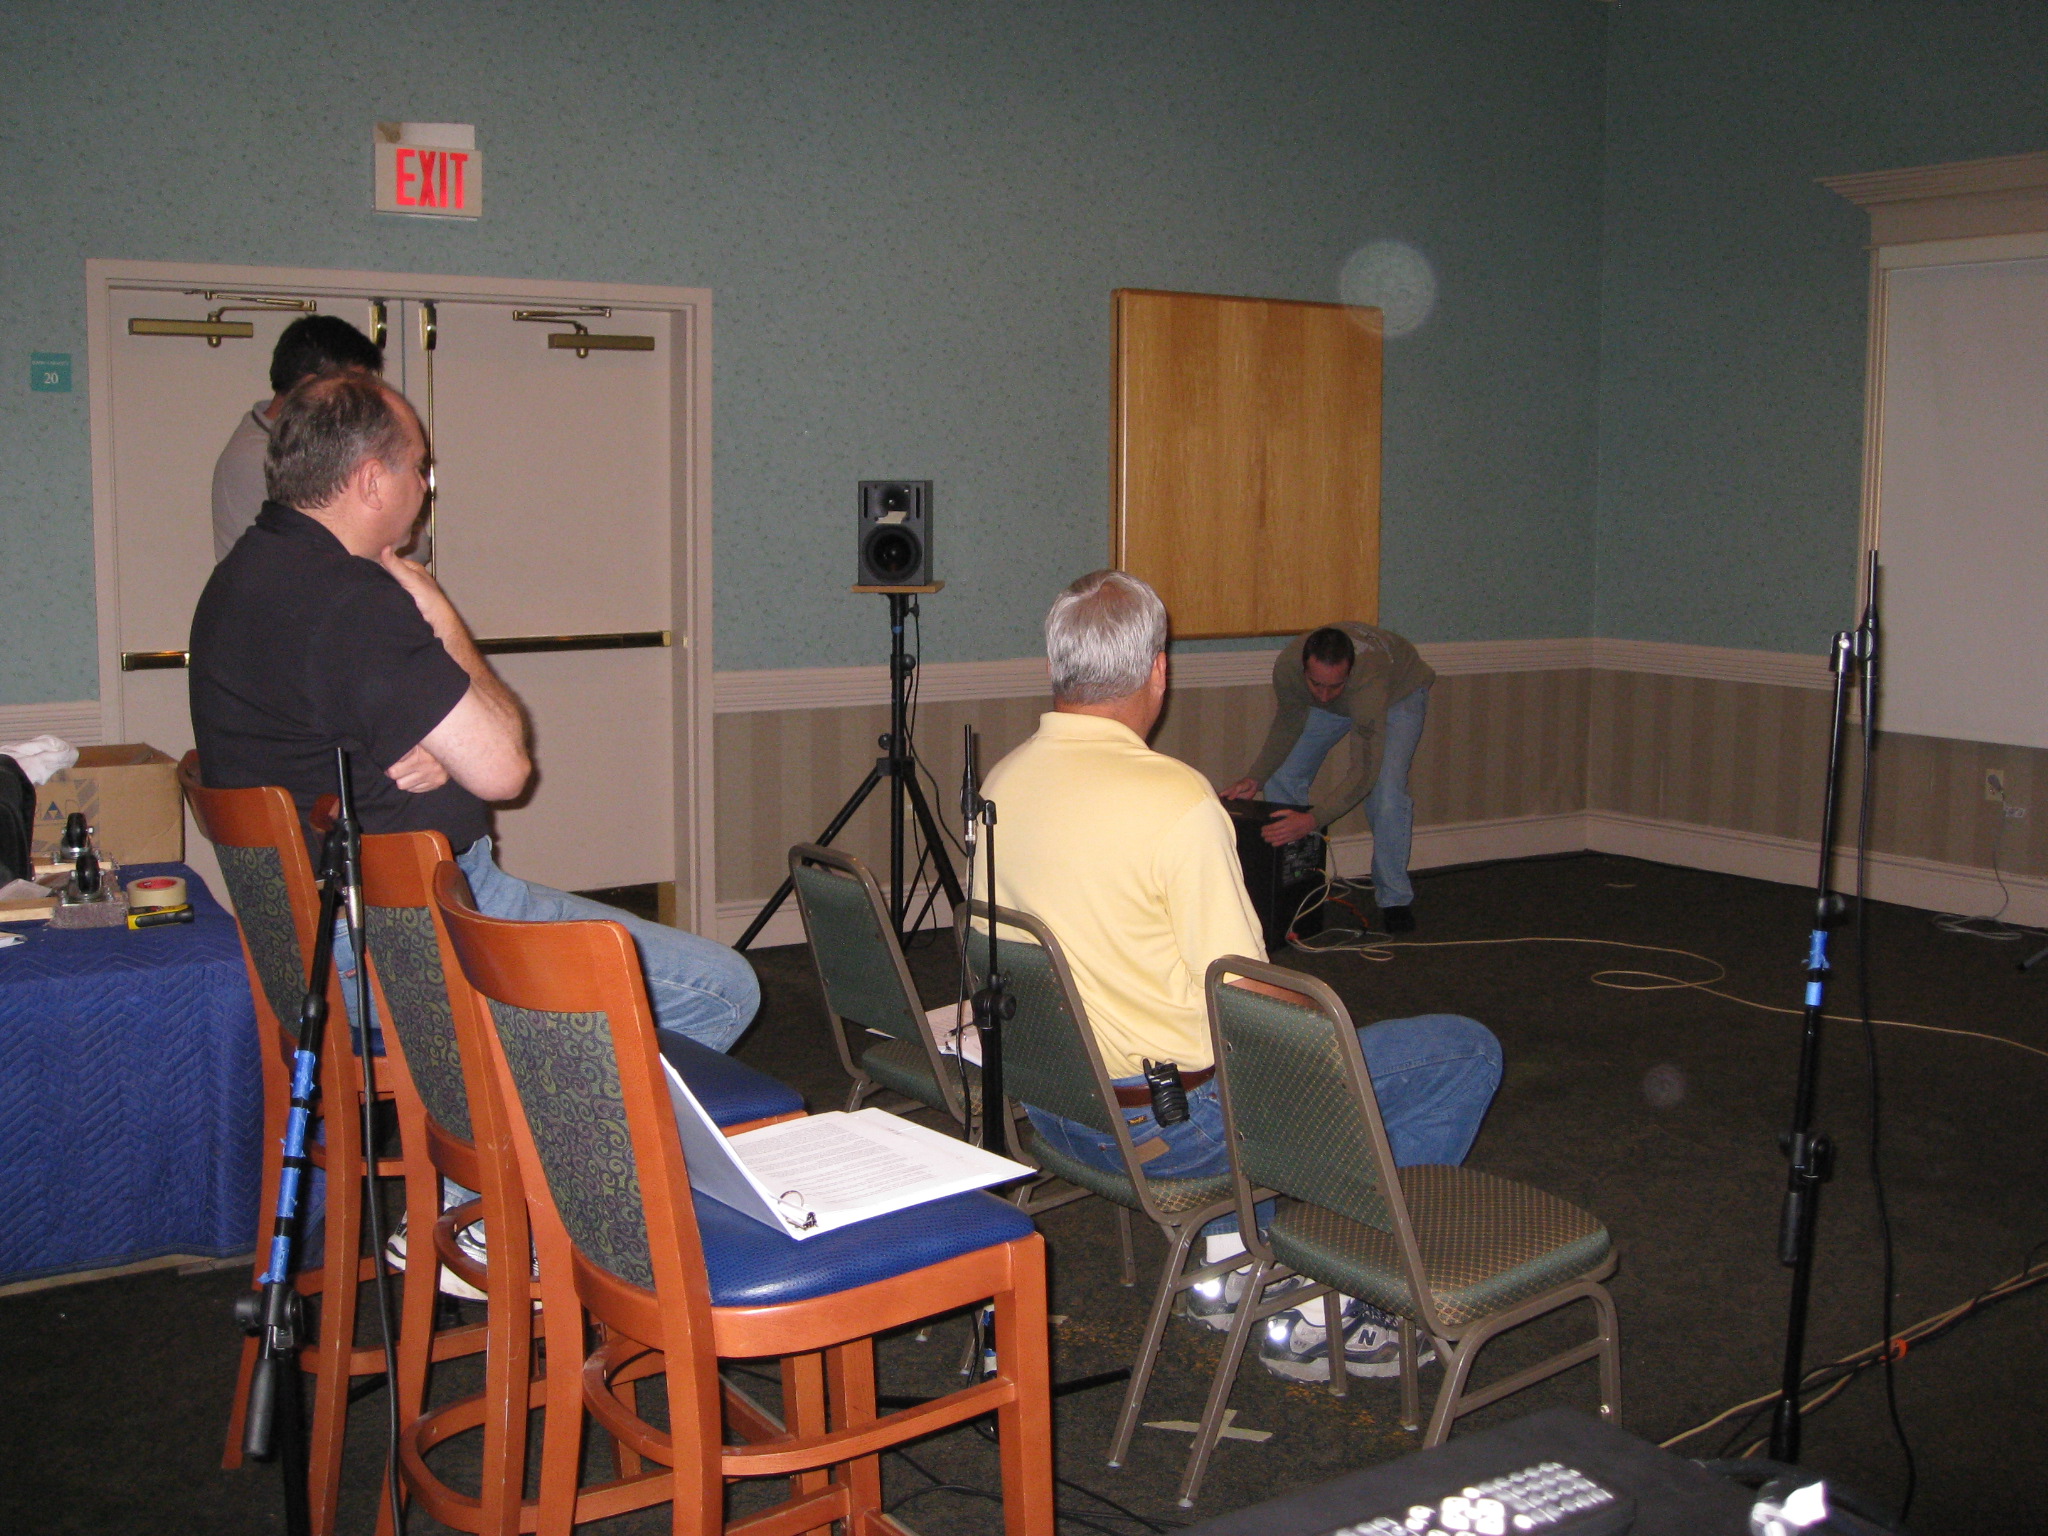
I showed up with my reference material and my notebook thinking there will be some training, then some hands on, then more training, and more hands on. Just as I had some preconceptions of the Level 1 training that were wrong so were they for Level 2. I showed up at the hotel conference room and there were 6 seats and 7 speakers set up in not any ideal way.
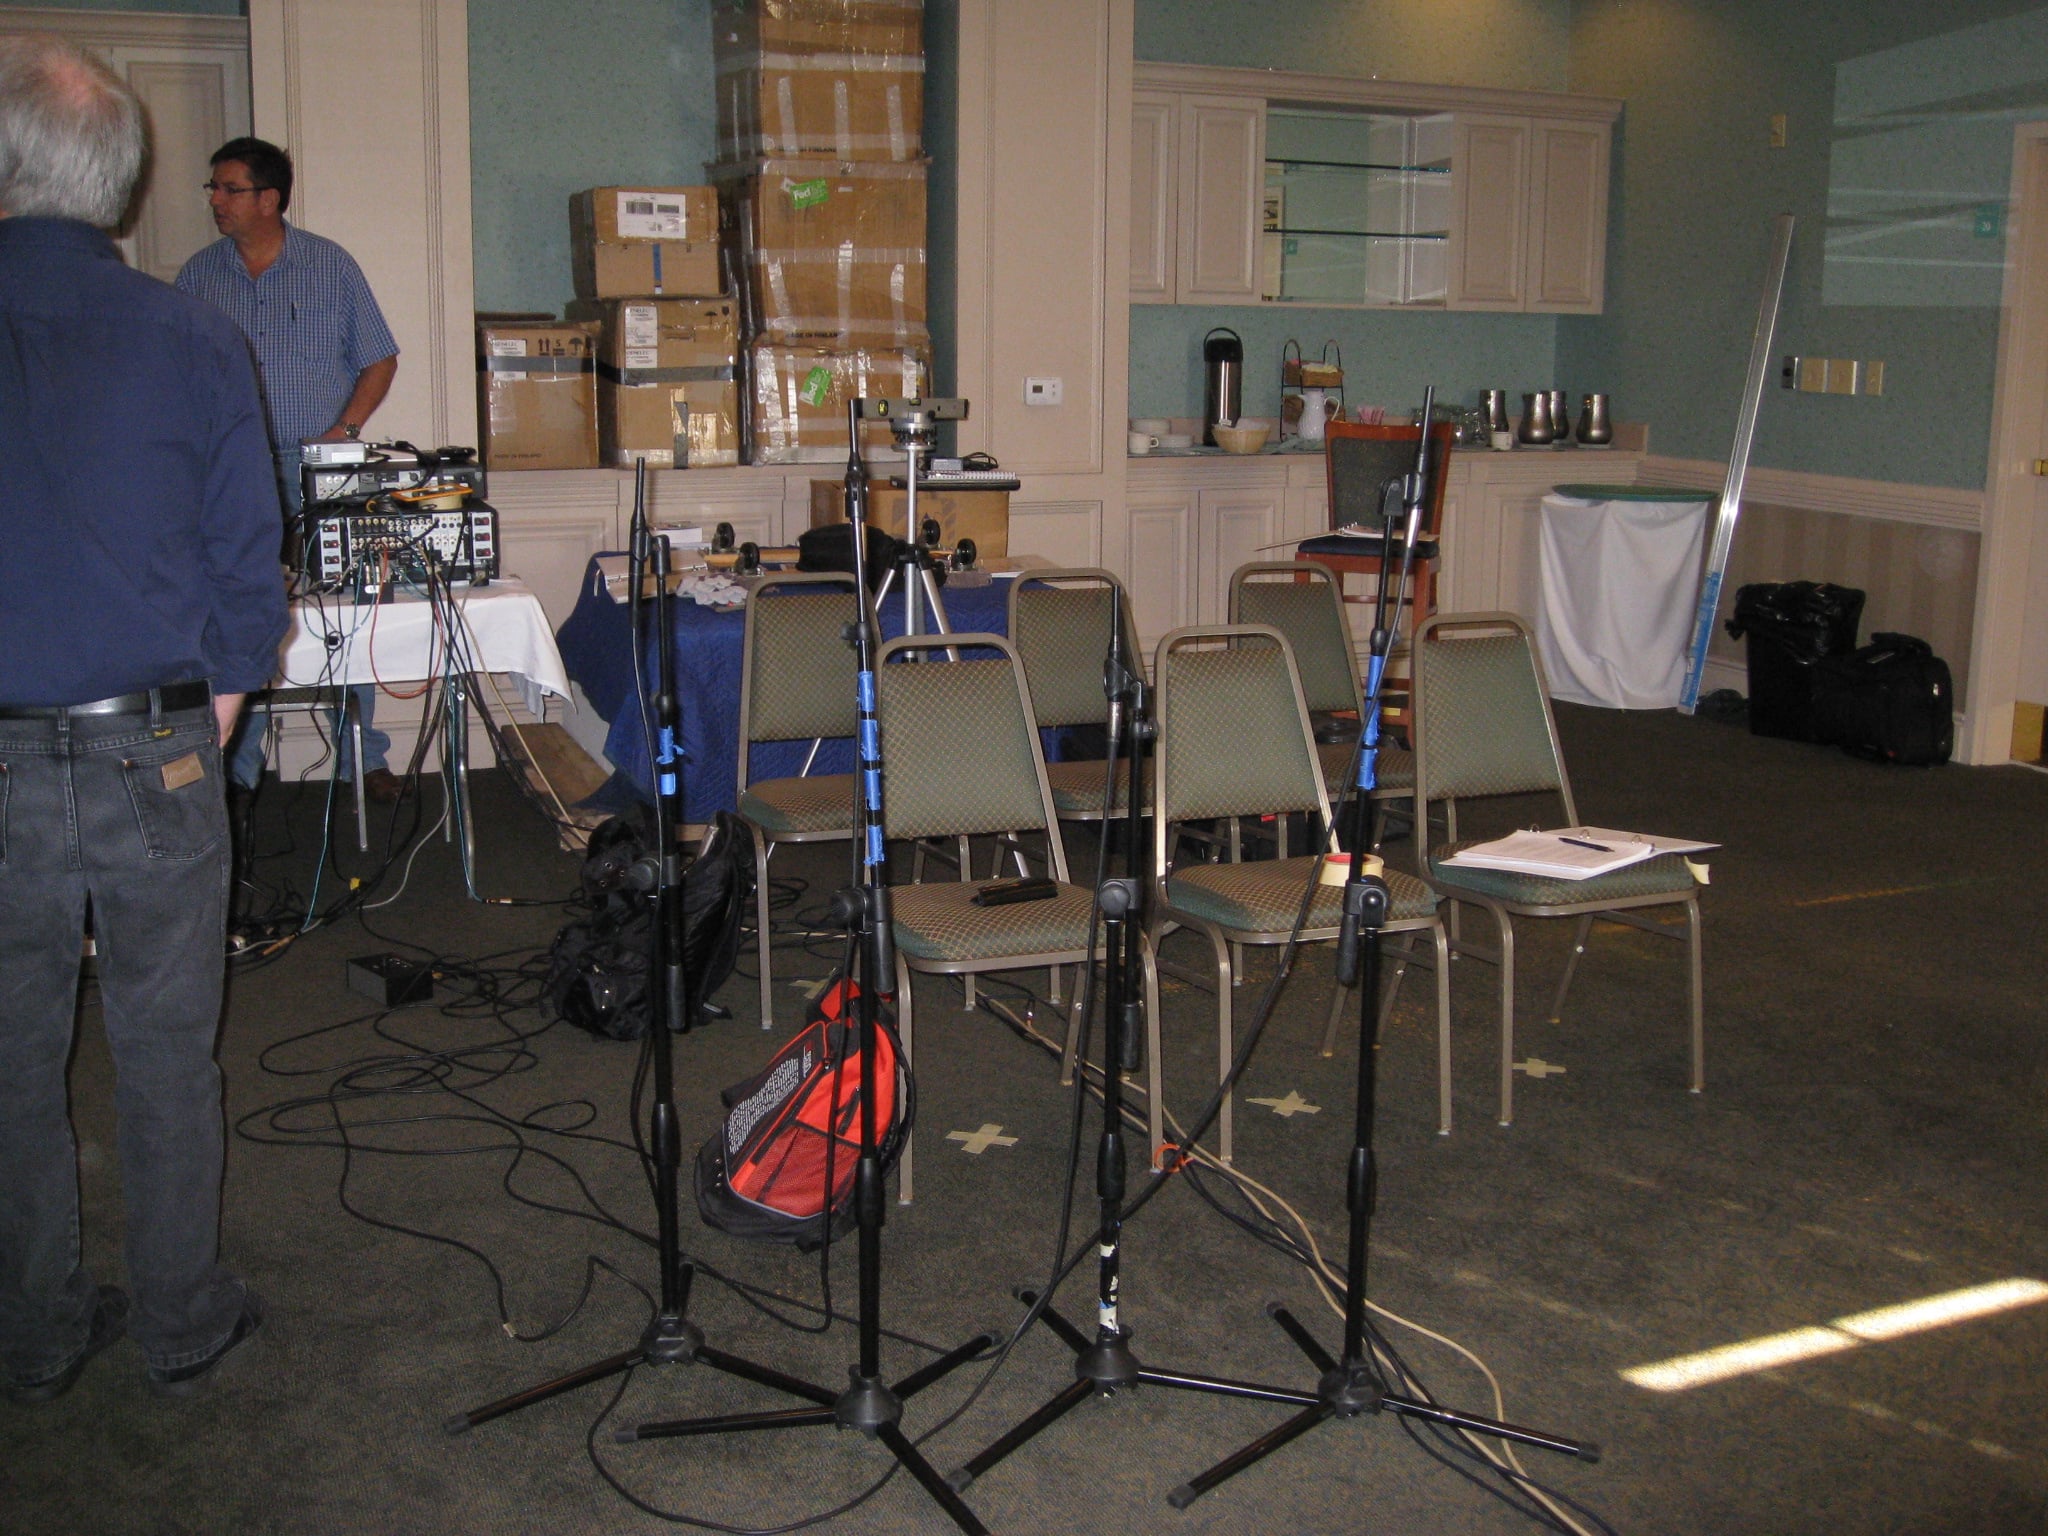
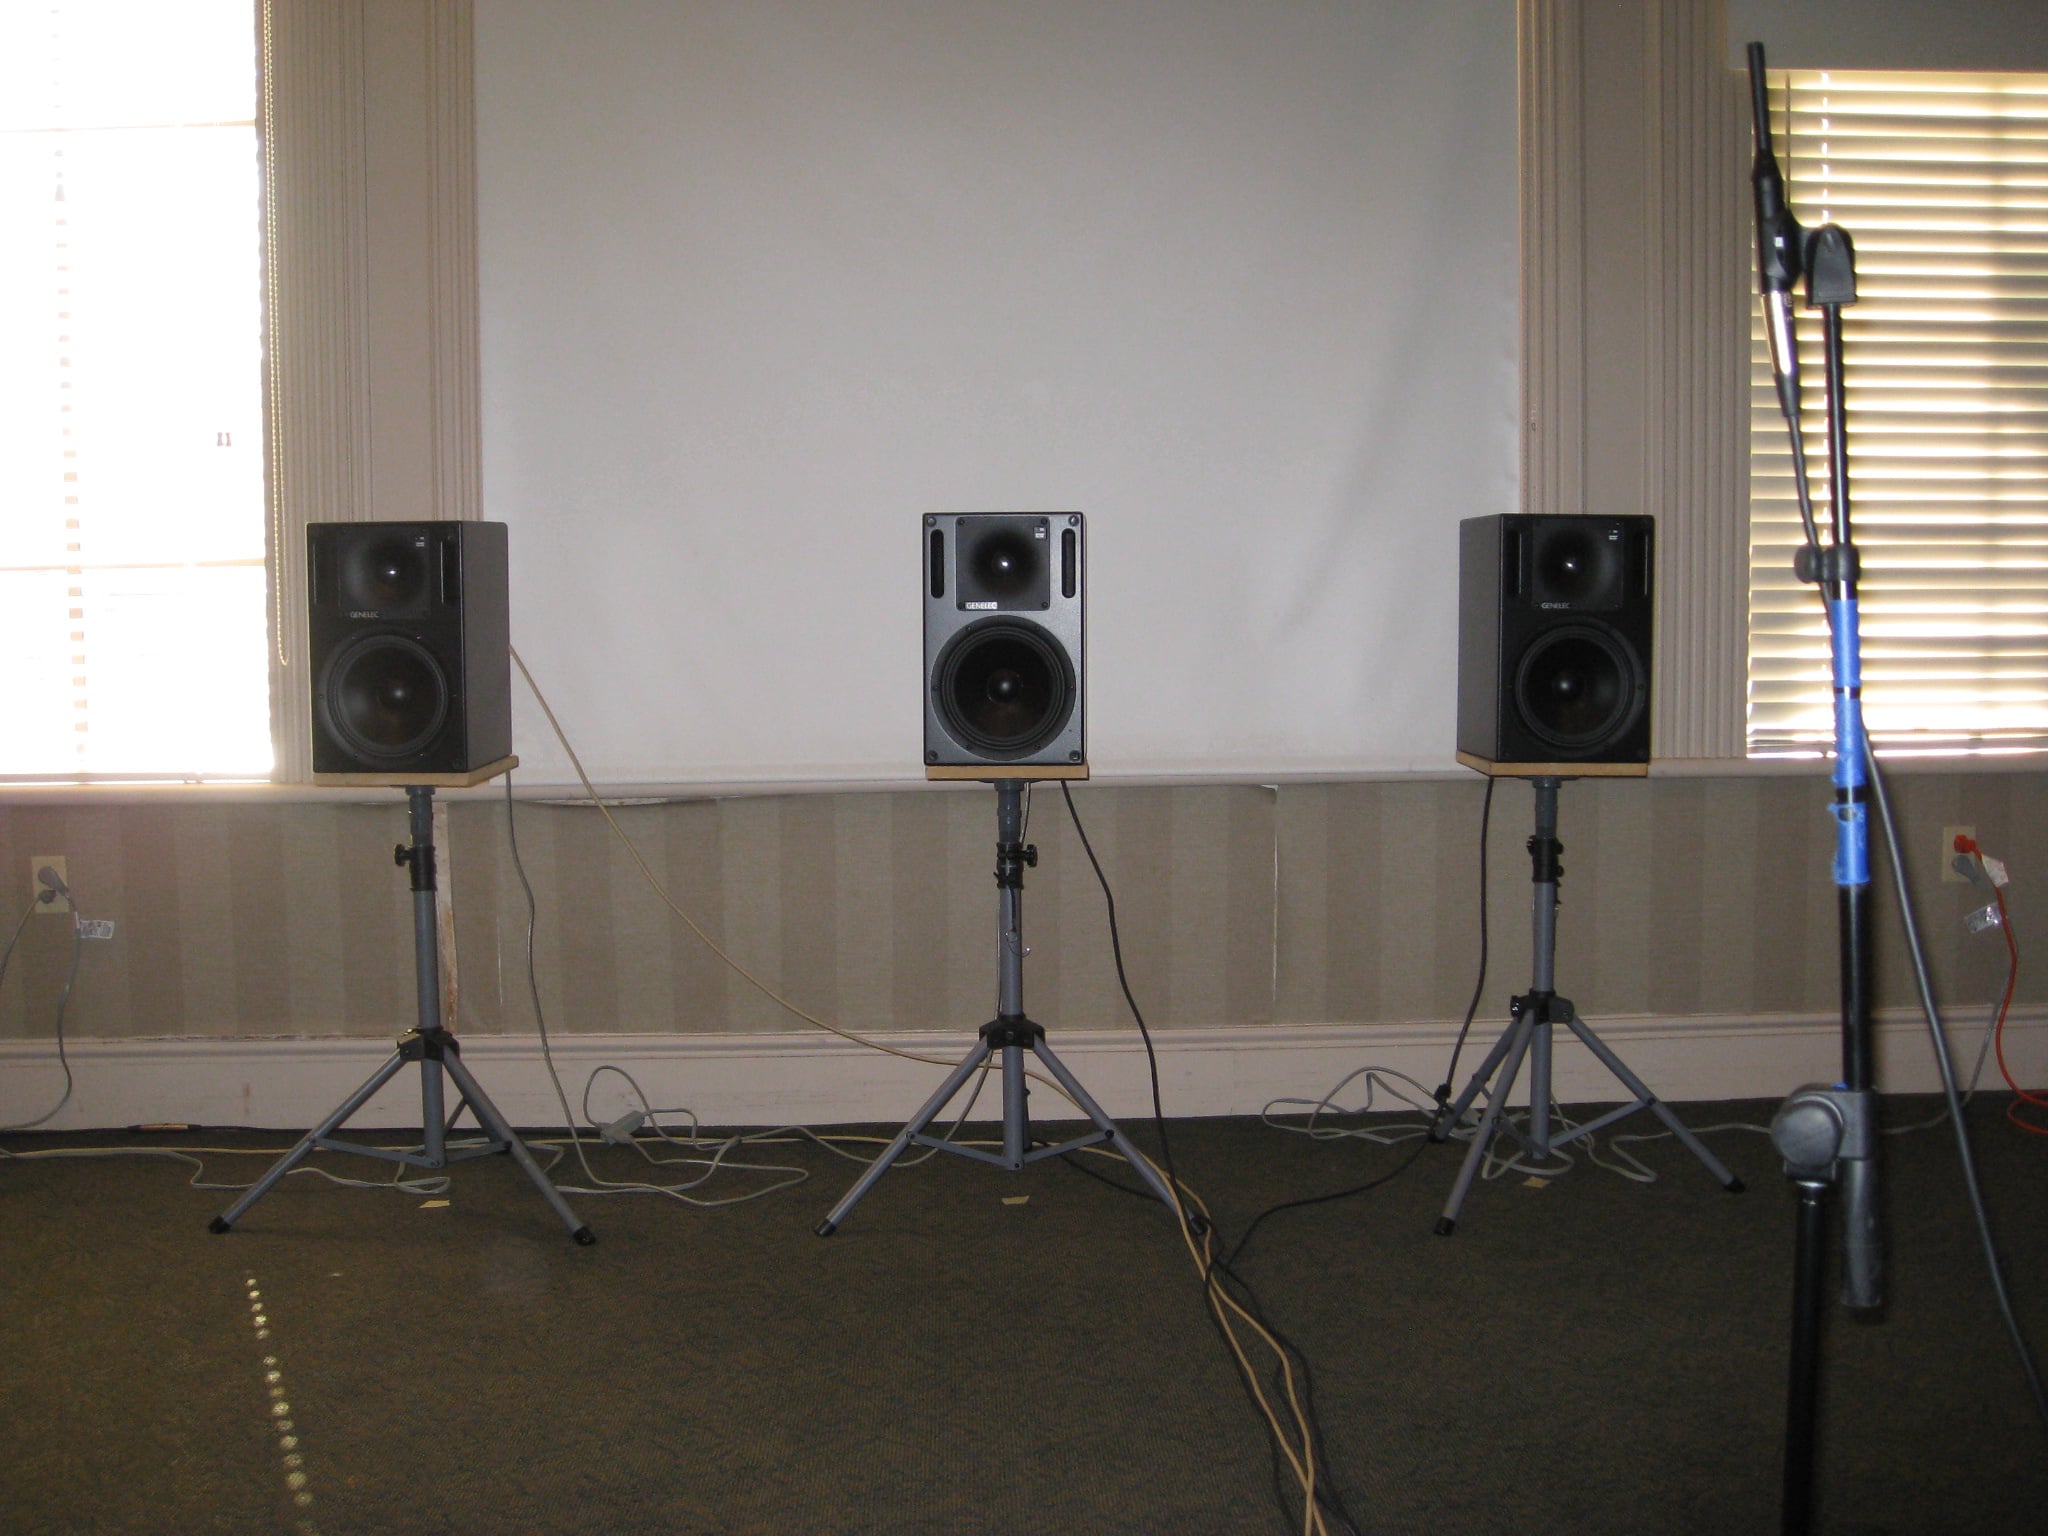
The speakers were all Genelec self powered speakers and the five channels were on tripod stands. Not something you would normally see in a home but HAA travels to different states and these looked like they were well suited for traveling. There were also two subs, one in the front corner and one off to the side. Behind the seats on a table were the electronics all wired up and ready for something.
I took a seat and got my notebook out while waiting for the rest of the students to show up. Gerry has one assistant instructor, Jim Harber, who ended up leading much of the workshop and believe me, both of these guys know their stuff. Once the other students had arrived, there were a total of five.
Next, the workshop began by talking about the roles of the group. I usually don’t like role-playing in a training class but this one turned out to be pretty cool. There were five roles: The "Point", which is really like a supervisor. The "Scribe" and an "Assistant Scribe" were in charge of collecting data. The "Grunt" was just like what it sounds like, the person who did the physical work and finally the "Customer" who took notes and did evaluation.
This group or team of five (5) people’s goal was to evaluate and then calibrate this entire set up over the next 3 days. Let me be very clear here, evaluate and calibrate in HAA doesn’t mean to just listen to the system and then make some electronic tweaks to the gear. It means a whole lot more and three days could easily go to four.
Evaluate means understanding all the concepts of small room acoustics as opposed to large room like a church or concert hall and taking many measurements to get an idea of what you are dealing with in the room.
Calibrate means designing and setting up everything from the ground up including designing the shape and size of the room before it is constructed. Of course, not every Home Theater Specialist has the luxury of being there at inception and neither did we in this hotel room.
The workshop is broken up into exercises and at each exercise, each member of the team switched roles, which gave everyone a chance to do everything involved. Learning these roles was no easy task; it took our team half of the day to get some kind of synergy going which included getting to know one another.
Okay, half a day went by and we all had gotten to know each other a bit and we were on our way. You’re probably thinking “On their way to what?” The HAA has two basic guidelines to follow to complete a home theater set up.
First, there is the Acoustical Design Review (ADR), which boils down to the physical evaluation of the entire system. Then there is the Acoustical Calibration Review (ACR), which is where all adjustments are completed which included both physically moving speakers and electronically adjusting the equipment. Each report is done twice; once before adjustments are made and then again after. The reports can be completed manually but as I discovered later the HAA AV Pro software that guides the Specialist through the reports was extremely valuable.
The very first thing we did was listen to some predetermined music with the current set up. One of the tracks used extensively throughout the workshop, was “Hi-lili Hi-lo” by Ricky Lee Jones. None of the tracks sounded particularly good but this one was very bad. Being an Audioholic equipment reviewer the first thing that jumped into my mind was that these Genelec speakers were not very good. The track was distorted with very poor imaging and detail. Everyone knows that sound quality can be very subjective but there are certain aspects of sound that people can learn about and come to a consensus. Lots of people talk about having a “Golden Ear” and I for one do not believe in that. I think everyone has a Golden Ear. If the human brain can discern direction of sounds, which are only milliseconds of delay from one ear to the other then the brain can also discern other details of sound. It’s only a matter of learning what those details are.
 Some of the physical aspects that the ADR led us through were: was the room rectangular? Was the room sealed off or open? What was the location of the speakers? What was the location of the seats? Were there any obstructions of the sound path from the speakers to all seats?
In our instance, the sound path to the rear seat was blocked by a person in the front seat. Speaker location is a huge factor in sound quality. I recently saw a multimillion-dollar home with a theater where the left and right speakers were stuck all the way into the corners which are the absolute worse places they can be and the center speaker was way up high above the screen. Just imagine that car going across the screen; it would sound like its going over a hill that isn’t there. It was amazing to me that HAA could teach such simple techniques that most people don’t even think about to resolve such issues. The workshop also taught much more complex techniques that most people don’t want to think about but the Guru’s that go through the training love it. We went through all 41 elements of the ADR just observing and notating without moving anything.
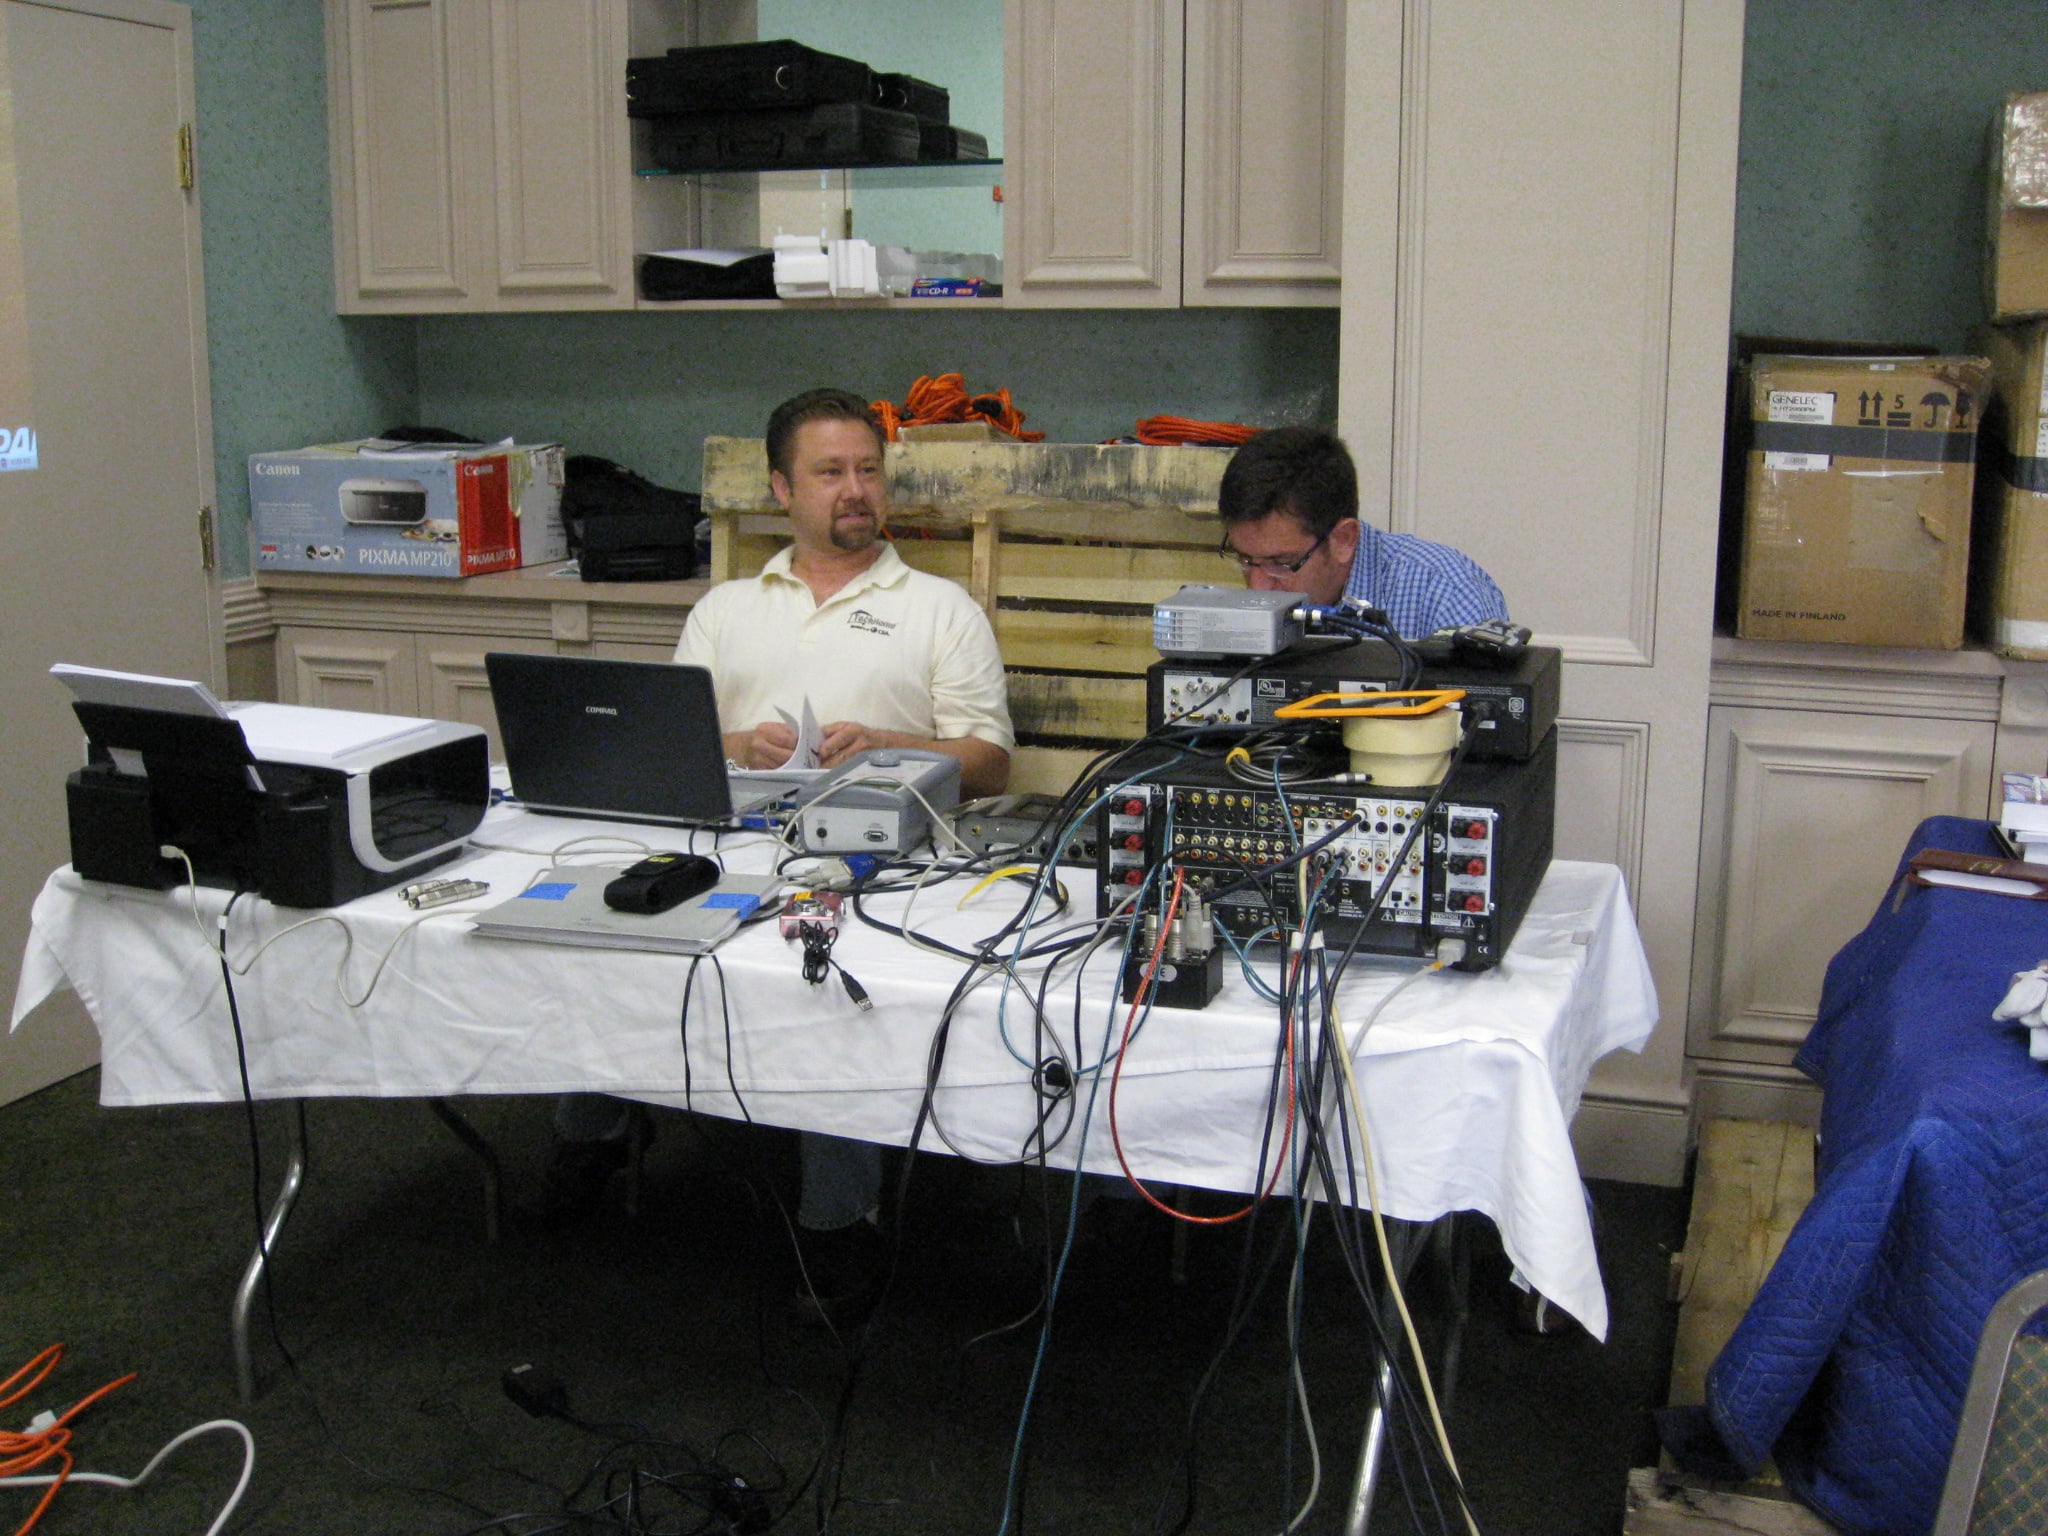
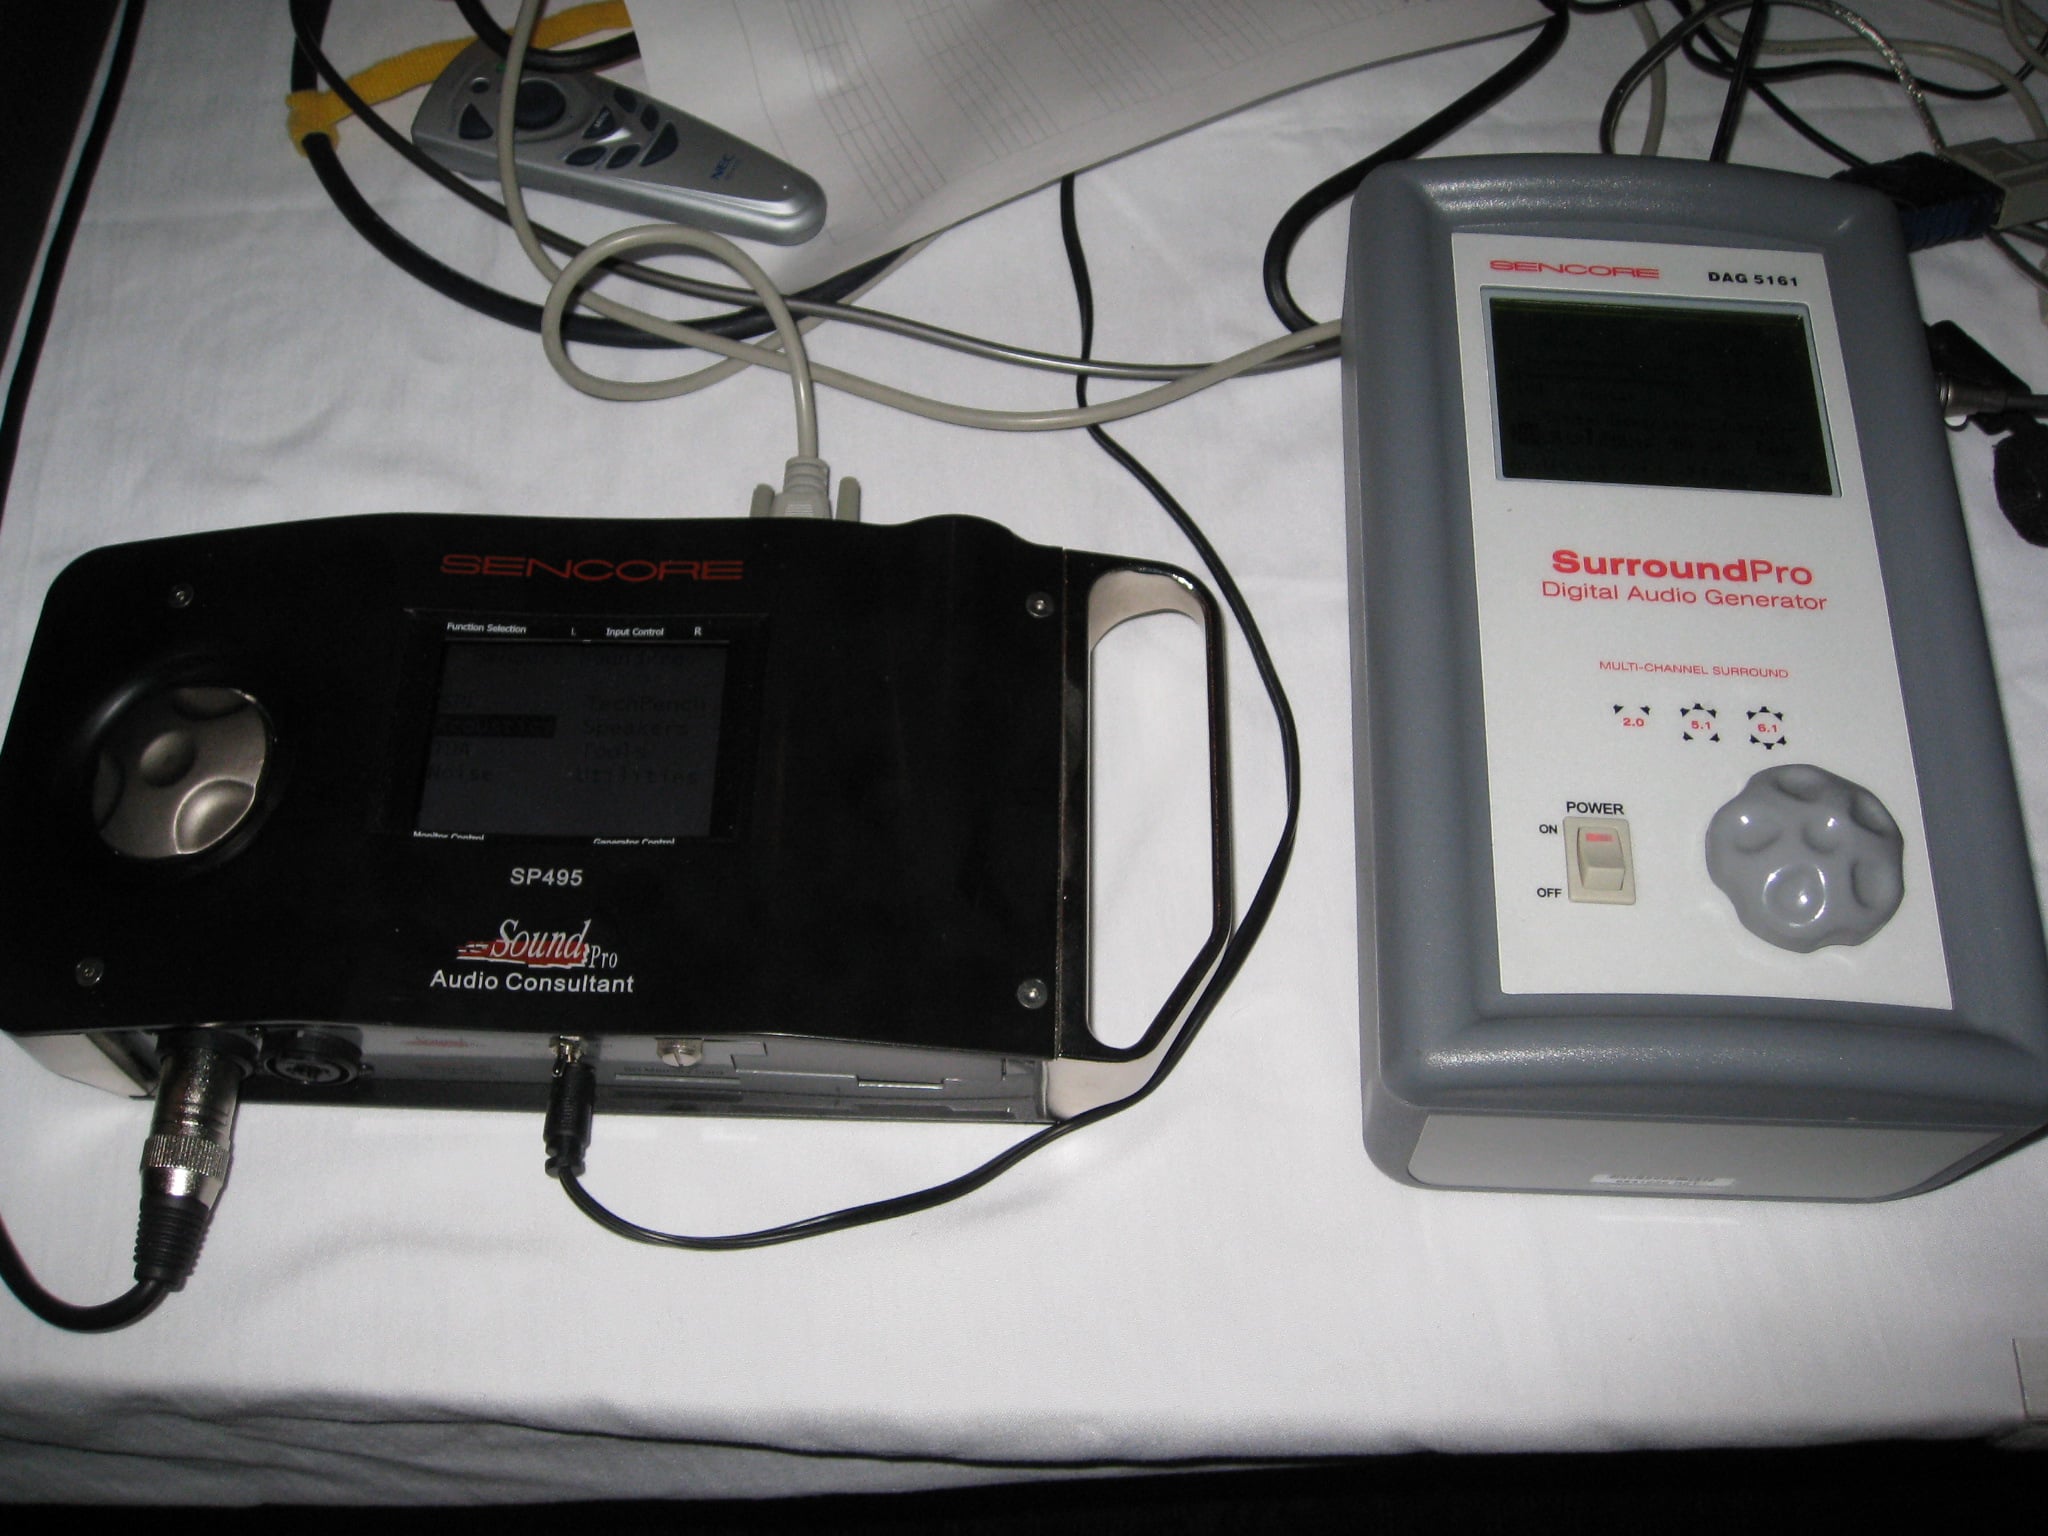 The next exercise was to evaluate the equipment and its setup. This evaluation included taking our first measurements, which was the near field speaker responses. Shown are the Sencore 5161 Digital Audio Generator and the Sencore SP495 Real Time Analyzer. The near field response of all of the speakers is an important aspect of the entire calibration because it gives a baseline signature of the speaker’s performance. If the speakers have some anomaly in their response, it needs to be known so that we wouldn’t try to correct the room for the speaker’s anomaly. Part of this evaluation was also to make sure that all equipment is properly connected. It’s very easy to connect the polarity of one of the speakers backwards and have it out of phase from the others. We did some critical listening at that point and went over the 5 HAA sound quality points:
- clarity
- focus
- envelopment
- response
- dynamics
As opposed to just learning about these points in Level I training, we had the music playing and discussed each quality in depth.
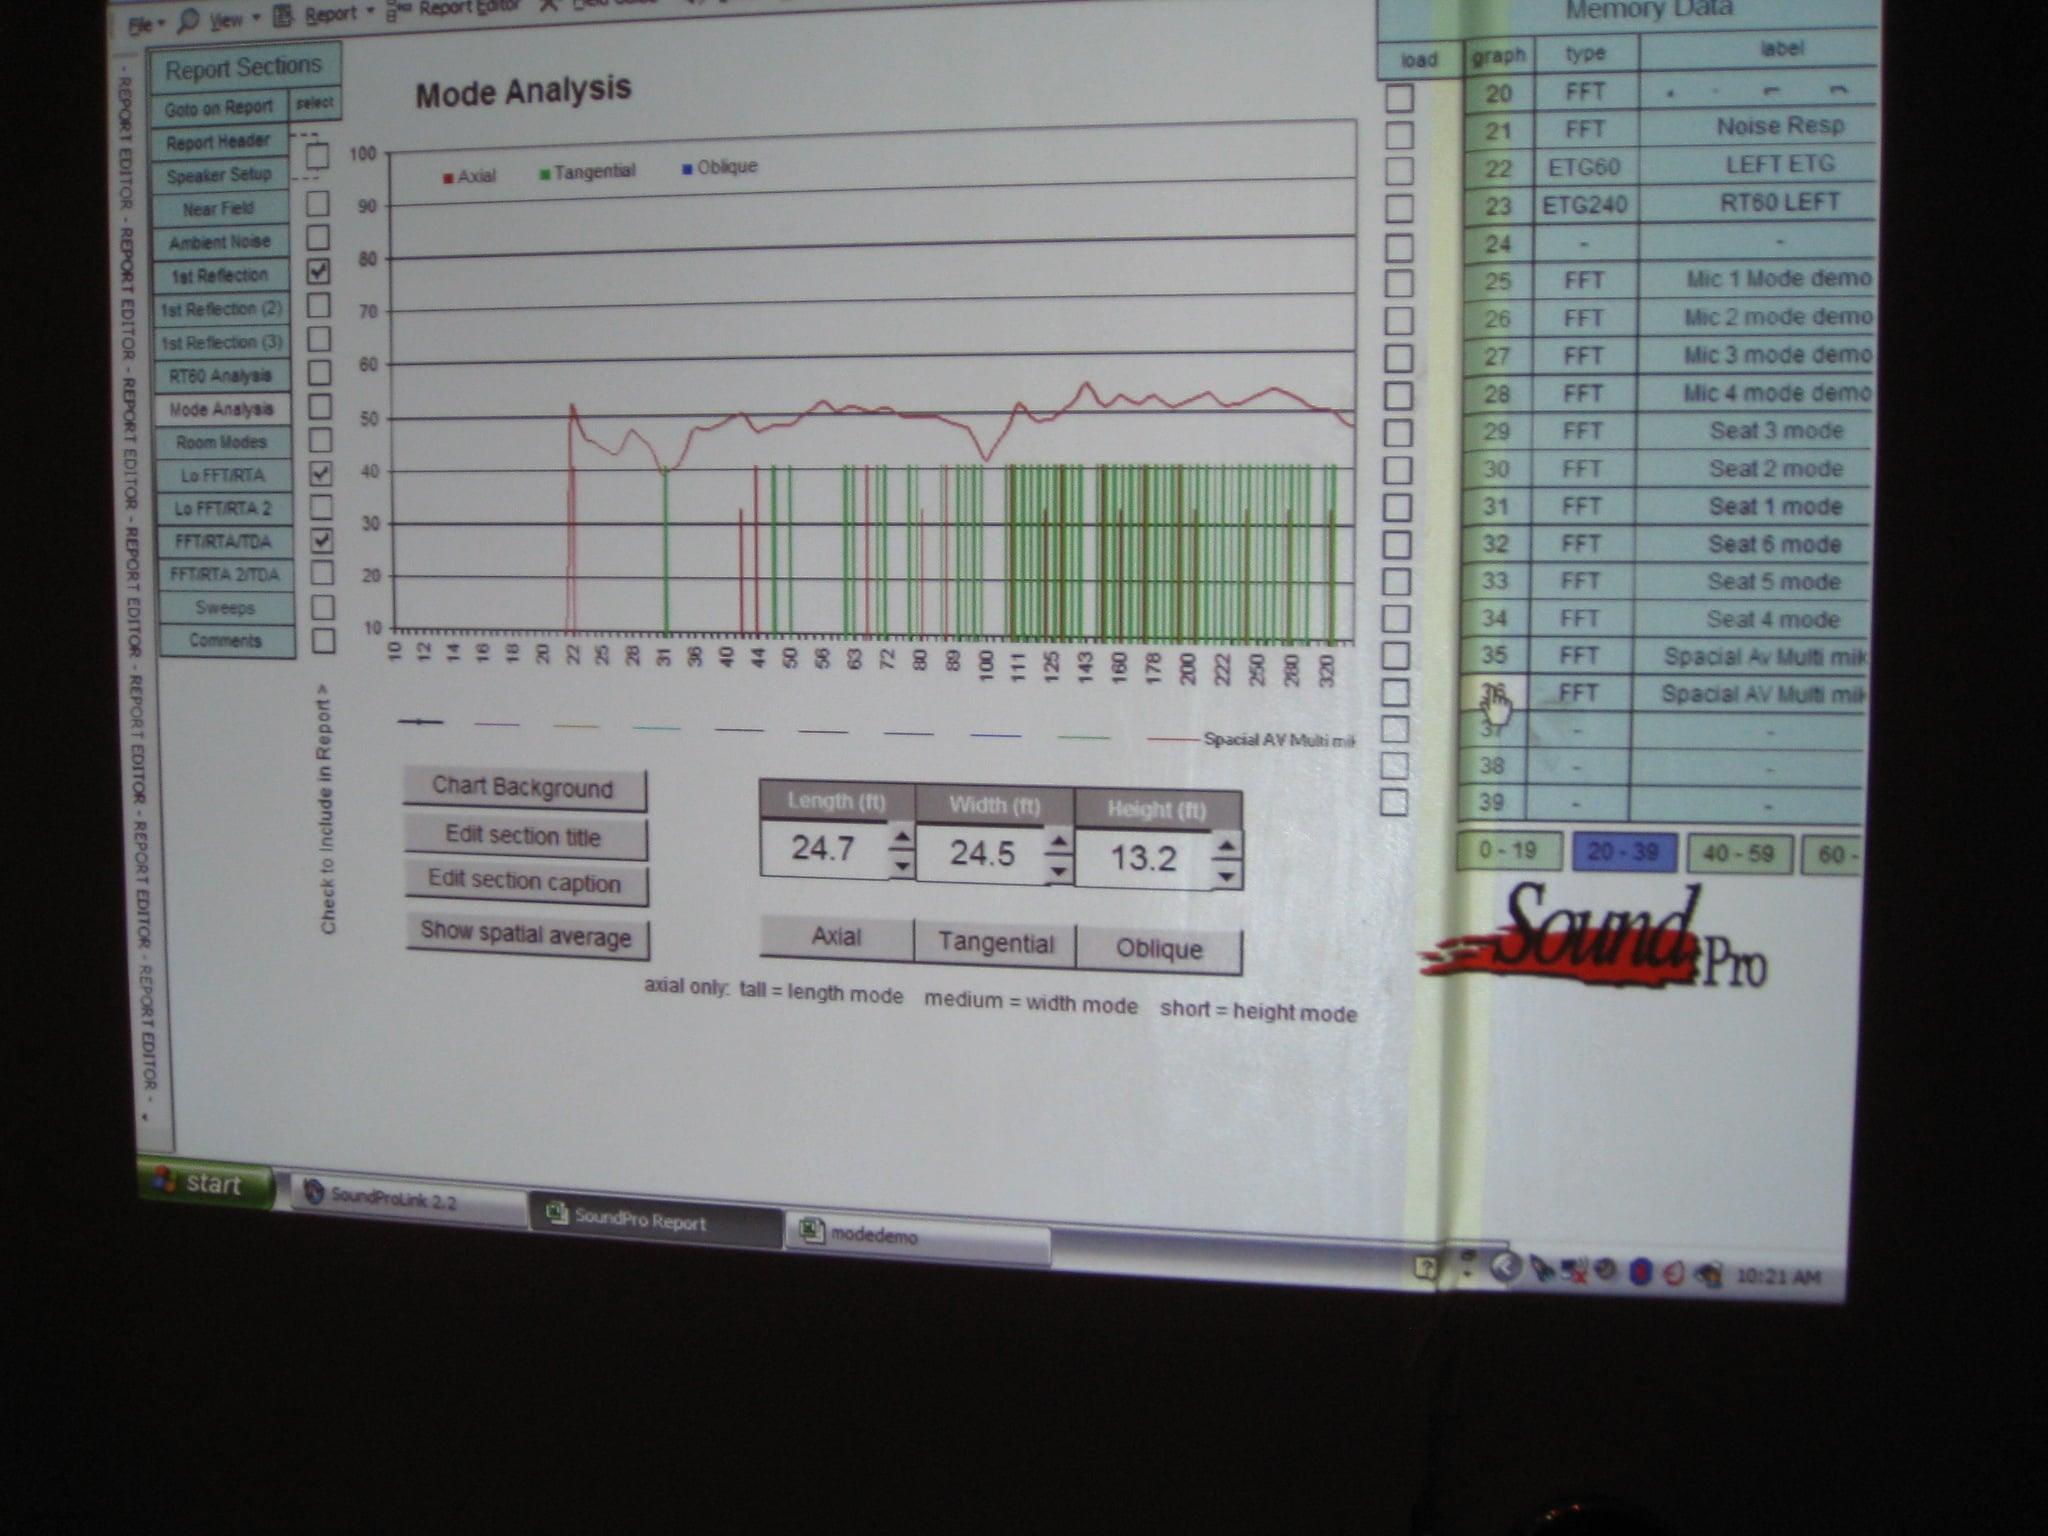 By this time, we really started getting the hang of our purpose and the role changing. We then started getting into some of the more serious measurements of the system and its integration into the room. First, we measured resonance modes of the room. We started by calculating them from the room dimensions but that technique is not an end all by any means and it doesn’t work in non rectangular room shapes. Although the room was generally rectangular, one wall had some cabinets. The calculations got us close but again we had to measure the room. This measurement was done by playing the low frequencies with the sub placed in one corner and the microphone in another corner of the room where the modal peaks are the greatest. From the measurement, we could see the peaks of the room and then we played a few of the modal frequencies. As we played each of them, we all walked around the room and it was enlightening to hear how different areas of the room were loud and quiet at that frequency. Having the sub woofer in a corner excites all of the resonant frequencies to their fullest (that’s a hint not to place your sub in a corner).
Remember we still were not making any adjustments we were just gathering data of the current set up. We measured the frequency response of the system at the seating area several times moving the microphone to different seating positions and noting the difference. Then we did a spatially averaged measurement. This was an important and powerful aspect of analysis. Four mikes are placed around the seating area at different heights and different locations, a multiplexer is used to sample each mike, and then the measurements are averaged by the Sencore equipment. This measurement was so important because it allows adjustments to be made for the entire seating area in a home theater and not just the sweet spot.
Home Acoustics Alliance Level II Workshop (cont.)
After the response measurements were complete, we did Energy Time Measurements, which is nothing more than a fancy way to look at reverberation. Of course, HAA is trying to turn us into audio gurus so it is a little more involved than just clapping your hands and listening to the echo. These measurements involved direct reflections and then all reflections. We learned and heard how direct reflections can impair focus and clarity, which we eventually treated with absorption while being careful not to use too much absorption because that can diminish envelopment. Without getting too technical, the goal was to help focus and clarity and keep the reverberation time (RT-60) between 250ms and 400ms, which is the time it takes the signal to decay 60dB.
The final analysis exercise was resonance sweeps. We manually slowly swept through the low frequencies with a fairly high volume to shake out the room. This process will find anything loose and it did. We found that the grill on the ceiling lights was vibrating like crazy. I never thought of doing this test until then and some of the calibration disks you can buy have the sweep but you want to do it manually so you can stop when you hear something vibrating in order to indentify the culprit. Anyone can do this simple test with a laptop. Many free programs exist that have frequency generators. All you need to buy is a 3.5mm speaker out to RCA cable.
 At this point, we have analyzed
the room and should now know what to do to calibrate it; but did we? Of course
we did. We all had Level I training and it was now time to apply those skills.
The first thing we did was a basic calibration, which is matching the speaker
levels and setting the delays (distances); The standardized test tone is band
limited (500 to 2K) pink noise to make these level adjustments. Next, we did the subwoofer calibration for a
single sub. It was important to learn where a single subwoofer should be placed
in the room for its best integration with the room modes. We moved it around
and performed measurements each time at the listening area. Once we found the
best position of the sub woofer, it was easy to see that no one would want a subwoofer
out into the room. So then, we tried HAA’s virtual sub woofer placement method,
which simulates a single sub in the correct position but has the two against
the walls. Another method was the Welti method of sub placement, which was our
chosen method. It involved placing the 2 subs at midpoint on opposite walls.
At this point, we have analyzed
the room and should now know what to do to calibrate it; but did we? Of course
we did. We all had Level I training and it was now time to apply those skills.
The first thing we did was a basic calibration, which is matching the speaker
levels and setting the delays (distances); The standardized test tone is band
limited (500 to 2K) pink noise to make these level adjustments. Next, we did the subwoofer calibration for a
single sub. It was important to learn where a single subwoofer should be placed
in the room for its best integration with the room modes. We moved it around
and performed measurements each time at the listening area. Once we found the
best position of the sub woofer, it was easy to see that no one would want a subwoofer
out into the room. So then, we tried HAA’s virtual sub woofer placement method,
which simulates a single sub in the correct position but has the two against
the walls. Another method was the Welti method of sub placement, which was our
chosen method. It involved placing the 2 subs at midpoint on opposite walls.
 There is a trick to the Welti
method. We couldn’t just move the subs to the midpoint position and be
finished. With this specific placement, the odd order resonance modes are
excited leaving peaks at those frequencies. This placement led to the next
exercise of equalization. We applied very specific equalization using a Digital
Signal Processor (DSP) to remove the peaks.
The DSP we used was a parametric equalizer from QSC
(QSC DSP-4 pictured). Unlike a
graphic equalizer, it allows the user to pick the exact frequency of a peak the
width of it and the amount of gain to remove. There are quite a few advantages
to using the QSC DSP. For one, it is very small (4 by 4 by 3
inches) and can be placed almost anywhere without taking up shelf space. The
other huge advantage is that it is programmed through a computer and the settings
are downloaded into the unit preventing a customer from changing the settings.
It also has many other features like gain control, limiter, high and low pass
filtering to name a few. The result
of our DSP equalizing was amazing; very smooth and well-integrated bass. The
focus and clarity was now better because the bass was smoothed and not
overwhelming. Even the rattles in the ceiling were gone but we still had a long
way to go. Hi-lili Hi-lo still didn’t sound great; I was beginning to think it
was a bad recording but it really was just a tough recording to reproduce.
There is a trick to the Welti
method. We couldn’t just move the subs to the midpoint position and be
finished. With this specific placement, the odd order resonance modes are
excited leaving peaks at those frequencies. This placement led to the next
exercise of equalization. We applied very specific equalization using a Digital
Signal Processor (DSP) to remove the peaks.
The DSP we used was a parametric equalizer from QSC
(QSC DSP-4 pictured). Unlike a
graphic equalizer, it allows the user to pick the exact frequency of a peak the
width of it and the amount of gain to remove. There are quite a few advantages
to using the QSC DSP. For one, it is very small (4 by 4 by 3
inches) and can be placed almost anywhere without taking up shelf space. The
other huge advantage is that it is programmed through a computer and the settings
are downloaded into the unit preventing a customer from changing the settings.
It also has many other features like gain control, limiter, high and low pass
filtering to name a few. The result
of our DSP equalizing was amazing; very smooth and well-integrated bass. The
focus and clarity was now better because the bass was smoothed and not
overwhelming. Even the rattles in the ceiling were gone but we still had a long
way to go. Hi-lili Hi-lo still didn’t sound great; I was beginning to think it
was a bad recording but it really was just a tough recording to reproduce.
 Next, it was time to
calibrate the left, center and right (LCR) speakers. Remember that calibrate
doesn’t necessarily mean to do something electronically. This exercise was
about moving the speakers to get a better frequency response. Like all of the
other exercises, it was move, measure and listen. We ended up skewing the room
slightly to one side (maybe a foot or so) to create asymmetry-allowing
reflections from the left wall not to be equal to reflections from the right
wall. This asymmetry helps smooth the overall response by spreading the reflections
out. We really didn’t do anything with the center channel
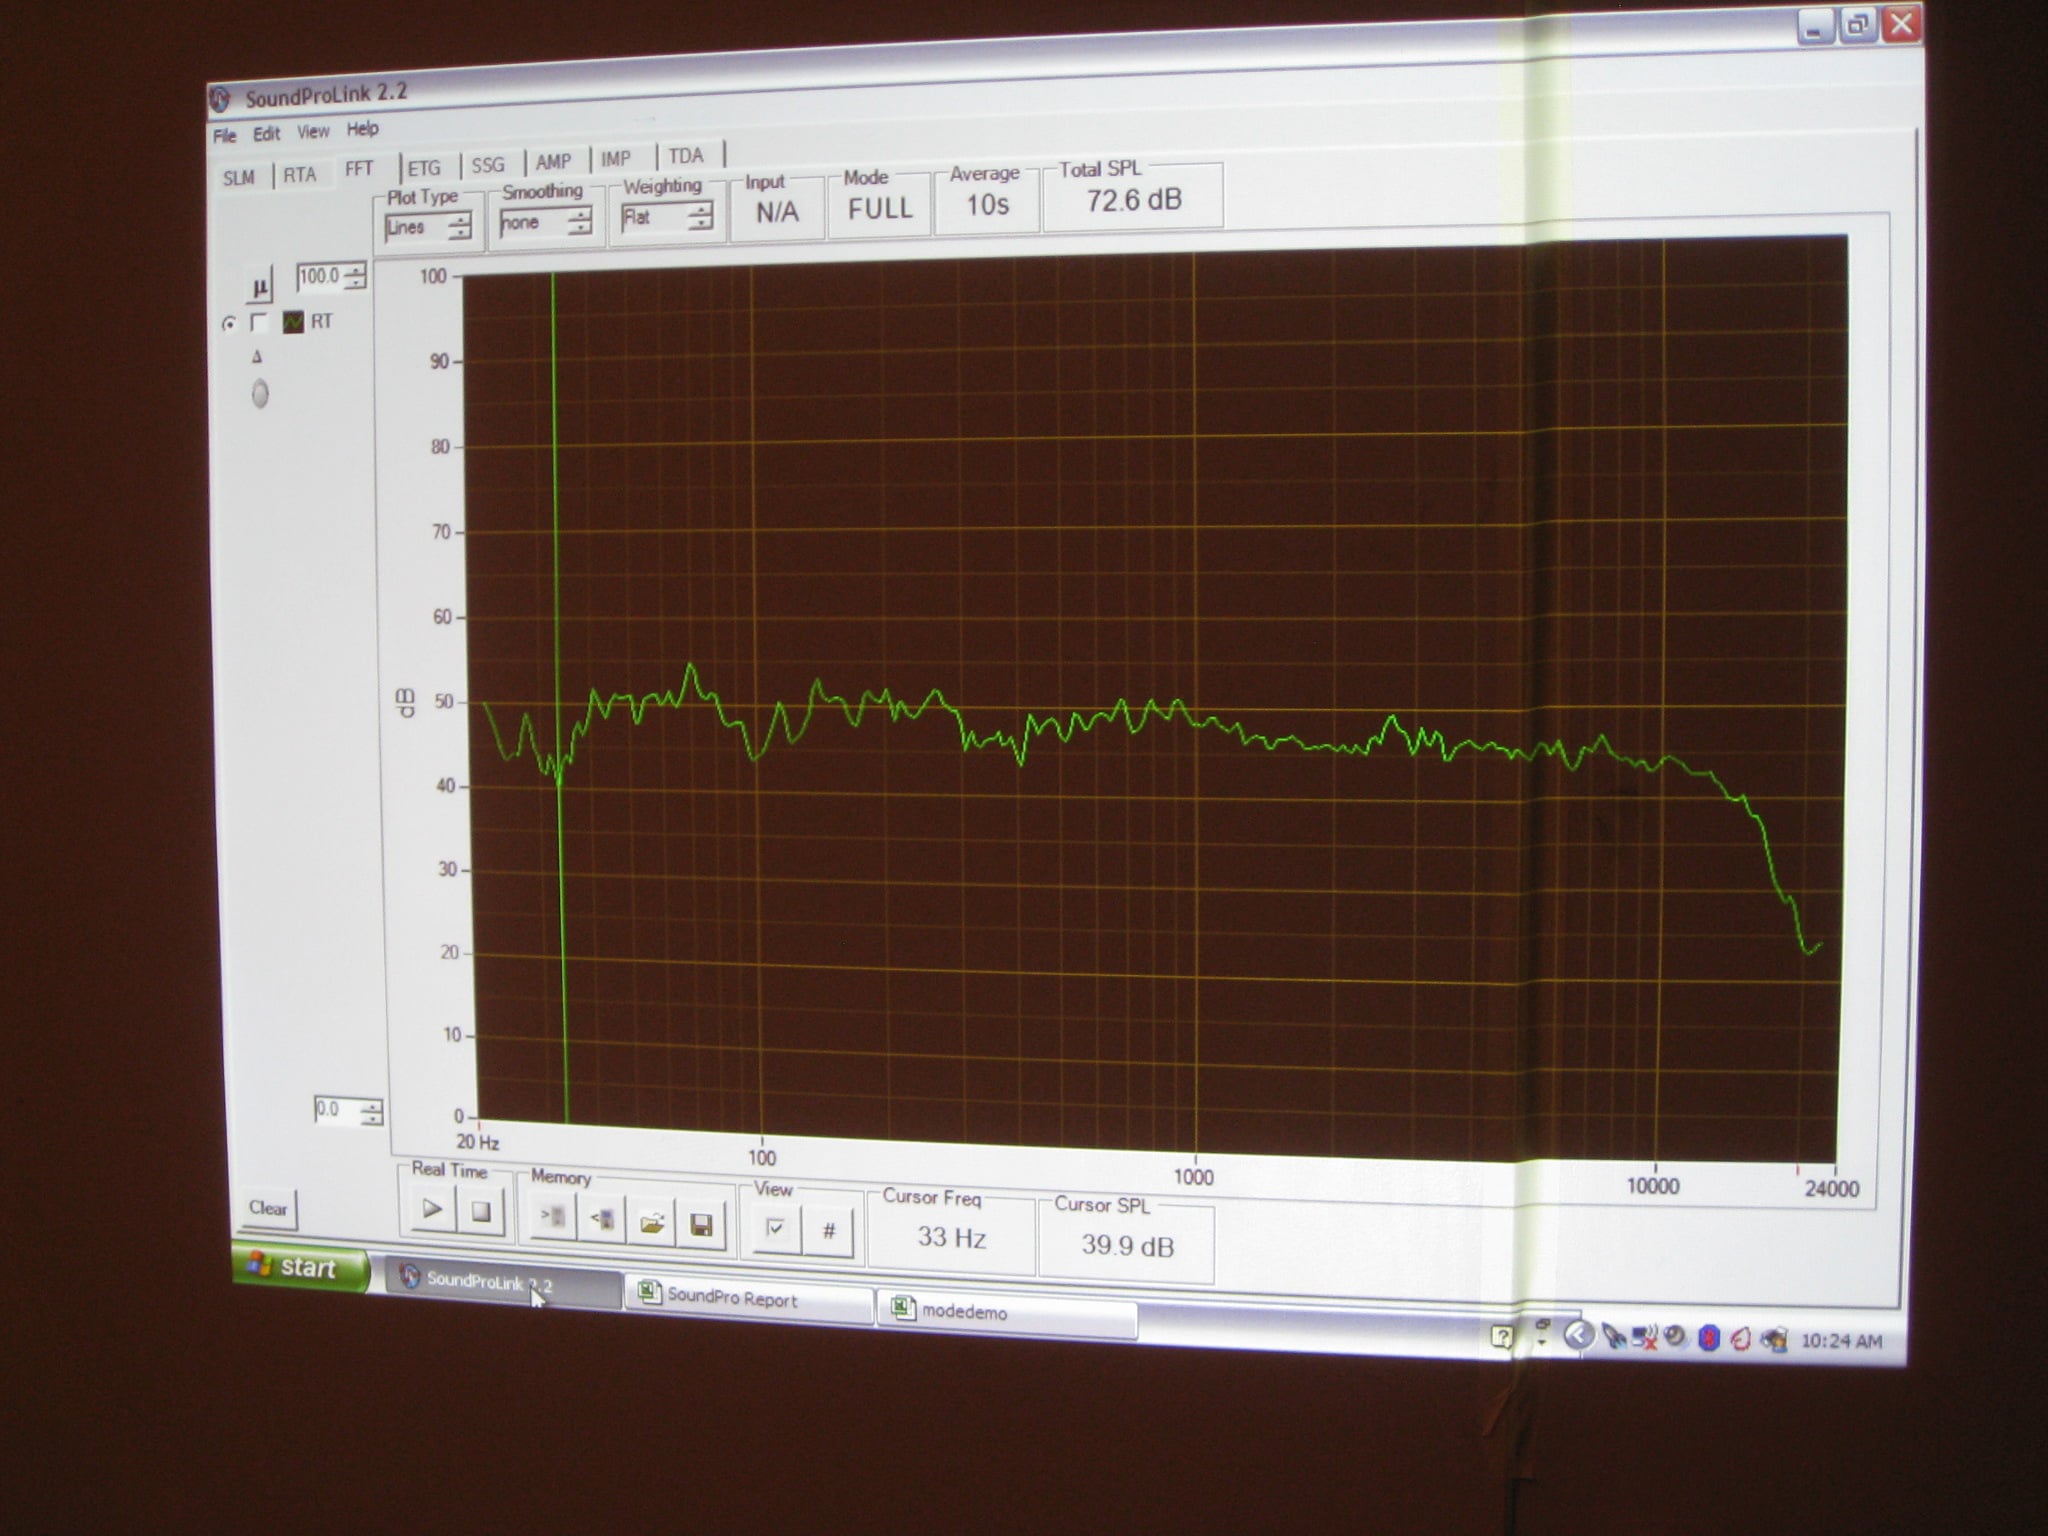
except keep it centered between the left and right speaker. You can see how smooth
our frequency response was at this point in the picture shown here. We also
just concentrated on two channel
listening which is very important because if you can get stereo music to sound
really good the rest follows much more easily. We even simulated raised rear
seating by borrowing some barstools for the rear seats.
Next, it was time to
calibrate the left, center and right (LCR) speakers. Remember that calibrate
doesn’t necessarily mean to do something electronically. This exercise was
about moving the speakers to get a better frequency response. Like all of the
other exercises, it was move, measure and listen. We ended up skewing the room
slightly to one side (maybe a foot or so) to create asymmetry-allowing
reflections from the left wall not to be equal to reflections from the right
wall. This asymmetry helps smooth the overall response by spreading the reflections
out. We really didn’t do anything with the center channel
except keep it centered between the left and right speaker. You can see how smooth
our frequency response was at this point in the picture shown here. We also
just concentrated on two channel
listening which is very important because if you can get stereo music to sound
really good the rest follows much more easily. We even simulated raised rear
seating by borrowing some barstools for the rear seats.
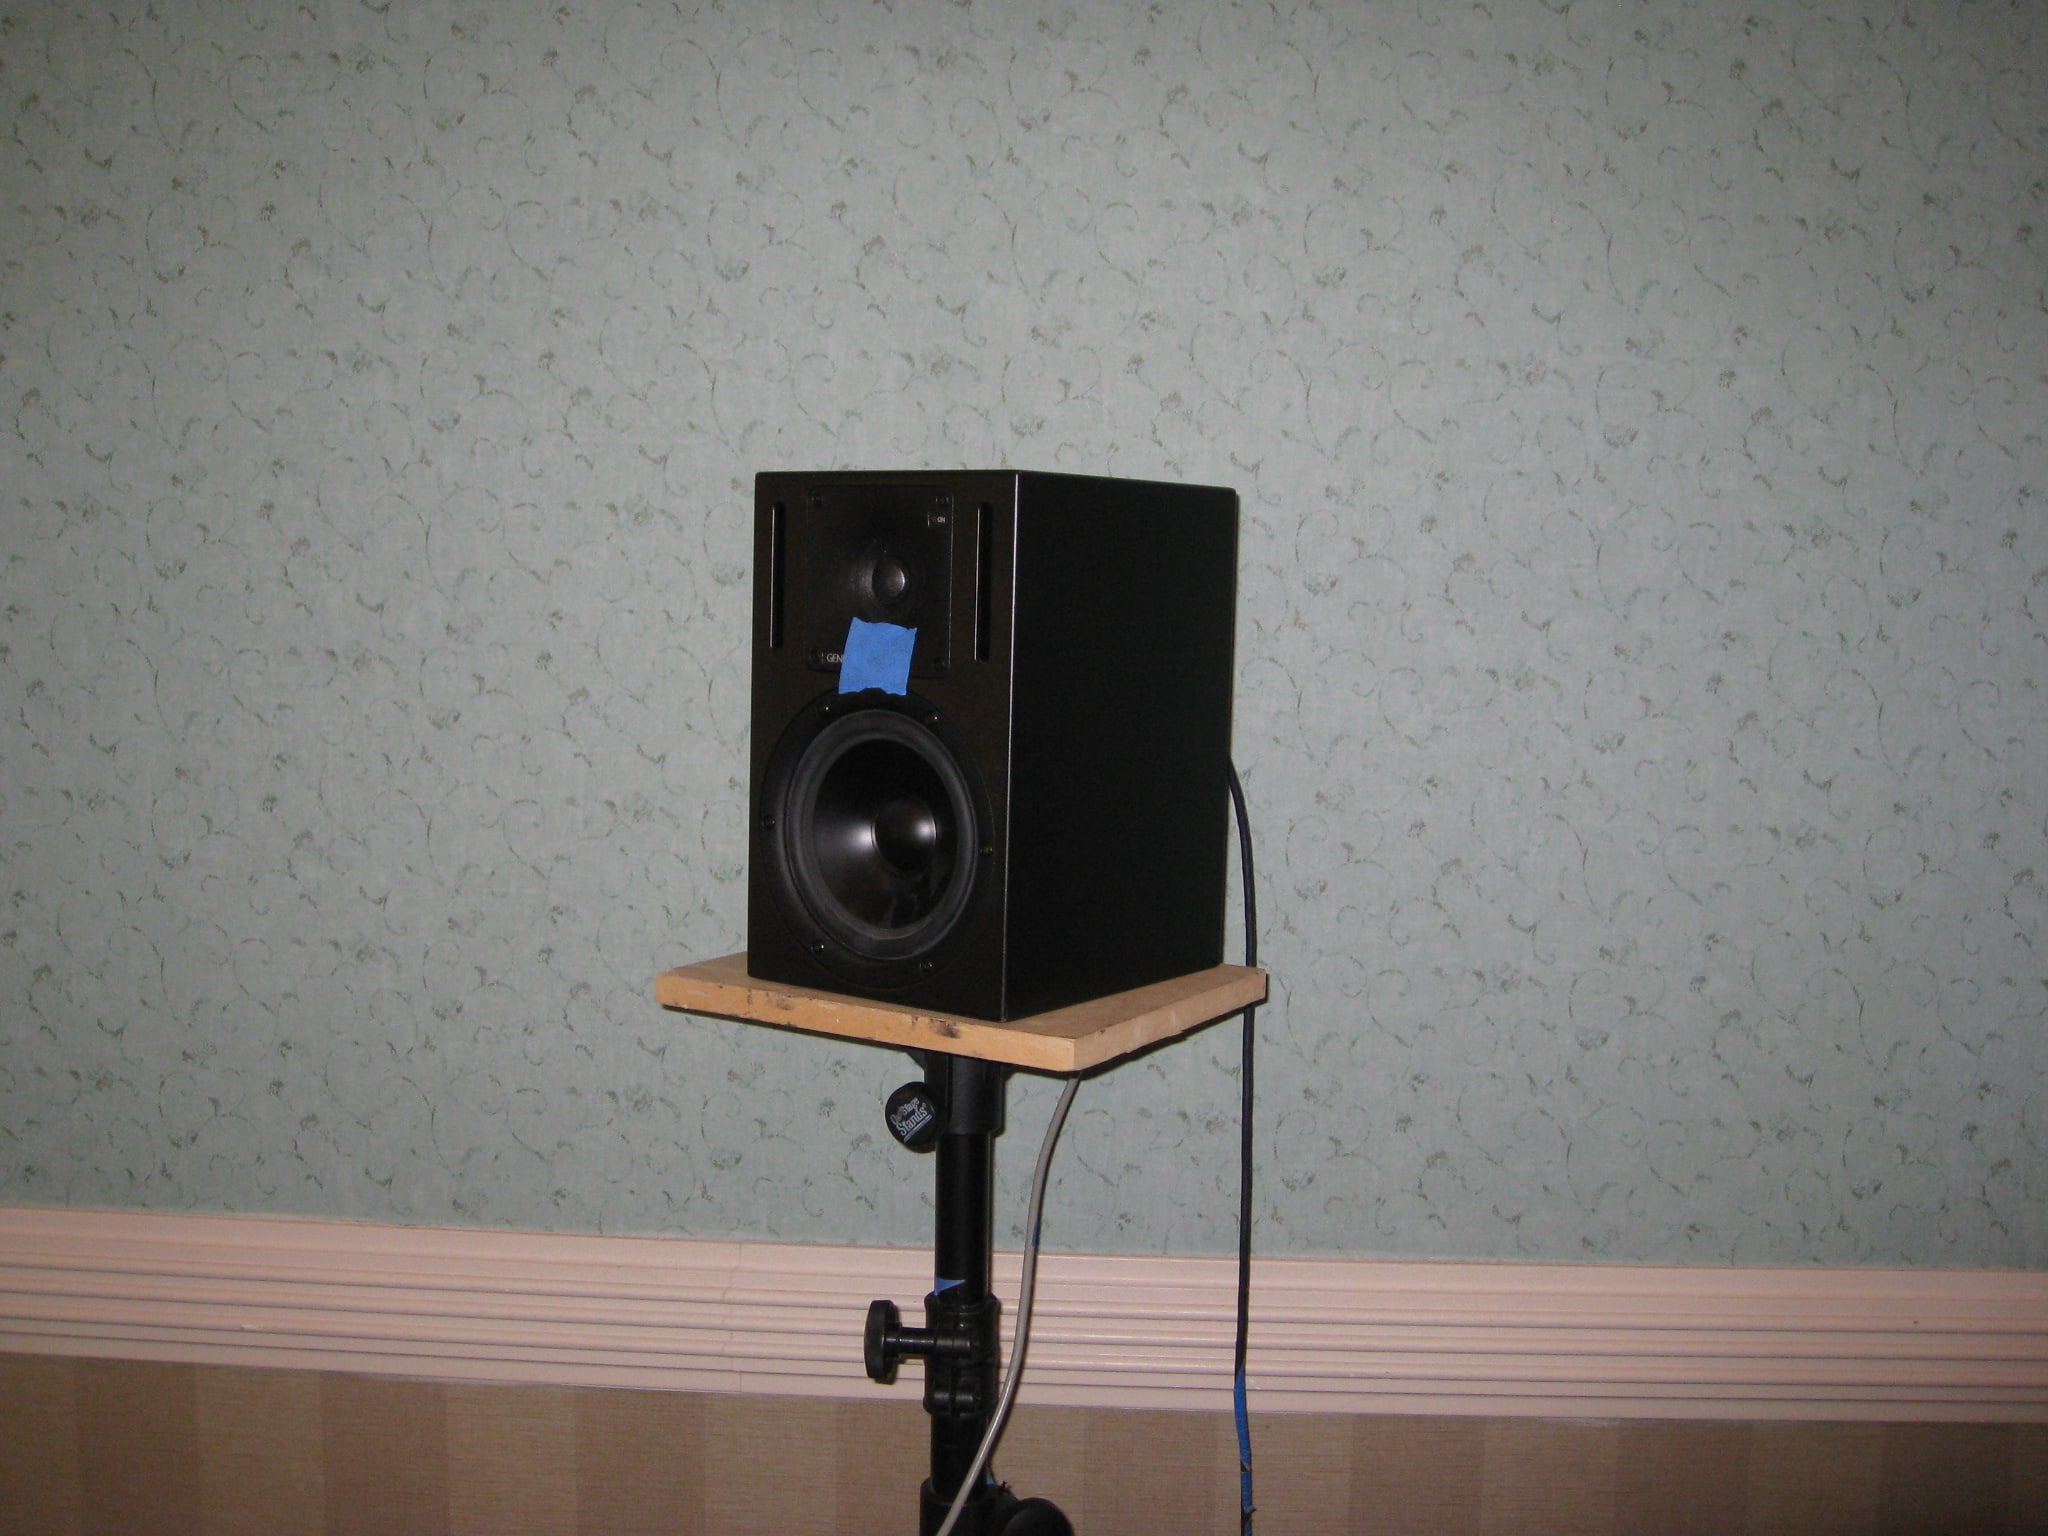
Once we were happy with our
speaker placement for the left and right we concentrated on the center speaker.
There are a couple of rules of thought for center speaker placement. One is to
have the LCR’s in an arc so that the physical distance is the same at least to
the sweet spot. The other is to have the LCR’s in the same plane. If the
theater was being designed from the ground up, the HAA philosophy is to get
this ultimate speaker placement and then build an acoustically transparent wall
in front of them including an acoustically transparent screen. Otherwise, the
speakers may be well out into the room. The idea of having the center speaker in
the same plane as the left and right is this: the left and right speaker alone
will create a phantom center speaker between them. If the center speaker is
behind this plane (the arc method) then it will be like having two center
speakers with one playing behind the other and then creating distorted acoustic
results. However, if it is in the same plane the acoustical wave of both the
physical center and the phantom center will be coincident. I am not sure I completely agree with this
philosophy. While it holds true when listening to Dolby Prologic II music,
which I’ve tried at home, most of the content in movies has the center channel information (dialog or moving effects) very
distinct from the left and right channels
(music). Even 5.1 channel SACD’s
will put the singer in the center and the music in the left-right channels. Regardless, putting the center speaker in
the same plane does not hurt anything.
Editorial Note on Center Channel Placement
Arranging the center in an arc places it in a different acoustical position than the phantom center. It changes the response obtained during the two-channel exercises. Placing it in the same plane does not (generally) change the response and this simplifies the calibration process. The only advantage of the arc method is time alignment which is easily fixed with time delay.
 By this time, we were getting
things fairly close to having a good sounding room but there was still more to
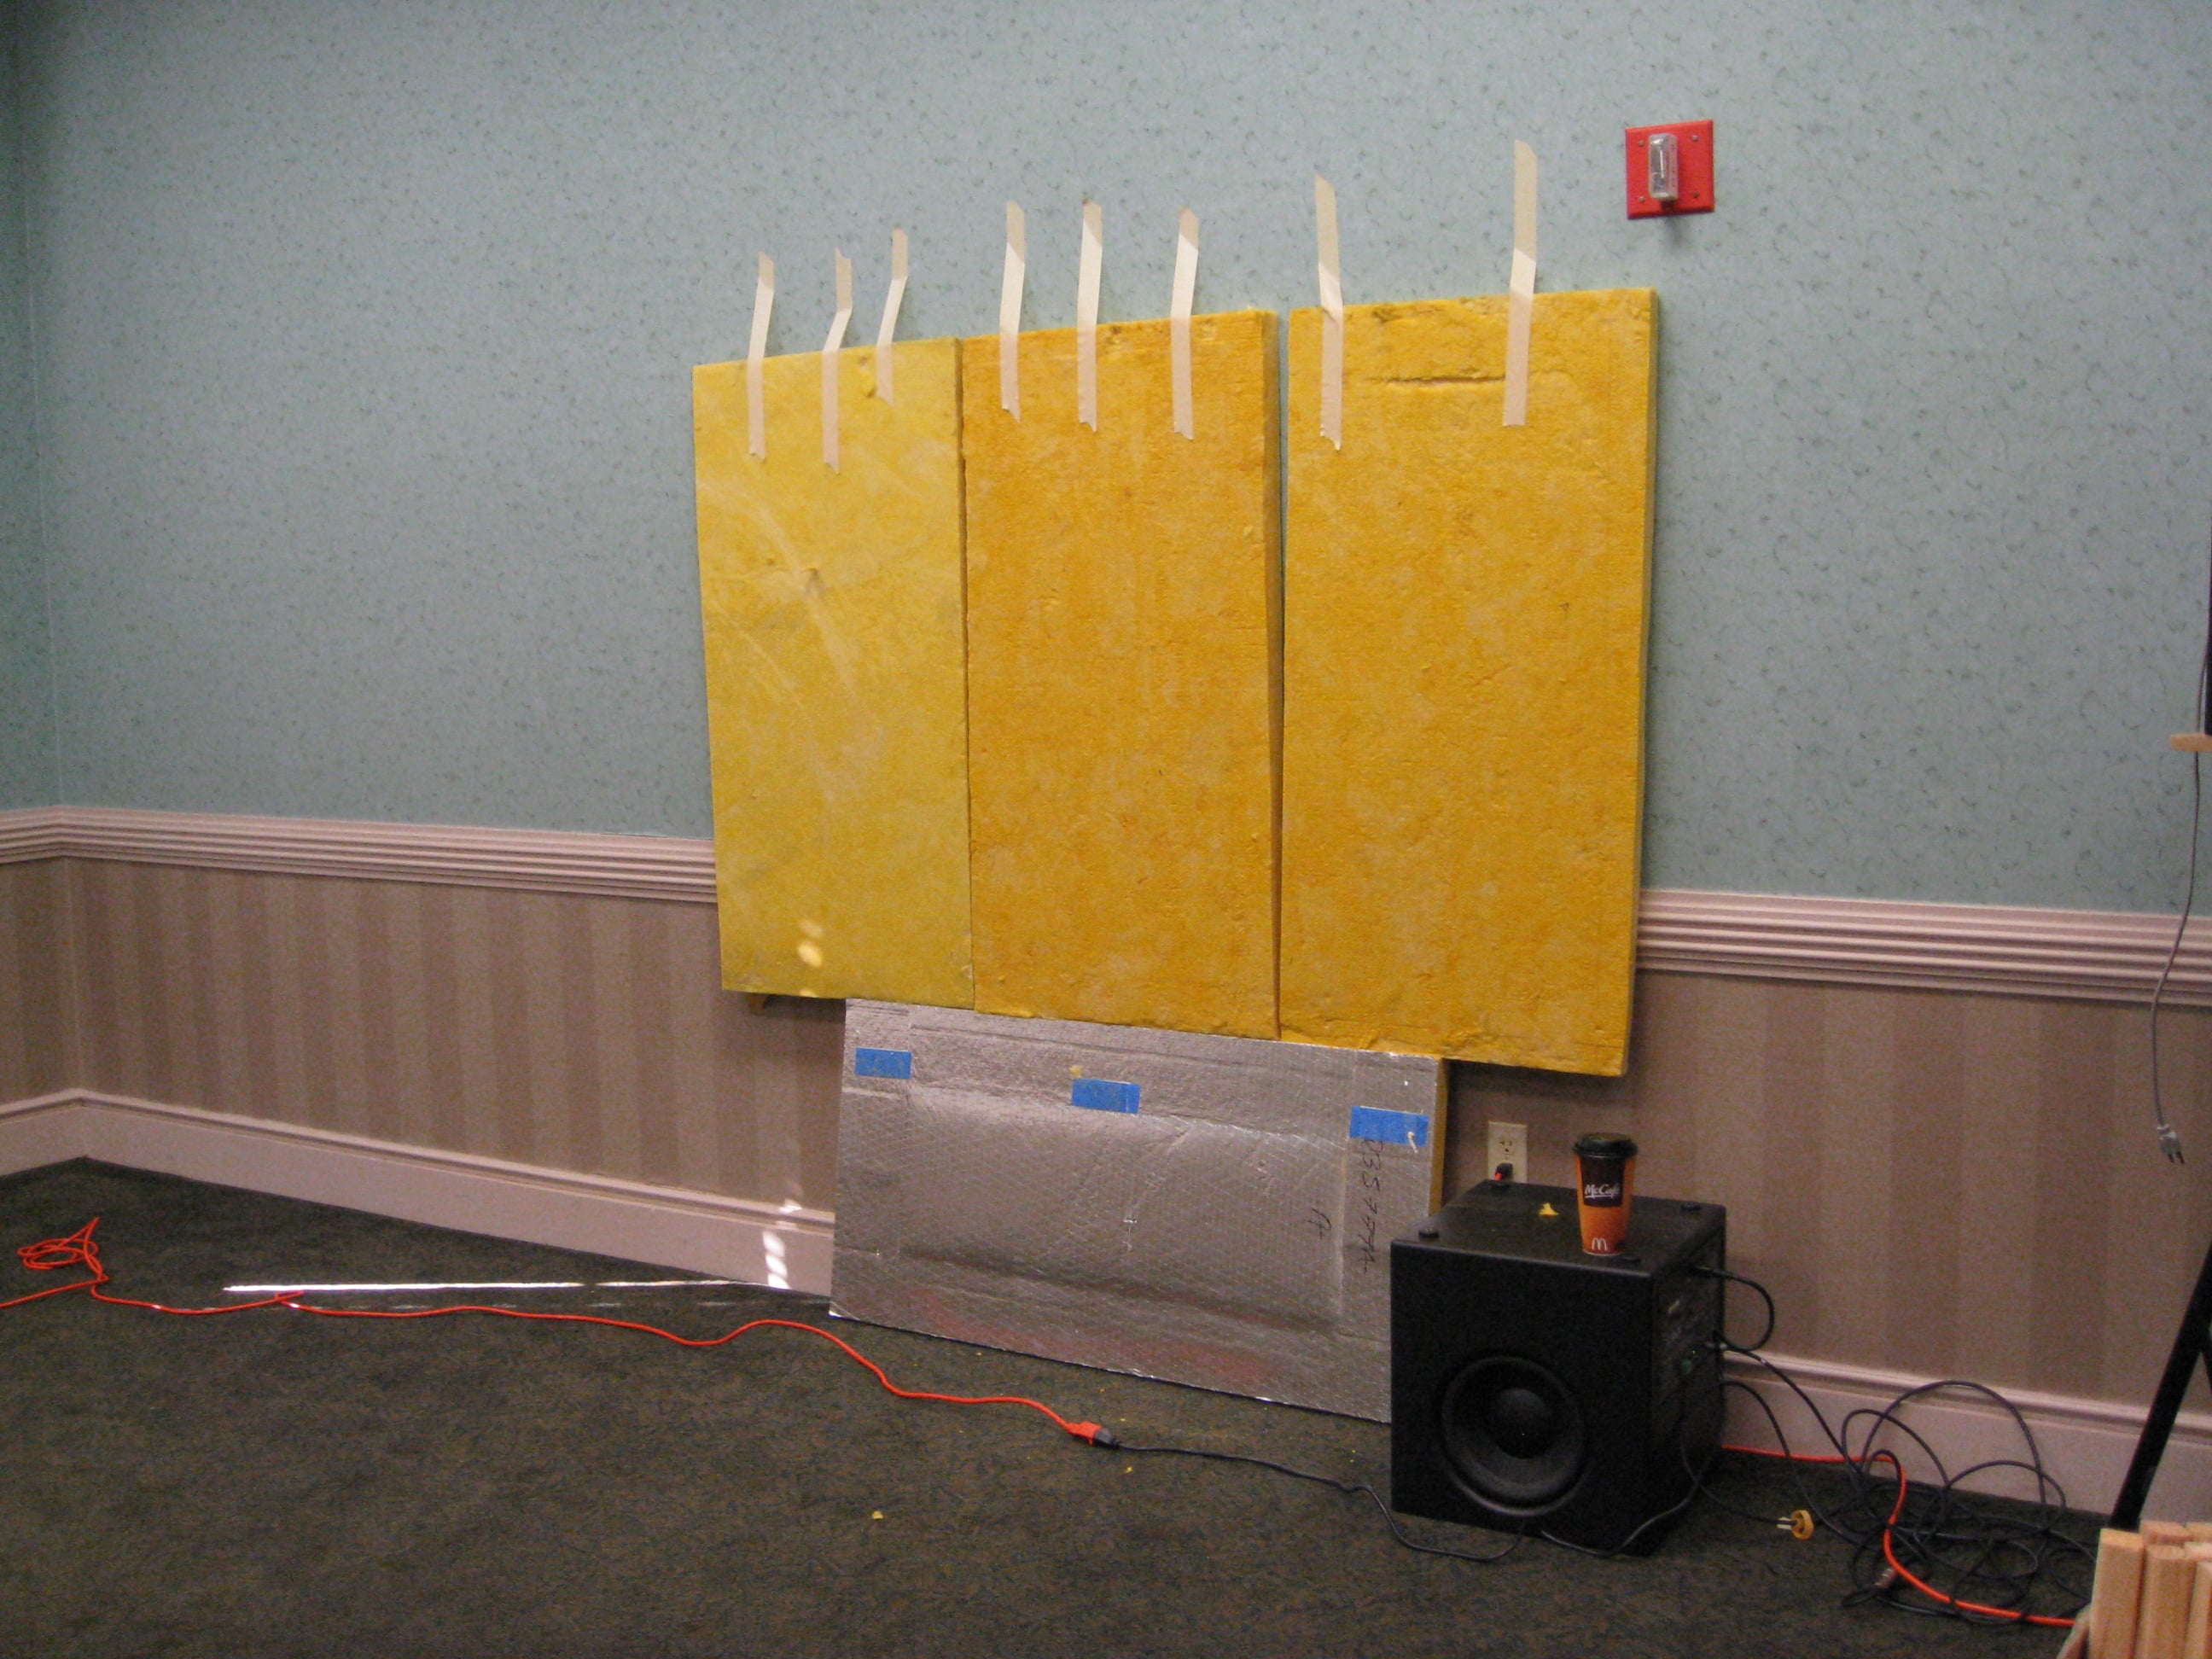
do. We had to add acoustical treatment to the walls. We started by finding the
mirror points to the sweet spot. The Customer sat in the sweet spot while the Grunt
walked along the wall with a mirror until the speakers could be seen which was
done for the left, center and right speaker for both walls. Once those mirror
points were marked, which were the direct reflections, we then had to choose
what kind of treatment to put there. Absorption will help bring down the
overall reverberation of the room and diffusion will help the envelopment.
Fortunately there were hybrid panels that did both[GAL1] . Even though the group quickly chose the hybrid,
I personally wanted to hear all three while sitting in the sweet spot. It was
an opportunity to hear how the different acoustical treatments sounded. We also
ended putting absorption behind each front speaker to tame some of the speaker
boundary reflections. The picture here looks pretty cheesy but this was
obviously not a permanent setup.
By this time, we were getting
things fairly close to having a good sounding room but there was still more to
do. We had to add acoustical treatment to the walls. We started by finding the
mirror points to the sweet spot. The Customer sat in the sweet spot while the Grunt
walked along the wall with a mirror until the speakers could be seen which was
done for the left, center and right speaker for both walls. Once those mirror
points were marked, which were the direct reflections, we then had to choose
what kind of treatment to put there. Absorption will help bring down the
overall reverberation of the room and diffusion will help the envelopment.
Fortunately there were hybrid panels that did both[GAL1] . Even though the group quickly chose the hybrid,
I personally wanted to hear all three while sitting in the sweet spot. It was
an opportunity to hear how the different acoustical treatments sounded. We also
ended putting absorption behind each front speaker to tame some of the speaker
boundary reflections. The picture here looks pretty cheesy but this was
obviously not a permanent setup.
 So all the treatments
were up and now there was only one thing left; integrating the surround channels. The idea if you didn’t already know was to
create a diffused surround effect as opposed to directly pointing the speakers
at the seating area. We ended up pointing the speakers toward the back wall and
letting the cabinets and items help diffuse the sound though it would have been
better to place diffuser panels on the back wall to more properly break up the
sound. We then did another basic calibration for level matching all of the
speakers, measured and finally listened to our tracks in both stereo and Dolby
Prologic II. Now hearing The Ricky
Lee Jones track “Hi-lili Hi-lo” was amazing. We went from a bad sounding system
without changing any equipment to an awesome sounding system just because we
learned what to do with the room. The Genelec speakers were not just “fine,”
they were great. All of the tracks were
sounding stunningly good compared to two days before. It was very hard to
believe how important these seemingly little changes could do so much. Now that doesn’t mean that a GPX home theater in a box can sound awesome.
Equipment with high distortion cannot be corrected with any type of room
calibration.
So all the treatments
were up and now there was only one thing left; integrating the surround channels. The idea if you didn’t already know was to
create a diffused surround effect as opposed to directly pointing the speakers
at the seating area. We ended up pointing the speakers toward the back wall and
letting the cabinets and items help diffuse the sound though it would have been
better to place diffuser panels on the back wall to more properly break up the
sound. We then did another basic calibration for level matching all of the
speakers, measured and finally listened to our tracks in both stereo and Dolby
Prologic II. Now hearing The Ricky
Lee Jones track “Hi-lili Hi-lo” was amazing. We went from a bad sounding system
without changing any equipment to an awesome sounding system just because we
learned what to do with the room. The Genelec speakers were not just “fine,”
they were great. All of the tracks were
sounding stunningly good compared to two days before. It was very hard to
believe how important these seemingly little changes could do so much. Now that doesn’t mean that a GPX home theater in a box can sound awesome.
Equipment with high distortion cannot be corrected with any type of room
calibration.
Later that final day we were allowed to listen to our own music and of course, I brought my audition music that I use for all of my articles. Now I could compare what we had done here to what I have at home. Unfortunately or fortunately depending on how you look at it, I left a little depressed because this system that we set up in a hotel conference room blew away my system at home and it’s not about the equipment. The next day I listened to my own system and starting taking notes on all of the changes I needed to make. I already had some ideas before the workshop of some changes I needed but now that I was HAA Level II trained, I knew what needed to be done in more detail.
 The requirement for HAA Level
II certification goes hand in hand with the changes needed for Reference System
4 because it is not a certification test. The requirement for certification was
to create a calibration report of a theater on our own and this was no easy
task. Although I knew all of the concepts now it was very difficult to repeat
the same exercises on my own. Mainly because my measuring equipment set up is
different from what the workshop had. I had to apply the same concepts from the
workshop and figure out how to do the measurements with what I had available. One example is that I didn't have 4
microphones and a multiplexer. Now if I were a Home Theater Specialist and did
this for a living I would definitely be getting the extra equipment. I did
purchase a few things to help; one of which was new measurement software called
ARTA. I recommend to anyone wanting to do their own measurements to take a look
at this software. It is free to try and is fully functional except to save
plots and projects. However, it still is not as robust as the Sencore equipment
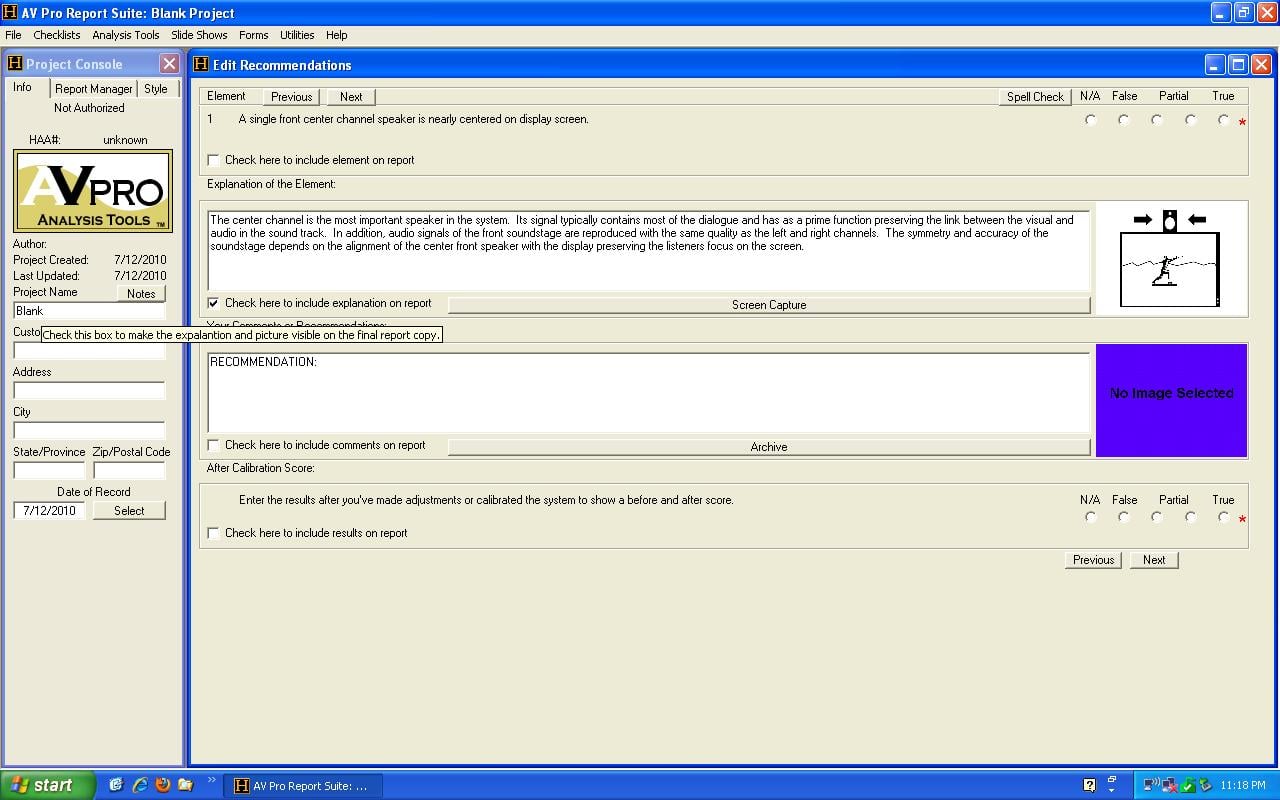
which again if I were an HT Specialist I would acquire it. Well after drudging
through the ADR without the AV Pro software I quickly realized the value in
using the software to do the ADR and ACR.
I created a report with several
recommendations to Reference System 4. As time permits and being a DIYer I will
be making several changes to the system.
The requirement for HAA Level
II certification goes hand in hand with the changes needed for Reference System
4 because it is not a certification test. The requirement for certification was
to create a calibration report of a theater on our own and this was no easy
task. Although I knew all of the concepts now it was very difficult to repeat
the same exercises on my own. Mainly because my measuring equipment set up is
different from what the workshop had. I had to apply the same concepts from the
workshop and figure out how to do the measurements with what I had available. One example is that I didn't have 4
microphones and a multiplexer. Now if I were a Home Theater Specialist and did
this for a living I would definitely be getting the extra equipment. I did
purchase a few things to help; one of which was new measurement software called
ARTA. I recommend to anyone wanting to do their own measurements to take a look
at this software. It is free to try and is fully functional except to save
plots and projects. However, it still is not as robust as the Sencore equipment
which again if I were an HT Specialist I would acquire it. Well after drudging
through the ADR without the AV Pro software I quickly realized the value in
using the software to do the ADR and ACR.
I created a report with several
recommendations to Reference System 4. As time permits and being a DIYer I will
be making several changes to the system.
So what does all this mean for you? If you are a Home Theater Specialist I urge you to take HAA training, your customers will be thrilled. If you are a theater enthusiast and want your system to sound better, don’t throw money at the equipment, put it into an HAA certified professional. The same goes if you are a two-channel stereo audiophile. Audiophiles always seem ready to purchase better and better equipment to perfect their sound system, which I am not trying to discourage, but they tend to disregard the proper room setup and calibration. Whatever place you take in this ever-changing audio world the one thing that stays the same is the physics of acoustics and HAA is the avenue for optimizing small rooms.
Visit the Home Acoustic Alliance (HAA) for Certification Training Information or Hiring an HAA Certified Installer
Ken Stein is a contributing writer and reviewer for Audioholics and he really REALLY likes his speakers (which he should, since he spent countless hours hand-crafting them himself.) Ken is an engineer with FedEx and applies his diligent attention to detail to his speaker and electronics reviews here at Audioholics.
View full profile