
How to Set Up Plex on Roku and Rip Blu-ray Discs
How to Set Up Plex on Roku
Media Servers are all the rage lately. While streaming services like Netflix and Hulu give you easy access to TV and movies at home or on the go, they don’t have Blu-ray quality video and audio. High-end servers like the Kaleidescape provide Blu-ray quality playback, but are costly to purchase and limit your playback to the room that the box is located in.
Fortunately, there are options like Plex. Plex can provide playback for your DVDs and Blu-rays in their original quality. Plex can also stream this content to mobile devices and your web browser. Beyond movies and TV, Plex also provides easy playback of your entire music collection, home movies, and pictures, as well as other internet content. It can become the content hub for your home theater, and it’s practically free.
Today, we’re going to walk you through setting up your own Plex system.
Plex on Roku Instructional Video
There are 3 pieces needed to get Plex running:
1) You need the free Plex Media Server software. This sends your content to the playback devices.
2) Next, you need the Plex Client playback software on a Home Theater PC, or a supported device like the Roku. These “catch” the content that the Plex Media Server sends out. You can also use a mobile device, or web browser, but, today, we’re going to focus on the highest quality playback options. Note that in the case of a Home Theater PC, you can install both the server and client on the same PC for a single device solution.
3) Finally, you need to get your content on to your computer, so we’ll give you some options for moving over content from Blu-rays and DVDs that you own.
Part 1 - The Media Server
Step 1 is to download the Plex Media Server software
There are options for Windows, Apple OS X, a wide variety of Network Attached Storage, and more. We’ll be using the Windows version in this tutorial.
Step 2 is to install the media server software
During installation, Plex will ask you to name your server. Because mine runs on a computer in my spare bedroom, I’ll call it “Bedroom Plex." When the Installation is complete, Plex Media Server will now run in the background, even if you restart your computer, unless you tell it not to. Plex will ask you to create a login ID. This allows you to view your content and make system changes from any internet connected browser.
When you want to make changes to the server settings, simply login at plex.tv, or right click on the taskbar icon, and select “Media Manager." All the configuration is done through a simple web interface.
Step 3 is to add your content to libraries. Libraries are how you add and organize your content in Plex. You simply select what type of library you want (i.e. Movies, TV Shows, Music, Photos, or Home Videos), and then tell Plex which folders it should pull that content from.
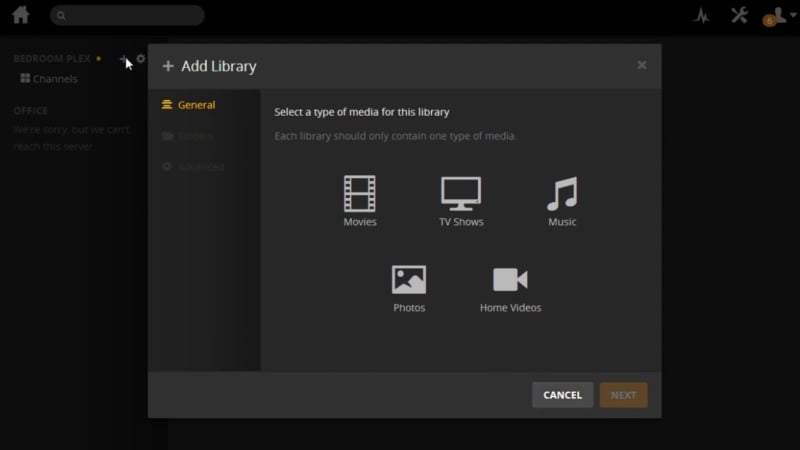
Create libraries to add and organize content
To add a library at anytime, login to Plex and click the “plus symbol” next to your server name. Movies and TV libraries will match show descriptions based on the file name, Music will use metadata tags, and Photos and Home Movies will simply display the name of the file itself.
A single library can point to multiple folders, so if you have one folder for lossy mp3s, and one for lossless audio, you can select both folders for “Music”. For more advanced users, you can create multiple libraries. For instance, you can create a library called “Kids TV” and only allow your children access to that library through their devices. You can save your “Grownup TV” library for your Game of Thrones episodes.
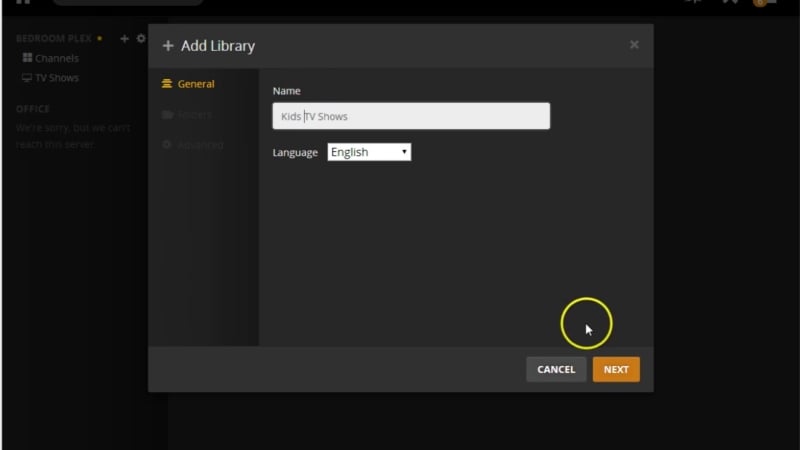
Create a library with only kid friendly content, this means no HBO shows.
That’s it, your content is now being served up. Let’s move onto Part 2, setting up a client.
Part 2 - The Plex Client
Step 1 is to download the Plex Client software
The Plex website shows you all your options for where you can playback your content. If you have an HTPC, the free client gives you the most beautiful Plex presentation and your media can playback in its original bitrate and resolution, including lossless HD audio. We’re going to take another inexpensive and simple approach and load Plex on the $50 Roku Streaming Stick. This setup doesn’t offer original quality, but still looks great, streams Dolby Digital/DTS, is simple to set up, and is available for $50 or less. You can find out more about the Roku streaming stick in our video review.
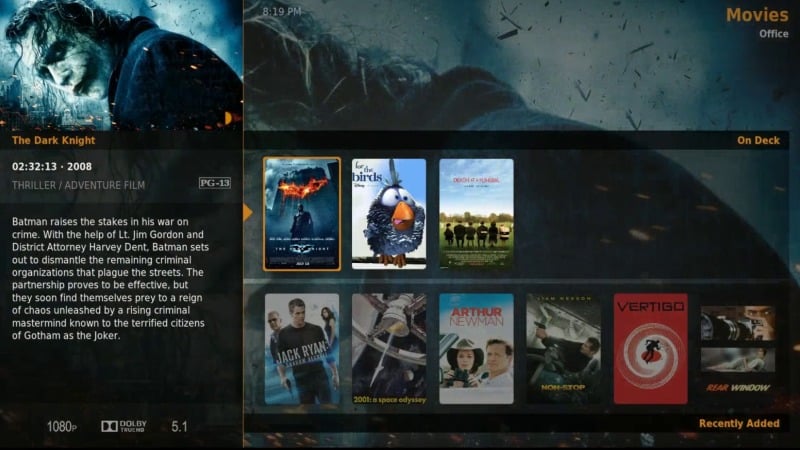
Plex HTPC interface
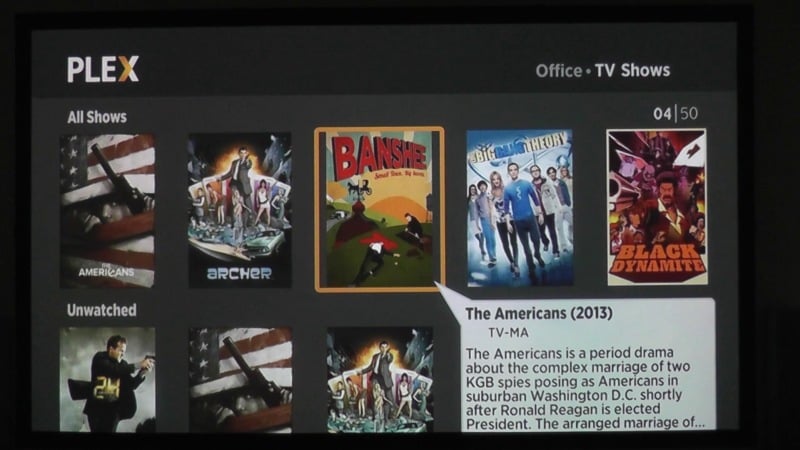
Plex HTPC interface
The Plex channel for Roku can be purchased from the Roku store for $5. Plex also offers a monthly, yearly, or lifetime “Plex Pass” option which, in addition to supporting the Plex developers as they continually add great new features, gives you access to free apps on all platforms, among other things.
After you have installed the Plex Roku Channel, simply select it and sign in using your Plex login. Roku will search for your Plex Media Server and find the media that you are sharing. You can now easily play TV, Movies, Music, and Pictures stored on your server computer or NAS.
At this point, you are finished with configuring Plex.
In Part 3 we show you how to get the DVDs and Blu-rays you own onto your Plex Server.
Part 3 - Ripping Blu-rays and DVDs to your Plex Server
First, a quick note: we know that there is still a lot of legal ambiguity around ripping content that you have legally purchased. At Audioholics, we believe that you should be able to watch purchased media on your system regardless of whether it’s coming from a standalone Blu-ray player or a media center frontend. We DO NOT believe that you should be able to rip and keep a copy of borrowed or rented media. If you’d like to discuss this, please visit the Audioholics forums.
Okay, let’s get our Blu-rays on Plex. For this, you’ll need a Blu-ray drive installed in your computer and some software.
Step One: Download and install MakeMKV. You can try it free for 30 days, and after that you will need a product key for full functionality. Luckily, MakeMKV provides the key for free on their forums, but you will need to re-enter it every thirty days. They do this because the program is still in Beta and they want to ensure that people are running the most current version.
Step Two: Start MakeMKV and insert the Blu-ray disc you want to rip into the drive.
Step Three: Open the disc by clicking on the large Blu-ray drive icon. The software will read and list all the titles found.
Step Four: You’ll need to select the title that you want to rip. For a Movie, it’s safe to pick the title with the largest file size. For TV shows with multiple episodes on each disc, you’ll need to select each title, once again, by the largest size. HD audio tracks will not be selected by default, so click the small arrow next to each title to select specific audio and subtitle tracks.
Step Five: Select the output folder where you want the title saved. This should be the same folder that you pointed your Plex library to. Click on the icon with the green arrow pointing at the hard drive that says “Make MKV” (3rd over from the left) to begin the rip. This will take a while as these files are large, so go grab a drink and come back later.
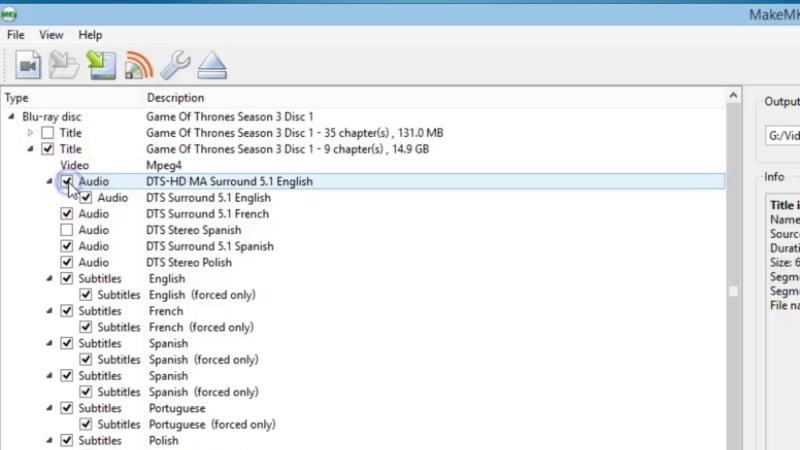
MakeMKV interface (click for larger image)
When the rip is done, you may want to rename the files using the title and year for movies, and title, season and episode number for TV. This will make sure that Plex correctly identifies your content and downloads the proper images and other information. You can also create subfolders to keep everything organized.
Conclusion
That’s it. You now have everything you need to get Plex up and running at little to no cost. In addition to watching your content at home, you can explore Plex mobile apps to access it on the road, and share your content with friends. Let us know how you like Plex, whether you’re using it on Roku, a HTPC, or another device.
Marshall is an Educator by trade, and currently lives in Oregon. He was lucky enough to grow up in a musical household, and though the AV equipment wasn't the greatest, it was always on. His dad introduced him to Queen, Paul Simon, and Sgt. Pepper's, and his mom played Lionel Richie and Disney Soundtracks. When Marshall was 14, his uncle passed down a pair of JBL towers and Marshall finally had his own system. Having enjoyed podcasting and video production over the past 10 years, Marshall is happy to be contributing at Audioholics.
View full profile