
A Tale of 5 Installs Part 4 - A Basement? In Florida?
This installation is truly unique. I found a basement in Florida. I know, I know, typically they are referred to as "swimming pools" but this one was actually a basement. And it was under a concrete slab of sorts. Don't ask, but it was cool to run into a totally new situation and stretch my troubleshooting skills to their limits. This job entailed integrating a new 5.1 audio system from Aperion Audio (using their new 4B speakers and Bravus 8D subwoofer) into a one-of-a-kind Florida room. The bar was set high, so I grabbed "Tim" the homeowner and inquired about the best way to place the speakers and design the system.
Vital Statistics:
- Happily married with a full complement of four kids
- Wife very concerned with aesthetics
- Older home with Florida room on "slab with basement" and no attic
- Medium-sized multi-purpose room with entertainment center
- A/V Knowledge Level: "What's a subwoofer?"
Typically in Florida, Basement = Swimming Pool
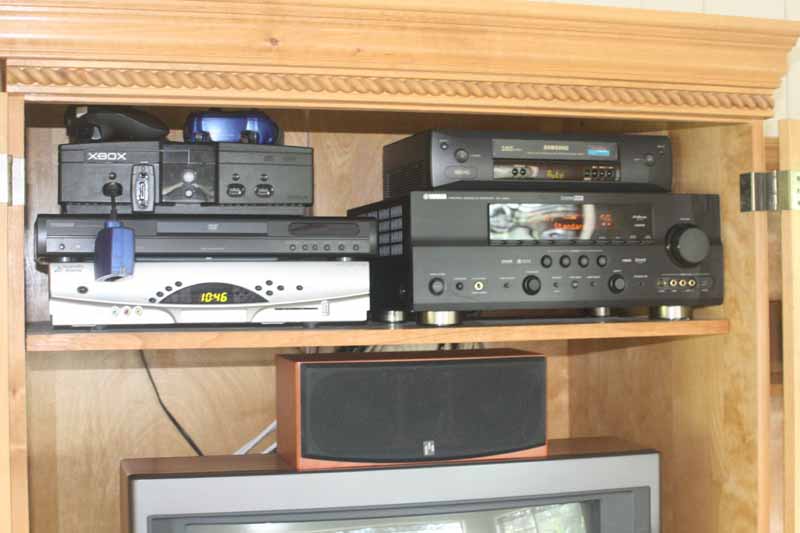
Some people have older systems or none at all. Tim, the homeowner and Pastor of Trinity Presbyterian Church here in town, had a 27-inch tube television an old DVD player, a VCR and an Xbox (no, not a 360). The best video resolution in the entire system was the interlaced component output from the DVD player, however since the television couldn't support anything more than composite video - we were sticking with the lowest common denominator. I had never seen so many yellow cables in my entire life - but the existing system actually had some level of genius to it. Think about this: the TV only had a single RF (cableTV) input and a single composite input. There was a VCR, Xbox, DVD player and Cable box. How would you hook it all up? They pulled it off (with no cable-switching required) and I was, to put it bluntly, rather impressed. The VCR took the input from the DVD player, and the game system fed the TV's composite input directly. On top of this, the cableTV went directly (via F connection) straight to the VCR and then on to the TV using channel 4 as its default input. And they think I'M the expert!
 This family was in for a real treat,
however, and I couldn't wait to deliver the goods. We'd be adding a real Yamaha
RX-V663 AV receiver, Aperion Audio's new Intimus 4B satellite & 4C
center channel speakers, and a Bravus 8D subwoofer - product types that to my
knowledge have never graced this living room. I was excited and so I got ready
for whatever lied ahead.
This family was in for a real treat,
however, and I couldn't wait to deliver the goods. We'd be adding a real Yamaha
RX-V663 AV receiver, Aperion Audio's new Intimus 4B satellite & 4C
center channel speakers, and a Bravus 8D subwoofer - product types that to my
knowledge have never graced this living room. I was excited and so I got ready
for whatever lied ahead.
By now I figured I was prepared for anything. As I often find, I was wrong. Walking into the home of this fourth installation I was led to a room positioned towards the rear of the home. This was an enclosed "Florida room" of sorts with a poured slab floor... on top of a basement. What? In one of the most unusual structures I'd ever seen I found that the room into which I'd be installing a 5.1 system from Aperion Audio was actually sitting atop an honest-to-goodness basement accessible from the rear of the home. It had a flat roof, so there were no attic options available to us, leaving the floor as the main point of access. That was cool... or so I thought.
Planning...
Getting a lay of the land, we decided to keep the entertainment system exactly where it was and simply work the front three speakers into appropriate positions, while adding surround speakers to the rear of the room, flanking the main listening areas. This would keep the room simple, and not disrupt the aesthetics more than necessary - a major factor in our considerations. To do this we needed to come up through the basement in a very accurate manner so as to drop down and run our cables through to the rear of the home (underneath the room itself).
Basements are Cool...
 This was a trying time and took a lot
in planning the actual undertaking. Because the room was essentially situated
on concrete there was no convenient way to drill up into the wall cavity to run
our surround wires. Access to the crawlspace was via one of two methods: going
in from underneath the rear deck, or snaking around through the basement and
entering through a transitional area with gaps in the footer. I choose the
former, but actually ended up using both before the job was over. By the way,
if you like collecting various animal skeletons - crawlspaces under old homes
are the place to be.
This was a trying time and took a lot
in planning the actual undertaking. Because the room was essentially situated
on concrete there was no convenient way to drill up into the wall cavity to run
our surround wires. Access to the crawlspace was via one of two methods: going
in from underneath the rear deck, or snaking around through the basement and
entering through a transitional area with gaps in the footer. I choose the
former, but actually ended up using both before the job was over. By the way,
if you like collecting various animal skeletons - crawlspaces under old homes
are the place to be.
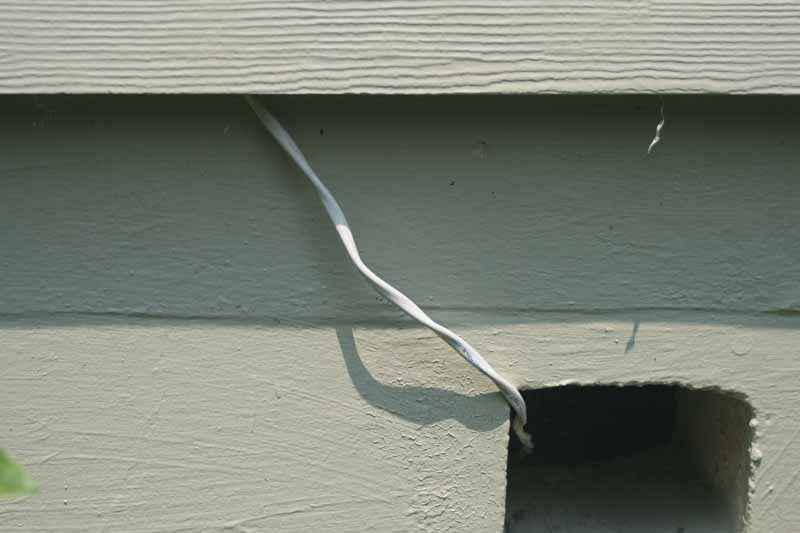 I began by working through the
surround speakers. Fortunately, this was an older home - and that meant holes
and vents. We found that if we ran the wiring through the vents in the rear of
the crawl space we could snake them up and under the lap of the siding and into
the home. It left very little cable exposed (just 2-3 inches) - much less than
any typical aftermarket cable or phone company. OK, that was the easy part.
I began by working through the
surround speakers. Fortunately, this was an older home - and that meant holes
and vents. We found that if we ran the wiring through the vents in the rear of
the crawl space we could snake them up and under the lap of the siding and into
the home. It left very little cable exposed (just 2-3 inches) - much less than
any typical aftermarket cable or phone company. OK, that was the easy part.
The hard part was figuring out how to come up behind the entertainment center. It moved easily enough and there were several power outlets for reference. The trouble was, none of them showed up on the Florida room side of the wall. That meant I needed to go around and enter the main basement and make my way to the opposite side of that wall (on the other side). This wasn't a big deal, except that the layout of the house made for some really complex measurements that needed to be taken in order to get my bearings. Remember, I needed to know exactly where to drill so I didn't come up in the wrong room or miss and go through a bedroom floor. Getting my bearings was of the highest importance. After several trips back and forth I was able to determine that NONE of the power cables I was looking at ran to the locations inside of the Florida room.
Darn you, Murphy! This meant they were on the opposite side of the wall - in the children's bedrooms. Everything I had based my measurements (and point of reference) on was encased in block and "invisible". Time for Plan... um, C.
First Thing's First
 I decided to drill out my two panels
for the rear surrounds. That way I'd be ready when I finally ran my cables up
through the rear of the house. Using my trusty drywall keyhole saw I made quick
work of the plaster and slats which needed to be removed for the low voltage
box to fit within the wall. Fitting the boxes over each hole I tightened them
up and was ready for when the wire was fed up through the empty wall cavity (as
with most older homes, there was no insulation, which made my job far easier).
I decided to drill out my two panels
for the rear surrounds. That way I'd be ready when I finally ran my cables up
through the rear of the house. Using my trusty drywall keyhole saw I made quick
work of the plaster and slats which needed to be removed for the low voltage
box to fit within the wall. Fitting the boxes over each hole I tightened them
up and was ready for when the wire was fed up through the empty wall cavity (as
with most older homes, there was no insulation, which made my job far easier).
Let's Use a Shortcut
If I couldn't locate my bearings using the room itself, I needed a way to accurately determine location from the other side of the wall. The way to do this (quickest) was to drill through from a known location on the other side. Sounds cool but what does that entail? Easy - I pulled away a bed from one of the kids' rooms and located a power outlet directly across from where I wanted to have the tie-lines for the surround speakers (remember, since we were using an entertainment center and not hanging speakers there was no need to run binding post connections for the front or center speakers).
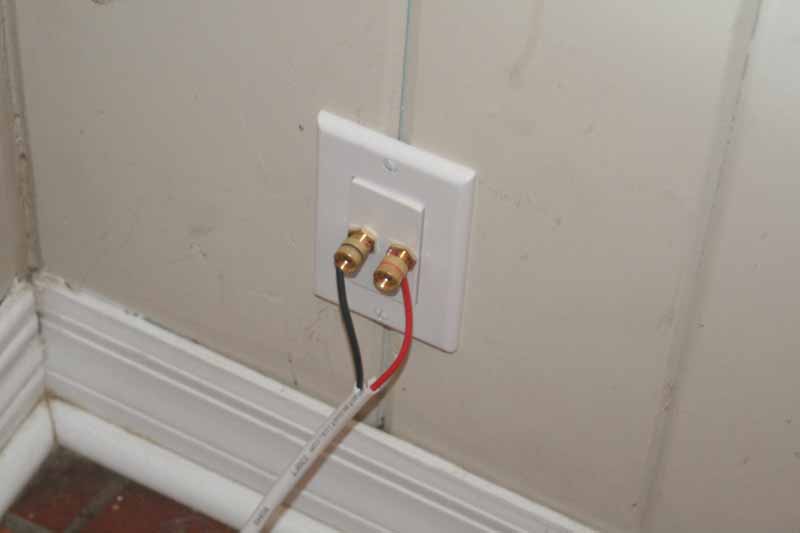
Pulling off the plate and locating the stud I drilled through (and down, since the Florida room was sunk by about 15 inches) on the other side and made a hole into the room. It was in a good spot and I opened up the hole from the Florida room so that I could insert the 4-pair binding post wall plate and also be able to easily snag the cable once it was inserted from below. I now knew that my hole was about 2-1/2 inches inside of where the AC power outlet cable came up in that room. I also had a lot more mess to clean up - but that's part of the job... or that's what I kept telling myself.
Back in Your Hole!
 Making my way through the crowded
basement I came back to the side of the wall where I could see all of the AC
power running up and into the children's bedrooms. I found the line I was
working off of (again, through careful prior measurements and some back and
forth between the actual rooms and the basement). Measuring 2-1/2 inches I
drilled up into the cavity. Pastor Tim came back to lend a hand and stuck a pen
light through our newly-made hole from within the room. It clearly shined down
into the access hole I had just drilled. Success!
Making my way through the crowded
basement I came back to the side of the wall where I could see all of the AC
power running up and into the children's bedrooms. I found the line I was
working off of (again, through careful prior measurements and some back and
forth between the actual rooms and the basement). Measuring 2-1/2 inches I
drilled up into the cavity. Pastor Tim came back to lend a hand and stuck a pen
light through our newly-made hole from within the room. It clearly shined down
into the access hole I had just drilled. Success!
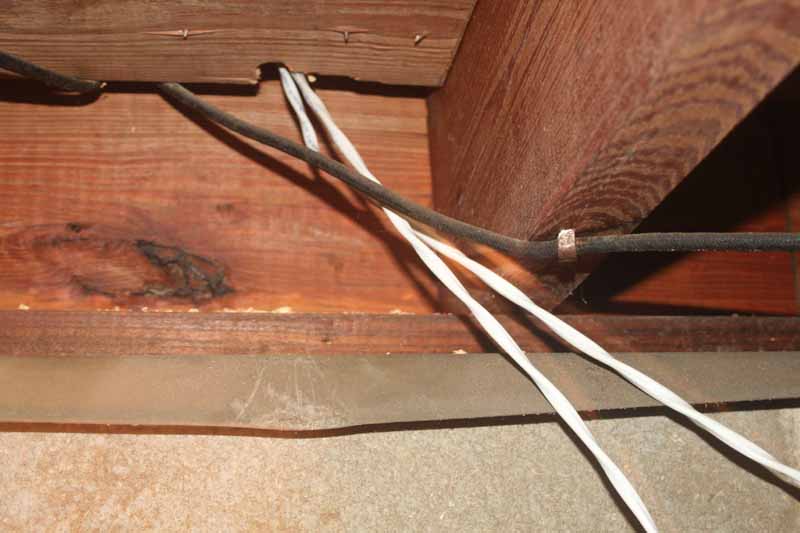
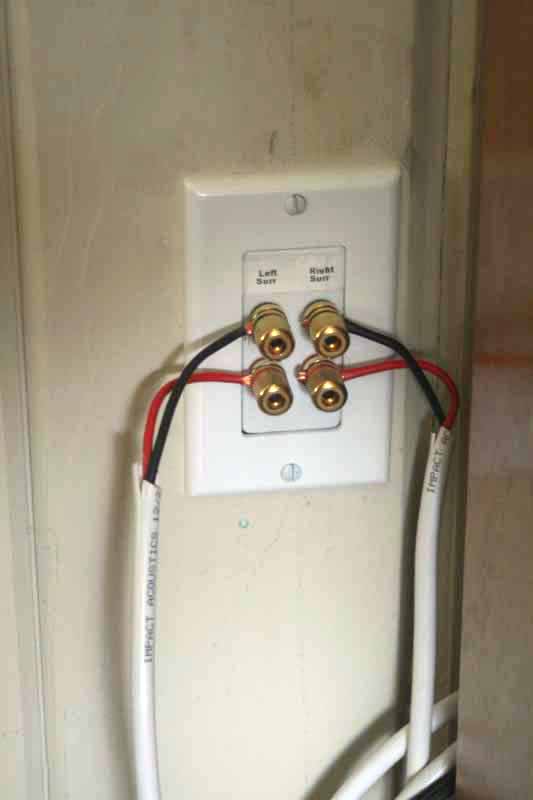 I pulled off a bunch of Impact
Acoustics 12/2 CL-rated speaker cable, enough to make my entire run, and
pushed two ends up through the hole. Tim caught both cables and we were off to
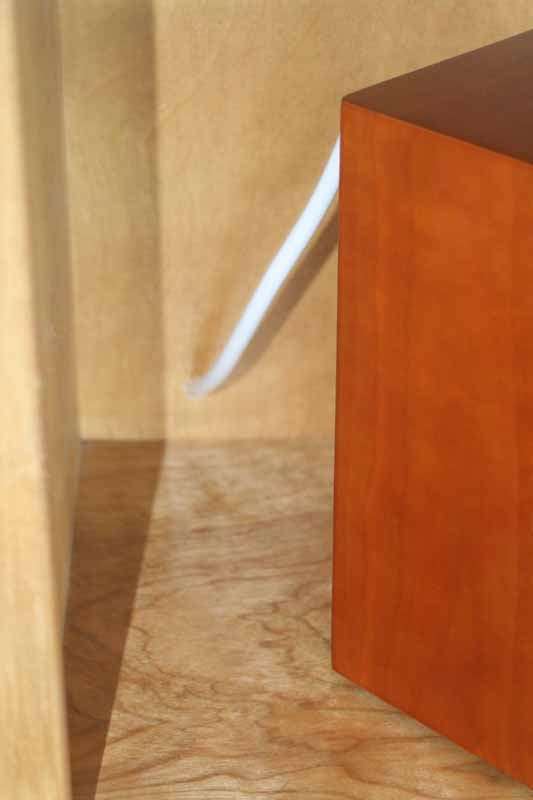
the races. I belly-crawled through a hole in the footer and re-emerged below
the Florida
room - cables in hand. Working my way to the back of the room, I executed the
plan for running the wires out through the nearest vent and up into the house.
This entailed drilling a small diameter hole upwards to break through into the
void underneath the wood siding. Shortly after doing this for both holes I had
the cables inserted and Tim pulled those inside as well... We were on a roll. I
ended up with a bit more slack than I would have liked, but overall it wasn't
more than a few feet of wasted cable that we needed to trim.
I pulled off a bunch of Impact
Acoustics 12/2 CL-rated speaker cable, enough to make my entire run, and
pushed two ends up through the hole. Tim caught both cables and we were off to
the races. I belly-crawled through a hole in the footer and re-emerged below
the Florida
room - cables in hand. Working my way to the back of the room, I executed the
plan for running the wires out through the nearest vent and up into the house.
This entailed drilling a small diameter hole upwards to break through into the
void underneath the wood siding. Shortly after doing this for both holes I had
the cables inserted and Tim pulled those inside as well... We were on a roll. I
ended up with a bit more slack than I would have liked, but overall it wasn't
more than a few feet of wasted cable that we needed to trim.
AC Feels So Good
Back inside it was now simply a matter of connecting the wires to my terminations and screwing the plates back into the walls. The next day would be the fun day where we'd connect the speakers and calibrate the system. After spending so much time underneath the house, having some nice air conditioning was a refreshing change and I was ready to end the day.
Connections and Conclusion
Wow, You Didn't Even Open This Stuff Up?
It was Day 2 of this fourth installation and I still had a ton of work left to do. Surprisingly, all of the speakers were still boxed up and so were the speaker stands that would support the Aperion Audio Intimus 4B satellite speakers. It seemed that no one was confident enough to mess with the equipment and wanted to let me set everything up before toying with it. I quickly transported all of the boxes to the listening room and laid them out to begin opening everything up and readying it for final installation. I brought along my spool of Impact Acoustics 12/2 speaker cable since I knew I'd need to cut jumper wires for each of the speaker connections.
Naked Gear
 The equipment was quickly de-boxed and
made ready to go. I began the tedious but simple task of stripping the cable
ends and cutting them to length. This took me longer than I'd have liked, but
it was certainly not a big deal overall. I have actually gotten quite good at
stripping the speaker wire and getting the leads exactly the length they needed
to be to fit the binding posts of both the Yamaha RX-V663
receiver
(what we were using for this system) and the wall plates. I got a little
impatient so I jumped back and forth between stripping cables and actually
placing and connecting the speakers. To install the main speakers I drilled
small holes in the rear of the bottom shelf of the three-piece media cabinet
that housed the television, speakers and various games, software, etc. It allowed
me to place the speakers at ear level without the need for stands. If you
remember, the flat roof of the room didn't allow for any ceiling mounting of
these satellites (or mini bookshelf speakers as I liked to think of them due to
their impressive build quality).
The equipment was quickly de-boxed and
made ready to go. I began the tedious but simple task of stripping the cable
ends and cutting them to length. This took me longer than I'd have liked, but
it was certainly not a big deal overall. I have actually gotten quite good at
stripping the speaker wire and getting the leads exactly the length they needed
to be to fit the binding posts of both the Yamaha RX-V663
receiver
(what we were using for this system) and the wall plates. I got a little
impatient so I jumped back and forth between stripping cables and actually
placing and connecting the speakers. To install the main speakers I drilled
small holes in the rear of the bottom shelf of the three-piece media cabinet
that housed the television, speakers and various games, software, etc. It allowed
me to place the speakers at ear level without the need for stands. If you
remember, the flat roof of the room didn't allow for any ceiling mounting of
these satellites (or mini bookshelf speakers as I liked to think of them due to
their impressive build quality).
Soon I had some tunes cranking in sparkling mono with the subwoofer engaged (hey, I was progressing one speaker at a time!). Eventually that spread to the Center and Right channel as well, encompassing all three front speakers... and then finally the full 5.1 system was completely wired. The subwoofer was tough since I needed to plug it into the front wall. With all of the legacy components going into this system I quickly ran out of outlets and had to utilize the two on the back of the Yamaha RX-V663 receiver to make it all work. This ended up being the right thing to do as it allowed me to control the power for the VCR and Xbox game console.
Calibrations and Listening Tests
 Now that the system was wired it was
up to me to get everything setup and running. Sure, I could use the built-in
setup microphone and auto-cal the unit, but that would be too easy (and screw
up the bass management anyway) so I pulled out my trusty Radio Shack meter and
tape measure and got to work (stand back... I'm an Audioholic). After a few
moments I had the subwoofer correctly set along with speaker levels, size and
delay (distances). Life was good and this system was really starting to sound
great.
Now that the system was wired it was
up to me to get everything setup and running. Sure, I could use the built-in
setup microphone and auto-cal the unit, but that would be too easy (and screw
up the bass management anyway) so I pulled out my trusty Radio Shack meter and
tape measure and got to work (stand back... I'm an Audioholic). After a few
moments I had the subwoofer correctly set along with speaker levels, size and
delay (distances). Life was good and this system was really starting to sound
great.
Conclusion - Sometimes People Are Happy for Reasons You Wouldn't Expect
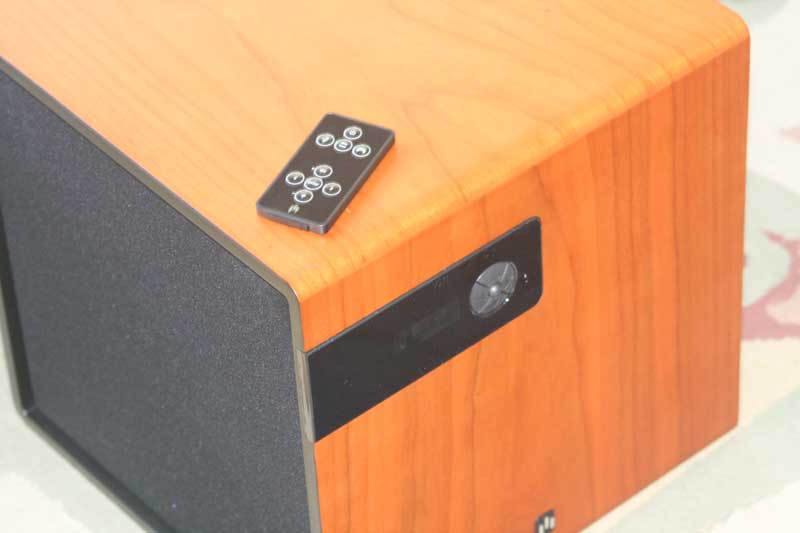
 While I planned on coming back and doing a formal
review of this Aperion Audio Intimus 4B Harmony SD system (long name, cool
speakers), the priority for now was getting the remote control to work on all
these legacy (i.e. old) components. I
read through the Yamaha User Manual and realized that it simply would NOT
control any cable boxes - likely due to their inherent complexity and the
Yamaha remote's lack of buttons. Since the receiver didn't come with a learning
remote I moved on and programmed it for everything else. Even with this
drawback it turned out that the system was 100x more easily controlled than
before. I went over the remote functions with Tim about 4 times in a row. He's
a smart guy but I think he kept underestimating how easy it was to use. Over
and over again he asked me "And I don't need to use the other
remotes?" Nope - you're good to go. It turned out that the combining of
their system through an AV receiver - routing both audio and video - was simply
the most amazing aspect of this system for Tim and his family. Sound quality was
cool, but I could tell that convenience was the dominating wonder-maker today.
That's cool. I needed to come back for the Aperion Audio review. That's when I
figured I'd rock the house out and let them know just how good a truly discrete
surround sound system with subwoofer can be.
While I planned on coming back and doing a formal
review of this Aperion Audio Intimus 4B Harmony SD system (long name, cool
speakers), the priority for now was getting the remote control to work on all
these legacy (i.e. old) components. I
read through the Yamaha User Manual and realized that it simply would NOT
control any cable boxes - likely due to their inherent complexity and the
Yamaha remote's lack of buttons. Since the receiver didn't come with a learning
remote I moved on and programmed it for everything else. Even with this
drawback it turned out that the system was 100x more easily controlled than
before. I went over the remote functions with Tim about 4 times in a row. He's
a smart guy but I think he kept underestimating how easy it was to use. Over
and over again he asked me "And I don't need to use the other
remotes?" Nope - you're good to go. It turned out that the combining of
their system through an AV receiver - routing both audio and video - was simply
the most amazing aspect of this system for Tim and his family. Sound quality was
cool, but I could tell that convenience was the dominating wonder-maker today.
That's cool. I needed to come back for the Aperion Audio review. That's when I
figured I'd rock the house out and let them know just how good a truly discrete
surround sound system with subwoofer can be.
Clint Deboer was terminated from Audioholics for misconduct on April 4th, 2014. He no longer represents Audioholics in any fashion.
View full profile