
Installing a Television Over a Fireplace
Install a TV Over Your Fireplace
Nothing has come up in local conversations with friends and family as much as what it takes to mount a flat panel television over a fireplace. Be it plasma or LCD TV, the big contention is that having a room with a centrally-focused fireplace results in a dilemma: Where do you put your flat panel TV if not above the fireplace? While some have stuck them off to one side or the other, either corner-mounted or placed within clunky built-ins, the best place, aesthetically-speaking is to mount the television over the top of the fireplace. This brings up a unique set of questions, concerns and choices, however, and we'll attempt to address each and every one of these in this article and practical how-to guide. What we won't necessarily address is the nitty gritty of how to use a spade bit to cut holes or how to cut and repair drywall. We'll point you on the path but, lest we turn this into a boring step by step tutorial on how to renovate your home, you can look up the nitty gritty details on your own.
Should I Install My TV Over the Fireplace?
The first thing that we want to address is should you install your flat panel TV over your fireplace? It's a good question – and one you should ask. There are a number of concerns with this particular installation and we recommend you go over a few basic factors:
- How much use do you typically give your fireplace?
If it receives ample use you really need to ensure that heat from the fireplace doesn't reach excessive levels for anything mounted above it. Ensure that you have plenty of physical insulation so that wiring located behind the wall and adjacent to the chimney isn't heated beyond manufacturer's recommended levels. This is typically not an issue unless you have a problem with your chimney and - for better reasons than damaging a few cables – you should have that checked periodically. - How steep is the viewing angle?
Though we will almost always prefer a central location for a television as opposed to a corner position, there are mantels which are simply too high to support a television in certain seating arrangements. If you sit too close or are otherwise craning your neck at an excessive angle, then mounting a TV above the fireplace may not be such a hot idea (we were waiting for a chance to use that pun). In general, try to ensure that your primary viewing positions are at least 12 feet away from the TV. If you are closer than that, expect to strain your neck to see the picture (picture yourself in the front row of the movie theater). Some may find this acceptable while, for others, it will get old very quickly. - How difficult is it to run power to the location?
The answer to the question "Can I run power here" is almost always "yes" – and simply a matter of difficulty. For some, running power will be made possible via an attic access. For others, there will be greater repair required as some portion of a wall will need to be removed in order to provide side access for power to be run across to the proper location. If your fireplace is entirely brick, stone, or other material and does not have a framed-in wall above the mantel, then you may need to use an exposed decorative conduit or other means to successfully deliver power from one location to another. Still other options, like FlatWire's pending 120VAC solution (which is pending UL approval) offer additional solutions.
The above should be considered well and all arrangements made before undergoing an install of this magnitude. In our specific test example we had attic access to run power and were also able to benefit from a fireplace that exists largely outside the house, providing us with a framed 2x4 stud wall section above the mantel. This makes running wire, both 120VAC and low voltage, far easier.
First Thing's First: Plan Your Installation
We started by laying out the desired connections for our over-the-fireplace television. There were two things we wanted to accomplish – and neither was going to be without its challenges. First, we wanted the flat panel TV to be able to communicate with two separate locations. Secondly, we wanted to ensure there was an Ethernet connection available for streaming functions which are becoming increasingly available on televisions these days.
For many, installing a television over a fireplace won't involve this many connections, however you may want to consider future options, even if your current needs don't require quite this level of flexibility. It is far easier to do everything up front, while you are running your cabling, than to go back in later and have to add additional wiring. The above diagram is merely what we chose to do in our particular instance, and your personal needs and imagination may vary with your room and requirements.
By way of description, you'll note that the above diagram includes 5 basic connections:
- 120VAC Power
You have to get power to your television. The safest way to do that is through the use of a system that allows you to plug a standard extension cord into a supply power socket which then takes that power and delivers it, via standard recessed receptacle, to your television. There are several companies that offer this, and we specify more on this below. - Cat5e (Ethernet)
We feel it's important to run a network connection to your television. There is so much going on in the area of streaming media services these days that it is highly unlikely that all but the most inexpensive TVs won't have at least some level of streaming media or networking technology in the next few years. We chose to use a Monster Cable PowerNet 200/300 system that transmits ethernet over our home's existing power lines. In this way, running power to a location behind the TV also gives me a source for connecting the television into my home network. - HDMI and Component Video (YcbCr)
I chose to run both HDMI and component video from a remote A/V rack into the TV. This allows me to send that television duplicate content from my primary theater room, or simply use it in conjunction with some of the unique equipment available to me in that location (like my Xbox 360). The use of component video allows me to make use of the "faster" analogue video connection for gaming – a connection that doesn't invoke tons of video lag as HDMI often results in. Because this particular run was close to 50 feet in length, I opted for a PureLink HDC Fiber Optic HDMI Cable System that is self-powered and handles full 1080p resolution. - Wireless HDMI
This last connection was a choice I made based on the complexity of getting an HDMI cable from the television's location above the fireplace to my corner-located in-room A/V equipment. Due to windows and the particular nature of the framing of that corner, it really made a lot of sense to simply utilize a wireless HDMI system. We tested out several systems, including one from Gefen that handles up to 1080i reliably via line-of-sight. That was a touchy system that didn't deal well with interference or anyone physically coming between the transmitter and receiver. Add to that the fact that this particular model couldn't be wall-mounted, and you'll see why we switched to a Philips Wireless HDMI solution that would fit behind the actual display.
There are near endless possibilities for wiring up your television, and some will want to also run a separate coaxial line for antenna or cableTV if they don't plan on using a set-top box as we intended. All of our HDMI and component video runs originated from an A/V receiver. This freed us up to send a virtually unlimited amount of sources to our TV. In the case of the remote A/V rack, it features a Denon AVR-5308, which has dual HDMI outputs and can simultaneously transmit the same signal across component video (if the source is analogue, that is). For the wireless HDMI source, we're taking it from a Pioneer VSX-23TXH A/V receiver with dual HDMI outputs.
Mounting the TV and Running the Wiring
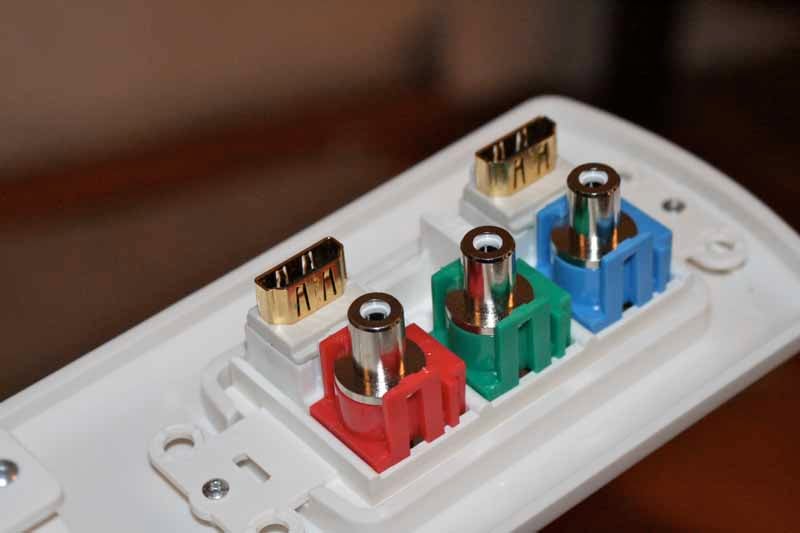
 When choosing your flat panel wall mount it's important to consider both your needs and the style of television you'll be installing. While super thin mounts are in, they are often impossible to actually utilize. Most TVs still have connections that require some clearance behind the television, and we've seen several of this thin mounts absolutely FAIL when you attempt to get your TV close to the wall and still plug in the 120VAC power plug – not to mention begin to connect HDMI video cables. Thin can be sexy, but it's a bear to actually make it work. Here is an example of a recent television we reviewed which features side-oriented inputs that don't truly allow you to insert a cable into them without having it stick out the side of the display:
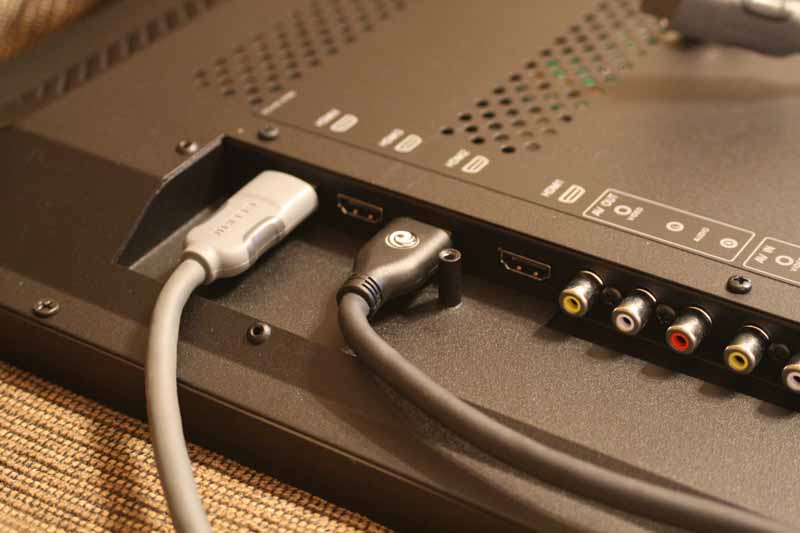
Good luck trying to hide cables with this television
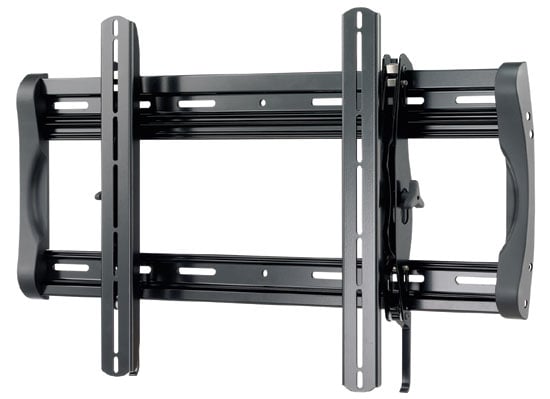
For above the fireplace I recommend, in fact I'd go so far as to say I insist on, a mount that offers at least 10 degrees of downward tilt. You're going to need that given that the display is mounted in a location that is higher than your typical stand or built-in location. We spoke a little about distance earlier, and you'll want to make sure you don't install a flat panel above a fireplace unless you are at least 12 feet away. Even then, you want the TV to be angled down while viewing. Now, while you can spend hundreds of dollars on automatic powered mounts... the best values are those that offer basic tilt and give you some room to maneuver behind the television. There's nothing better than a mount that feels rugged and offers you the ability to make connections to your television while it's still mounted to the wall. For this reason, we selected the Sanus LT25 Tilting Wall Mount for 30" – 60" flat panel TVs ($199).
 This wall mount is possibly the best basic tilting wall mounting systems I've used for larger flat panel televisions. For most people I don't recommend tilting mounts, but for an installation up high, it's a necessity and the Sanus offers some bang-up features that make this a very user-friendly mount:
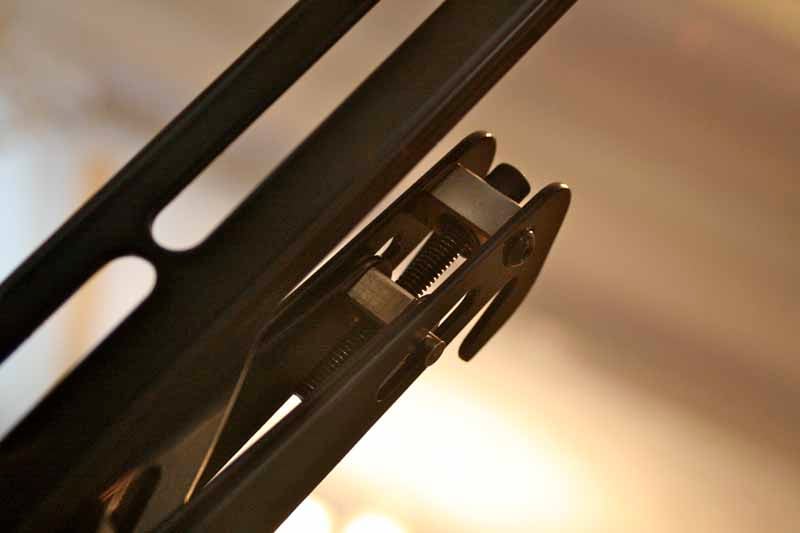
- Effortless tool-free tilting – you can tilt the TV by hand, and it retains enough tension to stay where you put it – even with a larger 55" TV.
- A custom (ProSet™) height and leveling adjustment system which means you can mount it to the wall, install the TV, and then tweak it to ensure everything is perfectly level – after it's installed. Perfection is no longer required for a level installation.
- A feature which holds the TV away from wall while you make your video and audio connections (ClickStand™).
- Open wall plate design that provides plenty of room for cable routing and wall plates
- Easy left and right shifting that can be done regardless of how the mount's base needed to be positioned to line up to existing studs.
We're not pushing Sanus (OK, yes we are) but they've been around a while and really seem to know how to make a good mount. You can find these mounts online or at just about any electronics retailer. In either case, make sure the mount is easy to use and that it doesn't require absolute perfection in order to get your TV installed, leveled, and connected. With a straight wall-mount scenario I'd say get a cheap sub-$100 wall mount, but with an over-fireplace installation, expect to pay a little more to get a product that's more capable and flexible. Believe us, this is not the place you want to skimp.
Running Your Wires
When running your wires you need to pay attention to several factors to avoid making time-consuming errors. First of all, don't be too fooled by all that space in the center of your wall mount. You have to use that area sparingly and keep in mind the location of your television connections and how the mount itself might interfere with cabling. For some installs of this nature, you'll want to actually place your 120VAC and low voltage (HDMI, component vide, etc) connections above the mount in order to provide the most room to maneuver. Remember, your TV will typically angle downward, so if your connections are at the top they will stand the best chance of clearing all obstacles. In addition, your TV will typically be much larger than the mount, giving you additional wiggle room on installing wall plates and hiding your connections.
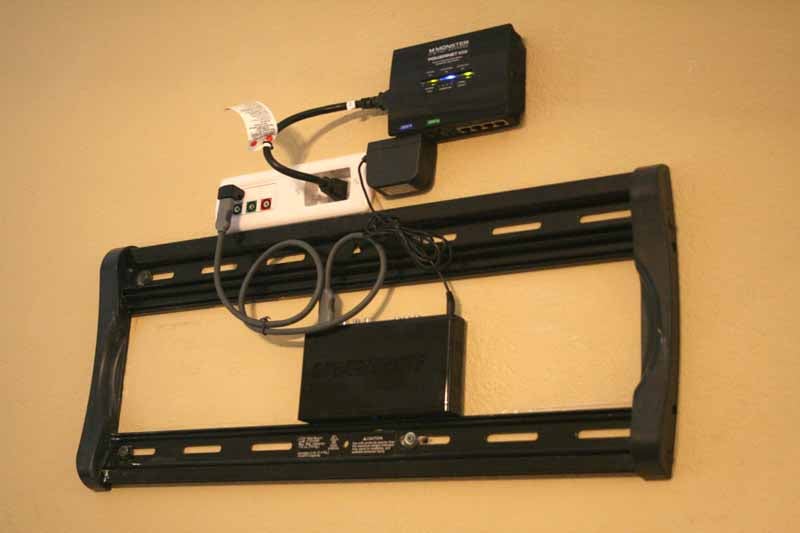 The two primary devices visible on the wall behind our flat panel mount are the Monster PowerNet system and a PowerBridge Total Solution kit. We talked a little of the PowerNet above, and an added bonus is that it offers surge protection in addition to offering a great way to bring a wired network cable to your wall-mounted flat panel television. The PowerBridge is an excellent solution since it combines two of the necessities of an install such as this: power cabling and A/V connections. In this particular install, we ran HDMI and component video cables to the low voltage side of the PowerBridge, and connected the 120VAC inlet to our equipment closet, so that we could power the display off of our APC S15 UPS. You could also use one half of the PowerBridge product to simply take a feed off an existing outlet and run it to a plate behind the television mount. The advantage of using the whole system is that it doesn't require an electrician and allows you to safely run the power cable without having any electricity present until you are completed and jump the power to it from an existing receptacle. Here's how the system basically works in diagram form:
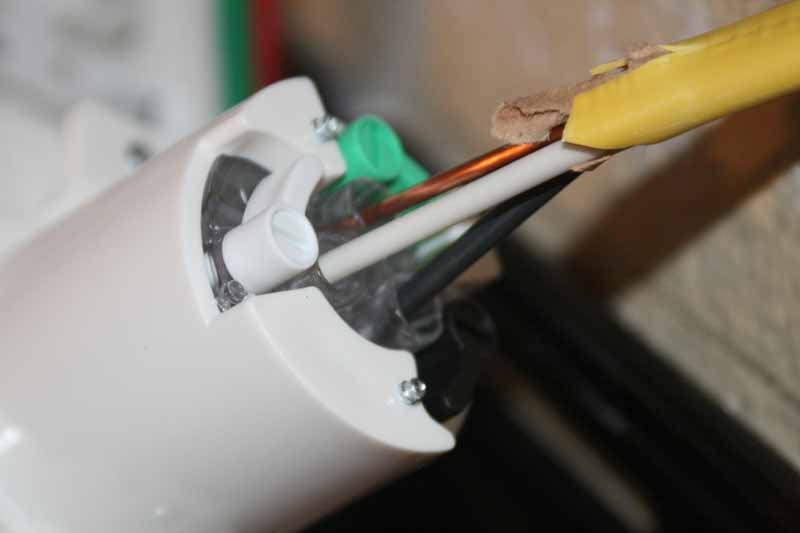
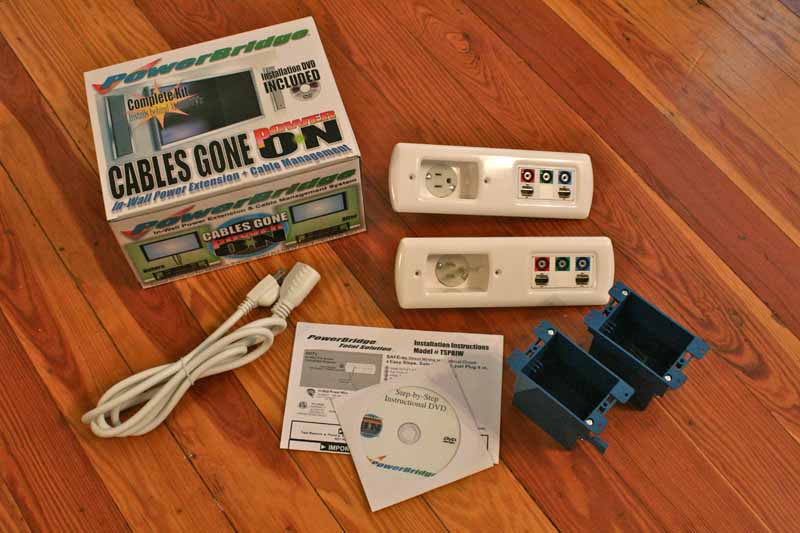 As you can see, you can wire up the two components of the PowerBridge Total Solution system without any electricity present. Once everything is completed, you then add power to the system and test it using a standard voltmeter or circuit tester before plugging in your television. We find this system to be extremely popular and practical for homeowners and custom installers alike. The kit comes complete with both power/AV receptacles, two back boxes, and even a short extension cord for delivering power to the completed system. You just supply the 12/2 cable at whatever length you need to span the two connection points. The company is even rolling out a new patented connection system that removes the hassle of using a screwdriver and bending the 12 gage wiring to fit underneath a terminating screw. We were fortunate enough to test it out and verify that it indeed takes most of the work out of making an electrical connection. We also like that the low voltage half of the PowerBridge Total Solution system is Decora-compatible, so you can customize the low voltage models to your heart's content.
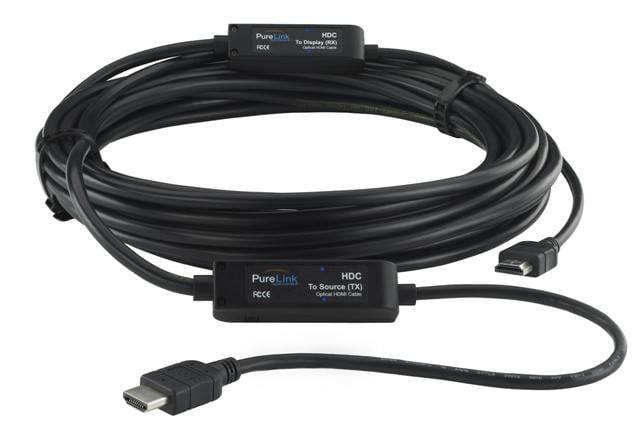 Speaking of low voltage – that's where you're going to get all of your audio and video signals, so it's good to plan those out well. We chose to go with the PureLink HDC Fiber Optic HDMI Cable System. This is an excellent solution for runs like this and it's self-powered, though you can also supply 5VDC if needed at the source side of the cable. Our sample installed very easily and ensured that our HDMI cable wouldn't drop the ball when we sent it 1080p from our remotely-located AV equipment rack. This cable has male HDMI ends on both sides and we were able to simply plug it directly into the PowerBridge Total Solution wall plate alongside the component video cable. This gave us a nicely terminated point from which our wall-mounted television could pull its analogue and digital video connections.

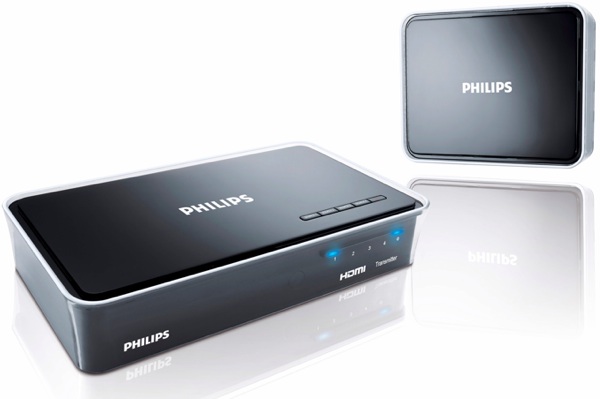 For our wireless HDMI system, we initially took a look at the Gefen Wireless UWB HDMI system, but found it to be a tad cumbersome. In addition to that, this particular model could not be wall-mounted (the company does have a GefenTV Wireless for HDMI Extender 5GHz model that is wall-mountable). We opted for the Philips Wireless HDTV Link which allows up to 1080p/30 or 1080i/60 to be transmitted to a display. This was perfect for our needs, and the more streamlined system would fit nicely behind the display. If you decide to go with a wireless HDMI system, shop around and don't expect it to be cheap.
It didn't take long before everything was ready and we had all of our connections in place. While there was some significant attic work, it didn't take more than a spade bit, cordless drill and some fire caulk to get everything situated nicely and run down the wall into position. Since our fireplace went through the lower half of our wall, our top half was pure joy to work in. We had ample space to position our electrical box and get everything dressed up and ready to go.
Conclusion and Resources
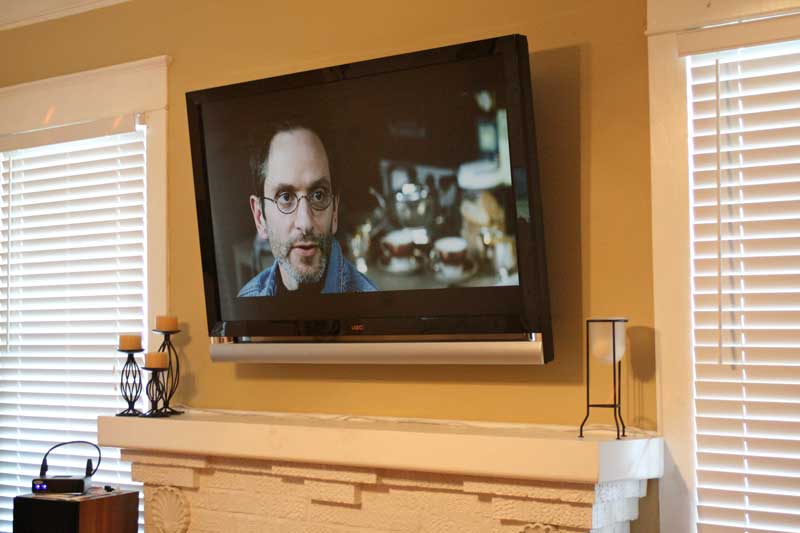 This final step was the most satisfying. The ease with which the Sanus LT25 made television mounting was made evident by the fact that I was able to lift a 55" Vizio VF551XVT LED TV into place with my wife and a couple of small step ladders. The mount has clips and the trick is simply sliding the tilt-able brackets (which are fastened to the TV) down the wall until they catch. When the TV sat on the wall, we found that we could easily tilt it upwards, make our connections, and then tilt it downward so that it was correctly oriented to our seated position. When we got done with the heavy lifting we noticed that the TV was slightly crooked. Grabbing the included hex wrench, I quickly dialed in the height adjustment on the right bracket and the TV was perfectly level in no time. Had that adjustment not been there I would have had to remove the TV, remove the mount and start all over again. This is one handy feature!
Conclusion
It is no small thing to undertake a project like this and it's best done with at least one dedicated helper throughout the entire process. The end result is a pleasing television that allows our main speakers to be positioned to either side of the TV, creating a much more effective sound stage and a greater flexibility in how we entertain guests in our living room. Mounting a television over the fireplace isn't for everyone – but it sure drums up interest in those I converse with on a regular basis. With aesthetics playing a major role in marketing these days, it's not surprising to see so many people aching to do something cool with that new flat panel they purchased with their tax refund. If you fit this description, then maybe it's time to take the plunge and put that TV up top where it belongs!
Resources
PureLink HDC Fiber Optic HDMI Cable System
Richard Kim, rkim@dtrovision.com
201-488-3232, 212-897-8888
Price: Varies
http://www.dtrovision.com/hdc_fiber.htm
Sanus Systems LT25 Tilting Wall Mount
Fits 30" – 60" flat panel TVs
Price: $199
http://store.audioholics.com/product/1971/47/sanus-lt25-tilting-wall-mount-with-proset---black
PowerBridge Total Solution Kit
Price: $80-$150
http://www.powerbridgesolution.com/powerbridgeproducts.html
Philips SWW1800/27 Wireless HDTV Link
Price: $799
http://www.p4c.philips.com/cgi-bin/dcbint/cpindex.pl?ctn=SWW1800/27&scy=us&slg=en
Gefen Wireless HDMI Extender (UWB)
Price: $999
http://www.gefen.com/kvm/dproduct.jsp?prod_id=4318
Pioneer Electronics VSX-23TXH A/V Receiver
THX Certified A/V Receiver
Price: $1000
http://www.audioholics.com/reviews/receivers/pioneer-electronics-vsx-23txh
Clint Deboer was terminated from Audioholics for misconduct on April 4th, 2014. He no longer represents Audioholics in any fashion.
View full profile