
In-Wall Speaker Selection & Installation Basics
Pong
In-wall speakers are becoming more popular these days with aesthetics playing a major role in dictating the theater system components. In the olden days (think Pong), in-wall speakers typically didn’t offer the sonic chops to be taken seriously, but a lot has happened since then (think Call of Duty 4). Technological advancements in driver design, system integration and active room equalization is allowing enthusiasts to bring the Cineplex theater experience into their own homes, even when using all in-wall speakers and subwoofers. Of course this is assuming the right speakers are chosen and installed properly. This article explores some basic fundamentals for choosing and installing in-wall type speaker products in efforts to realize their maximum performance and yield the best possible experience to the end users.
Step 1: Choosing the Right Speakers
Before getting into the down and dirty on installing in-wall products, you must first choose the proper products for your application. In choosing the products, the first question you should ask yourself is:
Are these speakers being installed in an existing home or during pre construction?
If you answered “pre construction”, than it is highly recommended that you select speakers with back box enclosures as this provides them with a controlled enclosure space to yield better performance, particularly in the lower frequencies, as well as isolating their sound from transferring into adjacent rooms.
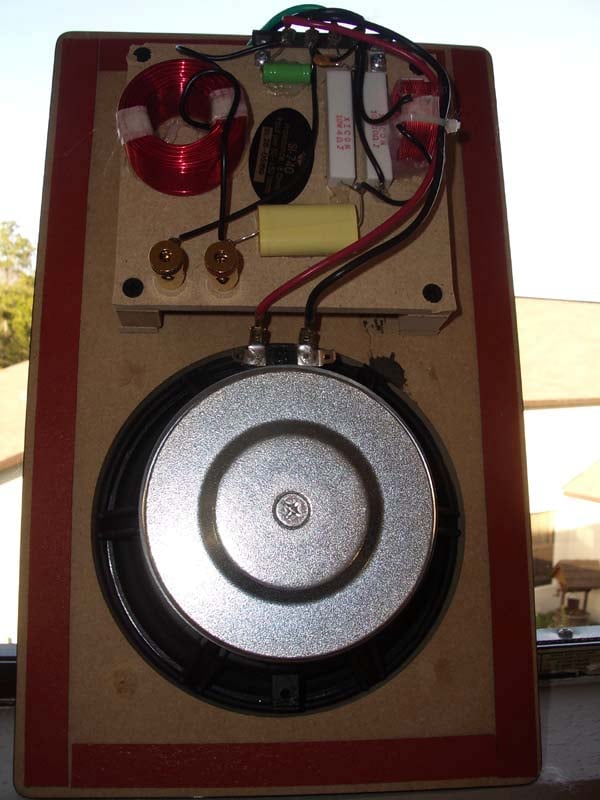
Some Examples of Back Box Enclosed In-wall speakers


Dali in-wall (left pic) Triad in-wall (right pic)
Assuming you are like most people looking to install a home theater into an existing room with the drywall already up, you basically have two options:
1. use an on wall / in wall product such as the Axiom W series which incidentally have their own back boxes or an on wall product such as the EMP EW30 flat panel speaker.
2. use free air in wall products and create your own back box or install a retro fit back box that some manufacturers offer for their products.
For those choosing option #2, I will show you how to create your own basic back box that although won’t replace a true enclosed speaker design, does incredibly well and is relatively easy to implement.
So your options include in-wall, in-ceiling, in-wall/on-wall hybrids or flat panel mount speakers. The focus here is in-wall and in-ceiling products but many of the guidelines I outline can be utilized for all of these speaker types.
Step 2: Positioning the Speakers
Speaker Placement General Illustrations
A good starting point is to go with an ITU 7.1 recommendation for speaker placement with some excellent placement notes courtesy of Soundoctor which is also very compatible with the THX recommendation as per the diagrams below. Since most rooms are rectangular, the THX diagram is usually a more practical layout.
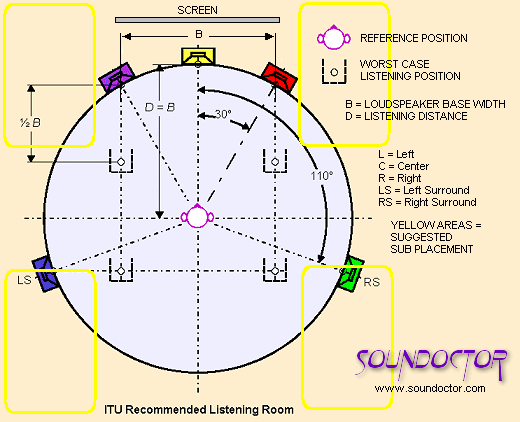

ITU Speaker Layout (left pic) THX 7.1 Speaker Layout (right pic)
The Front LCR Speakers
 Speaker
positioning is perhaps the most important consideration when fidelity is of
concern. Ideally the three front speakers (Left, Center, Right) should be
placed at ear height (seated position) as close to equidistant from the listening area
as possible to provide the most direct path of audio between the speaker and the listener -
line of sight if you will. If you can’t manage equidistance, be sure to compensate via the
receiver/processors time management circuitry.
Speaker
positioning is perhaps the most important consideration when fidelity is of
concern. Ideally the three front speakers (Left, Center, Right) should be
placed at ear height (seated position) as close to equidistant from the listening area
as possible to provide the most direct path of audio between the speaker and the listener -
line of sight if you will. If you can’t manage equidistance, be sure to compensate via the
receiver/processors time management circuitry.
Utilizing in-ceiling speakers for the front three channels is usually not advised for those concerned with fidelity of playback, especially for music. Placing a speaker too far off axis from the listening position not only hinders its high end frequency response and off axis power response, but can often lead to that “voice of God” effect which is more prominent for the front three speakers than the surrounds since human hearing is far more directional in front of your head than it is to the sides or behind. I highly recommend reserving in-ceiling speakers for the front three speakers as a last resort only.
For more information on how we perceive sound, check out our articles on Human Hearing.
The Surrounds
 Ideally you
would follow the same placement guidelines for box speaker surround installs
which are two side channels placed slightly above ear height and slightly back
from the listening area (depending on speaker type) and the two direct
radiating back channels at the same height about 6-8 feet apart depending on
the distance to the listening area (80% separation from the distance to the
listening area is a good rule of thumb here).
In my application, I installed two in-ceiling speakers as my bedroom
system is a 5.1 system.
Ideally you
would follow the same placement guidelines for box speaker surround installs
which are two side channels placed slightly above ear height and slightly back
from the listening area (depending on speaker type) and the two direct
radiating back channels at the same height about 6-8 feet apart depending on
the distance to the listening area (80% separation from the distance to the
listening area is a good rule of thumb here).
In my application, I installed two in-ceiling speakers as my bedroom
system is a 5.1 system.
The Subwoofer(s)
 In the
Audioholics showcase Master Bedroom, I was fortunate to have access to the
house during pre-construction and thus chose to integrate dual in-wall
subwoofers with back boxes. I placed
them about ¼ the length of the front wall from each side wall so that they
would be roughly equidistant from the bed.
Using two subs is always preferred as it provides better and more uniform
bass distribution to a wider listening area, as well as increasing the maximum
available output.
In the
Audioholics showcase Master Bedroom, I was fortunate to have access to the
house during pre-construction and thus chose to integrate dual in-wall
subwoofers with back boxes. I placed
them about ¼ the length of the front wall from each side wall so that they
would be roughly equidistant from the bed.
Using two subs is always preferred as it provides better and more uniform
bass distribution to a wider listening area, as well as increasing the maximum
available output.
Placement is critical and it is recommended that you try to use symmetry relative to the listening area when placing multiple subs in a room to minimize path differences and ensure they properly acoustically sum to avoid cancellations or overly boosting certain frequency ranges.
For placement guidelines, please consult our article: Subwoofer Placement – the Place for Bass.
Step 3: Installing the Speakers
The Front LCR Speakers
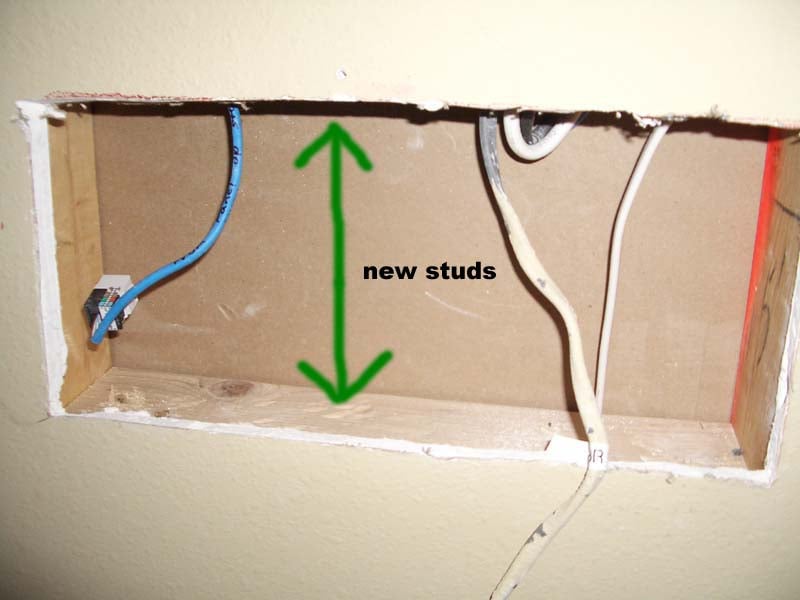
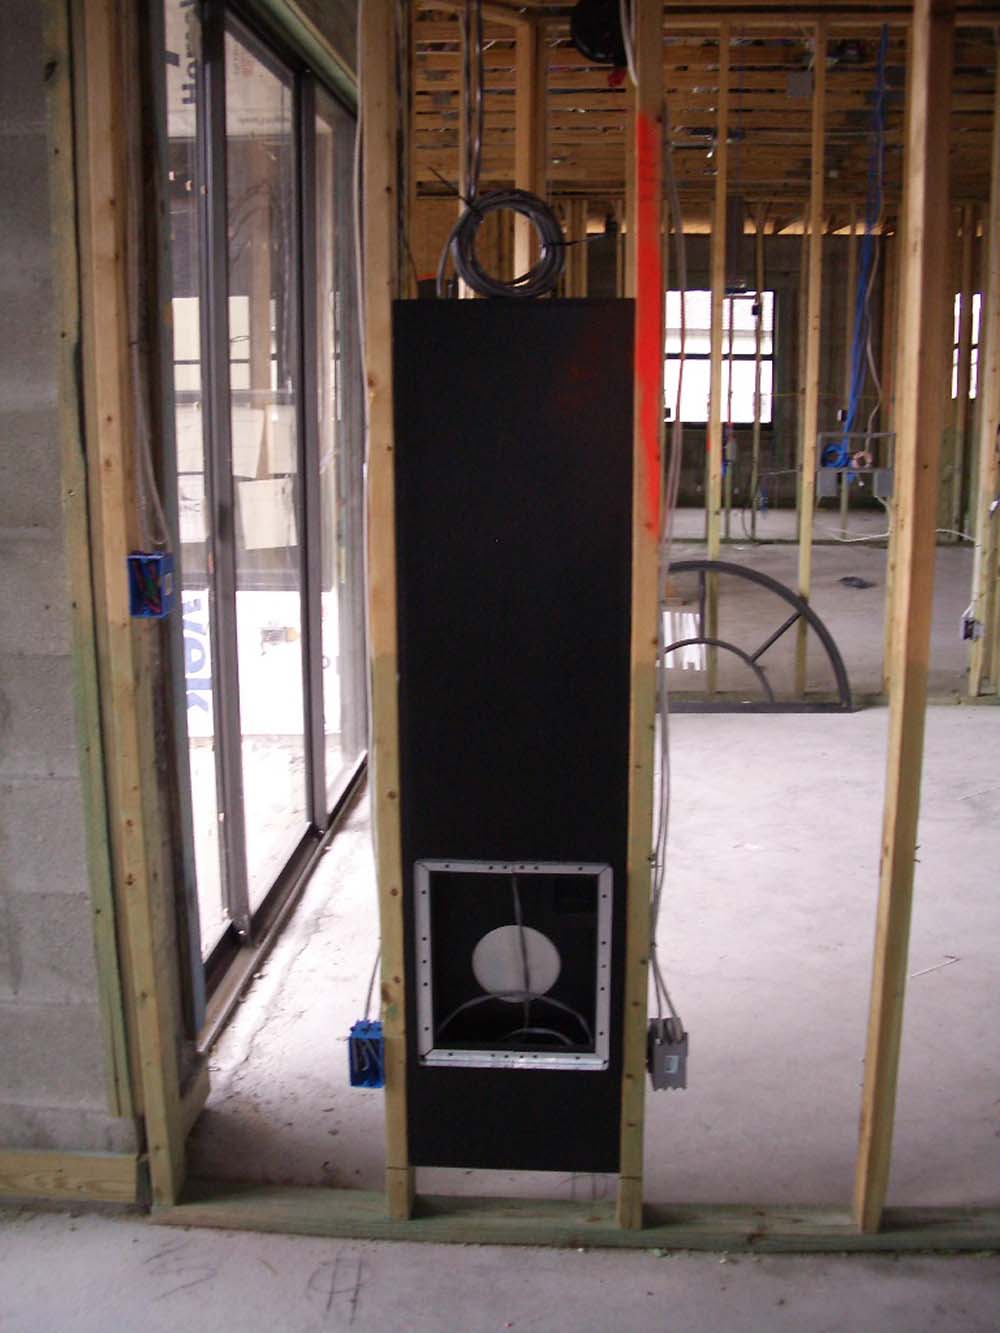
OK, so you’ve
picked the speakers, marked off their locations on the walls, and cut out the
drywall using the supplied template from the manufacturer as a guideline. DON’T
follow their next step of simply connecting the speaker and popping it into the
wall. Instead consider creating a pseudo back box like I did using 2x4s and
some insulation. Since you are installing the speakers between two studs
(usually 14” on center), you can use those as the sidewalls. All you need to do
now is cut two pieces of 2x4s to wedge between the studs and serve as the top
and bottom of the back box. I went one step further and secured them with wood
screws and some clear caulking to ensure they wouldn’t rattle or come loose
over time.
Editorial Note: Make sure you pre-drill holes in the studs for the speaker wire else you won't get very far when you crank up your system to enjoy some tunes.
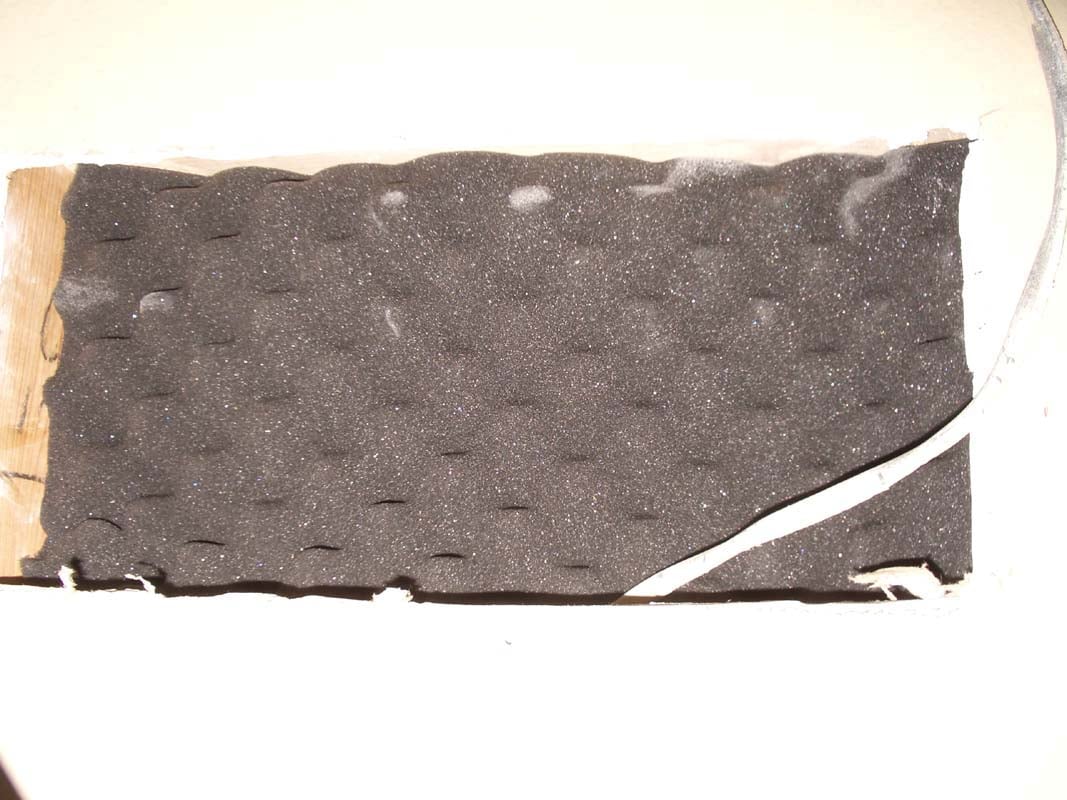
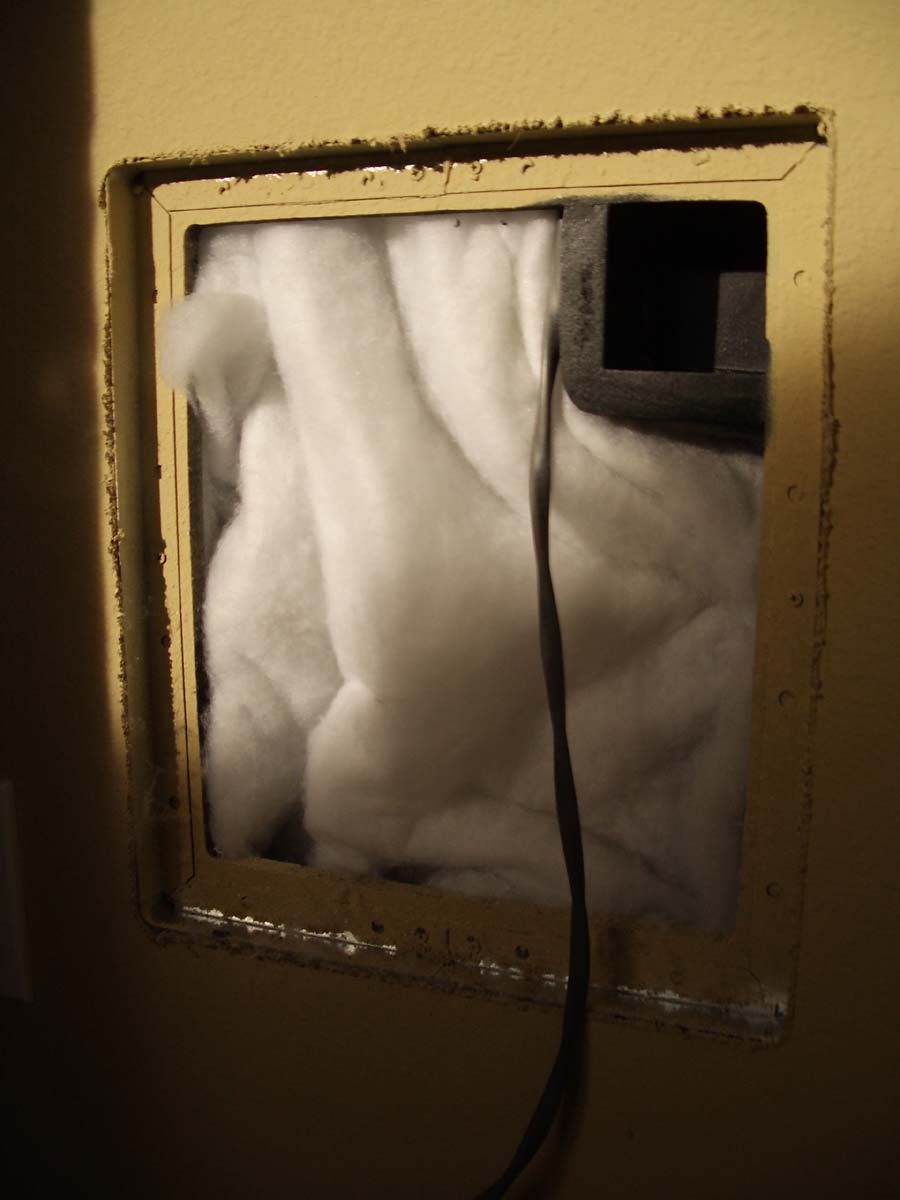
You now have a sealed enclosure for your in-wall speaker. If you want to get even fancier, you can tack on ¼” plywood to serve as the back of the cabinet bay but it’s not an absolute necessity. The drywall will work reasonably well, especially if you stuff the cavity with some Dacron or standard insulation.
The Surrounds
 Using the
manufacturers supplied template as a guideline, cut out a circle in the proper
ceiling locations where you intended to place the surround speakers. If you are
doing 7.1, I highly recommend utilizing in-wall speakers for the side channels
and in-ceiling speakers for the back channels. I have found this to be an
incredibly good combination that provides excellent envelopment while at the
same time remaining quite musical to take advantage of Dolby Prologic IIx Music Mode.
Using the
manufacturers supplied template as a guideline, cut out a circle in the proper
ceiling locations where you intended to place the surround speakers. If you are
doing 7.1, I highly recommend utilizing in-wall speakers for the side channels
and in-ceiling speakers for the back channels. I have found this to be an
incredibly good combination that provides excellent envelopment while at the
same time remaining quite musical to take advantage of Dolby Prologic IIx Music Mode.
My ceiling
spaces were heavily insulated making a back box somewhat less of a necessity,
especially since the sound doesn’t really bleed over to an adjacent room. But,
for better acoustical control and sound isolation, I strongly encourage you to
inquire about a manufacturers back box (usually in the form of an insulated
metal can). In order to eliminate any possibility of baffle to ceiling vibrations, I recommend lining the diameter of the speaker frame which connects to the ceiling with caulking prior to screwing it into the ceiling. Be especially careful to not get any caulking on the cone of the driver.
The Subwoofer(s)
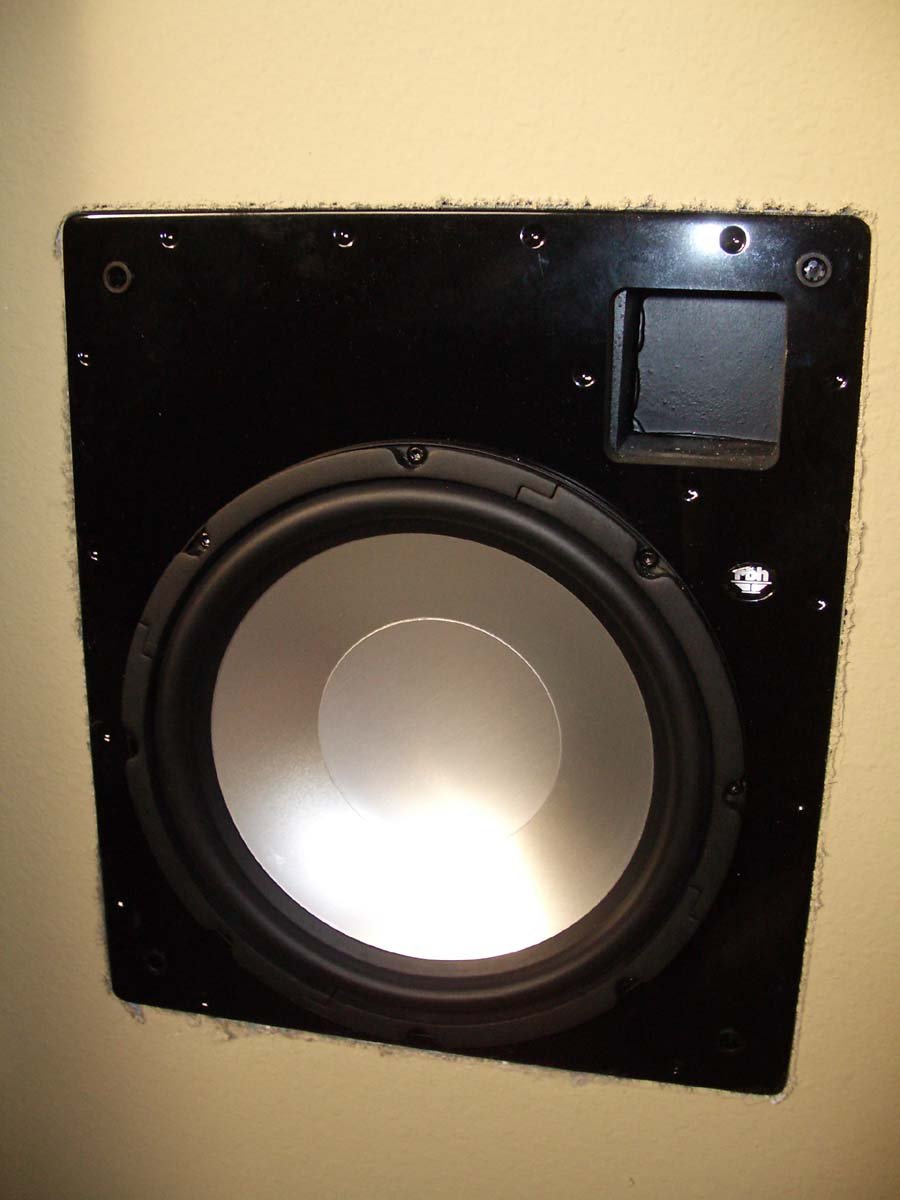
I got lucky here as I had access to the Audioholics Showcase home before drywall was put up so I installed a pair of RBH Sound SI-10 enclosures between my stud bays. Using an epoxy glue, I lined the sidewalls of the RBH enclosures and the adjacent stud bays I was mounting them in. I then used wood screws on the inside walls of the RBH enclosure and drilled them into the stud bays every foot or so. Once the screws were in place and the glue dried, these cabinets became a permanent fixture to my home.
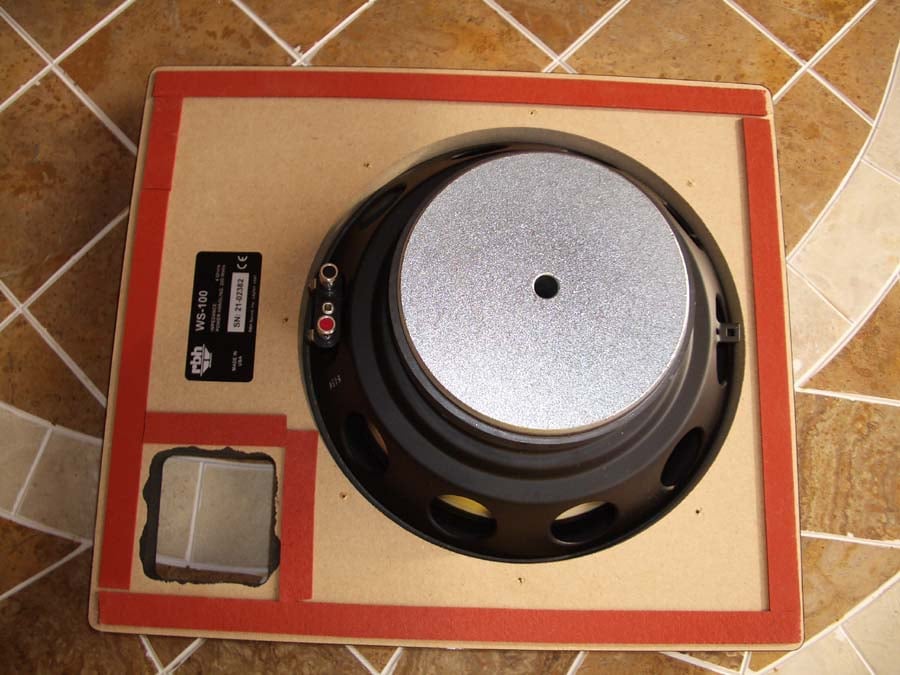
RBH Sound Signature SI-10 In-wall Subwoofer
If you are
installing a free air in-wall subwoofer, I again encourage you to find out if
the manufacturer offers a retrofit back box you can install after the drywall
is already up. Otherwise, follow the guidelines I laid out when installing the
Front LCR speakers and you should be good to go. An enclosed space (even if its not the optimal box volume) is usually a better option than operating a subwoofer driver in free space as it increasing power handling, provides better noise isolation into adjacent rooms and also provides much improved mid bass output which is critical in achieving a good subwoofer to satellite speaker blend for seamless integration.
Step 4: Calibrate and Enjoy
 The first thing to do is verify all of the speakers
are working using the internal test tone generator in the receiver/processor.
It’s always a good idea to do a polarity check via an Avia test disc and/or the
auto setup feature found in most receivers these days. Next set the delays and channel
trims relative to the primary listening area using a handy SPL meter set to C-weight,
slow response. For more information on calibration and setup, check out the
Calibrate your System in the Tips and Tricks section of Audioholics.
The first thing to do is verify all of the speakers
are working using the internal test tone generator in the receiver/processor.
It’s always a good idea to do a polarity check via an Avia test disc and/or the
auto setup feature found in most receivers these days. Next set the delays and channel
trims relative to the primary listening area using a handy SPL meter set to C-weight,
slow response. For more information on calibration and setup, check out the
Calibrate your System in the Tips and Tricks section of Audioholics.
Having done extensive listening tests of the RBH in-wall speakers I utilized in this article with and without controlled back boxes, I can tell you its literally a night and day difference. Without the back box, the sound seemed less focused and more resonant in nature. I was amazed at how much sound leaked through the next room, almost as if I was experiencing home theater meant for that adjacent room.
Once I built the back boxes and insulated them, the sound isolation in the next room became a reality. I could now partake in a full fledged home theater experience in my bedroom with minimal disturbance in the next room. Vocal intelligibility, imaging, and dynamics were greatly improved and I felt like I was finally listening to a high performance boxed system in the comforts of my bedroom. The bass from dual subs properly placed in the room was to die for and there was little need for room correction since my main listening area was well balanced by the dual subs and the added room gain below 30Hz reinforced the somewhat limited output of the in-wall subs giving them a much more authoritative presence and slam factor.
Conclusion
 So there you have it, a complete home theater system
with no obtrusive boxes or floor space consumed by large subwoofers. An in-wall
system properly installed and setup should provide you with a similar
experience to its boxed counterparts but without cramping your room décor or
taking up precious floor space. Taking the extra time during the installation
process to do it right will endlessly reward you each time you turn your system
on. The goal for any good home theater system is to be so connected with the
experience that the equipment literally disappears. There is no reason why this
goal cannot be achieved with a properly executed in-wall system. This is
something I am reminded of each weekend while enjoying the latest episode of
Heroes in High Definition 5.1 surround sound with my wife in the comforts of
our bed. Now all I need to figure out how to sell my wife on hooking up the
Xbox 360 in our bedroom. I won’t be holding my breath on this, but I welcome
suggestions.
So there you have it, a complete home theater system
with no obtrusive boxes or floor space consumed by large subwoofers. An in-wall
system properly installed and setup should provide you with a similar
experience to its boxed counterparts but without cramping your room décor or
taking up precious floor space. Taking the extra time during the installation
process to do it right will endlessly reward you each time you turn your system
on. The goal for any good home theater system is to be so connected with the
experience that the equipment literally disappears. There is no reason why this
goal cannot be achieved with a properly executed in-wall system. This is
something I am reminded of each weekend while enjoying the latest episode of
Heroes in High Definition 5.1 surround sound with my wife in the comforts of
our bed. Now all I need to figure out how to sell my wife on hooking up the
Xbox 360 in our bedroom. I won’t be holding my breath on this, but I welcome
suggestions.
Equipment List
| Front Speakers | RBH Sound MC-6 |
| Center Speaker | RBH Sound MC-414 |
| Rear Speakers | RBH Sound MC-615 |
| Subwoofers (2) | RBH Sound Signature SI-10 |
| Receiver | Denon AVR-5805 Zone 2 |
| DVD Player | Denon DVD-5910CI |
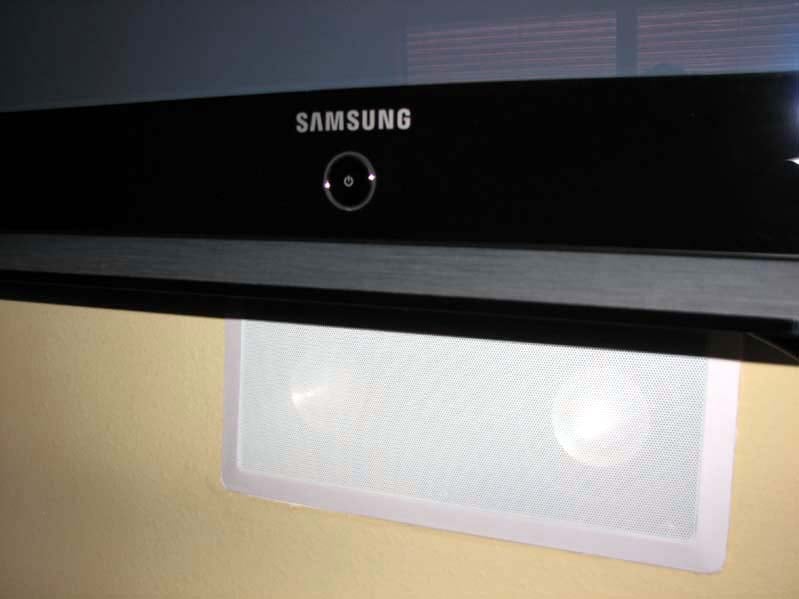
| Display | 42” Samsung HP-S4253 Plasma |
| Speaker Cables | Bluejeans 10AWG |
| Interconnects | Impact Acoustics Sonicwave |
Gene manages this organization, establishes relations with manufacturers and keeps Audioholics a well oiled machine. His goal is to educate about home theater and develop more standards in the industry to eliminate consumer confusion clouded by industry snake oil.
View full profile