
Home Theater AV Cable Prewire Basics 101
wire mess
Originally Published: June 5th, 2007 by Ray Adkins
Introduction
Pre-wiring homes for today’s complex home theater systems can often times be a very frustrating task even for the highly skilled A/V professional. There are many factors that need to be considered before a home is wired for video and sound. This basic tech tip article may help guide you through the rigorous process thus turning this project from daunting to fun and educational. We will give you guidance on how and where to route your cables, as well as tips on the proper cables to use for your installation. Get your home ready for tomorrow's state of the art home theater systems today. Read our article and watch our Youtube video.
How To Prewire A Home Theater
Planning
A key factor before you start pre-wiring your home is planning.
- A/V equipment rack location
- Selecting and installing the correct wire for the pre-wire
- Pre-wire for future upgrades and flexibility
- Use the correct tools when pre-wiring
- Route the wire correctly in the wall and in the ceiling
- Terminate the wire correctly to the A/V components
A/V Equipment Rack Location
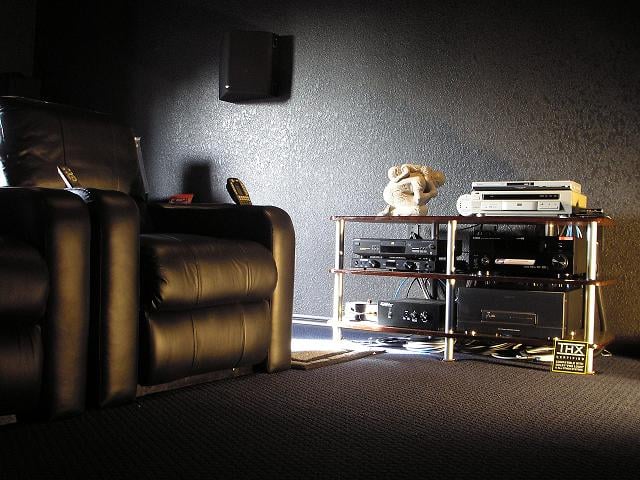 The first step is to know where
your home theater equipment will be installed in the room. This is the central
location where all the wire from speakers, subwoofers, TVs, front projection
systems and accessories will merge and be terminated to the equipment. In my
dedicated home theater I prefer having my A/V component rack on the side wall
at about the half way point of the room. I prefer this location because of its
close proximity to my chairs. This location also provides uniform and shorter
wire runs to my front projector and multiple speaker systems. You can install
the A/V rack in just about any location in or out of the room. Generally, I
don’t recommend placing A/V components in close proximity to the video viewing
surface. The reason for this is simple. In a darkened room, power indicator
lights and LED indicators on the A/V components can be distracting and glare
off the viewing surface. If the A/V component rack is placed in a position that
is not in a direct line of sight, the A/V equipment lights become less of a
distraction and your viewing will be more enjoyable.
The first step is to know where
your home theater equipment will be installed in the room. This is the central
location where all the wire from speakers, subwoofers, TVs, front projection
systems and accessories will merge and be terminated to the equipment. In my
dedicated home theater I prefer having my A/V component rack on the side wall
at about the half way point of the room. I prefer this location because of its
close proximity to my chairs. This location also provides uniform and shorter
wire runs to my front projector and multiple speaker systems. You can install
the A/V rack in just about any location in or out of the room. Generally, I
don’t recommend placing A/V components in close proximity to the video viewing
surface. The reason for this is simple. In a darkened room, power indicator
lights and LED indicators on the A/V components can be distracting and glare
off the viewing surface. If the A/V component rack is placed in a position that
is not in a direct line of sight, the A/V equipment lights become less of a
distraction and your viewing will be more enjoyable.
 If you choose a location
behind the seated position or out of the room you will need to consider using a
RF based remote control. IR based remote controls need line of sight for proper
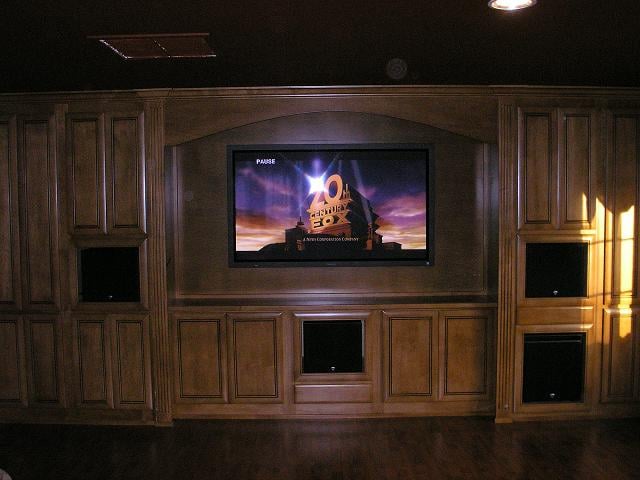
operation. Many homes have custom A/V cabinetry that will house a large screen
TV and A/V components on a front wall and often doors will cover the A/V
equipment for concealment. If this is the case with your future installation,
you should consider the use of a non glare surface for the doors and must
remember that A/V equipment needs proper ventilation. If you look closely,
below the A/V rack pictured above you can see wire coiled up and hidden
underneath. This wire will be used for system expansion or future system
upgrades. I have spot lighted the area and pulled the wire out to the front of
the rack for the photo, normally it would not be seen.
If you choose a location
behind the seated position or out of the room you will need to consider using a
RF based remote control. IR based remote controls need line of sight for proper
operation. Many homes have custom A/V cabinetry that will house a large screen
TV and A/V components on a front wall and often doors will cover the A/V
equipment for concealment. If this is the case with your future installation,
you should consider the use of a non glare surface for the doors and must
remember that A/V equipment needs proper ventilation. If you look closely,
below the A/V rack pictured above you can see wire coiled up and hidden
underneath. This wire will be used for system expansion or future system
upgrades. I have spot lighted the area and pulled the wire out to the front of
the rack for the photo, normally it would not be seen.
Choosing the Right Speaker Wire and AV Interconnects
 The first step is knowing
what type of wire to install for home theater A/V components you currently have
and may need for future upgrades. A professionally pre-wired home theater
should always be ready for upgrades. Having said that, it is virtually
impossible to future proof your pre-wired room. However, you can make future
upgrades much easier with proper planning. For example, running a conduit of PVC piping from your A/V rack to your display/projector can make it possible to run new wiring after your drywall goes up. There are two types of pre-wire
installations: new construction and retro fit custom installation (homes that
are already built). Regardless of the installation type, the wire used and
installation methods are similar. All wire that is to be installed in the wall
should be rated for in wall installation and comply with the National
Electrical Code (NEC). Speaker wire approved for in wall installation will
typically be stamped with the designation UL approved CL2 or CL3.
The first step is knowing
what type of wire to install for home theater A/V components you currently have
and may need for future upgrades. A professionally pre-wired home theater
should always be ready for upgrades. Having said that, it is virtually
impossible to future proof your pre-wired room. However, you can make future
upgrades much easier with proper planning. For example, running a conduit of PVC piping from your A/V rack to your display/projector can make it possible to run new wiring after your drywall goes up. There are two types of pre-wire
installations: new construction and retro fit custom installation (homes that
are already built). Regardless of the installation type, the wire used and
installation methods are similar. All wire that is to be installed in the wall
should be rated for in wall installation and comply with the National
Electrical Code (NEC). Speaker wire approved for in wall installation will
typically be stamped with the designation UL approved CL2 or CL3.
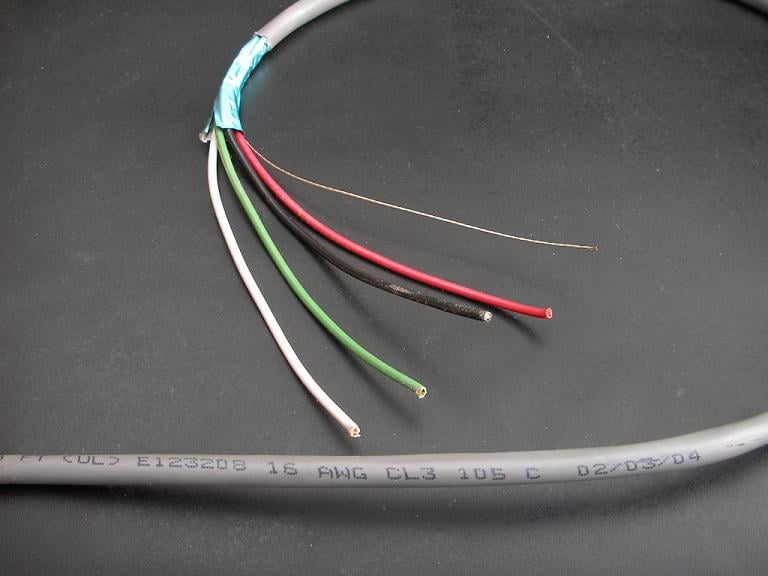
Speaker Cables
In wall speaker wire is available in many gauges, and comes in both shielded and un-shielded varieties. For high performance home theater installations and longer runs we typically recommend heavier gauge 12AWG two conductor for each speaker in the system. One alternative to this is to use 14AWG - 4 conductor cables, which create an aggregate 11AWG - 2 conductor cable. There are a few advantages to 14/4 cable, including superior flexibility as well as the security of having a backup pair of conductors in the unlikely event that one pair should fail or you later desire to add another set of speakers (i.e. an Atmos Elevation speaker which would sit on top of your surround speakers). Speaking of Atmos, if you would like to take advantage of the new format, we would also recommend pre-wiring for in-ceiling speakers; note that Atmos can support up to 10 overhead channels in home, though 2-4 overhead channels is a more typical figure supported by today's A/V receivers.
Generally, I like to run shielded in-wall speaker wire; however, if you are meticulous in your installation shielded wire may not be necessary. Multi-room or zoned pre-wire installations don’t really need large conductor wire because they are normally used with volume controls (VC’s) at lower listening levels. The use of 14 AWG is fine for these types of installations up to about 50ft. Most often, purchasing in-wall speaker wire in bulk is the most cost effective. When you measure distances for speaker wire runs add about 30%-50% to your distance total or purchase a 250ft of 500ft spool. The additional wire is needed: I will explain why later in the article.
Check out: Speaker Cable Gauge (AWG) Recommendations for more information on this topic.
Interconnects
Interconnects can be broken down into two flavors: balanced and unbalanced. Unbalanced connections are far and away more common than balanced connectors in the home market, though balanced connectors offer a locking connection and tend to suffer less from grounding issues. The best style of unbalanced cable is RG6 quad shield coax. This wire can be used for subwoofer interconnects, component video cables, digital interconnects, analog interconnects, and satellite/cable distribution. Meanwhile, balanced cables can be used for AES/EBU digital connections and analog audio connections (including compatible subwoofers). Presuming your source devices and A/V receiver or Pre/Pro are located on the same rack, you'll primarily need to plan for pre-wiring subwoofer connections.
For pre-wiring subwoofers, we would recommend running multiple connections, i.e. at least one run to each each side wall and rear wall. Even if you're not planning on running three or six subwoofers (we do recommend multiple subs to smooth in-room response), the issue here is that it's difficult to predict where your subwoofer(s) will sound best. From that standpoint, it's best to have several options to play with so you can find out what works best for your room.
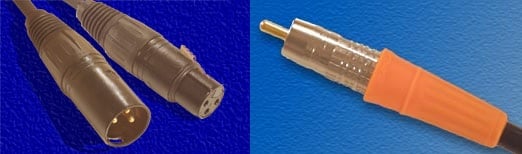
Balanced connection (left) vs unbalanced (right).
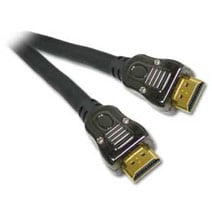
HDMI Cables
High Definition Multimedia Interface (HDMI) is currently the cable of choice for transmitting high definition audio and video in high end home theater installations. HDMI connections are seen on Blu-ray players, HDTV’s, cable boxes, gaming consoles, and projectors. Depending on the length of your run, some care needs to be taken with the cable you purchase. While few (if any) cables should have difficulties with the usual 3-4' run between a Blu-ray player and your A/V receiver, longer runs to a projector can be a little more problematic. For runs up to 50 feet, we would suggest purchasing standard category 2 certified cables, which are tested at 340MHz and can pass a 1080p60 or 2160p30 signal. Beyond 50 feet, you'll probably need an active HDMI cable solution ala Monoprice's Redmere HDMI cables. For runs to a projector, we would also recommend running conduit with a second HDMI cable for redundancy, as well as an ethernet cable for triggering your electric screen (if applicable). As always, if it goes in the wall or in the ceiling it must meet NEC standards.
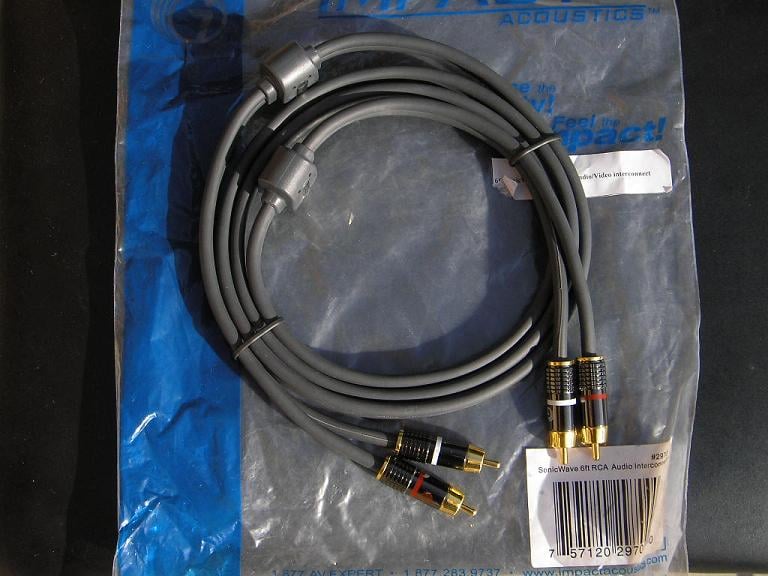
Impact Acoustics Sonicwave Blue Jeans Cable Series-2
Ethernet Cable
Category 5 (CAT-5) is often used in structured wiring, phone, computer multi-room control systems, and home automation systems. CAT-5 can also be used in home theater applications for remote control and as a trigger cable for operation of electric screens and other accessories. Cat-5 wire is generally generic and can be purchased in either shielded or unshielded 250ft and 500ft spools.
A Final Word about Wire Selection
There is much hype and marketing BS in the wire world. The simple fact is that the audio/ video wire market is big business with many boutique manufacturers competing for your hard earned cash. When you see that fancy package with slick marketing slogans you are essentially paying more for some thing that will end up in the recycle bin. Shielding, termination, flexibility, and construction are the most important traits to look for in a cable. Below you see two examples of analog interconnects. Can you tell me which one you think sounds better?
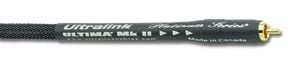
It must be the one with the fancy braided cover and the slick logo with directional indicators, right? If you can hear a sonic difference between these two cables with moderately priced equipment, then make room in your closet for that superman outfit! Cables should not sound like anything; their job is to transmit signal from one source to another without coloring the sound. Try not to get caught up in hype! Then you can spend your home theater dollars on something of greater importance.
Wiring the A/V Rack Wall
You Need Tools to Pre-Wire
The tools you need to complete the pre-wire job are dependant on the type of pre-wire you need to install: new construction or retro. New construction pre-wire installations are much easier because the wire is installed before the sheet rock and insulation. You have complete access to the stud bays and attics. Retro custom installations are a little more difficult because you need to fish wire in pre-existing walls with the sheet rock in place. In some cases, you may need to cut the sheet rock to provide access for the wire run, then patch and refinish the sheet rock.
Basic Tool List: New Construction
- Heavy duty corded or cordless drill
- Wood boring, auger, or paddle drill bits
- Hammer
- Ladder
- Camera
- Various hand tools like screw drivers
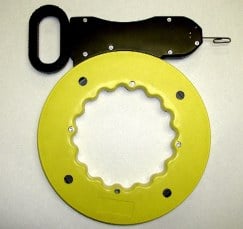
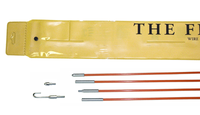 Basic Tool List: Retro Custom Installation
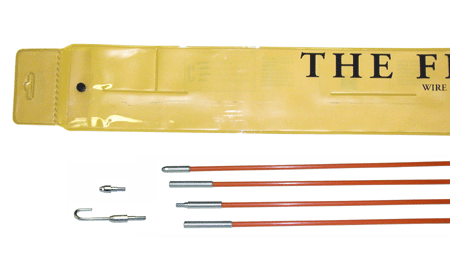
- Heavy duty corded or cordless drill
- Wood boring, auger, or paddle drill bits ( may need longer lengths)
- Fish tape or fiberglass fish rods
- Bright Flashlight
- Ladder
- Various hand tools
- Roto zip or drywall saw
- Dry wall patching tools
- Dust Mask

Retro pre-wiring can be dirty, frustrating, and sometimes dangerous. If you don’t have the skill and knowledge to perform the various tasks or if you are unsure of your ability, my best advice is to hire a competent A/V installation professional.
Let’s Get Busy (A/V Rack Wall)
Now that we have established the location of the audio/video equipment in the room and have the tools to complete the job, it’s time to get our hands dirty. The photo shows typical stud framing of an exterior wall with the wall studs installed 16-inches on center. Partitioned interior wall may or may not have blocking installed between the studs as illustrated in the photo designated by the letter “B”. As previously stated, if you are pre-wiring new construction, blocking will not present a problem because you have access to the inside of the stud bay to drill holes in the blocking. If you have a retro pre-wire you may have to cut out the sheet rock to drill through this blocking to run your wire. A quick word about drilling holes in stud framing before we proceed. As a rule, I never drill more than two holes with a maximum size of 1-inch in a stud bay. The reason for this is because it could potentially weaken structural stud framing. In the picture, you see only two holes for each stud bay with the holes drilled in the center of the 2x4 blocking. The same rule should apply for drilling through the framing top plate of the wall. If you are not sure about the local code regulations, you may want to consult with your local planning and building department.
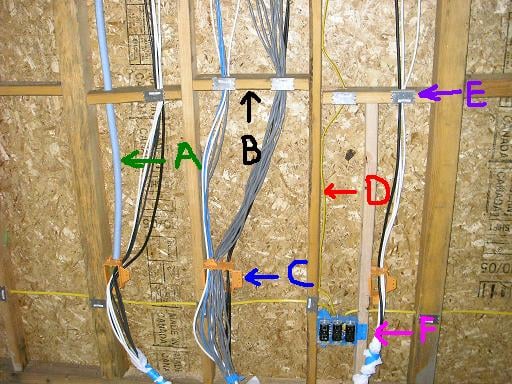
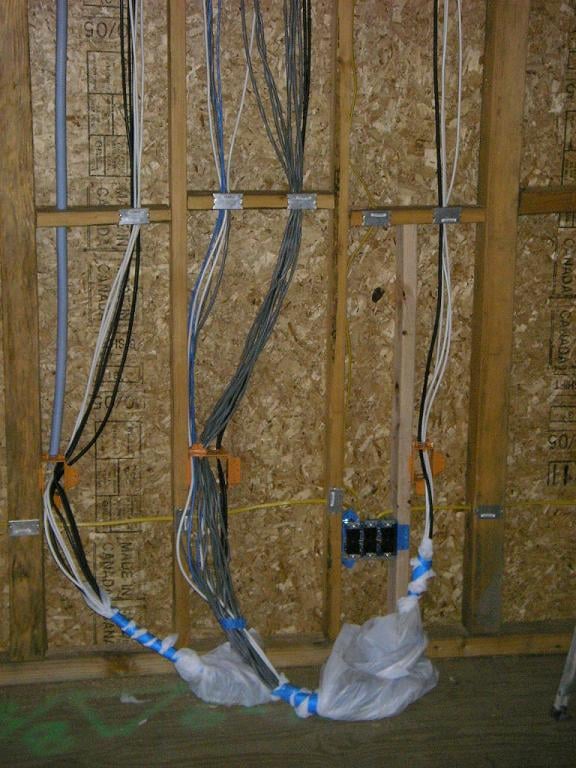
Low voltage work boxes as illustrated with the letter “C” should be large enough to accommodate all of your wire. Note the location of the low voltage boxes in the photo; they are installed above the high voltage romex electrical circuit to prevent RF electrical interference. A good rule to follow when pre-wiring your home theater is to always keep your pre-wire as far away as possible from high voltage electrical wire. Looking at the photo you will see that high voltage romex is also installed vertically in the stud bay as illustrated with the letter “D”, there is no pre-wire installed next to the romex that runs vertically up the wall. Instead, the wire is installed in the next stud bay.
If you have a retro installation, you should locate electrical outlets on the wall and high voltage electrical romex wire runs before you drill into the stud framing. Nail plates are installed everywhere the pre-wire goes through the stud framing as illustrated with the letter “E” The nail pates prevent the wire from being damaged if a nail or screw is installed in the wall after sheetrock is installed. Flex tube conduit is installed in the wall as illustrated with the letter “A”. The conduit is left empty and provides access for future wire pulls for future expansion. This low cost item is often over looked in high end home theater pre-wire installations. Electrical outlets as illustrated with the letter “F” also need to be considered. You need not spend your money on “audiophile” electrical outlets but should install commercial grade 20 amp outlets. The reason for using the commercial grade outlet has nothing to do with sound quality: that’s all BS. The main reason is that commercial grade outlets have better grabbing power. The tangs used in the commercial grade outlets will hold heavy power cords better than conventional 15 amp “El-cheapo” outlets. Partially dislodged power cords can create system hum and buzz so spend the extra $2 for the good outlets. The last thing I want to mention about the photo and illustration is how the wire is installed. It hangs gently with no sharp bends and comes out of the low voltage box as a trunk of wire.
 For my
dedicated home theater room, I installed allot of extra wire because wire is
relatively cheap and you never know what you will need for future upgrades.
Starting with the speakers I wired for the main left, center and right speakers. Additionally, I ran wire for an alternate pair of front speakers
and an additional center channel. I also installed five runs of RG6- QS just in
case I ever acquire self amplified speakers. For the subwoofers, I used two Blue
Jeans LC-1 pre-terminated subwoofer cables. I pre-wired two additional RG6-QS
cables for the future. For the surround sound channels, I pre-wired for two
side mounted surround speakers, two optional surround speakers at the back of
the room, and two EX channels. I ran two
RG6-QS cables to the rear corners of the room for future upgrades. When you have
completed the speaker pre-wire runs, lightly tack the wire to the back of the
wall for any wall mounted speakers and leave an additional 2-3 feet of wire to
pull out of the wall after the sheetrock is installed. Now that you have
completed all of your in-wall pre-wire, take photographs of all your wiring in
the stud faming. This will help you locate it after the sheetrock is installed.
Pick a central location and record measurements to the location of each wire or
mark the measurements on the floor where the wire is located in the wall. All of the future upgrade cable should be
neatly coiled in low voltage boxes.
For my
dedicated home theater room, I installed allot of extra wire because wire is
relatively cheap and you never know what you will need for future upgrades.
Starting with the speakers I wired for the main left, center and right speakers. Additionally, I ran wire for an alternate pair of front speakers
and an additional center channel. I also installed five runs of RG6- QS just in
case I ever acquire self amplified speakers. For the subwoofers, I used two Blue
Jeans LC-1 pre-terminated subwoofer cables. I pre-wired two additional RG6-QS
cables for the future. For the surround sound channels, I pre-wired for two
side mounted surround speakers, two optional surround speakers at the back of
the room, and two EX channels. I ran two
RG6-QS cables to the rear corners of the room for future upgrades. When you have
completed the speaker pre-wire runs, lightly tack the wire to the back of the
wall for any wall mounted speakers and leave an additional 2-3 feet of wire to
pull out of the wall after the sheetrock is installed. Now that you have
completed all of your in-wall pre-wire, take photographs of all your wiring in
the stud faming. This will help you locate it after the sheetrock is installed.
Pick a central location and record measurements to the location of each wire or
mark the measurements on the floor where the wire is located in the wall. All of the future upgrade cable should be
neatly coiled in low voltage boxes.
Routing the Audio / Video Cables and System Termination
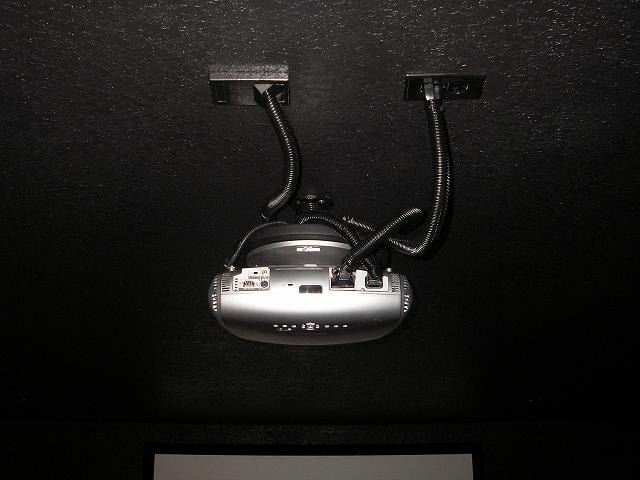
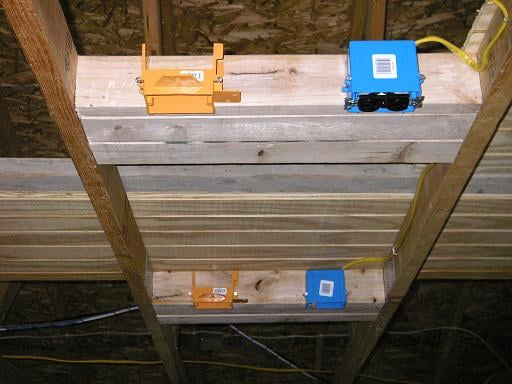 I use a front projection system in my theater
and I wanted to make sure I had pre-wire to alternate locations in the ceiling just
incase I change the projector and it has a shorter throw distance. As you can see in the photo, I have two locations. 2x4’s are nailed across
the ceiling trusses to box them in. This provides a sturdy surface in which to
bolt a projector. 115 volt outlets are installed for both locations and the low
voltage boxes are installed on the other side for separation. For the wire
installation, I pre-wired one 35ft. Blue
Jeans BJC Series-2 HDMI cable, one 35ft. Impact Acoustics Sonicwave component
video cable, and three un-terminated runs of RG6-QS that will remain coiled up
in the ceiling. The use of commercial grade outlets is highly recommended for
projectors because the power cord hangs upside down.
I use a front projection system in my theater
and I wanted to make sure I had pre-wire to alternate locations in the ceiling just
incase I change the projector and it has a shorter throw distance. As you can see in the photo, I have two locations. 2x4’s are nailed across
the ceiling trusses to box them in. This provides a sturdy surface in which to
bolt a projector. 115 volt outlets are installed for both locations and the low
voltage boxes are installed on the other side for separation. For the wire
installation, I pre-wired one 35ft. Blue
Jeans BJC Series-2 HDMI cable, one 35ft. Impact Acoustics Sonicwave component
video cable, and three un-terminated runs of RG6-QS that will remain coiled up
in the ceiling. The use of commercial grade outlets is highly recommended for
projectors because the power cord hangs upside down.
How To Prewire A Home Theater
The Correct Way to Route Wire
 Having been in many new construction homes, I am often appalled when I
see wire installed by the so called “professional low voltage specialist”. If
you are going to hire someone to pre-wire your home find a professional A/V
installation specialist. Pre-wiring for A/V is different than pre-wiring for
phones, alarms and computer networking. Wire installations for A/V systems need
to be clean and routed correctly because your systems performance relies on
correct installation. Planning, patience, and care are necessary to ensure top
performance from your pre-wire installation. First rule: never cross high
voltage electrical wire with your low voltage pre-wire. There is always a way
to keep your
Having been in many new construction homes, I am often appalled when I
see wire installed by the so called “professional low voltage specialist”. If
you are going to hire someone to pre-wire your home find a professional A/V
installation specialist. Pre-wiring for A/V is different than pre-wiring for
phones, alarms and computer networking. Wire installations for A/V systems need
to be clean and routed correctly because your systems performance relies on
correct installation. Planning, patience, and care are necessary to ensure top
performance from your pre-wire installation. First rule: never cross high
voltage electrical wire with your low voltage pre-wire. There is always a way
to keep your 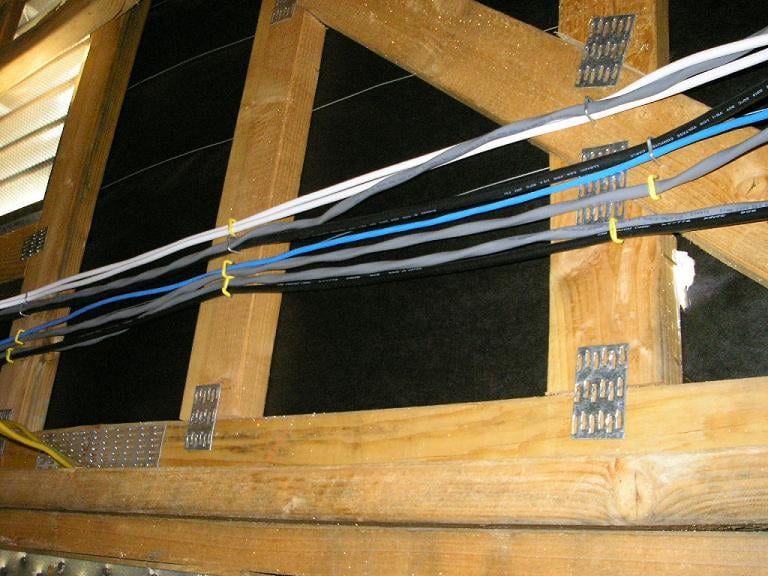 pre-wire away from romex wire runs that feed electrical outlets
and lighting. Remember when I told you to add 30-50% to you wire length totals?
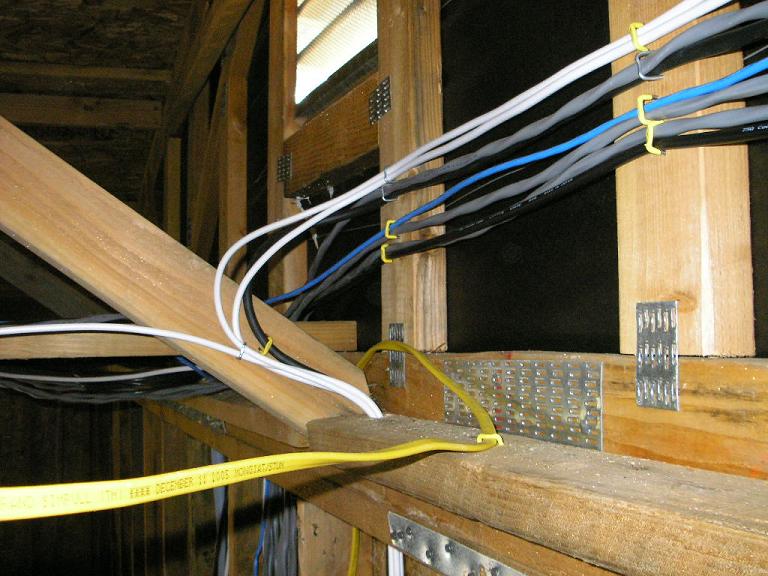
Now you get to find out why. As shown in the picture, the pre-wire is routed up
through the top plate of the wall. As you can see, there is a romex wire run
installed on the top plate. The pre-wire is installed at least 12-inches above
the romex. The white RG6-QS wire is pulled away from the romex and then stapled
above. Note the gentle sweeping bends in the RG6-QS. Never kink or bend a wire
with too small of a radius. All wire runs are pulled lightly then stapled to
the framing for a nice clean run. Romex staples are used to secure the wire to
the framing and the staples are nailed in just enough to hold the wire.
pre-wire away from romex wire runs that feed electrical outlets
and lighting. Remember when I told you to add 30-50% to you wire length totals?
Now you get to find out why. As shown in the picture, the pre-wire is routed up
through the top plate of the wall. As you can see, there is a romex wire run
installed on the top plate. The pre-wire is installed at least 12-inches above
the romex. The white RG6-QS wire is pulled away from the romex and then stapled
above. Note the gentle sweeping bends in the RG6-QS. Never kink or bend a wire
with too small of a radius. All wire runs are pulled lightly then stapled to
the framing for a nice clean run. Romex staples are used to secure the wire to
the framing and the staples are nailed in just enough to hold the wire.
 When the wire is secured to the framing, you should be able to lightly
pull on the wire and it should move freely inside the nailed staple.
When the wire is secured to the framing, you should be able to lightly
pull on the wire and it should move freely inside the nailed staple.
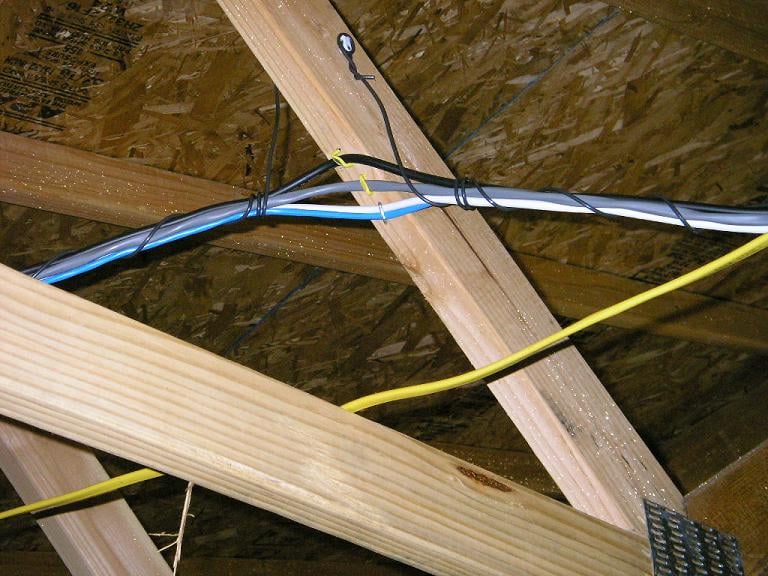
There are many types of wire fasteners, I prefer the romex staples because they are faster to install. Use what works for you. With the wire secured to the side walls, you don’t have to worry about someone accidentally breaking or stepping on a wire because it’s out of the way. There is always a way to avoid crossing romex, sometimes you just need to think about it and be a little creative. One way is to suspend the pre-wire over a romex run. In the photo, the pre-wire is suspended 18-inches above the romex. Staple each wire to the truss cross brace then construct a simple sling with some left over stiff wire (12 AWG romex works). Wrap the stiff wire down each side of the pre-wire and then staple it above. This will relieve tension on the pre-wire run when suspended. If you plan on installing in-wall or in-ceiling speakers, the same rules apply. Routing pre-wire the correct way takes more wire but your installation will be cleaner and your system will be less likely to develop hum, buzz or noise in the video image because you took the time to do it the correct way.
Don’t get my wiring dirty
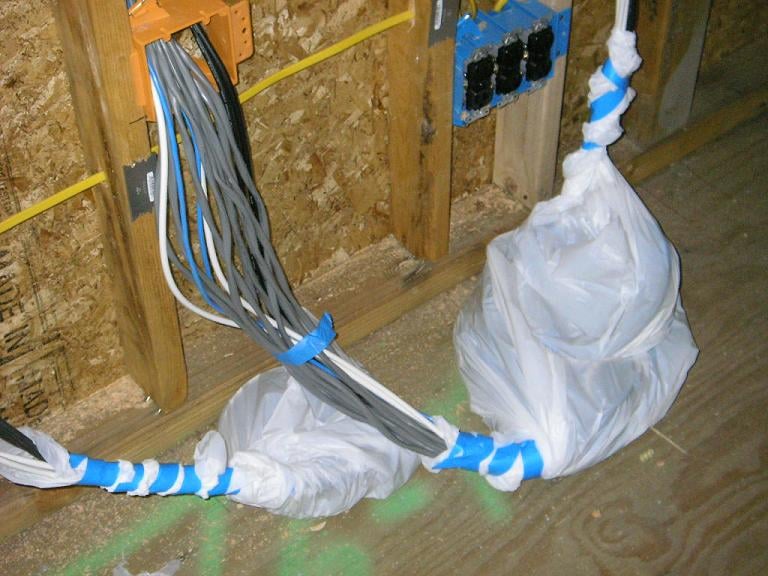 Now that you have completed your nice neat pre-wire, the last thing you
want is the dry wall installers mucking it all up. If you bag and tape your
pre-wire before sheet rocking and finishing, you will be thanking yourself.
Another thing you need to realize is that many in the construction industry
know little about the wiring you just installed. They may believe it’s nothing
more than electrical wire. If you don’t want boots tromping all over your wire
you may want to pin them up to the framing while your room is under
construction and supervise the installation of the insulation and sheetrock.
Now that you have completed your nice neat pre-wire, the last thing you
want is the dry wall installers mucking it all up. If you bag and tape your
pre-wire before sheet rocking and finishing, you will be thanking yourself.
Another thing you need to realize is that many in the construction industry
know little about the wiring you just installed. They may believe it’s nothing
more than electrical wire. If you don’t want boots tromping all over your wire
you may want to pin them up to the framing while your room is under
construction and supervise the installation of the insulation and sheetrock.
One Last Word About Electrical
The electrical system that feeds power to your home theater should be a consideration in new construction homes. Obviously, in retro homes it may be harder to update the electrical system but it can be done. I recommend a minimum of one dedicated 20 amp circuits for your A/V receiver or power amplifier, an additional 20 amp circuit for your subwoofer(s), one 15 amp circuit for video, and one circuit for lighting. If you're looking at high powered amplifiers like the Emotiva XPR-1, you might even consider the installation of a 220V circuit for a bit of extra juice. All circuits should have independent Hot, Neutral and Grounds: thus the name dedicated. If you plan on using a dimmer control for your lighting, make sure the dimmer is high quality. Cheap dimmers can introduce hum and buzz into the system. If you plan on installing home theater chairs with electric recline mechanisms, plan for the placement of a 15 amp outlet in the floor at the position of the chairs. Finally, for those utilizing a projector, consider running a line of Romex from your rack versus a regular outlet: if you're using a battery backup / voltage regulation system, this allows your projector to make use of those amenities as opposed to being limited to a light duty line conditioner.
System Termination
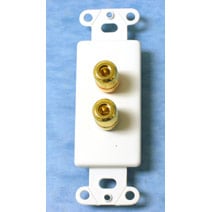
After your room’s construction is completed, it’s time to terminate your system’s components. Many installers like to use wall plates with binding posts for a clean look. I don’t like this approach because it adds four more termination points for the speaker wire. Using binding post plates with speaker wire, you will have the connection at the receiver or amplifier, front of the plate behind the A/V rack, back of the plate at the A/V rack, back of the plate at the speaker location, front of the plate at the speaker location and finally the binding posts on the speaker. That’s six termination points, if you are counting for one speaker! Instead of the binding post wall plates I prefer to use pass through wall plates. With the use of a pass through plate, you only have two termination points per speaker, one at the binding posts of the receiver or amplifier and one at the binding posts of the speaker. Wire termination to A/V equipment in the rack should be neat and well organized. Again there is always a way to route interconnects and wire away from power cords in the A/V rack. If you do need to cross a power cord do so at a 90 degree angle. Never run interconnects and power cords side by side. Interconnects to receivers, amps, DVD players and other equipment should be relaxed with gentle bends, don’t try to make too short of a cable reach.
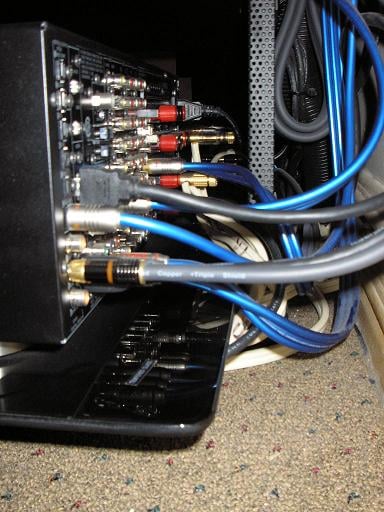
You can keep your cabling neat and together a number of ways. Split Loom is the black plastic tube that is split down one side and has a corrugated look to it. It is available in sizes from 1/4" to 1-1/2”. The use of split loom will keep cabling neat and give the back of your rack a high tech look.
Another option is to use Velcro tie straps to keep your cabling looking neat and together. These are available at most pro sound stores. The last option is plastic zip ties; you can use these (I do) but be careful. Don’t pull them tight around your cables, only enough to hold them in place. The small teeth on them will cut your cables if you pull them too tight.
Wrapping It All Up
 There are many was to
dress up an installation. I don’t like the idea of running cabling and power
cords together down the center post of a projector mount for the reasons previously
explained in the article. With a little patience and creativity you can come up
with great looking alternatives that will improve your systems performance. A
small detail like painting your outlet covers the same color as your walls and
ceilings or selecting outlets that closely match your décor are little details
that will polish and give your home theater a finished look. Pre-wiring a home
theater yourself and doing it the correct way can be very rewarding. Careful
planning, patience, research, and attention to detail are the keys to a trouble
free high performance home theater installation. Be sure to check with local
your local building codes before you begin a pre-wire project. If you are gong
to hire a custom installation A/V professional you now know how wiring should
be routed and installed and that can prevent costly mistakes.
There are many was to
dress up an installation. I don’t like the idea of running cabling and power
cords together down the center post of a projector mount for the reasons previously
explained in the article. With a little patience and creativity you can come up
with great looking alternatives that will improve your systems performance. A
small detail like painting your outlet covers the same color as your walls and
ceilings or selecting outlets that closely match your décor are little details
that will polish and give your home theater a finished look. Pre-wiring a home
theater yourself and doing it the correct way can be very rewarding. Careful
planning, patience, research, and attention to detail are the keys to a trouble
free high performance home theater installation. Be sure to check with local
your local building codes before you begin a pre-wire project. If you are gong
to hire a custom installation A/V professional you now know how wiring should
be routed and installed and that can prevent costly mistakes.