
Yamaha DVD-C750 DVD Player Review
Yamaha DVD-C750 DVD player
- Product Name: DVD-C750 DVD Player
- Manufacturer: Yamaha
- Performance Rating:

- Value Rating:
- Review Date: February 03, 2005 19:00
- MSRP: $ 329
|
Video Processing
Audio Processing
|
Other Features
|
Pros
- Good Video performance at this price
- Excellent audio performance
- Progressive and Interlaced outputs active simultaneously
- Very good build quality
- Multi-disc changer
Cons
- Will not pass blacker than black
- Slow load times
- User interface difficult to navigate/setup menu layering makes it
- difficult to make video adjustments
- No gamma adjustment
- Cannot adjust speaker levels when DVD is in play mode
- 120Hz fixed crossover setting for Small speakers
DVD-C750 Overview, Setup and Remote Control
Yamaha is no stranger to the DVD player market. For years they have been selling DVD players at various price ranges with a host of the latest and greatest features within each respective price class to meet the market needs. Finally, a manufacture has stepped up to the plate and produced a universal DVD player that is cost effective and serves as a multi changer CD player, as well. Thank you, Yamaha, for producing a DVD player with very nice build quality, good video performance, excellent audio performance and capabilities.
What's inside the box?
Upon opening the factory sealed box, I found that the DVD-C750 was well packed from the factory. The DVD-C750 box contained: the DVD player, one remote, one user manual, and one set of cables. I am not an advocate for the high-end cable manufacturers but the cables shipped with this unit are not practical for installation. The cables are not well built as per Audioholics standards. The user manual is well written and easy to comprehend.
The first thing I noticed after unpacking the DVD-C750 was the build quality of the player. It is very impressive for a DVD player that retails for $329. The front panel is neat and well organized. The rear of the DVD-C750 has multiple outputs including both toslink and coax digital; 6.1 channel direct analog outputs; right and left mixed analog outputs; and component, composite and s-video outputs. All RCA outputs are gold plated and they are well spaced for easy connection. The power cord is non detachable.
|
OSD Audio Set-Up Page |
OSD Video Set-Up Page |
|
|
|


Remote Control
The DVD-C750 remote is better than the typical remote of other players in this price range. It is responsive and the buttons are clearly labeled. However, its practical usage for home theater is limited because of the lack of back lighting. A simple solution is to program your systems universal remote control with its basic functions and store it away when needed to operate very specific functions.

Audio Set-Up
Setting up the DVD-C750 was a little laborious because of the difficult user interface. I had trouble selecting the setting that I wanted and found it difficult to use the remote control and navigate through the set up process. Though, it was difficult to get a grasp on how to select different items, I did progress and manage to set up the audio portion of the player. On the audio set up page, I configured the Analog output to MULTI for DVD-A/SACD playback. This is the factory default. Digital output was set to ALL for Dolby Digital/DTS. For Speaker set up I selected LARGE for all my speakers and subwoofer to YES. The bass management crossover for SMALL is much too high at 120Hz for most non-satellite or cube speaker systems. I would have preferred an adjustable crossover or a fixed 80Hz setting for SMALL. The DVD-C750 has the option to select CD up Sampling Rates of 88.2 kHz (x2) or 176.4kHz (x4). The default setting for Sampling Rate is OFF. The DVD-C750 also has a Night mode, which compresses the sound by reducing the dynamic range and sound output during loud passages. It also increases the low passages proportionally so the faint movie dialog can be more clearly heard at low volume levels. I left the Night mode in the factory default position: OFF. The DVD-C750 has internal test tones for level matching the analog outputs. You cannot, however, adjust the speaker levels while a DVD is playing. This makes it very difficult (nearly impossible) to adjust speaker levels when using the more precise test tones of special calibration discs like Avia. I resorted to using the internal test tones to level match my speakers for DVD-A /SACD playback and tweaked it thereafter for more precise level matching. The DVD-C750 allows you to adjust the delay times for the center channel and surround speakers. Delay times are in milliseconds rather than feet or meters (note every 1ms of delay corresponds to approximately 1.1 ft). Since my surrounds are closer to the listening position than my fronts, I selected a 10ms delay for the surrounds.
Video Set-Up
I began the video set up the same as the audio. For this review, I used the new Hitachi 70"VS810 LCD, the new Hitachi 55HDT51 55"plasma, and the Phillips 30PW850H HDTV. The DVD-C750 factory default for screen shape is 4:3 and I selected 16:9. I set the progressive scan mode to ON. There are four choices for Picture settings: Standard, Bright, Soft and Personal. The Personal setting allows you to adjust Brightness, Contrast, Tint, and Color. I chose the Standard mode. The other option in the picture settings menu is selecting Black Level Enhance. You can only adjust this when the DVD player is set for NTSC; it will have no effect if the DVD player is set to PAL. I left the Black Level Enhance setting to OFF for the review. The only other selection in the video set up is for Closed Captioning. I left this in the factory default OFF position. One final note about the onscreen display: when initiating the OSD it fills the entire screen. When you try to make an adjustment for video in the Personal Settings the onscreen display remains. This makes it very difficult to make adjustments with a disc like AVIA because you only see the onscreen display, not the changes being made. The other thing I noticed was an absence of Gamma control. I wish more DVD manufacturers would include this in the set up menus. The length of the load time is approximately 18 seconds from the time I pushed the door Close button on the front panel.
DVD-C750 Video Performance Tests
Testing and evaluating a DVD player's performance with test discs and various display devices is somewhat subjective to the reviewer's interpretations of the test results and are not absolutely scientific. Thus, the review should be used as a guideline only. For the review of this DVD player, the performance was based on the player and the display monitor. I used the new Hitachi VS810 70"LCD, the new Hitachi 55 HDT51 55"plasma, and the Phillips 30 PW850WH 30"HDTV - all of which were calibrated as close as possible to ISF reference standards. For the test and evaluation of the DVD-C750 I used Avia and Silicon Optix HQV Technology benchmark DVD test discs.
All tests were performed with the DVD-C750 set in progressive scan mode.
Resolution Test
With Avia, I checked the resolution capabilities. The 6.75MHz pattern in the test is clearly visible and well defined as shown in the photo lower right corner. After the resolution check, I proceedED to the black level test using Avia's pluge test pattern. The ability to display correct black level is an important part of a DVD player's performance. Correct black level settings will preserve shadow detail and improve the depth and contrast of an image. Viewing the pluge pattern, I noted that when the DVD-C750 is in the factory default setting, Black Level Enhancer set to OFF, and the picture settings set to standard, the black level was way too low and the image was washed out. The blacker than black pluge was clearly visible. I entered the set up menu and selected the Black Level Enhance to ON. Note, you cannot see the change made to the image because the setup menu is layered over the DVD image. After exiting the setup menu, I immediately noticed that the black level had improved. The blacker than black pluge was now barely noticeable and the image was no longer washed out. This is the setting I recommend for most installations.
Re-entering the set up menu, I selected the Personal picture setting. I began adjusting the Brightness and Contrast; exiting the setup menu after each adjustment to see what effect it had on the displayed image. It was tedious to enter and exit the set up menu after each adjustment, but I could find no other way to make the fine adjustments without the setup menu being present. I was able to calibrate the black level to a near perfect setting but I could not get the DVD-C750 to pass absolute blacker than black. The level that I was able to obtain was close, but not perfect.
Audioholics/HQV Bench Testing Summary of Test Results
Perfect Score is 130
Yamaha DVD-C750 Benchmark total score:
66/130
(This indicates a decent player at this price point)
|
Test |
Max Points |
DVD-C750 |
Pass / Fail |
|
Color Bar |
10 |
10 |
Pass |
|
Jaggies #1 |
5 |
3 |
Pass |
|
Jaggies #2 |
5 |
3 |
Pass |
|
Flag |
10 |
5 |
Pass |
|
Detail |
10 |
5 |
Pass |
|
Noise |
10 |
5 |
Pass |
|
Motion adaptive Noise Reduction |
10 |
5 |
Pass |
|
Film Detail |
10 |
0 |
Fail |
|
Cadence 2:2 Video |
5 |
5 |
Pass |
|
Cadence 2:2:2:4 DV Cam |
5 |
5 |
Pass |
|
Cadence 2:3:3:2 DV Cam |
5 |
0 |
Fail |
|
Cadence 3:2:3:2:2 Vari-speed |
5 |
0 |
Fail |
|
Cadence 5:5 Animation |
5 |
0 |
Fail |
|
Cadence 6:4 Animation |
5 |
0 |
Fail |
|
Cadence 8:7 animation |
5 |
0 |
Fail |
|
Cadence 24fps film |
5 |
5 |
Pass |
|
Scrolling Horizontal |
10 |
5 |
Pass |
|
Scrolling Rolling |
10 |
10 |
Pass |
| Total Points |
130 |
66 |
|
Comments on HQV Testing
While this DVD player has very good image detail (I viewed no ringing at all in the Detail test) there was some lack of definition on the bricks in the bridge and the stairs. There was also some trailing and smearing in the image during the Motion Adaptive Noise Reduction tests. Some minor artifacting was also present and the image was also a little soft.
During the Film Detail test the DVD-C750 lock on time was a little slower than desirable and there was significant moiré in the grand stands. There was also stair stepping and image blur was evident along the wall. There was also some minor ripping and jaggedness in the DV Cam and Animation cadences. We could have easily said that this was borderline; but we "round down" to encourage manufacturers to clearly hit the mark. The most important cadences listed are 24fps film and the 2:2 Video and animation cadences but there are few movies shot in DV Cam. On the Scrlling Horizontal Text there were visible jaggies in the main body of the image as the text scrolled.
DVD-C750 Viewing Evaluation
After reading the benchmark test results, you are probably under the impression that this DVD player did not perform well. As stated previously, the tests utilized are very rigorous. None of the DVD players that I have tested to date have received all 10's and none have even passed all of the tests. The Yamaha DVD-C750 was the first DVD player to be tested with this new benchmark in a formal review. Others will follow and many will likely do a lot worse than the DVD-C750. In normal installations, with normal content (non-test environment) the Yamaha DVD-C750 will be a good performer.
The viewing evaluation is also very subjective and is based on the reviewer, the material used for the review, and the display system. Most often, reviewers and users will use reference based DVD's to evaluate their DVD player's performance. In this reviewer's opinion, DVDs that are reference quality, like Finding Nemo, are not always good DVDs on which to base a viewing evaluation. Reference quality DVDs like this make every DVD player and display device look good. For this evaluation, I chose Star Wars Episode 1. This DVD has a very good transfer, not reference due to edge enhancement among other things, but still very good. The other DVD I chose was Casper, it has an average transfer quality. Using this mix will give a pretty good idea of how well the DVD-C750 will perform, not only with very good quality transfers, but also average transfers.
The Yamaha DVD-C750 video performance was good to very good. In many cases its video performance surpassed that of many DVD players above its price point. I would recommend this DVD player for installations on screen sizes no larger than 60"with the appropriate seated viewing distance. With that size screen and viewing distance, the minor flaws will be undetectable and you will get a nice detailed picture. I was very impressed with this player's sharp image. The colors produced were very rich, flesh tones looked natural, and the overall picture looked smooth and free of artifacting on the 70" Hitachi LCD. The images below are actual screen shots of the picture produced by the DVD-C750. Any deviation in the picture quality of the image from the accompanying description has more to do with the digital camera I used than the actual performance of the DVD player.
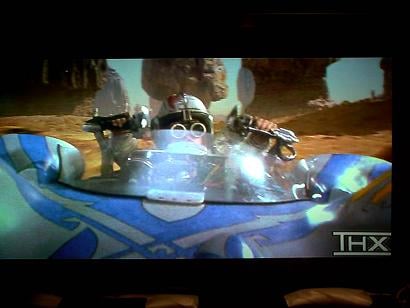 DVD:
Star Wars - The Phantom Menace
DVD:
Star Wars - The Phantom Menace
I used the Pod Race scene is
Star Wars: The Phantom Menace
for
evaluation. There is a lot of motion in this scene and the vibrant colors really allow you to see whether
noise is present in the background and open areas of the scene. The colors of the desert looked very
natural, with excellent detail, and the fast moving pans had no break up, judder, or
stutter.
The background remained fairly noise free. In addition, this scene is full of a tremendous amount of horizontal and angular motion, which wil serve to test any DVD player's ability to keep up with eliminating jaggies and other motion articfacts while still preserving the original picture detail
DVD: Casper
The next shot is from the Casper DVD. I like to use this particular scene to see how much noise
is generated in the area of the stained glass windows. The area around the windows is pretty dark so it
is very easy to detect noise and loss of detail on the steps than go up.
There are many straight
lines in the scene so it is also easy to see if how this DVD player is doing with jaggies as the camera
pans around the room. Scenes like this are a treasure trove of diagnostic scenery and it's great to see
how well players fare on the material.
The DVD-C750 had very little noise and the steps were very detailed. Many DVD players have trouble with this particular DVD and scene due to its inherent complexity combined with the camera motion within the room


 In the subsequent photo, the dress has a lot of fine detail and is
bright
white against flesh tone. The mechanical arms are black and the background is well
lit. There is also a lot of movement in this particular scene. The DVD-C750 did a very good job of
accurately producing the scene without noise. The flesh tone looked accurate, the black appeared black,
the white looks balanced with no indication of blooming and there was no ringing around the objects. The
images in the background remain well defined.
In the subsequent photo, the dress has a lot of fine detail and is
bright
white against flesh tone. The mechanical arms are black and the background is well
lit. There is also a lot of movement in this particular scene. The DVD-C750 did a very good job of
accurately producing the scene without noise. The flesh tone looked accurate, the black appeared black,
the white looks balanced with no indication of blooming and there was no ringing around the objects. The
images in the background remain well defined.
The car in the above pictured scene is traveling down the track at a steep to shallow angle. There are many straight edges. The walls have texture and there is light cascading through the windows. There are lights hanging from the track and most all of the scene is focused. Many times in this scene, the hanging lights will look pixilated; the light cascading through the windows will have a lot of mosquito noise; and the texture on the walls will not be defined and will blur together. The DVD-C750 did a very good job with this scene. Everything was well defined and the images were sharp though I noticed bit of mosquito noise in the light cascading through the windows and some flashing on the wall textures.
DVD-C750 Listening Tests & Conclusion
Moving on to the listening evaluation, I connected the DVD-C750 to my Yamaha RX-V2500. I used a generic Toslink cable for the digital output and Generic analog interconnect for the multi-channel analog outputs. I used the Klipsch Reference system: RF-7 fronts, RC-7 center, RF-35 surrounds, and RSW 15 subwoofer for my evaluation. These are very revealing speakers and they will unmask any shortcomings that your system or your listening material may have.
With the Yamaha receiver set to Auto DVD and surround Normal. I listened to the excellent Dolby Digital soundtrack from Star Wars Episode 1. The DVD-C750 sounded like every other DVD player that I have heard in its price range with a digital connection. The Yamaha RX-V2500 quickly locked onto the bit stream; and there were no lags, clicks, or pops. If there are performance differences in similarly priced DVD players digital outputs these ears are surely not golden enough to hear them.
 Progressing to the next part of the evaluation, I loaded my DVD-Audio music
sampler. I like this disk; it has everything from Insane Clown Posse to Brazilian
Romance.
Progressing to the next part of the evaluation, I loaded my DVD-Audio music
sampler. I like this disk; it has everything from Insane Clown Posse to Brazilian
Romance.
The first track I selected was Graham Nash (The Chelsea Hotel). I have heard this song many times. The beginning of the track has quite a plucking of the guitar, followed by Graham's whispery voice, then deep authoritative bass. Listening to this song on the DVD-C750 was a sheer delight. I have never heard this track sound so good in this system. Vocals were magnificent, the bass was deep and authoritative, the surrounds had plenty of energy, and the whole track sounded balanced. I had previously listened to this DVD and soundtrack on my Pioneer DV-578A-S DVD-Audio player, DVD563 and my old JVC XV723. At the beginning there was a faint hiss on all the other players with the Chelsea Hotel. I always thought that this was a direct result of listening to this song at higher levels with a very revealing speaker. The Yamaha DVD-C750 had no such noise and the track sounded absolutely stunning.
The next track I selected was Brazilian Romance. This is a mostly instrumental track with a little vocal mixed in. It has little subtle effects of birds chirping and singing in the surrounds. Again, I have never heard this track sound this well in this system. The improvement over the other players previously mentioned was dramatic and startling. I always noticed on this track the birds chirping and singing in the rear surrounds, but listening to it on the DVD-C750 was like lifting a blanket off the rear speakers. The birds sounded like they were actually in the room. The other thing I noticed was the absence of excessive sibilance in the center speaker. With the other players, when the male vocals were present, I always heard a little ssss and lisp in the center speaker on certain parts of the track. While placing my ear close to the center speaker when the DVD-C750 was playing, the center speaker was clean and clear throughout the song.
I was not expecting this big of an improvement in audio performance over the other players that I have had in this system. I expected a subtle performance gain but the DVD-C750 was a giant leap forward with respect to DVD-Audio.
Multi-Channel SACD
After the exhilarating experience I had with the DVD-Audio discs listed above, I decided to give SACD a try. I have a very limited collection of SACD's. I have always preferred DVD-Audio - mostly because there were more titles from artists that I liked, and I started my collection early with that format. I selected the Police's Every Breath You Take SACD and the song "Roxanne."
The vocals were clear and the track had lots of energy. It was immediately apparent that the SACD sounded much better on the DVD-C750 than it did on either of the Pioneer DVD players that I have had in the system. Again, the whole song sounded as though a veil had been lifted off the speakers. Listening to this same SACD on the Pioneer DVD players yielded thin and lifeless tracks in comparison. Sting's voice sounded full and robust and it was centered exactly in the middle of the front sound stage. The drum hits were authoritative and the snare was solid in the rear speakers. Again the jump in performance level over the other DVD players mentioned was dramatic. I am not trying to beat up on the other players in this review - they are fine entry level DVD-A/SACD players; but it was readily apparent to me that the DVD-C750 was a significant step up.
Two-Channel Listening Tests
I completed my listening evaluation of the multi-channel performance of the DVD-C750 and now wanted to hear how well the DVD-C750 did with two-channel CD. I connected a generic brand of audio interconnects from the mixed R/L analog out puts on the back of the DVD-C750 to the R/L analog inputs of the RX-V2500. I selected Patricia Barber's Café Blue CD. I listen to this CD quite often and I really enjoy the swanky jazz club seductive vocals that she performs. I selected Pure Direct on the RX-V2500 and began with the track "A Taste of Honey". Patricia's voice was smooth and seductive. The sound was well balanced, open, and natural. There was never any hint of noise or grain. Just for the record, my ears are far from golden; not the kind of ears that you would insure at Lloyd's of London. The many years I have spent installing Pro Audio and Consumer electronics have surely had some effect on them; but I do believe that the many years of hearing and installing different audio components also allow me to make a subjective opinion on a particular piece of audio equipment. Having said all that, I hereby declare that this is one of the finest CD/DVD players I have heard for under $1000. Its Redbook CD performance was spectacular; easily besting the Pioneer DV-578A-S. It sounded even better than my standalone CD player - the old, but highly regarded, Sony CDP-XE 500 with Music Fidelity outboard DAC. The DVD-C750 has the ability to upsample CD's to a higher sampling rate. I tried this many times switching from OFF to 88.2kHz then to 176.4kHz. I heard no audible difference using the upsampling, so I chose to leave it in the OFF position. This concluded the listening evaluation of the DVD-C750. I must say it was a total shock and welcome surprise to hear such performance in a DVD player at this price.
Conclusion
The way to sum up the performance of the DVD-C750 is: would I recommend this DVD player for installations in mid to mid-high end Home Theaters? The short answer to this question is YES! The DVD-C750 does have some odd quirks and is not with out fault. However, these minor issues are to be overlooked if you want a player that has good to very good video quality, excellent build quality, and sound quality. I would recommend this DVD player just for its sound quality alone. The remaining shortcomings are to be overlooked at this price point.
Yamaha DVD-C750
MSRP: $329
The Score Card
The scoring below is based on each piece of equipment doing the duty it is designed for. The numbers are weighed heavily with respect to the individual cost of each unit, thus giving a rating roughly equal to:
Performance × Price Factor/Value = Rating
Audioholics.com note: The ratings indicated below are based on subjective listening and objective testing of the product in question. The rating scale is based on performance/value ratio. If you notice better performing products in future reviews that have lower numbers in certain areas, be aware that the value factor is most likely the culprit. Other Audioholics reviewers may rate products solely based on performance, and each reviewer has his/her own system for ratings.
Audioholics Rating Scale
 — Excellent
- — Very Good
- — Good
- — Fair
- — Poor
| Metric | Rating |
|---|---|
| Standard Definition Video Performance | |
| High Definition Audio Performance | |
| Analogue Audio Performance | |
| Bass Management | |
| Build Quality | |
| Ergonomics & Usability | |
| Ease of Setup | |
| Features | |
| Remote Control | |
| Performance | |
| Value |