
Denon DVD-3930CI DVD Player
Denon DVD-3930CI DVD Player
- Product Name: DVD-3930CI
- Manufacturer: Denon
- Performance Rating:

- Value Rating:
- Review Date: November 02, 2006 19:00
- MSRP: $ 1499
Video Features Misc Features Audio Features Power consumption: 70W Dimensions: 17.1" W x 5.5" H x 16" D Weight: 25.3 lbs
Supported Formats
DVD Audio/Video, Music CD, SACD, CD-R/RW (audio/MP3/WMA/JPEG), Video CD, DVD-R/RW(Video mode/VR mode), DVD+R/RW/Picture CD
10-bit Silicon Optix REALTA T2 Processing
Pixel Image (contour) Correction
1080p output via HDMI (also 480i) with support for up to WXGA/SXGA PC signals
Dual Discrete Video Circuit (DDVC)
14-bit 216MHz ADV-7324 video DAC
Keystone adjustment (+/-30 degrees vertical, +/-40 degrees horizontal)
15 picture quality adjustments
PAL/NTSC support
RCA and BNC component outputs (both active)
Discrete Power On/Off commands
RS-232C and Remote in/out ports
Backlit remote control
Advanced AL24 processing
24-bit/192kHz Burr Brown PCM-1796 DACs for front channels, 3 additional DACs for 5.1 surround.
Pure Direct mode
Denon Link 3rd Edition (DVD-Audio/SACD-compatible)
HDMI 1.1 multi-channel audio output (PCM/DD/DTS/DVD-Audio)
INDEPENDENT bass management over HDMI and analogue audio output
Three-box layout to isolate circuits
Vibration-resistant construction
50kHz/100kHz brick wall filter for SACD
THD: 0.0008%
SNR: 120dB
Pros
- 480i and 1080p via HDMI
- HDMI output autoformatting
- Unsurpassed video performance
- PAL/NTSC support
- INDEPENDENT bass management over HDMI and analogue audio output
Cons
- High retail price
- Makes DVD-5910 owners feel like they got ripped off
Comparison of Products & Build Quality
|
DVD-3910 |
DVD-3930CI |
|---|---|
|
|
>
|
DVD-3910 |
DVD-3930CI |
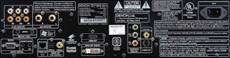 The rear panel of the DVD-3910 shows a DVI-D output in addition to the HDMI output. There are also IEEE 1394 connections and a single set of component video outputs. |
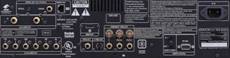 Enter the DVD-3930CI with dual component outputs (including BNC) a single HDMI 1.1 output and much higher quality audio outputs. DenonLink is now up to 3rd Edition (no firmware upgrade needed) |
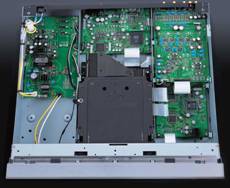 The DVD-3910 seemed to be very well built with excellent components |
 The DVD-3930CI (shown with its secondary internal cover removed) is more akin to a tank, with discrete power supply components and an upgraded video processing board that houses the new REALTA chip. |
 The interface seems to be about the same on both units 舰 |
 But the DVD-3930CI has a slightly more refined look that takes away some of the "my middle school art student designed this interface" feel that plagued Denon until now. You also have more direct access over each function with global, tab-based navigatio |
Unpacking & Build Quality
We pulled the DVD-3930CI out of the packaging it came in and balked at the strain it took to haul the unit onto the floor. Wow, a 25 pound DVD player that doesn't have a 1/2" thick aluminum faceplate to "fake" its bulk! We haven't seen this kind of mass since - well, the DVD-5910 came out. The build quality on the DVD-3930CI is nothing short of stellar, which is why I have such a hard time believing this isn't the flagship Denon DVD product. With discrete power supplies for audio and video, as well as a video processing board that takes up more room than the interior components of some AV processors we've seen, it's hard to see how it can be improved upon (at least physically).
We opened up the Denon DVD player (don't try this at home, kids) and found - another cover. The metal grounding and vibration "shield" found inside the normal cover made us very curious as to what this little gem was hiding 舰 Inside we found a little tiny man and a white gerbil running on a wheel - just kidding. The unit, as pictured above, is chock full of component-riddled circuit boards with high quality capacitors, chips and resistors. A very large heat sink covers the REALTA chip and makes it nearly impossible to get a better look at the video processing board without doing some major surgery to the unit. Suffice it to say, I was impressed and continued on with the review in humble silence (or was that a moment of silence for all the lost DVD-5910CI consumer sales this unit will cause?) Hey, don't get me wrong, DVDO scaling, simultaneous progressive component-HDMI outputs, and improved DACs on the 5910CI are cool and for the discriminating audio- and videophile "money is no object" type customer.
Player Set-up, Remote Control, and Video Tests
It's not terribly difficult to set up the DVD-3930CI (or any Denon DVD player for that matter) but there are many more options that you will find than on just about any other player on the market. It ‘ s this extra amount of configuration capabilities (coupled with a user manual written by a rabid sheep herder in Paraguay) that leads people to quickly glaze over and lose focus. We ‘ ll key you in to the more important items and enable you to avoid common pitfalls. First off, ignore the Language Settings menu 舑 you don ‘ t need anything there unless you don ‘ t want to use English.
Digital Interface Setup Menu
This menu is actually a bit deeper than it looks,
but only if you plan on doing PCM-conversion to your HDMI output and utilizing the discrete bass
management options of the Denon DVD-3930CI player.
Discrete?
Yes, the DVD-3930CI allows for
two separate bass management settings on the player. One for PCM-converted audio sent out the HDMI
output, and another for the analogue audio outputs. This is way cool and simply the first of its kind
at any price level we
‘
re aware of (save the DVD-5910CI of course). If you don
‘
t plan on
converting HDMI to PCM, then enable DenonLink if you have a compatible Denon receiver (and do the happy
dance if you do). You can also decide on multi-channel HDMI audio or stereo (if you only have
2-channels on a TV, for example) but you cannot utilize both HDMI audio and DenonLink at the same time.
To turn DenonLink on or off you
‘
ll need to fully stop the player before entering the Setup menu.
At this point disabling DenonLink will enable you to engage HDMI audio and set the format preference.
Digital Interface Setup Menu -
Bass Management
OK, back to bass management. The
DVD-3930CI allows you to fully configure bass management of the HDMI output, provided you allow the
player to convert the audio to PCM first (for SACD or legacy formats for example). Available settings
include size (Large/Small/None), delay (in 1 foot increments), levels (up to 10dB of attenuation in 1
dB increments) and crossover (40
舑
120 Hz in 20Hz steps). All in all, this is one of the most
sophisticated bass management setups we
‘
ve seen in a DVD player
舰
ever.
Video Setup Menu
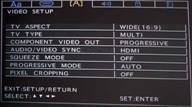
This is the next place you
‘
ll want to park your remote and
configure. The
Video Setup
menu is where you will set the type of display you have (16:9 or
4:3, PAL/NTSC) as well as whether you want to run progressive scan from the component outputs. A
setting for Audio/Video Sync allows you to synchronize the audio with either interlaced or progressive
signal as well as HDMI. Now, I edited dialogue and foley for years, and sync -
whether lip sync,
footsteps or even more ridiculous effects -
was
very
important. I can identify most sync
issues to within a frame depending upon the shot and the type of audio involved [thanks to Neal
Anderson and Patrick Sellers who mentored (i.e. hazed) me many years ago when I was starting my career
in audio editing.] The DVD-3930CI may adjust clock rates, but none of this seems to affect DenonLink
audio which worked steady in all modes of operation. As for the other methods of audio connection the
idea is that progressive and interlaced signals will have independent timings due to the differences in
the video processing occurring with those formats. HDMI, of course carries its own clock data. Bottom
line is that this feature will spark much discussion on audio forums and give a lot of nerds much to
talk about.
You'll want to leave Progressive Mode at AUTO and I recommend turning Squeeze Mode off (so that 4:3-encoded material can be stretched to fit the screen if you so desire). If, of course, you are a new HDTV owner and you spent the last few years acquiring 4:3 DVDs that don't have 'those stupid letterboxes at top and bottom' then you should immediately heap shame upon you and your family and you may put the player in 'AUTO' Squeeze Mode - and never EVER again buy non-widescreen (non-anamorphic) DVDs.
Audio Setup Menu
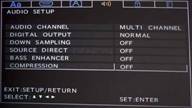
Ah, the Audio Setup menu. This is where you will configure the
player for stereo or multi-channel use including the enabling of VSS (Virtual Surround Sound) should
you desire to have simulated surround with 2 speakers. Unless you do not have a Dolby Digital or DTS
decoder in your AV receiver you'll want to leave
'Digital Output'
at
'Normal'.
'PCM'
mode will convert Dolby Digital and DTS signals to PCM for use
with older receivers. Downsampling isn't required unless your AV receiver cannot process sampling
frequencies over 48kHz.
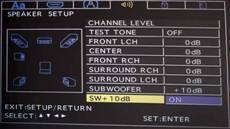
Source Direct is primarily an SACD function. It will allow you to run SACD (and other) signals directly from the unit, bypassing bass management, or apply either a 50kHz or 100kHz brick wall filter (for SACD). Alternatively you can turn off Source Direct and use the bass management features of the DVD player to ready the signal for your AV receiver's analogue inputs. The default is OFF, but if you plan on using the analogue audio outputs and have a receiver with bass management over its analogue audio inputs you may want to engage the SACD filter at 50kHz (we don't recommend ever setting it to 100kHz unless you have a very esoteric setup and want to annoy the birds outside of your home).
There are a few more settings in this menu. Bass Enhancer allows analogue 2 channel output of stereo sources with a subwoofer. If you are using the analogue outputs of the player, we recommend turning this 'On' unless you have truly full range speakers and/or no subwoofer. If you set Source Direct to either 50kHz or 100kHz this feature will not work. Compression is a night mode setting that allows you to experience more bass frequencies when the overall volume is reduced.
 Ratings Menu
These often underutilized settings are good if you plan on
providing unsupervised access to your DVD player.
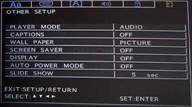
Other Setup Menu
This menu sets the player mode (Audio or Video) as
well as basic features that affect the player
‘
s general operation (wall paper, screen saver,
display light, auto power mode and slide show duration).
DVD-3930CI Front Panel, Remote & Video Tests
Front Panel Controls
With configurability comes complexity. Never one to make anything simple, Denon loves to put its configuration options in various places - hide them under rocks, put them in the nooks and crannies of the player - you know, spice things up a bit! In addition to the menu system, Denon also provides HDMI, SACD and Keystoning options on the front panel of the unit. HDMI and Keystoning functions are accessed by using the rotary selection knob/button on the right side of the player. You can select from YCbCr, RGB, or PC HDMI color settings (as well as Off).
For HDMI formats you have the ability to cycle through 480/576i, 480/576p, 720p, 1080i, and 1080p output resolutions. You also have access to the 'Auto' option which will match the output resolution to the display's native panel resolution (based on the player's comparable menu setting of the same name.) I found that when the Setup menu is set to 'Panel Res' the Denon still output 1080i to my Optoma HD81 projector (which is 1080p native... or IS it?) Changing the Setup Menu to 'Max Res' caused the Denon to correctly output HDMI at 1080p. However, with the number of 720p displays I've seen lately which handle 1080p input I would think this feature needs a bit more work (or I again found a bug limited to my particular configuration). In either case, this is hardly tragic and it seems as if reviewers would seek a function to automatically adjust HDMI resolutions before any consumers.
Remote Control
Move along, nothing to see here - The remote that comes with the new DVD-3930CI is nearly identical to the previous model's remote, so I'm not inclined to write much other than to say it is still partially backlit, quite bulky, and likely to be replaced by a universal remote by anyone capable of affording a $1500 DVD player.
Video and/or Audio Measurements
Audioholics/HQV Bench Testing Summary of Test Results
Perfect Score is 130
Denon DVD-3930CI Benchmark total score: 130
(The
best
player we've reviewed to date, matching the DVD-5910 score)
|
Test |
Max |
1080p |
1080p |
1080p |
|---|---|---|---|---|
|
Color Bar |
10 |
10 |
Pass |
Pass |
|
Jaggies #1 |
5 |
5 |
Pass |
Pass |
|
Jaggies #2 |
5 |
5 |
Pass |
Pass |
|
Flag |
10 |
10 |
Pass |
Pass |
|
Detail |
10 |
10 |
Pass |
Pass |
|
Noise |
10 |
10 |
Pass |
Pass |
|
Motion adaptive Noise Reduction |
10 |
10 |
Pass |
Pass |
|
Film Detail |
10 |
10 |
Pass |
Fail |
|
Cadence 2:2 Video |
5 |
5 |
Pass |
Fail |
|
Cadence 2:2:2:4 DV Cam |
5 |
5 |
Pass |
Fail |
|
Cadence 2:3:3:2 DV Cam |
5 |
5 |
Pass |
Fail |
|
Cadence 3:2:3:2:2 Vari-speed |
5 |
5 |
Pass |
Fail |
|
Cadence 5:5 Animation |
5 |
5 |
Pass |
Fail |
|
Cadence 6:4 Animation |
5 |
5 |
Pass |
Fail |
|
Cadence 8:7 animation |
5 |
5 |
Pass |
Fail |
|
Cadence 24fps film |
5 |
5 |
Pass |
Fail |
|
Scrolling Horizontal |
10 |
10 |
Pass |
Pass |
|
Scrolling Rolling |
10 |
10 |
Pass |
Pass |
|
Total Points |
130 |
130 |
|
(80 |
HDMI output was set at 1080p.
Comments on HQV Testing
As with other Denon players we've tested, the AUTO progressive mode is the only mode that the player should typically be in, excepting very specialized uses (for instance, when writing the Video1 section of a review). With a maxed out score of 130, the DVD-3930CI ranks the highest of our tested DVD players to date (matching the DVD-5910 for this honor). It's no surprise, of course, since the HQV testing methodology was designed around the REALTA video chipset present in this player. We knew this day was coming, which is why our rigorous DVD testing also includes a number of additional tests not catering to any single manufacturer.
Viewing and Listening Evaluation
We selected a myriad of movies on DVD and utilized the Denon's upconversion capabilities at both 1080i and 1080p resolutions to see how well it performed on our reference Optoma HD81 1080p DLP projector. The results were not surprising in the least, and we watched a LOT of content on this player before calling it a day. Viewing and listening evaluations became somewhat blurred due to the selections we made. We spent a lot of time listening to the movie selections and quite a bit of time watching material that came with our listening discs. Following are some of our observations.
DVD:
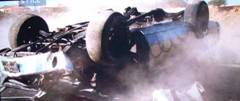
The Fast and the Furious:
Tokyo Drift
While not particularly a heartwarming and Oscar-winning movie, this
third installment was much more enjoyable than the second blunderfest
of fast cars and loose women. I enjoyed the visuals and the Denon was
able to show lots of clean lines (on the cars) and detail (on the
actors and scenery) so that we got a very good feel for the real world
excellence of this player. Discernable black detail was excellent,
thanks in part to the resolution of the projector of course, and I felt
as if nothing was missing from the intended picture. The screen
captures never do the experience justice, but they may help give you a
reasonable feel for the capabilities of this player.


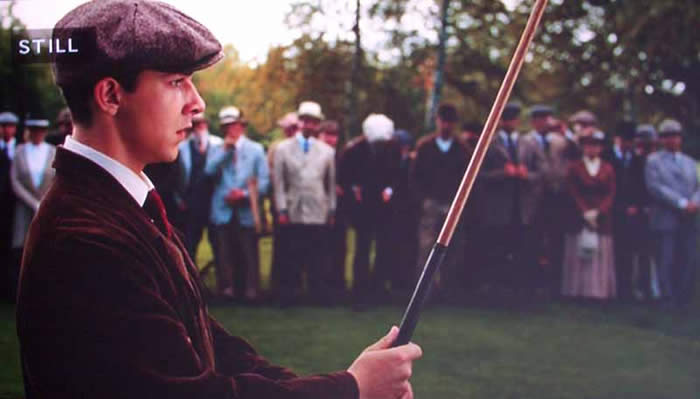
DVD:
The Greatest Game Ever
Played
Sometimes it's good to just put in a non-epic movie and see how
well the DVD player handles average material. While the story is excellent and the acting superb,
The Greatest Game Ever Played
won't dazzle anyone with its special effects or cinematic
grandeur. Still, the Denon did a faithful job of pulling out detail in darker scenes (of which there
were many) and detail, while a bit soft due to the cameras and lenses used, was accurate.

DVD:
The Fifth Element
(Superbit)
I've probably made it known to our regular readers (ad infinitum,
I'm sure) that this is by far my favorite film of all time. Fortunately
for me, it's also one of the best mastered DVDs ever to be produced.
Edge detail is perfect (not overenhanced) and colors are rich with deep
but visible dark scenes. This is one disc all videoholics should own.
The Denon DVD-3930CI produced the finest rendition of this disc I've
ever seen on my reference display. I had the fortune (for lack of a
better term) of viewing this movie on its Blu-ray release -
a butchered mess. The Superbit DVD is much better. Lower resolution
perhaps, but a perfect master without the film defects or graininess
present in abundance on the
"so called" HD version. The screen captures aren't perfect due to my
digital camera, but I could watch this film over and over again on this
player.


Listening Evaluation
I grabbed a ton of material for these listening tests, partially because I really wanted a good sampling of music, but also because our friends at AIX Records had just sent in a fresh batch of pristinely-recorded DVD-Audio discs. Many discs came with a DVD-Video side which we took the liberty of capturing for you to enjoy as well. These discs represent material that is recorded without any post processing - no compression and no effects boxes. Armed with a fresh batch of audio ammunition, I headed to my reference listening room which consists of an RBH Sound CinemaSITE system guided by a Denon AVR-4306 receiver. There are four subwoofers in the room, including two SI-1010Ps and a couple of Velodyne DD10s . Achieving excellent bass extension and a smooth response is not a problem. I utilized the analogue outputs of the player to send audio from the player to the receiver (in order to experience the DVD-3930CI's DACs) and all my audio cables were pre-soaked in kosher chicken fat for 6 hours to ensure they were fully optimized - OK, that last part is a joke.
DVD: Robert Plant and the
Strange Sensation
This DVD was sent to us from V Entertainment Network who is
handling some of the promotion of this new DVD. We popped it in and
gave it a listen. Plant's rendition of
"Black Dog"
showed that his voice had lost some of its range over the years, but
after a couple of listens I felt the direction had an interesting turn
and lent some original and fresh character to a classic song.
In the original hit "Freedom Fries", percussion and lead guitar rule the roost and a funky, persistent bass lick add some texture and oomph to the track. Synth lines were clean and the track had this airy reverb that filled the room and seemed to have a smooth, unimpeded decay.


"Four Sticks" is yet another revised Zeppelin hit, and I really liked the tone of Plant's voice here as well as the general arrangement of the tune which maintained some of its "Mission Impossible" feel but relaxed a bit to allow a bit of ebb and flow to the tune. The slight mic feedback present on the second verse did nothing for me, but those things happen - and you certainly know it's authentic.
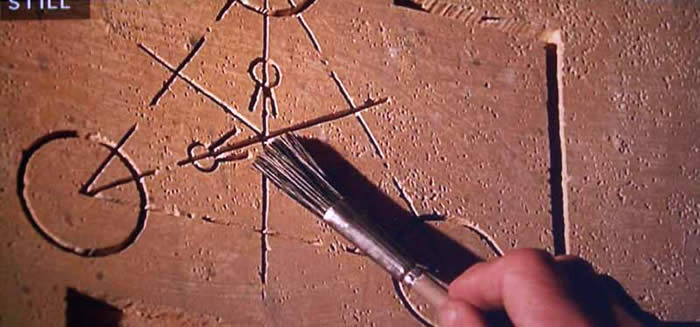
Vantage
Point: Resolution
I slipped in Vantage Point's
Resolution
DVD from AIX Records and got a double dose of HD-recorded
&
mastered video combined with exceptional audio. After I took some pics
I flipped over the DVD disc and queued up the DVD-Audio tracks for some
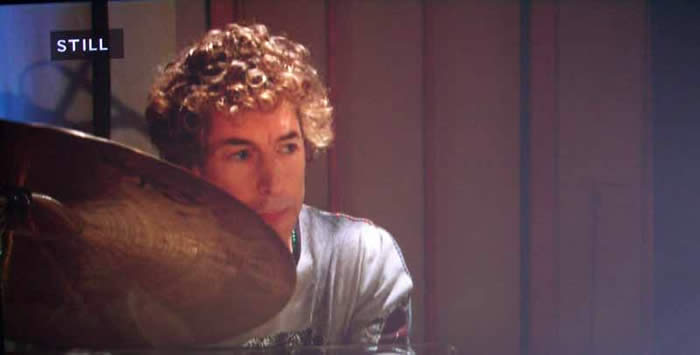
HD listening. The first track,
"Blind Sided", features Simon Phillips (who has played for almost
everyone including The Who, Jeff Beck, Peter Gabriel, and Toto to
name just a very few). His drumming style is focused and intense and
this disc features him, not just as a player, but also as a band
leader. Teamed up with Jeff Babko (bandleader for the
Jimmy Kimbel Live
show) the sound is simply amazing. The Denon brought forth pristine
audio with fantastic piano that was vibrant and neutral and had a
smooth reverb. The drums were almost hyper-analogue with no discernable
compression to be found. A strong bass line chorus which mirrored the
drums created a wonderful texture of sound in the listening room while
the brass instruments rang through cleanly.
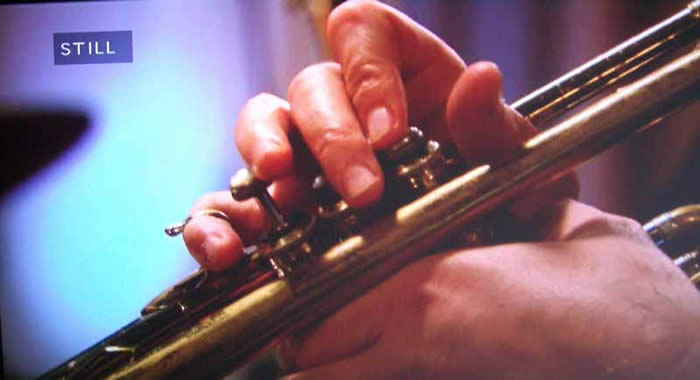
"Sting Like A Bee"
featured an acoustic bass intro that I could feel in my chair. Finger
noises cut through the room to my ears and the well-rounded lower
mid-bass extension was superb. When the piano and cymbal rolls came in,
the soundstage simply opened up and welcomed me in. Trumpets were clean
and brassy, but without the compressed top edge you often hear in
lesser systems and recordings. Decay on the drums and especially the
cymbals was smooth and natural.  Lowen
&
Navarro: Carry On Together
Lowen
&
Navarro: Carry On Together
"Compass Point"
starts off this album with soft drums and stereo-miced acoustic picked
guitar and mandolin. The vocals were well separated in the mix and I
found that the Denon simply excelled at allowing the clean and clear
audio through to my RBH Sound CinemaSITE system.
Starting off with some 12-string harmonics the title track, "Carry On Together", only gets better by adding tight harmonies into the intro verse. Tracks like this are exceptionally revealing and the DVD-3930CI was extremely transparent sounding. The DACs on this player are simply astonishingly good.
Steve Miller Band: Fly Like
an Eagle 30th Anniversary Special LE DVD
Hearing
the Steve Miller Band in 5.1 was a treat and allowed the infamous
"Space Intro"
to be put out in a very convincing surround sound
- how it
should have been done -
were the format around at the time (Miller actually mixed the album in
Quad). The DVD-3930CI delivered realistic drums and whisper accent
verses in the surrounds -
both of which were a subtle reminder of the DVD player's capable Burr
Brown DACs. High frequency synth effects and a clear cymbal bell drive
on through the song and Miller's vocals have that
"classic but sultry"
tone which certainly added to his popularity.
Track 4 "Serenade" has some chorused guitars along with doubled vocals and tightly mixed drums. All of this blended well within the listening room. Hearing this track on the Denon player made me want to cancel the afternoon's activities and settle back for the rest of the album. Dedicated fans of the Steve Miller Band will enjoy the DVD video performance of a 2005 concert at Shoreline Amphitheatre in Mountain View, CA., but video quality is quite poor. I am guessing this is partially due to the original masters, but mostly attributed to the level of compression required to fit everything onto the DVD. What was interesting was how well the DVD-3930CI handled the non-HD source content (resembling stretched 320x240 MPEG-1.) It looked absolutely horrific on another player. The Denon's deinterlacer circuits were obviously working overtime to make it presentable!
The funky "Take the Money and Run" put out that driving, upbeat sound that defined many of the Steve Miller Band's top hits. In the reference system, with the Denon cranking out this tune in 5.1 surround, it was a little like being at the studio's mix room listening in on my own private session.
Review Conclusion
I can't tell you how impressed I was with this player. It is an enigma and I predicted how hard it would be to review the DVD-5910CI following this report. The DVD-3930CI is simply such a stellar performer it doesn't leave much left to be desired. Video quality is above par as is the audio fidelity coming form this unit. Whether you are going analogue or digital, audio or video, the Denon isn't going to let you down and it will be very hard, if not impossible, to find anything that competes with this product at or below this price. At $1500 this player isn't for the weak of heart (or light of wallet) - this is an audioholic's and videoholic's transport. Highly recommended is an understatement.
The Score Card
The scoring below is based on each piece of equipment doing the duty it is designed for. The numbers are weighed heavily with respect to the individual cost of each unit, thus giving a rating roughly equal to:
Performance × Price Factor/Value = Rating
Audioholics.com note: The ratings indicated below are based on subjective listening and objective testing of the product in question. The rating scale is based on performance/value ratio. If you notice better performing products in future reviews that have lower numbers in certain areas, be aware that the value factor is most likely the culprit. Other Audioholics reviewers may rate products solely based on performance, and each reviewer has his/her own system for ratings.
Audioholics Rating Scale
 — Excellent
- — Very Good
- — Good
- — Fair
- — Poor
| Metric | Rating |
|---|---|
| High Definition Video Performance | |
| Standard Definition Video Performance | |
| High Definition Audio Performance | |
| Analogue Audio Performance | |
| Bass Management | |
| Build Quality | |
| Ergonomics & Usability | |
| Ease of Setup | |
| Features | |
| Remote Control | |
| Performance | |
| Value |
Clint Deboer was terminated from Audioholics for misconduct on April 4th, 2014. He no longer represents Audioholics in any fashion.
View full profile