
Westinghouse TX-42F430S LCD Review
Westinghouse TX-42F430S
- Product Name: TX-42F430S
- Manufacturer: Westinghouse
- Performance Rating:

- Value Rating:
- Review Date: September 16, 2008 11:17
- MSRP: $ 1199
42” TFT (Thin Film Transistor), Active Matrix LCD,
1920 x 1080 vertical stripe; anti-glare coating
Viewing Angles: 176° (H) / 176° (V)
HDTV Compatibility" 480i, 480p,
720p, 1080i, 1080p
Speaker Output: 15W (x2 Channels) 10 W Subwoofer
Contrast
Ratio: 1000:1
Color
Gamut: 75% NTSC
Lamp Life: 50,000 Hrs
Viewing
Angle: 176° Horizontal, 176°
Vertical
Response
Time: 8 ms
Video Features:
Preset
Video Modes - Enhanced/Movie/Game/Sports
Screen
Fit Modes - Standard/Fill/Overscan
Progressive
Scan
3D
Noise Reduction
Inverse
3:2 Pulldown
De-Interlacing
3D
Adaptive Comb Filter
2D
OSD Graphics Engine
Selectable
Color Temperature - 3 User Adjustable
Advanced
Calibration Menu
Dynamic
Contrast
Convenience Features:
Autosource™
SpineDesign™
DayBright™
- High contrast LCD for both day and night
Parental
Control
Sleep
Timer
Dimensions Physical
42.1”, 1067mm (W) x 29.3”, 743 mm (H) x 9.0”, 226 mm (D) (with Base)
42.1”, 1067mm(W) x26.9”, 684 mm (H) x 5.5”,139 mm (D)
(w/out Base)
Weight Net
/ Gross 32.5 kg / 27.5 kg
70.56lbs. (with Base); 60.64 lbs. (w/out Base)
Pros
- Price
- Intuitive menu system
Cons
- Poor picture performance
- Isn't that enough?
TX-42F430S Build Quality and Setup
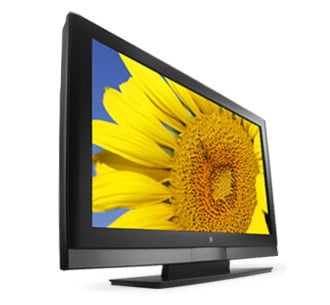
We haven't reviewed a Westinghouse display in a long time (since 1080p first came on the scene in fact) and were very interested in seeing what changes they've made since their first models. The TX-42F430S is a 42" LCD that touts a lot of features at a very low price. Westinghouse may not be a huge name in LCDs right now but a well performing LCD at this price point could quickly propel them to the forefront of public consciousness. With a compliment of measurement tools and the legacy Westinghouse LVM-42v2 on hand (also a 42") I got ready to not only take measurements but also to do some comparisons.
First Impressions and Build Quality
 The
Westinghouse "look" seems to be very well established as the
differences between the TX-42F430S and its older brother are fairly minimal.
There is a bit less gray and a bit more black, but the size of the bevel is
about the same though the newer unit is a bit taller. The frame is constructed
of a matte plastic that is both sturdy and nondescript. Once you remove the
stickers touting all the features of the display, you'll have a hard time making
out any features at all on the frame (this is a good thing). The box it arrived
in was fairly small in comparison to the size of the display and they used a
very nice plastic edge system to hold the display in place and to protect it
during transport. I can't say if these are in any way superior or inferior to
the foam ones but they definitely don't fall apart as easily. As someone that
has to repackage the display in a few days, I appreciated that.
The
Westinghouse "look" seems to be very well established as the
differences between the TX-42F430S and its older brother are fairly minimal.
There is a bit less gray and a bit more black, but the size of the bevel is
about the same though the newer unit is a bit taller. The frame is constructed
of a matte plastic that is both sturdy and nondescript. Once you remove the
stickers touting all the features of the display, you'll have a hard time making
out any features at all on the frame (this is a good thing). The box it arrived
in was fairly small in comparison to the size of the display and they used a
very nice plastic edge system to hold the display in place and to protect it
during transport. I can't say if these are in any way superior or inferior to
the foam ones but they definitely don't fall apart as easily. As someone that
has to repackage the display in a few days, I appreciated that.
The TX-42F430S is not exceptionally thin, nor exceptionally light. In many ways, it is a bit bigger than its predecessor (which is unusual in this day and age of "the incredible shrinking electronic device"). There is a very, very small LED below the screen that will turn blue when the set is on, amber when it is in standby, and off when it is, well, off. It has never failed to amaze me that there seems to be a need to let you know that your set is on via a little blue light. I know it is on. I can see the picture. The light is neither all that bright nor obtrusive and it can be disabled via the menu, which I did.
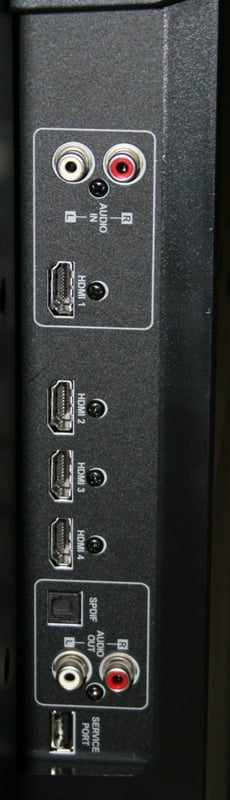
The stand comes attached (I prefer this though it really isn't a mark for or against the unit) and it is a bit heavy at nearly 10 pounds. As Westinghouse displays are wont, the inputs are up the sides of the center post with the HDMI inputs on one side and just about everything else on the other. The TX-42F430S has a whopping four HDMI inputs which is phenomenal at this price point. There is absolutely no reason why you would need more. Also included are a pair of component inputs, a shared S-video/composite input, and a VGA (HD15) input for you computer lovers. Noticeably absent is the (quickly becoming standard) USB port for displaying pictures and home movies though again, not really a strike against it.
Setup & General Use
 Setup
consisted of taking it out of the box and placing it on my Diamond
Case cabinet. At 70lbs, it is a bit much for one person but two will handle
it easily. The orientation of the inputs means that there is generally a lot of
room for each (a notable exception being the two component inputs which are
crammed side-by-side). In general, I much prefer Westinghouse's input
orientation to almost every other display I've tested. They are high enough on
the spine that you can get to them easily and see them even after the unit is connected.
Additionally, the way the cables fall makes it easy to tie them together out of
the way. This "shove everything up into the bottom the display" is
for the birds and often results in HDMI cables falling out over time. And don't
get me started on the ones that enter directly into the back of the unit. How
are you supposed to easily hang a flatscreen with a bunch of cables sticking
out the back?
Setup
consisted of taking it out of the box and placing it on my Diamond
Case cabinet. At 70lbs, it is a bit much for one person but two will handle
it easily. The orientation of the inputs means that there is generally a lot of
room for each (a notable exception being the two component inputs which are
crammed side-by-side). In general, I much prefer Westinghouse's input
orientation to almost every other display I've tested. They are high enough on
the spine that you can get to them easily and see them even after the unit is connected.
Additionally, the way the cables fall makes it easy to tie them together out of
the way. This "shove everything up into the bottom the display" is
for the birds and often results in HDMI cables falling out over time. And don't
get me started on the ones that enter directly into the back of the unit. How
are you supposed to easily hang a flatscreen with a bunch of cables sticking
out the back?
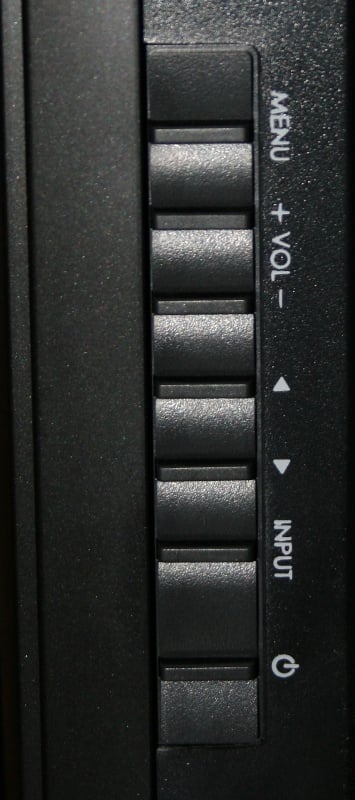
There are controls for the unit on the side including Power, Volume, Channel, Source, and a Menu button. There is an odd panel on the front just below the LED that looks like it should pop open for controls or inputs - it doesn't. The side controls are very responsive and easy to locate and use even in a dark room. The power cable is detachable and on the side with the HDMI inputs. I've read that others have had problems with this display in that it sometimes "crashes" and won't come back on unless you unplug it and plug it back in. I've had that problem with the older Westinghouse but not this unit. A detachable power cord makes this a very easy proposition. Honestly, there is something about this display that makes it look larger than the claimed 42".
 Off axis
viewing is very good, especially when you consider the performance of the older
set. I didn't notice any real appreciable washing out of colors as you moved
off axis. The TX-42F430S has three different aspect ratios - Standard, Fill,
and Overscan. Standard gives you the picture without any alteration. Fill is
your standard stretch mode and Overscan is a zoom mode. The aspect ratio
options are pretty limited compared to many competitors' offerings. But the
real problem is that there is no differentiation between the High Def settings
and the Standard Def. On High Def channels, you'll often see a thin yellow bar
up the side (usually left side) of the screen. This was never meant to be seen.
You can get rid of it by selecting the Fill aspect ratio which will not deform
the picture as much as just clip out that bar. The problem is that the aspect
ratio is global so when you switch to a Standard Def channel, the picture is
stretched and deformed. This means that you'll need to either learn to live
with the yellow bar, stretched SD content, or plan on flipping aspect ratios quite
often. There is no reason why the aspect ratios couldn't have been unique to
the type of signal.
Off axis
viewing is very good, especially when you consider the performance of the older
set. I didn't notice any real appreciable washing out of colors as you moved
off axis. The TX-42F430S has three different aspect ratios - Standard, Fill,
and Overscan. Standard gives you the picture without any alteration. Fill is
your standard stretch mode and Overscan is a zoom mode. The aspect ratio
options are pretty limited compared to many competitors' offerings. But the
real problem is that there is no differentiation between the High Def settings
and the Standard Def. On High Def channels, you'll often see a thin yellow bar
up the side (usually left side) of the screen. This was never meant to be seen.
You can get rid of it by selecting the Fill aspect ratio which will not deform
the picture as much as just clip out that bar. The problem is that the aspect
ratio is global so when you switch to a Standard Def channel, the picture is
stretched and deformed. This means that you'll need to either learn to live
with the yellow bar, stretched SD content, or plan on flipping aspect ratios quite
often. There is no reason why the aspect ratios couldn't have been unique to
the type of signal.
The Westinghouse has a full complement of menus. I've always been a fan of Westinghouse menus and the TX-42F430S is no different. The dropdown menu is nice and mostly unobtrusive. It remembers the category you were on last so you don't have to shuffle back through menus if you are accessing the same item over and over (very useful when you are fiddling with a particular setting). The Audio menu is present where you can select all the display's different sound settings. One thing to note is that you can mute the speakers which works exactly the same way as on the remote (which means the remote can undo it). Personally I like to see a "speaker disable" function that overrides the mute function completely. Also interesting to note is that the Audio Equalizer defaults to "Rock" which lowers the bass and treble rather than "User" where all the settings are set to flat. There are also Vocal, Bass (which actually reduces bass for some reason), Electronic, Classic, Jazz, and Speech. Oddly, there is an "Audio Only" function where you can turn off the display and only hear the speakers. This is excellent for people who use something like a music server or CD player in their living room but only use the television's speakers at present.
Menus
The Display menu is only really good for renaming your inputs (you can only select from a list and there is no manual way of entering your own labels). The TV menu is for setting up your tuners. The Power menu lets you turn on and off the front LED, set an auto standby mode (DPMS Mode - Off, 1/5/10 minutes), Sleep Timer, and Power On Plug. The DPMS Mode worked exactly as advertised and never turned off when I was watching something. The Power On Plug allows you to select if the set turns on or stays off when the unit loses power (something that happens all the time here). The Settings menu lets you do Factory Resets, set the OSD language, Timeout, and Transparency, and turn on or off the Autosource. If you lost your Quick Install guide, you can view it here (very handy) as well as viewing the System Info.
The way that Autosource works is that it senses whenever a new signal enters the display. It then automatically switches to that source. What it doesn't do is switch back to a currently playing source after that switch. The idea is that if you have a cable box and DVD player connected to the display, then when you turn one on, it switches for you. Presumably, you wouldn't have the two sources running at once. So if you are watching TV and you turn on the DVD player to eject a disc, it will auto switch to that source. Once you power off the DVD player, it does NOT switch back to your original source. If you've got a receiver that overlays the volume readout on top of your video signal, you'll want to disable that in order for the Autosource to work properly. In my case, I have a number of the video outputs of my Denon AVR-2307CI receiver connected up to the TX-42F430S. Every time I tried to change the volume, this triggered the Westinghouse to switch to the component video input (which, unlike HDMI, visually outputs the volume level information) on me.. Just something to remember if you are interested in using the Autosource function.
The Video menu, of course, is the most important one where all your calibration and picture settings are located. There are five Modes: User, Enhanced, Game, Sports, and Movie. All the settings are user adjustable so I'm not real sure why a "User" mode is needed. Of course, there are Brightness, Contrast, Saturation, Hue, Sharpness, Backlight, and Video Reset. I really liked being able to reset all the video settings or just a particular mode. There are three different Color Temps - Warm, Neutral, and Cool. When you click on Calibration Mode, an entirely different menu comes up which renames Brightness, "Black Adjustment" and Contrast, "White Adjustment" randomly. It also gives you access to turning the Deinterlacing on and off (not sure why you'd want it off but whatever), and the 3D Comb Filter on and off. While Color Temp on the main Video menu just lets you choose one of the three settings, under the Calibration mode you can adjust the global Red, Green, and Blue levels directly (it isn't as good as separate gain and cut controls but it is better than nothing). Many of the Video settings (Saturation, Hue, etc.) are also available with no discernable difference from the main menu counterpart.
Remote Control
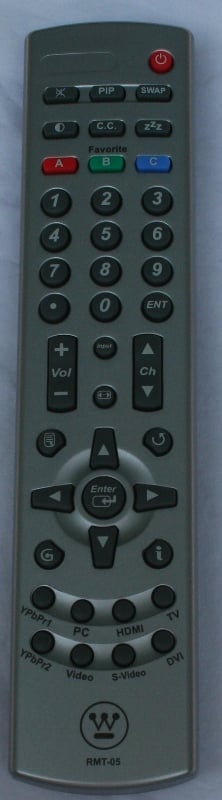 Westinghouse once again decided to go with a completely
NON-backlit remote. The light gray remote feels comfortable in your hand and is
fairly easy to navigate in the dark (good thing too). It is large enough that
it won't immediately be sucked into the couch (unlike its predecessor). There
are unique buttons for each input type at the bottom (though you still have to
scroll through the HDMIs - and without any on-screen help might I add) and there
is a global input scrolling button. Westinghouse has a history of denying users
direct access controls for more easily programming universal remote controls
and it looks like the TX-42F430S is no different. The aspect ratio button is
near the center control buttons which is very convenient. The Menu and Back
buttons (along with the information button which is useless in normal viewing
because the Back button does the same thing) are also easily accessible. For
some reason there is a Backlight scroll button near the top which seems to be
an odd choice for a remote. Why would you want to make it easy for kids/guests
to mess up your backlight settings? While overall this is an improvement from
the original remote (which spent more time lost in the couch than anything
else), it still has a long way to go before I consider it
"acceptable."
Westinghouse once again decided to go with a completely
NON-backlit remote. The light gray remote feels comfortable in your hand and is
fairly easy to navigate in the dark (good thing too). It is large enough that
it won't immediately be sucked into the couch (unlike its predecessor). There
are unique buttons for each input type at the bottom (though you still have to
scroll through the HDMIs - and without any on-screen help might I add) and there
is a global input scrolling button. Westinghouse has a history of denying users
direct access controls for more easily programming universal remote controls
and it looks like the TX-42F430S is no different. The aspect ratio button is
near the center control buttons which is very convenient. The Menu and Back
buttons (along with the information button which is useless in normal viewing
because the Back button does the same thing) are also easily accessible. For
some reason there is a Backlight scroll button near the top which seems to be
an odd choice for a remote. Why would you want to make it easy for kids/guests
to mess up your backlight settings? While overall this is an improvement from
the original remote (which spent more time lost in the couch than anything
else), it still has a long way to go before I consider it
"acceptable."
TX-42F430S Measurements
For calibration I'm using both the Sencore ColorPro5000 and Colormetre HCFR software. Basically, Sencore is great for calibrating your set but doesn't give you the pretty graphs that we like to show in our reviews. That's where Colormetre comes in. From the default settings, I measured:
Enhanced - 7500k (542:1 ANSI contrast ratio)
Game - 8700k (494:1 ANSI contrast ratio)
Sports - 7500k (620:1 ANSI contrast ratio)
Movie - 6700k (472:1 ANSI contrast ratio)
As you can see, color temperature in Movie mode without any calibration isn't too bad. It was a little too blue and red for my taste however, so I tweaked the settings a little. Calibration on the TX-42F430S is a mixed bag. It is easy to access the settings via the menu with the remote, though you'll find it resetting your settings from time to time (I couldn't identify exactly when or why). Just make sure you write your settings down when you are done just in case. A few oddities - settings for HD and SD content need to be set separately, settings are global for all inputs of the same type (all four HDMI inputs get the same calibration), and when you adjust the Red, Green, and Blue from the calibration menu, those settings stick even if you do a Video Reset. The only way to reset those setting is with a Factory Reset. I started off setting the Mode to Movie, Brightness down to 46, Backlight at 40, and in the calibration menu I switched the Warm Red to123, Green to 133, and Blue to 119. I ended up with a color temp of 6600k and a 588:1 Contrast Ratio.
 One of the most
disappointing results of my measurements was the discovery that the display
clipped whites and added a lot of artifacts to blacks (I tried to get a picture
of the test screen but I couldn't get it to come out). Using the DVE Pro disc,
I found that 95 and 100 IRE were indistinguishable from each other and that 5
IRE had a lot of visual artifacting. This means that any very light or dark
scene is going to have no definition (light scenes) or lots of artifacting
(dark scenes). Unfortunately, this wasn't one of those "only shows up in
the measurements but doesn't affect real world performance" things. It was
immediately noticeable with casual viewing. Lowering the backlighting (which
was set inexplicably high for default Movie mode) helped with the artifacting
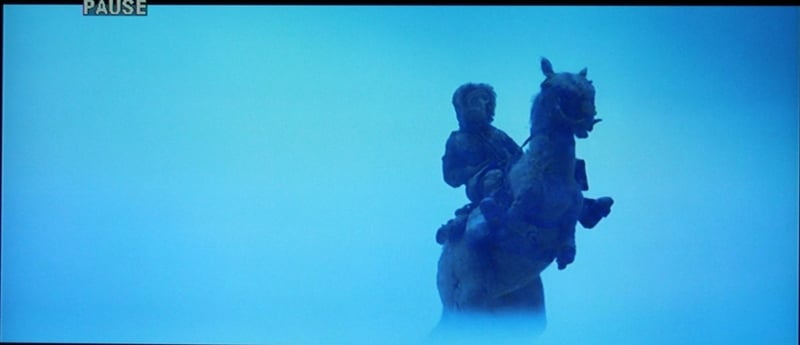
but not much. I found the most obvious example of white clipping during a scene
in The Empire Strikes Back. When Han
goes out on a Tauntaun looking for
Luke, it looks like the Tauntaun is standing in an amorphous field of white.
Sure, handing your teacher a blank sheet of paper and calling it a white horse
in a snowstorm might be funny, but I expect that ILM did a little more work
than that. Based on previous viewings of this movie on different displays, I
know they did.
One of the most
disappointing results of my measurements was the discovery that the display
clipped whites and added a lot of artifacts to blacks (I tried to get a picture
of the test screen but I couldn't get it to come out). Using the DVE Pro disc,
I found that 95 and 100 IRE were indistinguishable from each other and that 5
IRE had a lot of visual artifacting. This means that any very light or dark
scene is going to have no definition (light scenes) or lots of artifacting
(dark scenes). Unfortunately, this wasn't one of those "only shows up in
the measurements but doesn't affect real world performance" things. It was
immediately noticeable with casual viewing. Lowering the backlighting (which
was set inexplicably high for default Movie mode) helped with the artifacting
but not much. I found the most obvious example of white clipping during a scene
in The Empire Strikes Back. When Han
goes out on a Tauntaun looking for
Luke, it looks like the Tauntaun is standing in an amorphous field of white.
Sure, handing your teacher a blank sheet of paper and calling it a white horse
in a snowstorm might be funny, but I expect that ILM did a little more work
than that. Based on previous viewings of this movie on different displays, I
know they did.
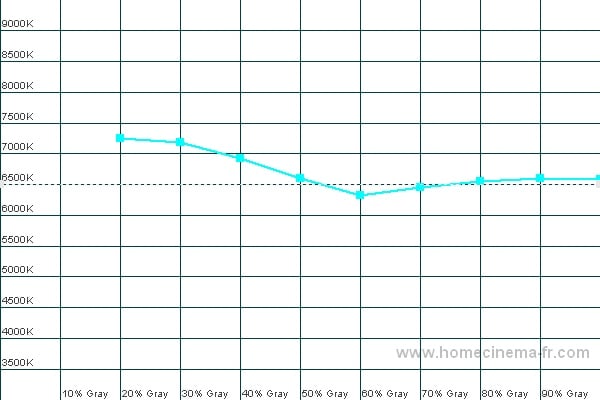
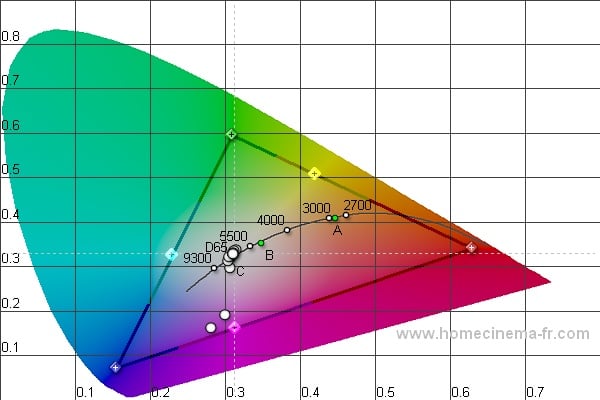
Color Temp (left); CIE (right)
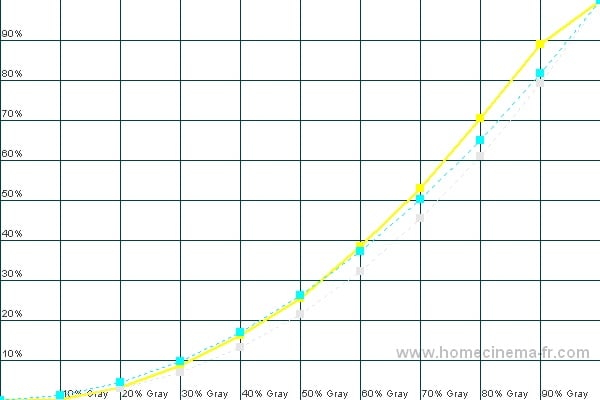
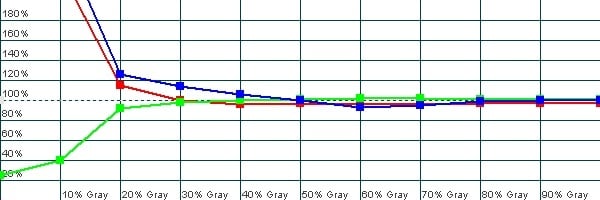
Luminance/Gamma (left); RGB (right)
As you can see, the RGB graph lines up nicely but without gain and cut scores, I couldn't get the Color Temp to get in line. Basically, I could push it up and down but the shape stayed the same. You can also notice on the Luminance graph where the clipping starts somewhere above 90 IRE. With a finer resolution, I'd bet we'd see exactly the point where it clips.
Audioholics/HQV Bench Testing Summary of Test Results
Perfect Score is 130
Westinghouse TX-42F430S Benchmark total score: 45/130.
|
Test |
Max |
Results |
Pass/Fail |
|
Color Bar |
10 |
10 |
Pass |
|
Jaggies #1 |
5 |
0 |
Fail |
|
Jaggies #2 |
5 |
0 |
Fail |
|
Flag |
10 |
0 |
Fail |
|
Detail |
10 |
10 |
Pass |
|
Noise |
10 |
0 |
Fail |
|
Motion adaptive Noise Reduction |
10 |
0 |
Fail |
|
Film Detail |
10 |
10 |
Pass |
|
Cadence 2:2 Video |
5 |
0 |
Fail |
|
Cadence 2:2:2:4 DV Cam |
5 |
0 |
Fail |
|
Cadence 2:3:3:2 DV Cam |
5 |
0 |
Fail |
|
Cadence 3:2:3:2:2 Vari-speed |
5 |
0 |
Fail |
|
Cadence 5:5 Animation |
5 |
0 |
Fail |
|
Cadence 6:4 Animation |
5 |
0 |
Fail |
|
Cadence 8:7 Animation |
5 |
0 |
Fail |
|
Cadence 24fps film |
5 |
5 |
Pass |
|
Scrolling Horizontal |
10 |
10 |
Pass |
|
Scrolling Rolling |
10 |
10 |
Pass |
|
Total Points |
130 |
45 |
|
All tests were run at 480i through the Component input.
|
Test |
Max |
Results |
Pass/Fail |
|
HD Noise Reduction A&B |
25 |
0 |
Fail |
|
HD Video Resolution Loss |
25 |
25 |
Pass |
|
Jaggies A&B |
20 |
0 |
Fail |
|
Film Resolution Loss |
25 |
0 |
Fail |
|
Film Resolution Loss - Stadium |
10 |
10 |
Pass |
|
Total Points |
105 |
35 |
|
Comments on Audioholics DVD Torture Tests
You'll notice that I did all the tests through the Component input. This is because the HDMI input failed the 6.5MHz resolution test (oddly) when using 480i mode. Overall, the HQV results speak for themselves. Jaggie and Noise reduction are nonexistent. Only the most basic of deinterlacing features are available. Using a good source with this set is imperative though, as you'll see later, even that isn't going to deliver a great picture.
TX-42F430S Viewing Evaluation and Conclusion
I've already mentioned the artifacting and white clipping during the measurement section. During the viewing evaluation, I noted tons of jaggies, noise, and white clipping. Motion blur was rampant and the overall viewing experience was very poor. I tried using the set with a Denon DVD-3910 (a reference level DVD player) set to progressive and even that didn't help.
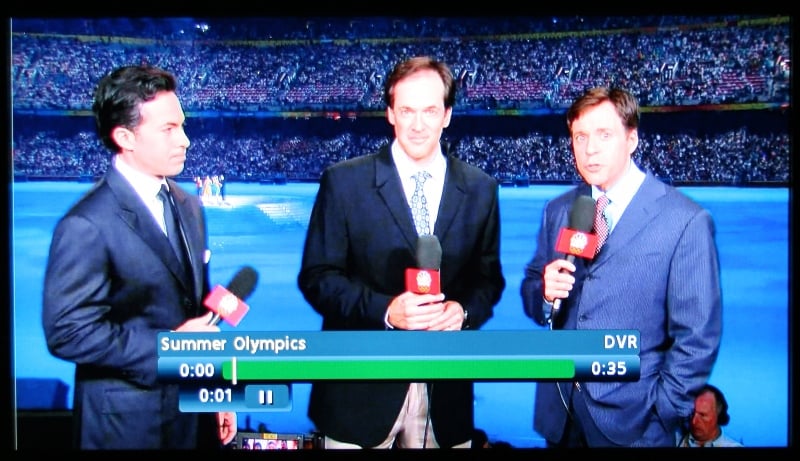
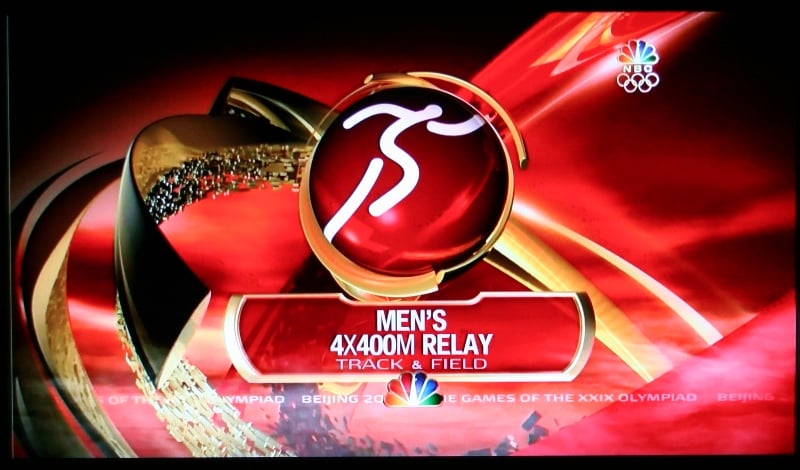
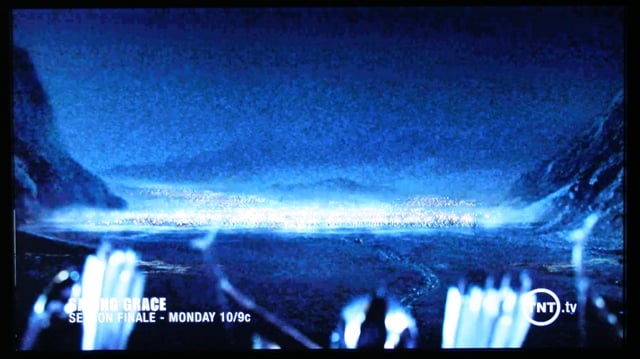
HDTV - 2008 Beijing Summer Olympic Games
It's hard not to spend some time watching the Olympics when they are on, since just about everyone else rolls over and plays reruns for two weeks afterwards. By the time it was over, I was well ready for it to be. I spent a lot of time with the Olympics noticing motion blur. Diving and Soccer in particular were rife with it. Westinghouse has this display listed with an 8ms response time. According to Westinghouse's own definition:
Response time is a measure of how long a display takes to change the image. A typical LCD television is 2 to 3 times faster than the average LCD computer monitor. TVs with fast response times are superior for playing computer games and viewing action movies and sports.
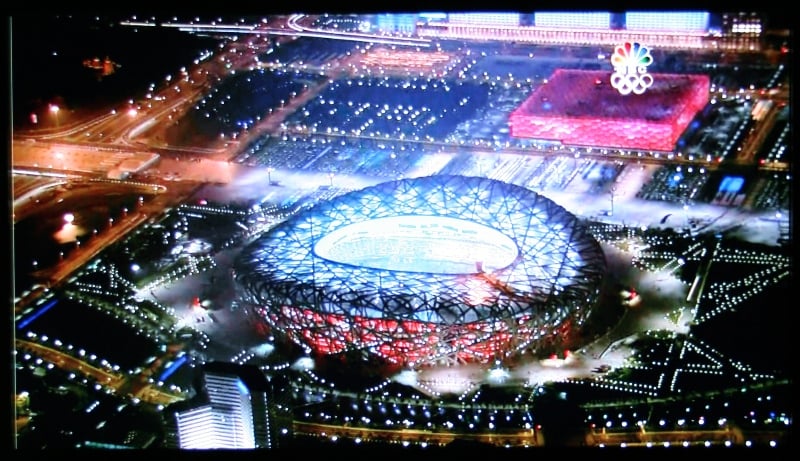
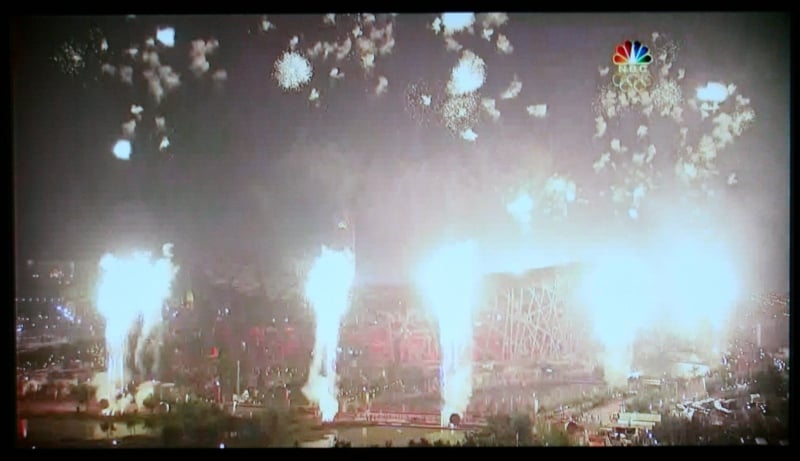
We'd have to wonder if Westinghouse borrowed too much from its PC monitor division in making these displays. The colors were well saturated and static pictures looked OK, but any motion was a mess of blurs. The closing ceremony was held at night and the amount of artifacting was legion and banding was evident near every light source. Notice the artifacting in the Olympics graphic in the last pic.
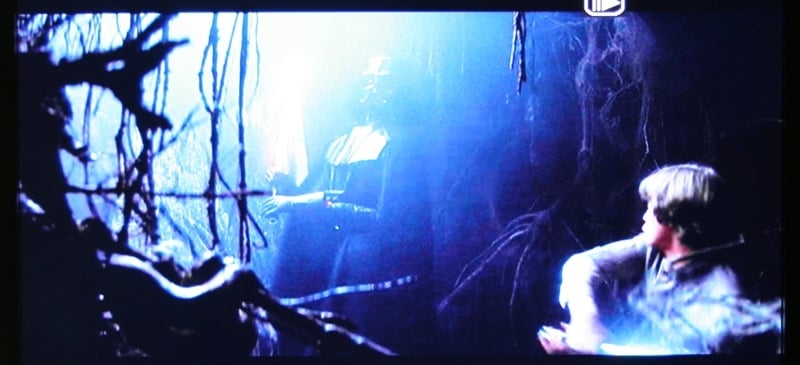
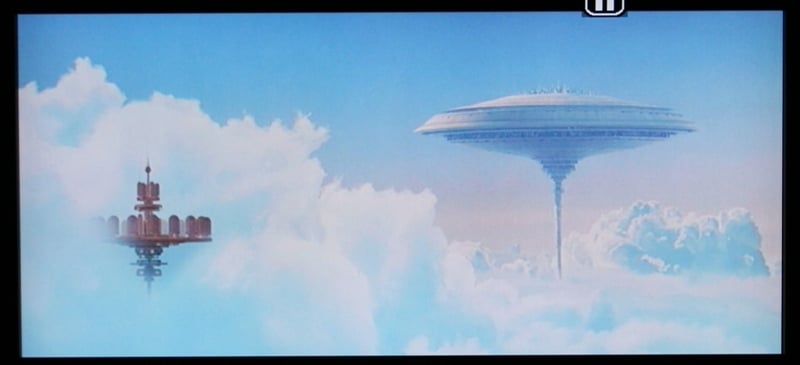
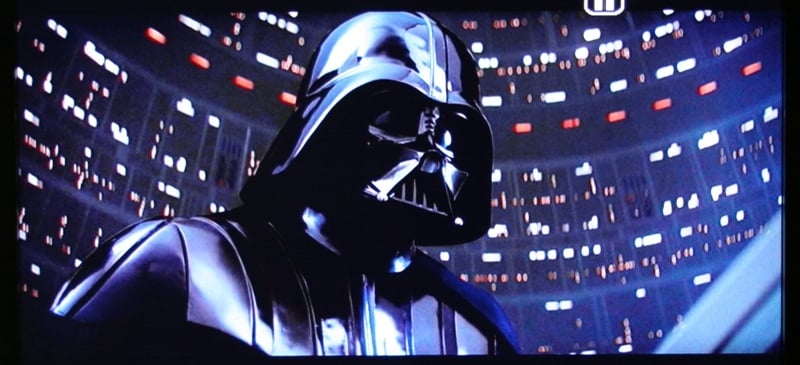
DVD - Star Wars: The Empire Strikes Back
Much of this DVD looked just fine, though again fast motion and dark/light scenes were problems.

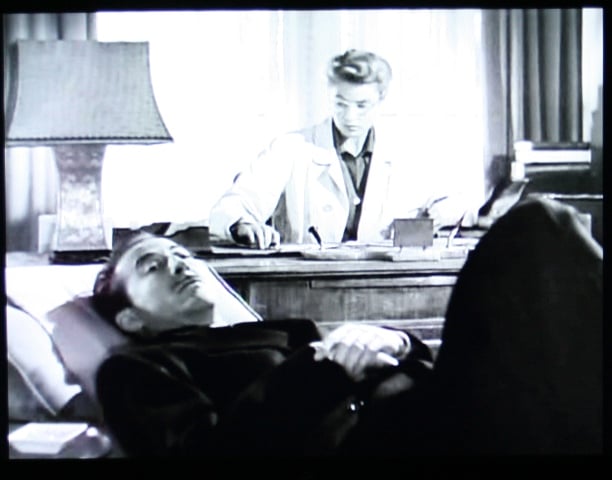
Various
Here are a few more pics I snapped thinking that I would use them in the review. At this point, it seems like it is just going to be more bashing so I'll just throw up a few. The dark, grainy blob is the arrows coming in at the end of LOTR: The Two Towers. The second is from the same movie and the kid's face looks fine but the figure in the foreground has a lot of noise. This is pretty typical of the performance with the characters looking OK but the backgrounds looking hazy and full of artifacts. The last two pictures are from Alfred Hitchcock's Spellbound. While many of the scenes are shot sort of soft, notice the moiré on Gregory Peck's jacket and how undefined Ingrid Bergman's white coat is compared to the white window behind her. Overall, SD performance lacked the crispness I've seen with other displays.


Conclusion
![]() What
is really important in the end is not how thick a display is, its price, or
calibration options - it is the quality of the picture. In the case of the
Westinghouse TX-42F430S, that is pretty poor. Artifacting on nearly every
scene, no substantial jaggie or noise reduction, and white clipping makes
viewing this display almost painful. The only reason I could see someone being
impressed with this set is if they went from a very old, very small set to this
one without knowing how good an HD display can look. It's also incredibly
inexpensive. I've read user reviews and "professional" reviews that
laud this display as being on par with Tier 1 LCDs. I just can't fathom how
anyone that spends any amount of time with this display can come to that
conclusion.
What
is really important in the end is not how thick a display is, its price, or
calibration options - it is the quality of the picture. In the case of the
Westinghouse TX-42F430S, that is pretty poor. Artifacting on nearly every
scene, no substantial jaggie or noise reduction, and white clipping makes
viewing this display almost painful. The only reason I could see someone being
impressed with this set is if they went from a very old, very small set to this
one without knowing how good an HD display can look. It's also incredibly
inexpensive. I've read user reviews and "professional" reviews that
laud this display as being on par with Tier 1 LCDs. I just can't fathom how
anyone that spends any amount of time with this display can come to that
conclusion.
Westinghouse TX-42F430S 42-inch LCD Display
$1199
Westinghouse Digital Electronics
1 (866) 287-5555
www.westinghousedigital.com
About Westinghouse Digital Electronics
Westinghouse Digital Electronics offers a
complete suite of innovative LCD displays for the professional and consumer
markets as well as LCD-based consumer electronic products that deliver the
latest digital content for the ultimate entertainment or commercial display
experience. Westinghouse Digital’s award-winning consumer HDTV line up includes
a complete family of 720p and 1080p LCD HDTVs and HD 1080p monitors in a wide
range of sizes and formats, HD Grade™ computer standard and widescreen
monitors, and a full line of digital photo frames. Westinghouse Digital is the
exclusive supplier of thousands of specially-designed LCD screens which deliver
entertainment, news and advertising in major brand gas stations to millions of
viewers each month.
The Score Card
The scoring below is based on each piece of equipment doing the duty it is designed for. The numbers are weighed heavily with respect to the individual cost of each unit, thus giving a rating roughly equal to:
Performance × Price Factor/Value = Rating
Audioholics.com note: The ratings indicated below are based on subjective listening and objective testing of the product in question. The rating scale is based on performance/value ratio. If you notice better performing products in future reviews that have lower numbers in certain areas, be aware that the value factor is most likely the culprit. Other Audioholics reviewers may rate products solely based on performance, and each reviewer has his/her own system for ratings.
Audioholics Rating Scale
 — Excellent
- — Very Good
- — Good
- — Fair
- — Poor
| Metric | Rating |
|---|---|
| Detail and Resolution | |
| Deinterlacing & Scaling | |
| Contrast and Black Levels | |
| Color Reproduction | |
| Noise Reduction | |
| Calibration Options | |
| Build Quality | |
| Ergonomics & Usability | |
| Ease of Setup | |
| Features | |
| Remote Control | |
| Performance | |
| Value |
As Associate Editor at Audioholics, Tom promises to the best of his ability to give each review the same amount of attention, consideration, and thoughtfulness as possible and keep his writings free from undue bias and preconceptions. Any indication, either internally or from another, that bias has entered into his review will be immediately investigated. Substantiation of mistakes or bias will be immediately corrected regardless of personal stake, feelings, or ego.
View full profile