
Yamaha YSP-1 Digital Sound Projector Review
Yamaha YSP-1
- Product Name: Yamaha YSP-1
- Manufacturer: Yamaha
- Performance Rating:


- Value Rating:
- Review Date: March 04, 2005 19:00
- MSRP: $ 1499
Amp
Section
Maximum Output Power
(EIAJ)
2 watts (1KHz, 10% THD, 10Ω) x
40
20
watts (100Hz, 10% THD, 4Ω) x 2
Speaker
Section
1.5" (4cm) cone magnetic shielding
type x 40
4.5" (11 cm) cone magnetic shielding
type x 2
Input
Jacks
Two pairs Analog Audio (1V, 32
kΩ)
Optical S/PDIF
Audio
Coaxial S/PDIF
Audio
Output
Jacks
Subwoofer Pre-out (1V, less than
120Hz)
Video Out OSD (1Vp-p,
75Ω)
System
Connector Jacks
1 System Control,
RS-232C
Finishes
Available
Silver enamel perforated
metal grille, High-gloss black Plexiglas base
General
Power Consumption: 50
watts
Standby Power Consumption: 0.5 watts
or less
Dimensions: 40.56" x 7.69" x 4.62" (103cm x 19.4cm x
11.8cm)
Product weight: 13 kg (28 lbs 10
oz)
Pros
- Single-box, high performance, 42 digital amplifier, surround sound system
- Very easy, 30-minute hook-up; interconnects only.
- Decor-friendly, highest spouse-acceptance factor system
- Plays impressively loud and clean
- Quality construction, exemplary fit and finish
- Excellent value vs performance
Cons
- Requires subwoofer for full-bandwidth movie sound
- Some non-re-EQ'ed DVDs can sound bright at high SPL
- Software set-up requires a learning curve
Yamaha YSP-1 First Impressions
 Years from now home theater enthusiasts may be reading whole articles on the available models
within the Digital Sound Projector category. For the present though, there exists only the
category-defining Yamaha YSP-1, a brilliant marriage of compact form with simply amazing
multi-channel synthesis capability.
Years from now home theater enthusiasts may be reading whole articles on the available models
within the Digital Sound Projector category. For the present though, there exists only the
category-defining Yamaha YSP-1, a brilliant marriage of compact form with simply amazing
multi-channel synthesis capability.
First Impressions
When we first heard Yamaha's demonstration of the YSP-1 at the 2005 CES we were fairly impressed. I remember noting at the time that the demo space had no roof. So the ambient noise level that is CES was at its usual 75DB or so. In fact, that was one of the most striking aspects of this demo. Instead of trying to construct an acoustically-correct sound room for their demo Yamaha's crew seemed to have wanted to do the exact opposite. Construct a topless room with simple, hard walls made of 1/2" ply. There were large openings at the two back corners through which dealers could walk in and hear the demo. Hmmm... what was up?
And the demo... I had heard demos like this in years past with any number of electronic-only methods of phase alteration and what-not that could throw simple sounds like birds chirping up and behind you - provided you sat in an exact sweet spot. So given the high ambient SPL from the CES crowd-noise and what seemed like a "parlor trick"-style demo on first listen, I was kinda-sorta impressed but not overly so.
Then, listening a bit longer while still facing forward I began to notice the spread of the rear soundstage. Sure the content was the usual thunder storm or chirping birds in a forest, but the sounds were definitely not coming from a tinny little HTIB speaker mounted to the wall. Rather, the sound was spread out, maybe four feet wide over my left and right shoulders. And it seemed to exist, not glued to a speaker source on the wall, but floating out in the open space behind me. It was audibly located perhaps a foot forward of the plywood-wall, open-ceiling juncture.
Two other interesting and new-to-me surround phenomena seemed to be taking place. First, because of the open ceiling, CES' ambient crowd-noise now became the ceiling! The YSP-1's surround sound did not blend with the crowd-noise. Instead, the surround image stayed fixed within the confines of the four-wall plywood room.
Secondly, the quality of the bird tweets and thunderstorm seemed to sound much more like the real thing. Since the whole Audioholics crew was hearing this demo at the same time, I tempered my enthusiasm for the moment while we politely requested a sample for review.
Yamaha YSP-1 What it is, What it is not
The Yamaha YSP-1 is, quite simply, a single-box, high performance home theater solution which, by its very nature, integrates more easily into a typical home environment than any product that has come before.
The YSP-1 is based around digital Sound Projector technology developed over the past 7 years in Cambridge, England, by 1 Ltd, a small hi-tech R&D IP-licensing company founded by Dr. Tony Hooley in 1995. Until now this technology was only previously licensed to Pioneer of Japan.
For more information, please read my exclusive interview with Dr. Hooley.
To define it component-wise using standard audio categories, the YSP-1's internal sub-systems would break down roughly as follows:
-
It is an Audio Preamp/Processor which integrates with analog or digital video sources. The YSP-1 hooks up to both digital and analog audio sources. Dolby Digital and DTS are built-in for movies while Dolby Pro Logic II and DTS Neo 6 can transform two-channel music into five channel surround. The number of inputs has been kept to a bare minimum but, as will be seen, they will support the most common configurations for which this unit will likely be used. This includes the capability to hook up to a DVD player, a cable or satellite receiver box (analog audio, digital video), an analog or digital TV and even analog audio from a VCR. Then there is the ever-present aux digital input which can be used for a digital cable TV, digital satellite TV or game console.
-
It h a s forty-two channels of digital amplification. The YSP-1 has forty 2.5 watt digital amplifiers, each tied directly to its own 1.25" transducer within the array. There are also two 20-watt digital amplifiers which deliver power to two 4.5" mid-woofers.
-
The YSP-1 has a proprietary (1 Ltd) digital signal allocation and "beam steering" audio processor chip. This chip directs both the appropriate channel content and the amount of power given each of the 40 array-transducers so that speaker groupings of individual channel beams can be "steered" toward different locations within the listening space. All of the transducers are used for ALL of the 5 different steered channels - they are NOT used as subsets; i.e. some for each beam only.
-
It is a button-push configurable two-cha nnel, three channel, five-channel and three LCR channel + 2 channel surround-capable speaker system. Forty-two transducers total; two 4.5" left and right front mid-woofers on either side of the master array of 40 approximately 1.25" diameter drivers. The crossover frequency of the two 4.50" left-right mid-woofer drivers is switchable to 80Hz, 100Hz or 120Hz to match with an outboard subwoofer for which a low-level output is provided. The mid-woofers' handoff frequency to the 1.25" forty-driver array takes place at 350Hz (1000 Hz in Corner-location mode).
-
It is the most decor-friendly, highest spouse-acceptance-factor, true surround audio system ever designed. With the debut of the Yamaha YSP-1, its product execution, from the quality of materials, to the stunningly elegant industrial design, marks a high-point for performance vs. value in a category-defining product.
Projecting surround channels acoustically
The design premise of Yamaha's Digital Sound Projector is contained in an in-house, training-oriented "white paper" of sorts entitled "The Goals of a High-Quality Sound Field Creation (System)." This title hints at the inherent 180º difference between the YSP-1 Digital Soundfield Projector we're reviewing here vs.1986's Yamaha DSP-1 Digital Soundfield Processor which, to this author's way of thinking, was a digital sound field re-creation device.
The Yamaha DSP-1, Stereo Review's Product of the Year for 1986, had algorithms built-in which were said to recreate the sound of famous concert halls, jazz clubs and stadiums from around the world. That product, launched when the only home theater format in existence was three-channel Dolby Surround, required a minimum of four amplifier channels and four loudspeakers plus a subwoofer to make the full system really blast off. And at the time, Top Gun, played thousands of times in dealer showrooms nationwide, introduced well-healed audiophile/movie aficionados to the joys of a movement which became known as Home Theater.
As spectacular as Top Gun was back then it required at least a couple thousand dollars in auxiliary equipment (extra boxes) to reach the system's full surround potential. Let's now come back to the present and take a look at the lofty product goals set for Yamaha's single-box sound field creation machine (as paraphrased from the Japanese-to-English translation):
Natural, Speaker-less Surround
"What makes a playback sound field artificial is the presence of speakers."
Agreed. From the beginning of home theater, the goal of the surround speakers has always been to generate a sense of immersion or envelopment; of making the surround speakers seemingly disappear. But before THX's doctrine of sound "immersion" was widely marketed, and with little understanding of surround's psychoacoustic implications, one-brand stereo systems began to be sold with two, small-box, single-driver surround speakers.
Power to these rear channels was usually from a low power "chip-amp" which at most would put out 20 watts at 10% THD. Driving low sensitivity, inexpensive "full-range" surround speakers, the end result would typically be a huge sound quality unbalance between clean, truly full-range front channels and an annoying, tinny "surround sound" signal emanating from behind the listener.
The sound of the Yamaha 's YSP-1 is light years ahead of that first generation of product. First off, all of the channels have a more natural, out-of-the-speaker-box sound. This is particularly apparent on center-channel dialog in which voices on a good recording are imbued with their natural timbre.
This clarity of vocal articulation is fairly startling to hear for the first time. When you're used to hearing the slight side-to-side cancellation effect of a horizontal D'Appolito center speaker, the YSP-1's natural sound is a very welcome change.
Yamaha YSP-1 Technology and Design
"The key is the size of an audio image. In the past it was said that a point source was the ideal for a sound source. That was correct for stereo but what about surround sound? The YSP-1 has been designed with the intent of paying more attention to the connectivity or extensity of a sound field than to the presence or localization of the sound image" (Extensity: In psychology, the quality of sensation which permits the perception of space or size.)
Extensity is an accurate description of the spatial envelope this Digital Sound Projector can portray. One gets the very new and somewhat eerie sense of the space within the room being defined by a movie's surround content. To illustrate; without the oft-times intrusive consciousness of in-wall speakers installed in the corner behind me and to my sides I can now sense the "sound bubble" of a particular movie from the prospective of the bigness or smallness of the effect itself. In other words, I think I'm hearing what the director and sound editor may have intended when he mixed in-studio from his fixed-position surround speakers.
It is this effect, this ability of the sound field to expand and contract depending on program content that is most difficult for my auditory memory to wrap around and get a firm grasp of. Many of us, after all, have been listening to surround from known, fixed speaker locations for almost a generation.
Putting aside the tremendous strides in direct surround vs. matrix, plus the ever increasing level of sound quality, one constant with surround speakers has always been that we know where our surround speakers are. We know how we expect them to "sound", no matter how wonderfully immersive and diffuse. And we expect that sound to come from the general direction of the rear and side wall perimeters.
It is this single aspect, this "floating-in-space" effect which helps to define the new sound of Yamaha's Digital Sound Projector. Before we were 2D surround, trying to make the case for that last dimension with wall mounted speakers. With the YSP-1, the surround sensation always exists in a 3D space and the "willing suspension of disbelief", as THX calls it, becomes easier to achieve.
Sound Creation with Extensity
Now that we have surround images floating in space, another apparent benefit becomes more obvious - that of the three-dimensional size of the floating image. It is here that my mind tells me this surround sound field is being portrayed unlike any I've heard from a point source, mono-polar surround speaker. Depending on the frequency content of the image, say, above 1 kHz, the projected image can have a greater sense of width and depth than is usually possible with wall-mounted surrounds. Conversely with the YSP-1, lower pitched sounds or effects, above the subwoofer's omni-directional frequencies can sound truncated or recessed.
In making that last statement though I would say it takes a trained ear, along with a good audio memory of what a particular moment in a film sounded like over a conventional surround system, to realize what may be missing in the sound reconstruction as projected by the YSP-1. And again, the honest-to-goodness 3D dimensionality of the surround soundstage greatly overwhelms the ear/brain's ability to determine the frequency envelope of an effect to your side or from behind.
Design and Construction
Yamaha designers are acutely aware of the import a category-defining product such as the YSP-1 can have. Not only with first adopters but also with the second and third generation design variants which are sure to follow. GK Design has been closely aligned with the Yamaha family for decades. For all this time GK and Yamaha have shared the same basic design philosophy of elegant, simple-of-line, design execution. This philosophy has held especially true whenever rare milestone products such as the YSP-1 are first introduced.
In the US, a little known aspect of Yamaha's manufacturing prowess is their line of high style, exquisitely made, wood furniture (since 1903) available only in the Japanese market. So there is quite a long history of design thought given to melding what is hoped will be an elegant statement-piece of electronics into a home environment.
I had been told that first samples of the YSP-1 were already shipping. And since my review sample came in an unmarked box my guess is that these shipments would follow Yamaha's long-held practice of sending the first lots to company rep organizations as well as press to see if there were any last minute issues which might have slipped past the engineering team.
This lot of product is usually dubbed pre-production. A couple hundred pieces are typically "test run" on the actual production line to check last possible assembly glitches that could compromise the product's build integrity. Also of note at this final stage of development is that all actual tooled production parts are used. So the following comments on the product's fit, finish and overall design should be virtually identical to final production.
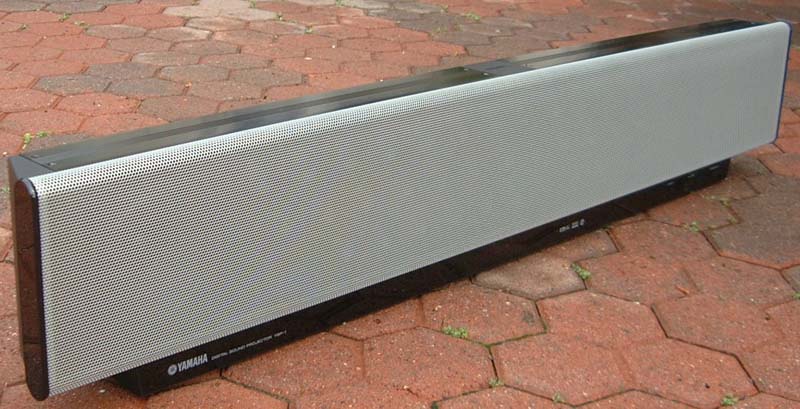
At a suggested retail of $1499 SRP the YSP-1's well-chosen and expensive construction materials plus exemplary fit and finish set a benchmark for every subsequent product to emulate. My significant other immediately approved the classy, muted silver-gray perforated metal grille across the upper span of the unit's face. She loved the fact that in most room lighting, the 42 black drivers mounted on a flat-black background behind the grille make them invisible. The bottom front area sports a clear Plexiglas-over-high-gloss-black background running lengthwise across the entire device. The subtle dull-to-shiny blend of the grille versus the base was also highly regarded in my household.
Behind the plexiglas in the unit's bottom-center is a 4" x 1/2" flouroscan dot-matrix display in a muted blue. This is my favorite choice of display technology and color as it is equally readable both in darkness and in most typical lighted room conditions. (The light level of this display is adjustable from 0 to -1 or -2 in the software. I found -2 worked equally well in darkness or daylight conditions.)
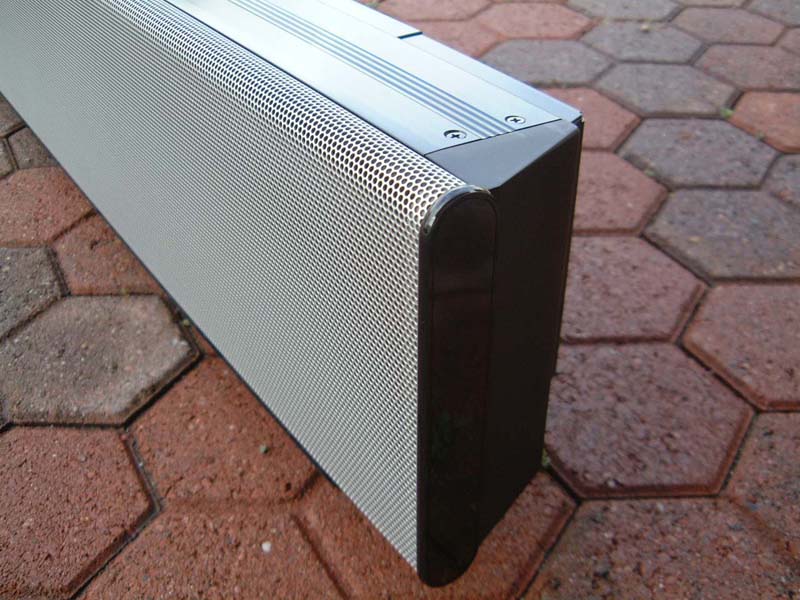
To the right along the bottom are four square, flat black tact-switch-style push buttons labeled Input, Volume - / + and Standby/On. To the Left along the bottom is a barely discernable Yamaha logo with "Digital Sound Projector YSP-1." A 0.2" wide x 6.25" high gloss black plastic end-cap finishes off both left and right sides of the perforated grille.
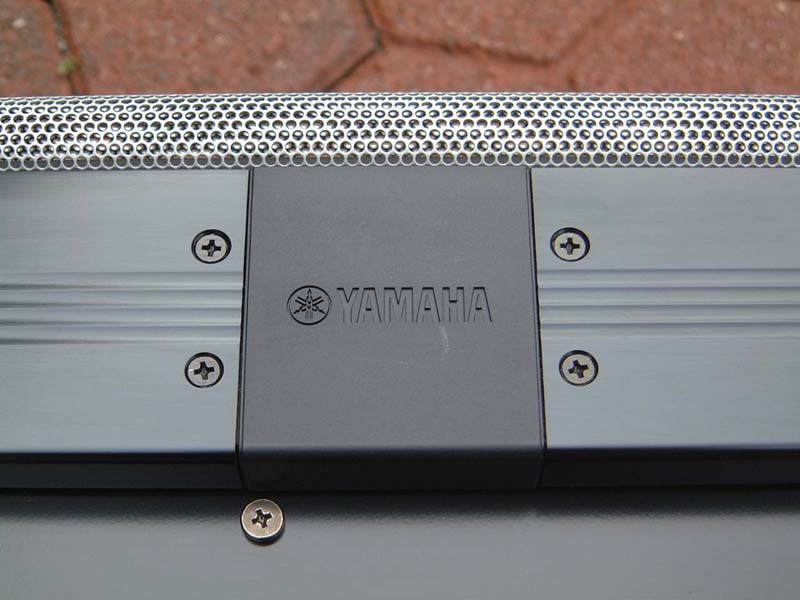
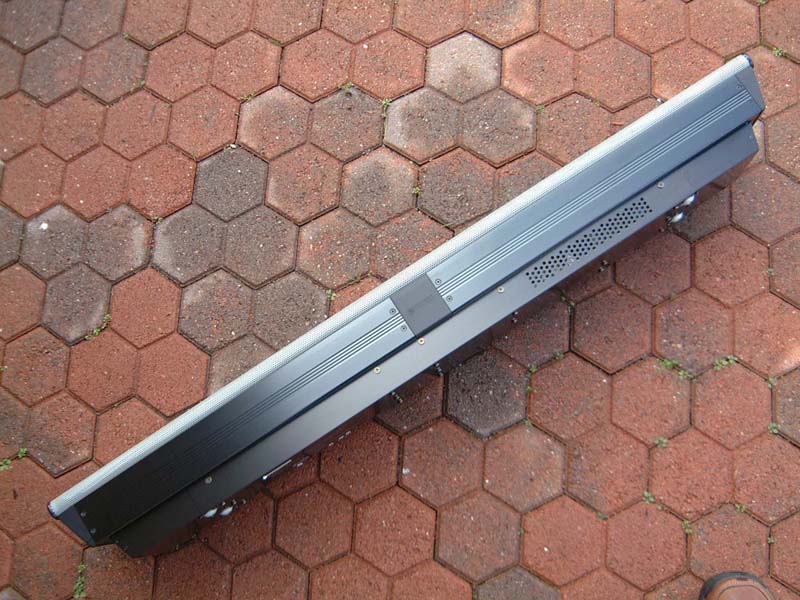
Moving around to the back, the unit's materials and quality of finish are every bit as impressive. Presumably to contain EMI radiation that may be emitted from the digital amplifier chips, a double-layer steel chassis has been fabricated with overlapping seams. The outer black-oxide coated chassis sits atop an eight-tenths width plastic injection-molded base. On the YSP-1's top, two black-anodized aluminum extrusions form the upper cover. A plastic cap which has the Yamaha logo reverse-embossed is affixed at the top center to cover the seam of the two aluminum extrusions.
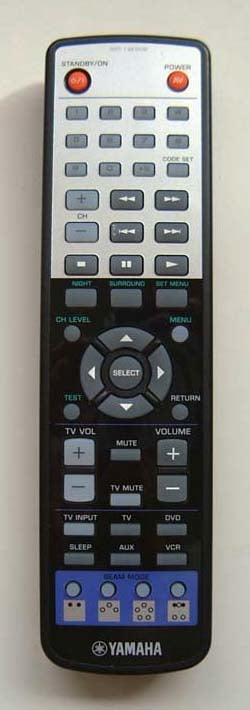
Yamaha YSP-1 Remote Control
 I'm big, really big on easy-to-use remotes. I'm just guessing here but I'd say
Yamaha's YSP-1 engineering team must have taken several samples home for their wives and kids during
development. The basic operations are simplicity in the extreme, and intelligently grouped along the
remote's bottom 40% of real estate. The remote works within a pretty generous ±30º window and at that
30º angle it's good for full functionality to about 20 feet.
I'm big, really big on easy-to-use remotes. I'm just guessing here but I'd say
Yamaha's YSP-1 engineering team must have taken several samples home for their wives and kids during
development. The basic operations are simplicity in the extreme, and intelligently grouped along the
remote's bottom 40% of real estate. The remote works within a pretty generous ±30º window and at that
30º angle it's good for full functionality to about 20 feet.
There are some really clever ergonomic touches that are not apparent until you study the remote's layout a bit more closely. For example, the TV channel up-down buttons have been moved up and out of the most-used bottom sector. (Keep it on channel 3!)
Another brainy move was placing all the set-up routine buttons in a sort of "no-man's-land" center section around the ubiquitous Up-Down-Left-Right directional wheel with center Select button. This leaves a neatly divided and simple-to-use remote with most-used, single-push controls at the bottom.
At the top are secondary controls which the kids or grandparents would use less often once the movie or TV program is started. This is a remote I can remember easily and, for instance, coach my fiancée's grandfather over the phone should he get in trouble. Just set it up once, warn kids and novices to stay away from buttons with green nomenclature in the center area, and you're home free. It doesn't get any better than that!
Along the remote's bottom are the four available beam modes. This section has a violet background which immediately identifies this remote as belonging to the Digital Sound Projector. (As we shall see later in the review all four beam modes are available when the YSP-1 and your video display are placed flat against a wall surface. For a corner arrangement, only two of the four modes, Stereo and 3 Beam mode are available.)
Above the beam mode selection buttons are a soft-white TV input selector and four dark gray source selection buttons for TV, DVD, VCR and aux. The owner's manual suggests aux can be either a digital satellite tuner, digital cable or a game console. There is even a sleep mode button which alternates by single presses between 30 minutes, 60 minutes, 90 minutes, 120 minutes and off.
The next section up from beam mode selection will be the most utilized. And it is here that the simple two-color button theme plus clever spacing ergonomics play such a subtle, yet vital roll. To the left in soft-white are the + and - TV Volume rocker-style buttons for the TV speakers. On the remote's right side the two + and - charcoal gray buttons simply called Volume. A soft-white TV Mute is in the center between these two rocker-style volume controls and matching charcoal gray Mute to quiet the YSP-1 is above that.
To me, the remote and its design are one of the surest signs signaling the care with which an electronic piece of gear has been designed. If system's remote functions well; if it is both intuitive in layout and labeling, and smooth and quick in operation, the end result is increased satisfaction with the system as a whole.
If you hold it down, the volume control on the YSP-1 goes from -99.5dB to 0dB in less than 10 seconds. That's 199 points of volume adjustability! To my mind the speed, smoothness and accuracy of this volume control are perfect. The mute threshold for the YSP-1 is adjustable in the menu, so you can have the volume cut off completely, or mute it to a level more appropriate to your preference. Using the YSP-1's remote to control my eight-year-old Mitsubishi TV's volume, the action of this new remote was much smoother than with the remote that came with the TV. Now that's cool...
Situated just below the Standby/On and AV Power buttons at the top is the numerical keypad. The numerical buttons will probably be used most times for setting up the initial remote codes for non-Yamaha devices. In my case, looking up the code for my Mitsubishi TV in the back of the YSP-1's owner's manual and punching in the code took all of 30 seconds total. Bingo, instant and seamless interoperability from the Yamaha remote. The best part of this simplicity of operation is that the Yamaha remote button named TV Input now handled, for the first time in my experience with a second party remote, the TV's input select function.
The top section of the remote also has a standard set of grey transport control buttons: Play, Pause, Stop, Fast Forward and Reverse and Chapter Advance/Reverse. These larger rectangular buttons functioned perfectly with the Yamaha DVD S1500 which I also had under review at the time. Toward the end of the review I did drag out one of my VCR's to check the code learning acuity on a device that might be fairly common in installations containing the Yamaha YSP-1. My Toshiba VCR had no problem functioning from the Yamaha remote so I'd give the code research team kudos here.
A single nit-pick: the remote control feature most of us Audioholics immediately look for... backlighting, is not included. Normally, in a product of this ambitious caliber I'd express disappointment. I'm guessing though that in most instances there'll be adequate lighting in the room anyway. So while I'll give the engineers a pass on this first version, at the same time I'd humbly request a fully backlit remote, (with the same great control layout please!) in your second generation Digital Sound Projector.
Yamaha YSP-1 Setup
One of the most outstanding aspects of the YSP1's all-in-one design IS its all-in-one design. As long as you mount the Digital Sound Projector either above or below your video display all other room and imaginary speaker placement locations can be input into the unit's DSP.
Even after having an absolute ball with this system for the last two weeks I still laugh in dumbfounded amazement every time I try a new set-up. After working so many years carefully figuring out front and surround speaker placement in dozens of rooms, it's hard to describe the feeling of being able to simply plop a single box on top of my TV, hook-up five or six interconnects and having immersive home theater like I've never experienced - all in less than 30 minutes.
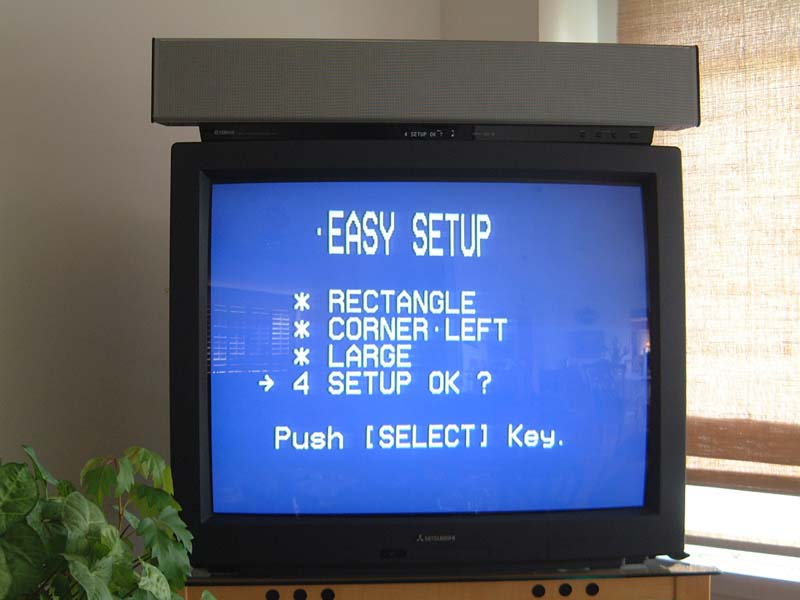
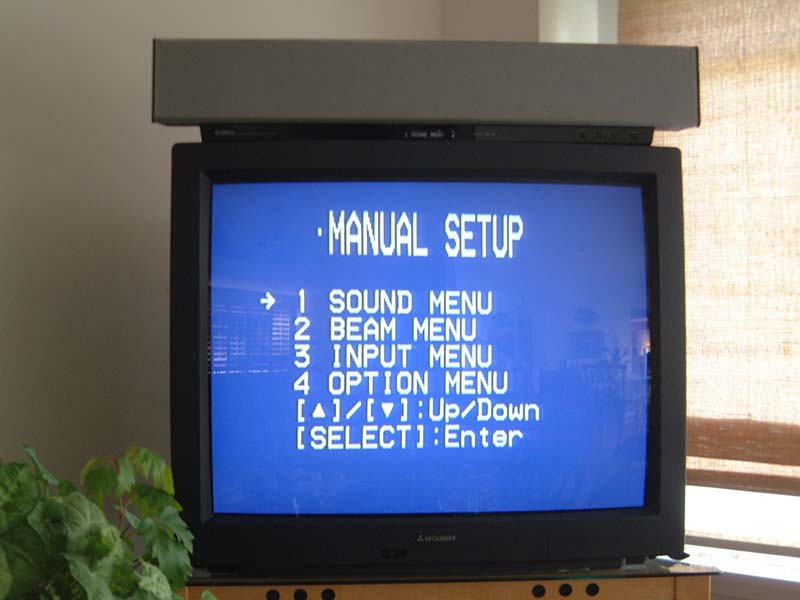
For basic hook-up to the TV, DVD, etc, the directions are well-written with clear, simple illustrations. Once all the hard-wiring is complete the on-screen set-up menu system will need to be utilized. Yamaha has anticipated that most people will not want to read too far into the set-up before they actually hear sound so the first Set Menu screen has only three choices: Memory, Easy Set-up and Manual Set-up.


A word of advice? Choose Easy Set-up and go through the two-minute, four-step program to get sound coming out of your magic box. It's simple. Select:
- Room Type : Square or rectangle? Got an L-shaped room? Choose rectangle.
- Spe a ker Position : Square has 4 choices including offset and corner. Rectangle has 8.
- Room Size : 3 general dimensions given. Pick the closest dimensions to your room.
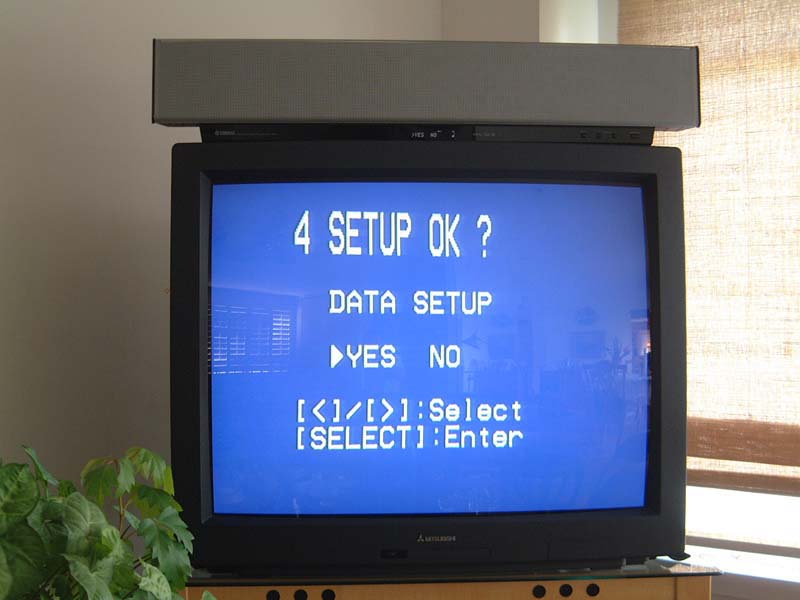
- Set-up Ok a y ? Say yes and input your first program into one of the three preset memories.
Sound comes out of the magic box. Surround sound floating in space . Center vocal sound that is up front, natural and clear. The initial audio impact of the YSP-1 will likely be far different than you've everexperienced . Enjoy the sound while you read a bit about Manual Set-up...
Phil Shea, has been Yamaha's point man for training on new products for longer than he'll care to admit. After seeing the reviewer/factory rep version of the YSP-1's owner's manual with its very succinct set-up instructions I decided to give Phil a call to see what he'd learned about the YSP-1.
It turns out that Phil had received his first unit in November '04 so he had spent quite a bit of time with the Yamaha magic box. He alerted me to a couple of labeling mistakes in the YSP-1's Manual set-up sequence which I'll cover in a couple of minutes. Phil's main suggestion to bear in mind when setting up, for instance, 3-Beam Mode (which I needed to use for my initial corner YSP-1/TV position) was to go through the entire set-up in the order in which they are presented in the menu. Deviate from that order by jumping to the end of the menu to change a parameter and you may wind up changing a parameter further upstream. Do that and you'll probably have to start over.
A screen I'd like to see added is a User-memory Table of Contents which shows all the settings that exist for that preset. As it is, unless a table is hand-written for each of the parameters to be input you'll have no way of remembering what you have engaged that works. If, on the other hand, you take some hard measurements of your room ahead of time, and you make a little top-view sketch of your room beforehand, you'll have a much easier time getting your first manual set-up in the ballpark sound-wise.
Once you've got that first program input into one of the three User program memories (I'd suggest memory 3) then you can go back through the exercise again and tweak your settings from there.
Yamaha YSP-1 Setup Part 2
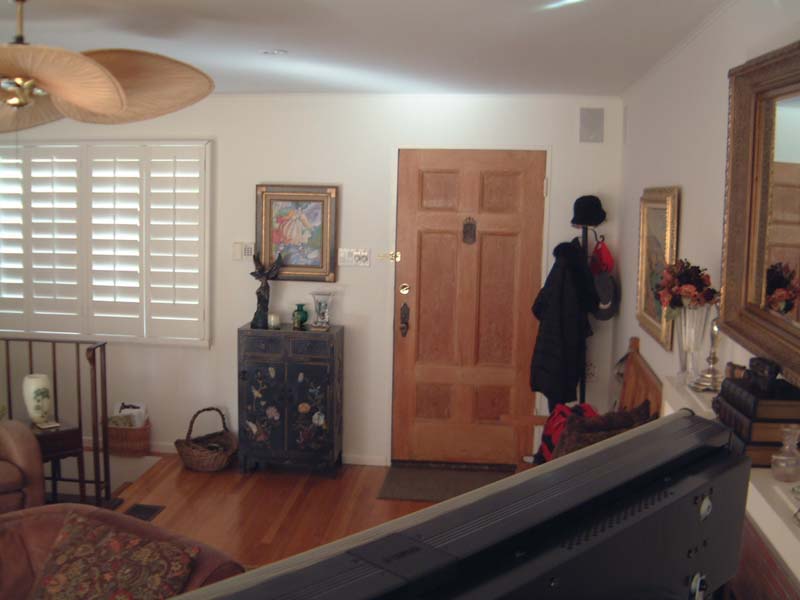
Here's are left-center-right shots of my open and very irregularly laid-out living room from the viewpoint of the YSP-1, looking out over it's top.
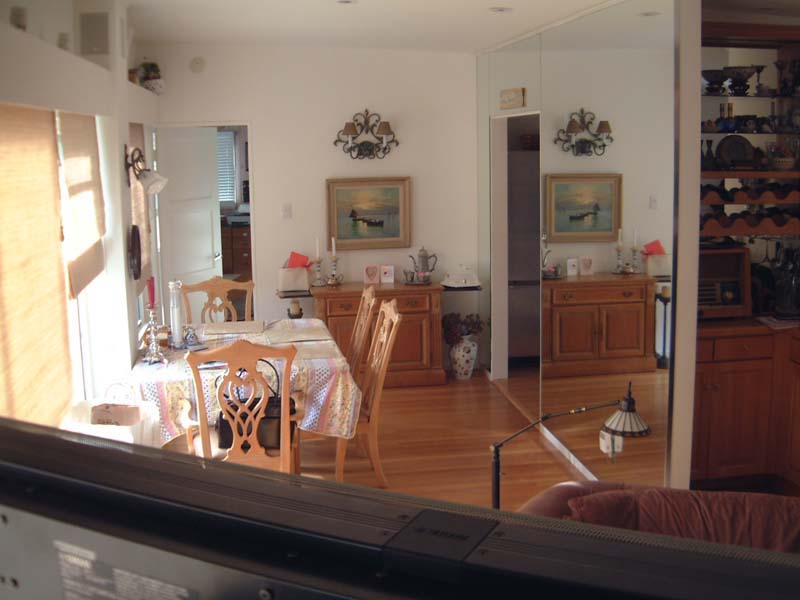
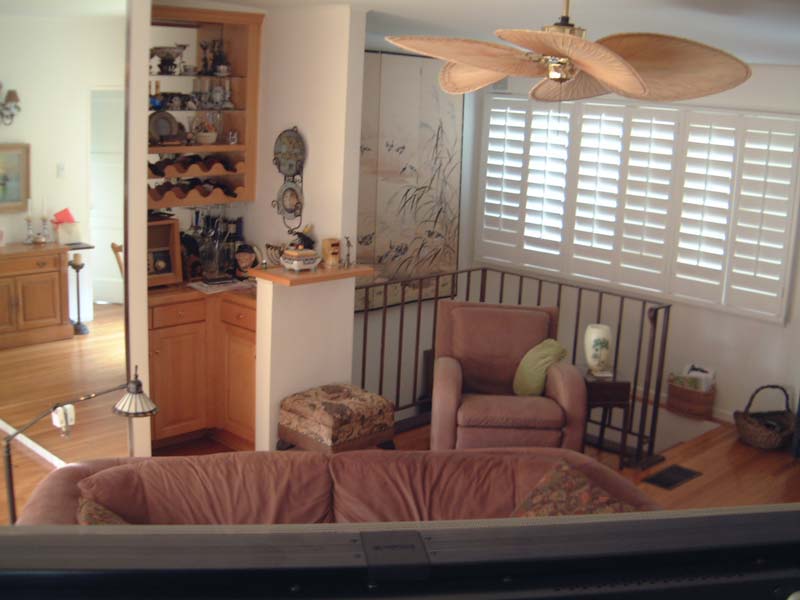
To the right, my living room is 25.5 feet long. To the left, toward the front door, it measures 21 feet. The loveseat, whose top cushions are just visible looking over the YSP-1, is 8 feet out and 15º down. In this corner placement there are only two beam modes available, Stereo and 3 Beam Mode. Be sure to press the 3 Beam Mode button first. Then, starting with the "a) Subwoofer Set" screen here's how to set up the YSP-1...
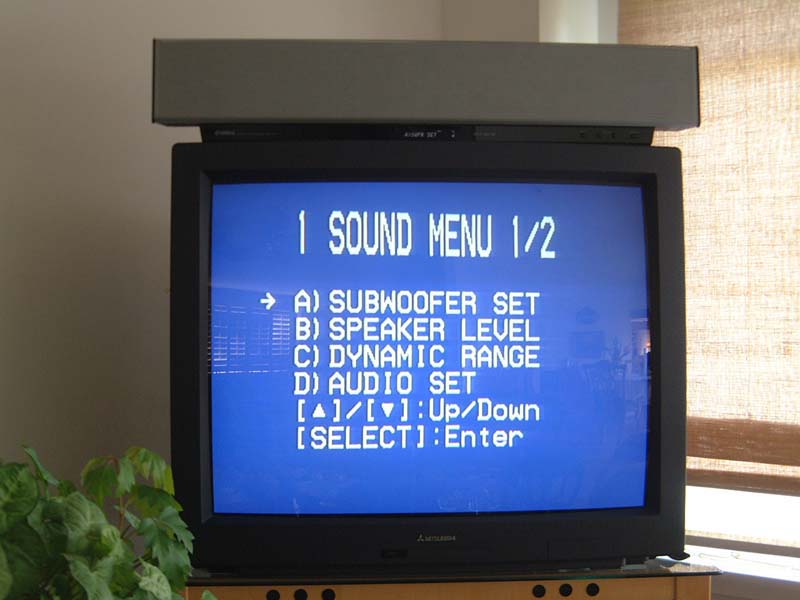
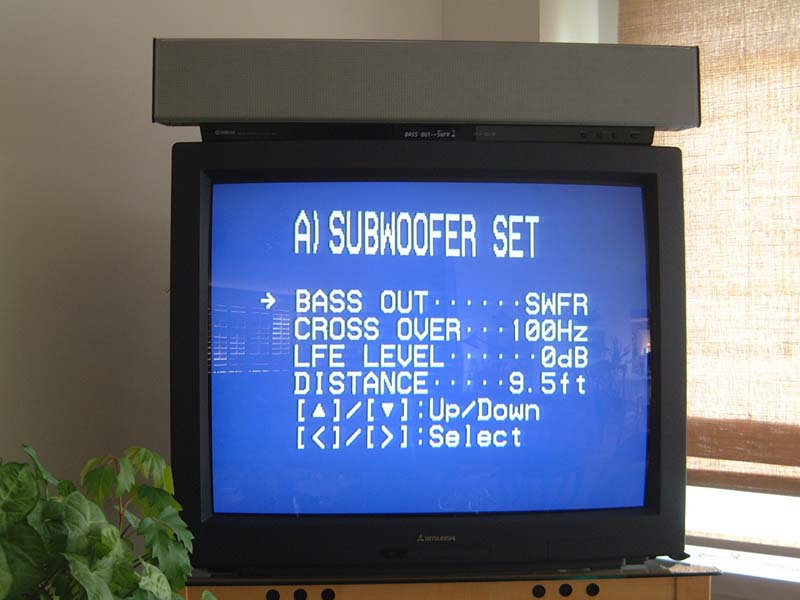
In this author's opinion, the YSP-1 must have a subwoofer added to consider it a true home theater system. For my tests I used two high power subwoofers from my standard home theater rig. For "Bass Out" the choices are SWFR, FRONT or BOTH. I chose SWFR and tried the 3 available frequencies, 80Hz, 100Hz and 120Hz. The 100Hz frequency seemed to give the subwoofer-to-YSP-1 the most open, unstrained sound.
Next, when the "b) Speaker Level" screen is selected, the YSP-1's pink noise is heard. And it is here that the first bit of screen confusion comes in. When the arrow is on "FR" the pink noise alternates between right and left. These channel levels are tied to each other. So when you think you are setting FR you're actually setting FR and FL. There is one bar for both.
When you set the arrow to Center you get pick noise which alternates between FL and C. On the YSP-1 this screen is done correctly and syncs up with the sound heard. I used my Radio Shack SPL meter (C-weighting, slow) to set the levels when listening at 75dB SPL.

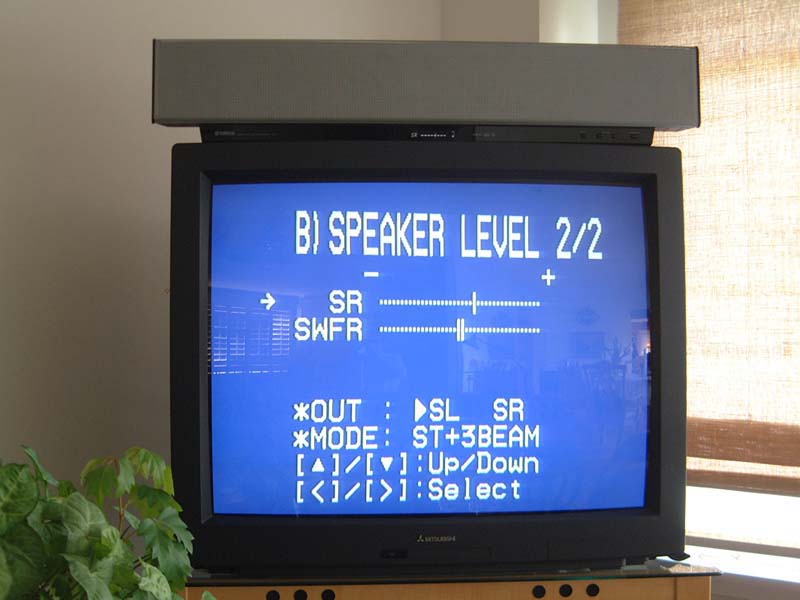

On the next screen of this sequence, with the arrow pointing to SL you'll see *OUT: FL > SL. What actually happens is that the pink noise alternates between C and SL, center and surround left. Once you get that figured out (by letting your ears tell you what you're hearing) you can set your levels accordingly. I set my levels with SL about 3dB higher than C because my listening position was much closer to the YSP-1 and I reasoned that SL or SR signals would have to travel much further in my room, bounce, and come back to the listening position. As it turned out, that decision worked well.
The final screen of the sequence shown above on the right adjusts the two rear surround levels to each other. This one's easy. Again just use the Radio Shack SPL meter and set SR to the same level as SL.
The subwoofer level was one that I had to go back and tweak a couple of times. This is because you basically don't have any other signal with which to compare and balance your sub(s). And because the sub's sound, properly done, is omni-directional you'll need to actually hear how your 3 Beam Mode's left, center and right channels articulate and form "sound in space". Only the center channel is actually localizable to the YSP-1. You'll have to get accustomed to this 3D effect before you'll have a handle on setting the sub level properly.
Dynamic range. Parents take note! If this system is for some very lucky Sponge Bob fanatics you might want to consider setting the dynamic range to MIN or STD instead of the MAX which floated my boat in my main listening area. I 舖 m betting that 99% of readers intend to keep the Dynamic Range at Max so let's continue with the set-up...
The YSP-1's mute level is configurable in several ways depending upon your needs. I set my mute level to -20dB because my TV mute goes to completely off. This way I keep using the YSP-1's sound most of the time. The "e) Tone Control" screen I completely missed the first couple of times through the menu because it's on another page all by itself. At first I was going to recommend that this overall system tone control be somehow moved forward to another screen. That is, until I learned that, through a sequence of button pushes I could access this single screen via the YSP-1's blue display window (no onscreen display required) and thus make overall sound system balance decisions while a movie was playing. One you get the hang of how to do this on-the-fly sound- tweak you'll use it often for differently balanced movies.
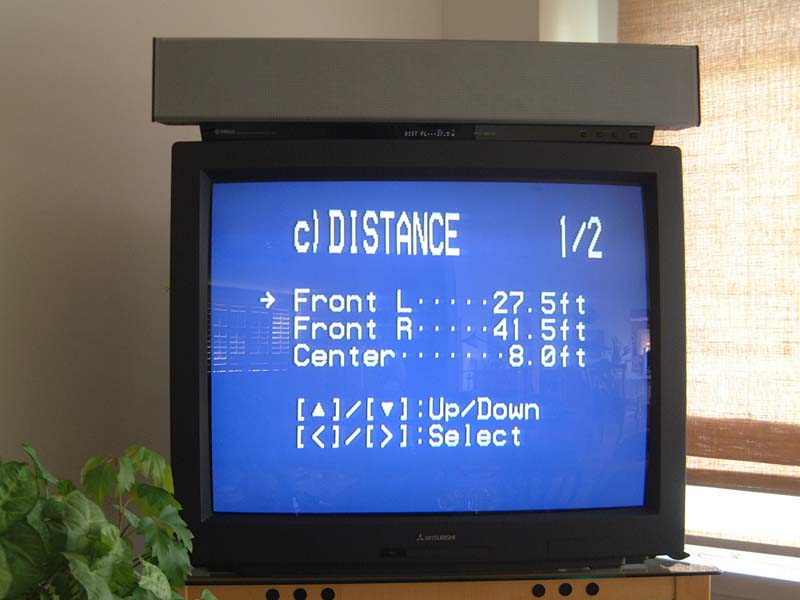
Reasoning that YSP-1's tiny drivers might work better if the sound were bounced off a close surface rather than one further away I measured 14.5' at a 55º-60º angle from the YSP-1 to the 8" wide column you see in the left-most room photo. (The half-open shade is in front of the column and an antique lamp hangs out from it.)
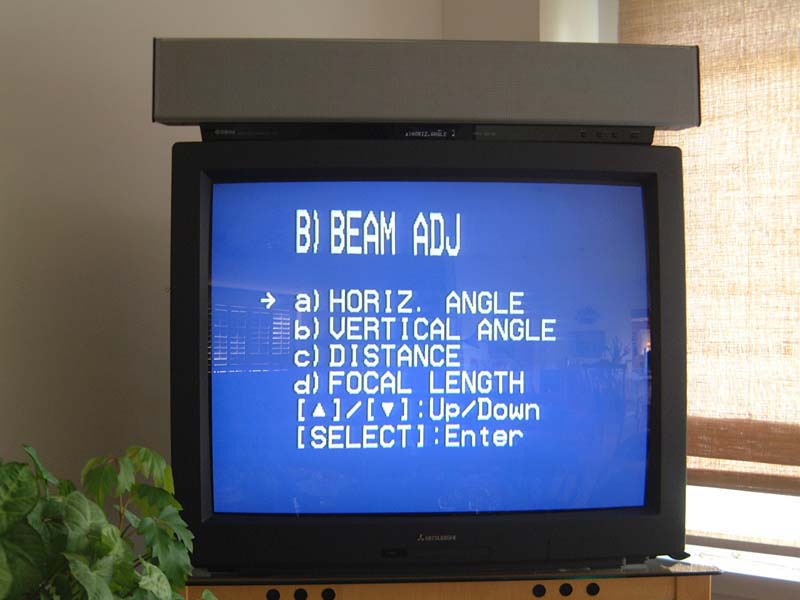
On the left side there was no surface nearer than the front door (with coat rack seen in the right-most room photo) so I set the left room distance (under "Parameters") at 21' (the entire width of the room) and the "b) Beam Adj" sub-menu "a) Horiz. Angle" to 65º. That 65º is the angle I estimated from the YSP-1 center zero position, looking out, toward the vicinity of the door. What you're trying to accomplish here is figure the angle at which the YSP-1's beamed sound will go out, hit a hard surface and bounce back to the listening area. As I discovered, the initial guesstimate is good for getting you in the ballpark. And that's all you are really trying to accomplish at this point. Once you go through the menu a second time, with the pink noise on, you'll find that you can hear the pink noise volume increase at your listening position. Keep your first settings wherever you first hear the volume increase. Once you're within ±15º or so you won't hear too much of a change.
Yamaha YSP-1 Setup Part 3
Here's a trick that worked for me: If, for instance, you are listening to pink noise from the right side, you can plug your left ear and vice versa. With so much wide band noise bouncing off so many surfaces the finger-in-the-ear trick seems to help your brain localize the proper pink noise direction a bit better.
The "c) Distance" parameter is a measurement of the distance the sound beam travels from the YSP-1 to the wall, bounces, and back to the center of the listening position. I found getting these dimensions pretty accurate seemed to give a better surround effect at the listening position.
The "d) Focal Length" setting: Yamaha's manual recommends a Center = -1.5 feet to give a similar frequency response across the listening positions. This recommendation worked well so I left the Center setting there. Focal Length Right and Focal Length Left seemed to be a different story. Focal length appears to attempt to focus the beam's width more widely (and less powerfully) with short distances and more narrowly (more acoustically powerful) when distances are increased.
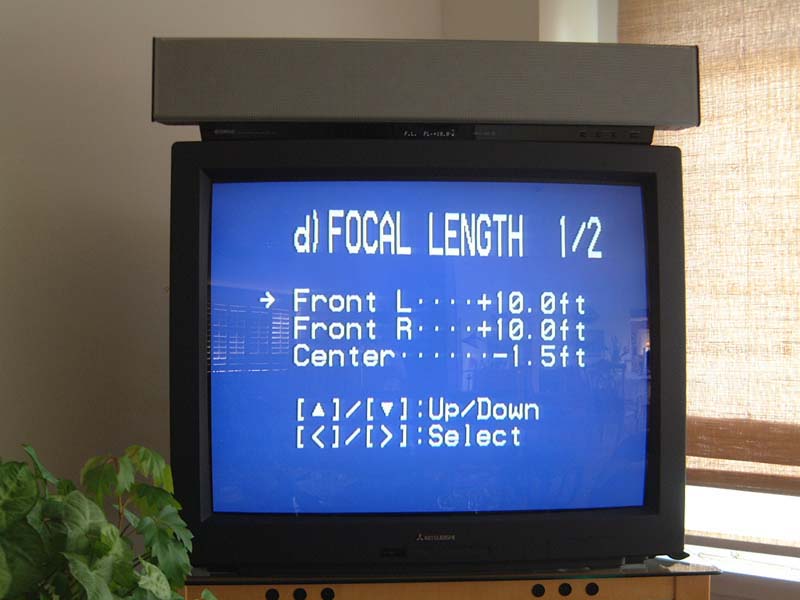
Again reasoning that we're dealing here with real world limitations as to how much a sound beam can actually be "focused" and how far it can therefore be thrown, I found it made little difference whether I set the Focal Length at the distance to the room's wall or out to the maximum YSP-1 menu parameter (which is at 80 feet). So I set this distance parameter at 45 feet and left it there. I suspect, however, that when I move the system to a smaller rectangular room with against-the-wall as opposed to corner placement there may more audible benefits to fine tuning this distance.
Dr. Hooley adds:
Actually, we use the Focal Length to determine, for positive focal lengths, the distance from the YSP-1 where the beam most tightly converges . There are two considerations:
1) If the required outgoing beam direction takes the beam close to the listeners on the way out, it's often helpful to minimize the beamwidth at the listener distance (i.e. set Focal Length to ~distance of listeners from YSP-1 in the direction of the outgoing beam), as this minimizes "cross-talk" - i.e. hearing the direct beam rather than the reflected beam.
2) Where crosstalk as in 1) is not such an issue, one can often pull-in (reduce) Focal Length to perhaps 2m or 1m so that beyond this close-in focal "point" the beam thereafter spreads out again, so that by the time it has reached the wall and bounced back to the listeners it is coming from a large area of wall - which of course just adds to the spatial / diffuse surround quality achievable with DSP, which cannot be attained with single-box surround speakers.
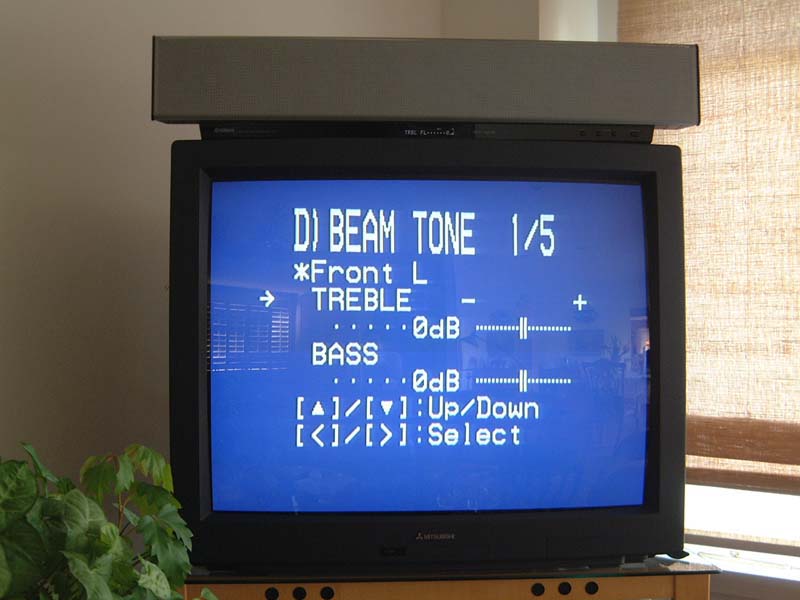
D) Beam Tone: What a concept! Adding bass and treble to a sound in space! As can be seen in the attached screen shots, each of the five channels in the 3 Beam Mode have treble and bass boost or cut capability. When I initially listened to the system in Easy Set-up Mode these tones were factory set at flat.
In the initial boulder-chasing-Indiana Jones scene from "Raiders of the Lost Ark" the boulder has its very low frequency rumble coming from the subwoofers. But there is also upper bass and low midrange frequency content of the boulder's sound against the two tree-rails it's riding on as it chases Indy from behind. With the Beam Tones set flat for all channels the boulder sounds as if it were made of steel and it is sliding and skidding on steel rails. Once +5dB of boost was added to the front left and front right channels the boulder once again sounded like a true rock riding on round tree rails. In short, the effect of adding bass in the Beam Tone menu does work.
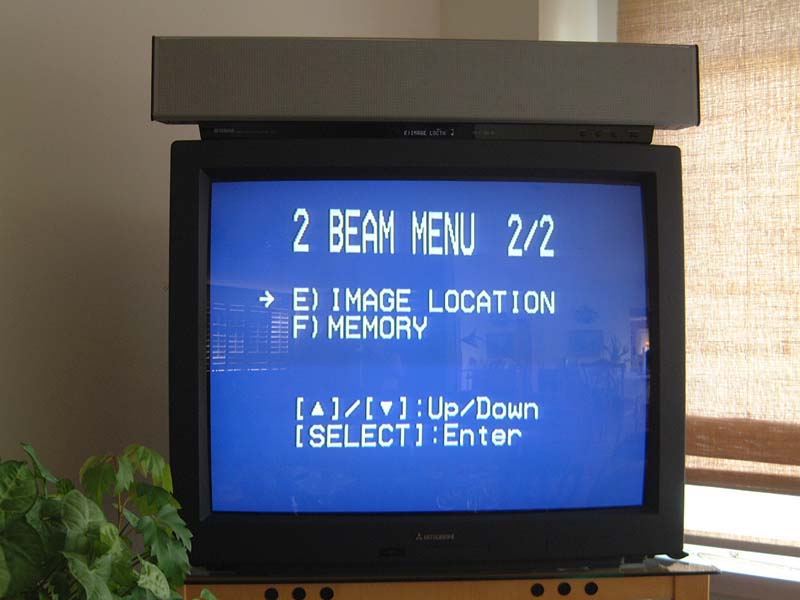
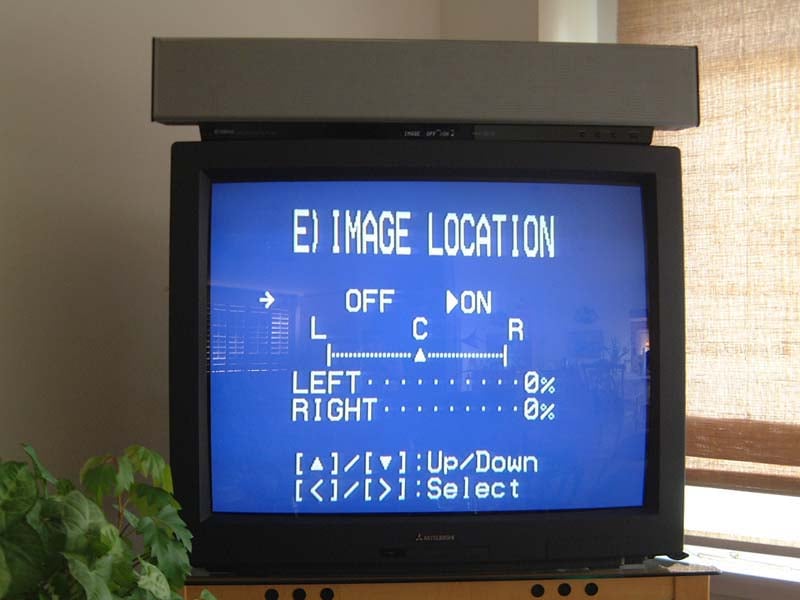
Lastly we come to the "e) Image Location" screen and the three User memories. The YSP-1's Owner's Manual has this to say about Image Location. "Use this feature to redirect audio signals if the sound coming from the left and right speakers seems unnatural, such as when your listening position is not the center of your listening room". Fair enough. My listening position is in the center of the listening room so the Left and Right outer speaker positions were left at zero %. (Zero in this case is supposedly for maximum front left and right sound spread, away from the actual locations of the left and right speaker clusters on the YSP-1. As you go up in % you ostensibly move the left and right speakers closer to their true positions, on the actual face of the YSP-1.)
We're at the end of the program. To freeze all these settings pick one of the three available user presets and hit 舖 Enter.' I found that once I had the system performing well, I could navigate through the menu quickly. It was easy to go in, change one parameter in the whole menu, and put this new parameter template into another User memory. It was then simple to A-B the results while watching favorite movie scenes. And rather than being the cumbersome chore this menu at first seemed, it became fun after the first week or so to continually make minor changes to see how the sound of a favorite scene would be changed.
Yamaha YSP-1 Measurements
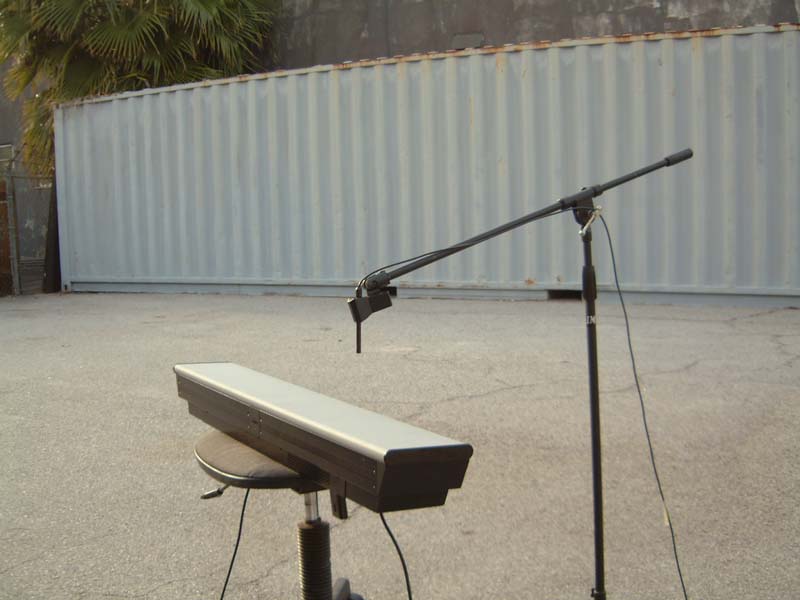
It was fairly easy to measure the YSP-1 outside in free air. For the 4.5" mid-woofer I did a close mic'ed measurement while the YSP-1 was pointing straight up. This gives a reflection-free curve with no curve-smoothing required. With the software set at 80Hz for the crossover the woofer curved out as seen below. Note how sharp the digital filter cuts off the mid-woofer at 1000Hz!
Please don't get too excited by the 114.5dB (average) SPL reading. This SPL is with the microphone almost touching the woofer cone so SPL readings are inaccurate. The woofer itself appears quite linear, ±1.25dB. It is -3dB at 68Hz which is very good performance for such a small driver. When moving the internal crossover up to 100Hz this 4.5" driver will stay more linear at higher power levels than if the crossover were kept at 80Hz. Listening tests (below) confirm the validity of the 100Hz, crossover-to-subwoofers choice.
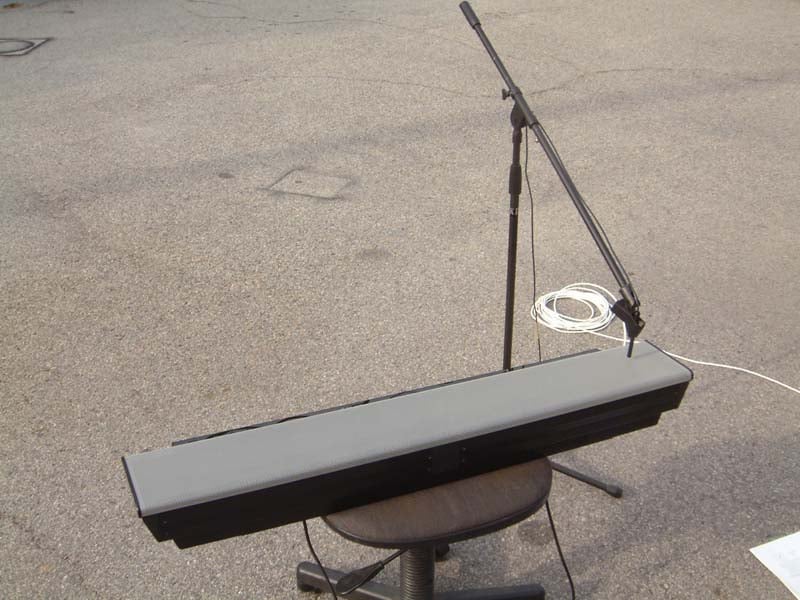
The graph below indicates the left channel frequency response for the system in Stereo mode. As can be seen in the upper microphone-speaker photo this measurement was taken with the mic 8" above what was assumed to be the left channel 1.25" speaker cluster.
From 200Hz and below you're seeing the response of the 4.5" woofer, which, at this measurement position, is about 12" away and at a 45º angle from the microphone. Note that the curve from 200Hz to 1000Hz is quite a bit choppier than the close mic'ed curve of the woofer only. This might indicate that the 1.25" "steer-able" drivers are brought down and overlap the woofer's frequency response in this range.
Normally such a frequency overlap is a no-no with hi-fidelity speakers made specifically for music reproduction. But the guess here is that the overlap helps with effectively implementing the Beam Tone mode, using the larger piston area of the 4.5" drivers in conjunction with the little 1.25" drivers when, for instance, +5dB of bass boost is dialed-in.
To finish up this curve, note that with all tone controls set to flat the 1.25" drivers exhibit a 5.5dB average bump centered at 6100Hz. The response does extend out fairly well to almost 15KHz but with the 6100Hz peak presence these upper frequencies are more likely to be obscured rather than heard if no attention is paid to attenuating the treble response via the internal treble Tone Control.
The final curve is a splice, at 1000Hz, of the composite woofer and tweeter curves. In this case the internal Tone Control was used to set the tweeter level to - 3dB. This setting yielded the best overall frequency response for the YSP-1.
This type of smiley-curve response is most comfortable to hear when listening non-critically to music and will usually be perceived as more than adequate treble extension within the context of TV or movie viewing. Also, the bump at 6100Hz most probably corroborates well with frequencies beginning lower, at around 3KHz in rendering the "floating-in-space" sound portrait the YSP-1 is capable of rendering.
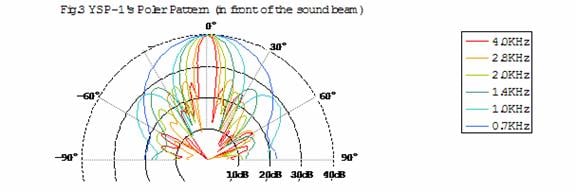
The caveat to the 6100Hz peak is that with movie music not specifically re-EQ'ed for DVD, instruments with lots of high frequency harmonic energy, like a tambourine, become immediately fatiguing. The same holds true for the CD and most music-only formats. As it is, the YSP-1's frequency response appears to have been specifically tailored to achieve maximum beam- throwing efficiency as is hinted by the inclusion of the multiple-frequency polar pattern chart contained in Yamaha's YSP-1 white paper.

Yamaha YSP-1 Listening Impressions
My open floor plan living room with corner placement is the space I used for most of my testing. The corner placement condition is the one which my comments have alluded to up to this point, so let's talk about the YSP-1's performance in this most sonically challenging situation...
After studying conceptual top-views of the different beam modes I concluded that my more open floor plan, with corner placement, was quite a bit larger than the largest room-choice given in the YSP-1's Easy Set-up menu. It seemed apparent that I'd be asking the YSP-1 to strut its stuff in an almost worse-case scenario.
By inputting and re-tweaking different Manual program settings for a couple of days I felt I had reached a point where I was getting close to the maximum performance out of Yamaha's Digital Sound Projector in my particular environment. So, what better way to wring out Yamaha's magic box than by renting the newly-released DTS 6.1 Special Edition version of 1986's Top Gun?
Using the 3 Beam Mode with my dual subs (one front, one rear) I set the YSP-1 level to -14dB as Top Gun's opening sequence with its tension-filled, slowly building musical score began to define, then expand the surround environment within my listening space.
I would describe the sound envelope of the YSP-1, operating from a corner into such a large space as a puffed-up trapezoid. This tall trapezoid runs front-to-back with the top, shorter base placed slightly behind the YSP-1 and bottom, longer base spread out quite a bit more way behind the listening area. This bloated trapezoid listening bubble might, with sources like Top Gun S.E. begin to approach a circle in a smaller listening space. For the most part though, the boundaries of the YSP-1's trapezoidal acoustic bubble handily trumped, in true 3-D spaciousness and realism, the "ideal" circle-of-surround-sound usually defined by actual surround speakers.
Listening to Top Gun's slowly building musical theme wherein new and more complex elements are added to Harold Faltermeyer's score every few bars, the adrenaline build-up from Yamaha's Digital Sound Projector splays sound out further and wider into the room as the SPL levels build naturally along with the score. When, at the music's crescendo, the F-14 jet hits full afterburner's on the carrier deck you feel the jet's explosive thrust slam you as the music transitions to the expansive, gut-thumping rhythm of "Danger Zone".
This scene was equally as exhilarating for my significant other who is usually screaming "Turn that down!" way before this point. That my fiancée could immediately enjoy such a scene, for the first time ever, is a tribute to the enhanced, palpable realism of the YSP-1's immersive and believable 3D soundstage.
Another reference-quality disc, Standing in the Shadows of Motown, was next in the rotation. This disc, like most music-centric DVDs, does not appear to have had its upper mid and treble frequency spectrum attenuated when the transfer was made to DVD. Cue up Chapter 5, the Joan Osborne rendition of Martha and the Vandellas' hit "Heat Wave" and you'll hear what I am describing.
With full orchestration by the Funk Brothers, the YSP-1 spews forth a soundstage which, though not as wide as would be the case if left-center-right speakers where at -30º, 0º and +30º angles, is far more realistic, exciting and convincing because of the YSP-1's 3D spatial capabilities. Close-up's of Joan's front-and-center vocal, do not command an expansive soundstage. Yet the realism of her voice is like all vocals I heard with Yamaha's magic box. It is clear, natural, open and nuanced. Her voice appears not to come from the speaker, but instead it is out-of-the-box real.
This particular cut does, however, begin to point out one of the trade-offs that evidently has been made with the Digital Sound Projector. The frequencies the YSP-1's small drivers are most capable of throwing furthest would appear to be in the 3-6 kHz range. It is this same relative frequency range that famous theater speakers like Altec Lansing's A7 500 "Voice of the Theater" used in the '40s and '50s to generate enough sound power levels out to the audience.
Back in that time, movie theater interiors were often entirely surrounded by heavy drapes. The natural bump in the 3-10 kHz frequency range of Altec's horn mid-tweeter was the solution for achieving flat sounding frequency response for most theater goers. Today's home theater is a different application. Nevertheless, this Yamaha's beam-throwing, frequency response curve is complementary to most DVDs. So the design of the YSP-1's response curve appears to have been carefully tailored for the most realistic surround effect that can be thrown furthest.
Turn to Disc Two from the Standing in the of Motown disc and listen to three jam sessions by some of the world's best musicians. These cuts sound like what you would experience if you carried the microphone around the room while next to the camera man. The ambience of this famous recording studio is stitched into the space of your listening room by the YSP-1. You hear the juxtaposition of the different musicians, the reverberations from those hallowed Motown walls. You hear it all! I'm talking about being immersed in the musical exhilaration of an event which only a lucky few ever experience. The YSP-1's three dimensional portrayal of this musical event is simply phenomenal.
Again though, when the camera moves to the Funk Brother's tambourine man, the front-and-center energy of his instrument so highlights the 3-6 kHz frequency region that the overall sound becomes grating and loses delineation. This segment is one of the many reasons why Standing in the Shadows of Motown " is such a great reference disc. This scene in particular is torture in the extreme for even very high-end tweeters. It is infinitely harder for the YSP-1's much fuller range drivers to be expected to handle.
For the two movie examples just described, the average SPL levels, measured at the listening position (8 feet away), ranged between 95-98dB using the Radio Shack meter. At these very loud levels the YSP-1 remained very clean and unstrained sounding except on the most over-the-top interjections of sound such as when the F14's afterburners kicked in. At this instant it did appear that the YSP-1 went into hard clipping. But I must emphasize that this was the only instance when I could actually say yes, the unit is clipping.
For the rest of my listening it seemed as if the YSP-1 was playing impossibly loud and cleanly when producing its prodigious SPL output. So I would conclude that some very clever soft-clipping circuitry has been designed into these 10-channel digital chips. Better than I've yet heard from any moderate power digital amps up to this time.
1 Ltd's Design Engineer adds:
One of the subtle but very powerful advantages of generating all of the 5-channel sound from the same set of loudspeakers and amplifiers is that there is inherent dynamic power sharing; so that when one channel is quieter it leaves all its unused headroom available for use by the other channels. Thus, the continuous max power available on any one channel is the same as the continuous max power available on all channels simultaneously.
Okay, any other nits? Yes, a couple:
The Yamaha YSP-1, in order to sound its best, must have a least one subwoofer to supply the required low frequency balance if you want to crank this puppy hard. In my set-up I was using a 650-watt, sealed 10" and an 850-watt sealed 12". Both subs had been equalized in my listening space to within ±2dB from 20Hz to 100Hz. It was only with this monstrous bass accompaniment that I was able push the YSP-1 hard enough SPL-wise to induce audible clipping .
Second, in my open floor plan living room with corner placement, the YSP-1 cannot synthesize a fully round "sound bubble" like an actual set of -90º and +90º dipoles or bipoles can. This is almost an impossibility given that the sound-beam-throwing phenomena exploited by the YSP-1 depends on the ear-brain being able to triangulate a point of sound using the sound source and both ears . Once one ear is blocked by one's head, such as would be the case for a sound at ±90º from the 0º listening position the "full-round-surround" effect is much more difficult to synthesize.
The upshot of the preceding paragraph is that for the YSP-1's power and small driver size, sound "beams" can only be made so narrow and therefore project only a specific distance with a limited amount of power before the beam spreads out and loses both power and focus. The YSP-1 does, therefore, have the potential to perform even better in a smaller, rectangular room, mounted not in the corner but against one of the wall surfaces. I plan to follow up this first review with a further thoughts piece when I move the YSP-1 into my smaller, almost square home office. Stay tuned...
Yamaha YSP-1 Summary
The Yamaha YSP-1's Digital Sound Projection is totally different and much more immersive and believable than I've heard from anything less the most precisely placed and calibrated "traditional" circle-of-surround set-ups. It is more real ; and truly three dimensional in its ability to convincingly envelop the listener.
Center channel dialog can be tuned within the software to portray an actor's natural timbre without chesty upper bass frequency boost often heard with horizontal D'Appolito-style center channel speakers. Overdubbed voice insertions can more easily be detected within a movie scene because the voice will often exhibit the hooded mouth-too-close-to-the-microphone characteristic of a hastily added section of dialog. Conversely, a vocal recorded in the natural environment of the scene will be heard as such.
This natural, out-of-the-box effect is usually only heard from very flat-response loudspeakers which also have a very smooth polar response envelope. The YSP-1's center-channel articulation prowess, properly tuned, is among the most naturally detailed I've heard. (Dr. Hooley: This is likely related to the almost spherical waves emitted by the centre channel when its focal length is set negative , e.g. to say ~-0.5 to -1.5m.)
The naturalness of the YSP-1's center channel sound is carried through to all other channels in equal measure. That it may falter to an extent when trying to portray left-right information, widely splayed out within an overly large, corner placement environment serves only to outline one of the sole limitations of this marvelous machine. (Perhaps, a bit more tweaking could be done with respect to Image Location?)
The ease with which the YSP-1 can engulf the listener in a three-dimensional, immersive environment, especially with a very typical, acoustically live room is head-and-ears above most wall or ceiling-mounted surround speaker systems. Women notice this honest portrayal-of-naturalness difference immediately. Plus there are no ugly protuberances adorning their walls or sound attempting to be hidden within the walls. No ugly wires either.
That the YSP-1 easily and handily out-performs the popular cube systems in the same price ballpark isn't the point. Rather, Yamaha's Digital Sound Projector hopefully marks the first, almost perfectly executed volley in a new consumer electronics category - Digital Sound Projectors. Bravo!
The Score Card
The scoring below is based on each piece of equipment doing the duty it is designed for. The numbers are weighed heavily with respect to the individual cost of each unit, thus giving a rating roughly equal to:
Performance × Price Factor/Value = Rating
Audioholics.com note: The ratings indicated below are based on subjective listening and objective testing of the product in question. The rating scale is based on performance/value ratio. If you notice better performing products in future reviews that have lower numbers in certain areas, be aware that the value factor is most likely the culprit. Other Audioholics reviewers may rate products solely based on performance, and each reviewer has his/her own system for ratings.
Audioholics Rating Scale
 — Excellent
- — Very Good
- — Good
- — Fair
- — Poor
| Metric | Rating |
|---|---|
| Ease of Setup | |
| Build Quality | |
| Appearance | |
| Treble Extension | |
| Treble Smoothness | |
| Midrange Accuracy | |
| Imaging | |
| Soundstage | |
| Fit and Finish | |
| Performance | |
| Value |