
Axiom Audio Epic Accent M0 On-Wall Speaker System Review
Axiom Audio Epic Accent M0
- Product Name: Accent M0
- Manufacturer: Axiom Audio
- Performance Rating:

- Value Rating:

- Review Date: October 02, 2009 14:00
- MSRP: $ 135/each or $998 (5.1 w/EP125) or $1686 (5.1 w/EP400)
|
Specs |
M0 |
|
Enclosure: |
Sealed |
|
Response +/- 3dB: |
160–20 kHz |
|
Impedance (Ohms): |
8 Ohms |
|
SPL in Room1w/1m: |
87 dB |
|
SPL Anechoic 1w/1m: |
83 dB |
|
Tweeter: |
1" titanium dome |
|
Woofer: |
3" aluminum cone |
|
Dimensions HWD (inches): |
6.5" x 6.1" x 2.3" |
|
Weight (lbs) each |
2.95 |
|
Max Amp Power: |
150 Watts |
|
Min. Amp Power: |
20 Watts |
|
Specs |
EP125 |
|
Enclosure: |
Vortex / Reflex |
|
Max Amp Power: |
125 Watts |
|
Cross-over Adjust |
60 - 120 Hz |
|
Phase |
0 & 180 |
|
Woofer Size |
8" |
|
DSP Controlled |
No |
|
Line In and Out |
Yes |
|
Balanced Line In and Out |
Yes |
|
High Level In |
Yes |
|
Room Trim |
No |
|
Dynamic Power Supply |
No |
|
Anechoic Resp. +/- 1.5dB |
|
|
Anechoic Resp. +/- 3dB |
35 - 150 Hz |
|
Room Resp. + 3dB/- 9dB |
25 - 150 Hz |
|
Max SPL Anechoic |
104 dB |
|
Max SPL In Room |
114 dB |
|
Dimensions HWD inches |
14.5 x 12 x 12 |
|
Weight lbs each |
20 lbs |
|
Specs |
EP400 |
|
Enclosure: |
Acoustic Suspension |
|
Max Amp Power: |
500 Watts |
|
Cross-over Adjust |
40 - 150 Hz |
|
Phase |
0 & 180 |
|
Woofer Size |
8" |
|
DSP Controlled |
Yes |
|
Line In and Out |
Yes |
|
Balanced Line In and Out |
Yes |
|
High Level In |
Yes |
|
Room Trim |
Yes |
|
Dynamic Power Supply |
Yes |
|
Anechoic Resp. +/- 1.5dB |
18 - 150 Hz |
|
Anechoic Resp. +/- 3dB |
18 - 150 Hz |
|
Room Resp. + 3dB/- 9dB |
17 - 150 Hz |
|
Max SPL Anechoic |
106 dB |
|
Max SPL In Room |
116 dB |
|
Dimensions HWD inches: |
13.75" x 10.5" x 16.8" |
|
Weight lbs each: |
48.55 lbs |
Pros
- Innovative bracket/termination system
- Small size
- Uniform off axis response
Cons
- Bracket screws strip easily
- Speaker sits far enough off wall to allow visibility of the hole/wires
- Occasional disengagement of speakers from brackets can disrupt playback
M0 EP125 & EP400 Build Quality
 Axiom Audio is well known on the Internet in general and to Audioholics readers in particular. They have consistently provided products that are value conscious while maintaining a very high standard of sonic quality. If Audioholics is about anything, it is about sonic quality. In-wall and on-wall speaker systems have always been in demand, even more so now with the proliferation of flatpanel displays. Axiom has already started to address that demand with their in-wall/on-wall hybrid Architectural series. The new Accent speakers address the needs of those who absolutely don't want to install a speaker in the wall. But on-wall speakers are a dime a dozen right? Well, if you can count on Axiom to do one thing, it's to innovate. Whether it is high-powered DSP-enabled subwoofers or digital amps with a design like no other, they'll surprise you. I guarantee they've got something up their sleeve this time that you won't be expecting. Something you've never seen before. Enter the Axiom M0 on-wall speaker system.
Build Quality
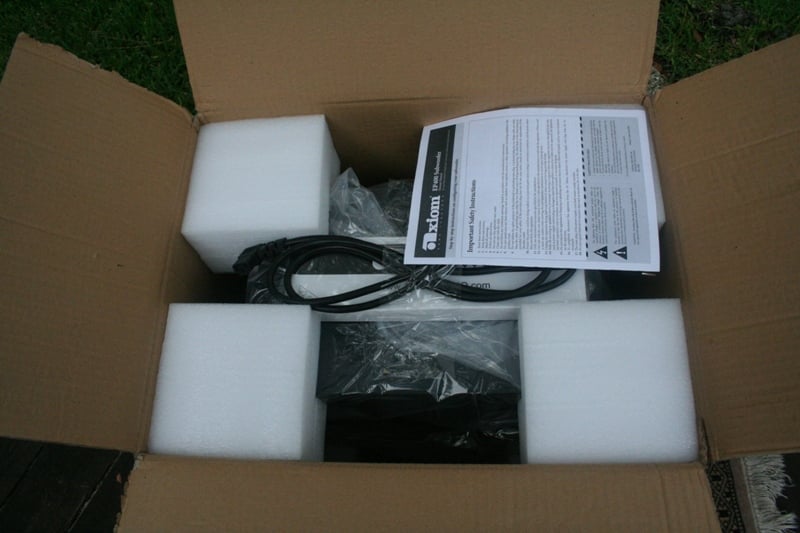
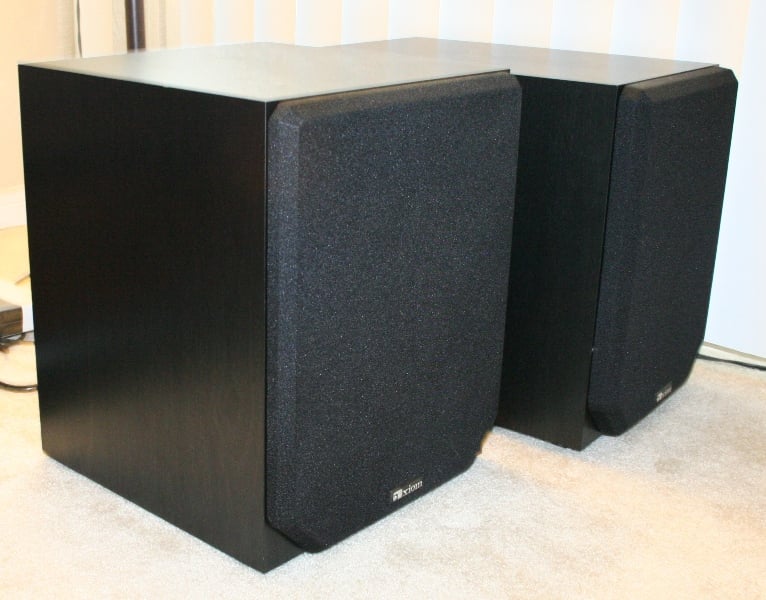
As every speaker I've ever received from Axiom (including my first speaker purchase before I ever worked for Audioholics), the M0s and the two accompanying subwoofers the EP125 and EP400 arrived well boxed and in good condition. The M0s in particular seem to have nearly as much insulation in the form of molded foam end caps as the speakers themselves. You'll get the boxes and think that the speakers will be a nice, small size until you open them and see that the speakers are half the size of the box. These are truly small speakers that should have little problem blending into a room.
On the other hand, I was shocked by the size of the EP400. I'm a proud owner of an EP500 which has long served me well in my reference home theater. I expected the EP400 to be maybe two-thirds the size of the EP500. The box that it arrived in made me think I was right--until I opened it. Again, Axiom Audio surprised me with their level of packaging. The EP400 was only a fraction larger (mostly deeper) than the EP125 - Axiom's least expensive subwoofer!

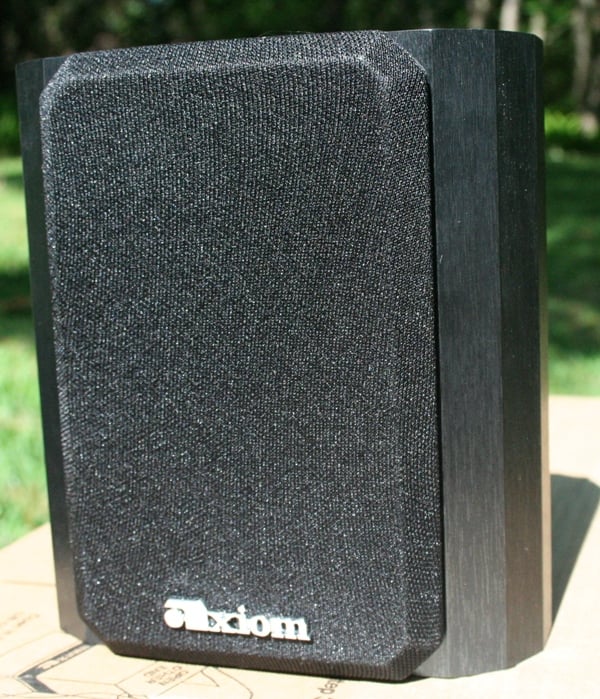
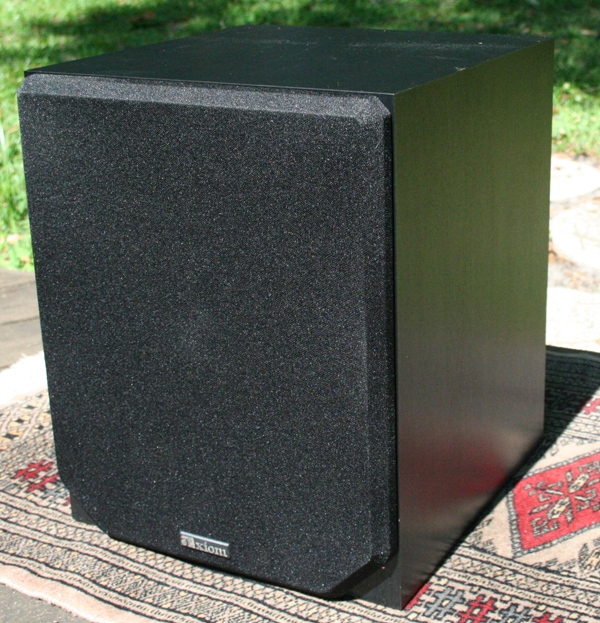
The system as a whole shares many of the qualities that Axiom fans will recognize. Each speaker arrived wrapped in a black wood grain vinyl wrap. Currently, the speaker system can be ordered in any of the Axiom vinyl wraps including cherry, beech, maple and a number of flat colors including charcoal, eggshell, and ebony. Many of the finishes are paired with more than one grill color. While it is not listed on the website yet, in fact you can order the Accent system in one of Axiom's custom real wood veneers.
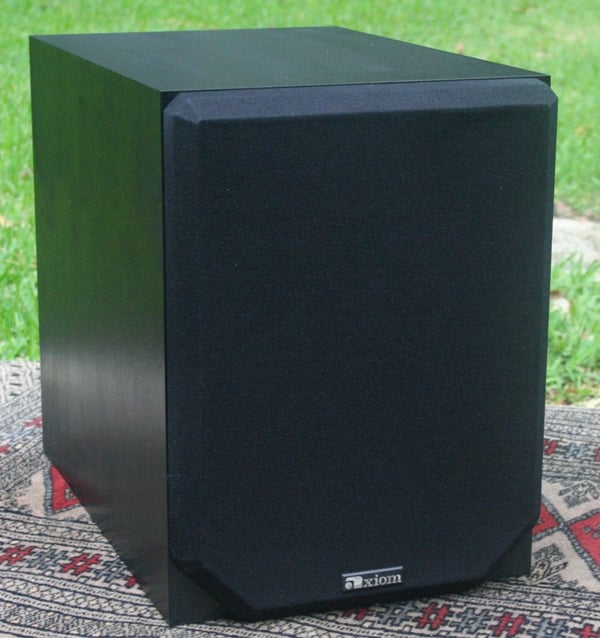
There are no rounded edges to be found anywhere on the Axiom speakers, again keeping with tradition. While the M0's have a rounded looking edge, they are actually octagons with two elongated sides. This does soften the edges a bit. As one who has lost more than his fair share of shin skin to an Axiom sub corner, I was not at all surprised when I had to comfort a crying child whose balloon had popped on the corner of one of the subs. While I am sure that the non-rounded edges are a way to keep costs down to give you the best bang for your buck, I wish there was a rounded corner option at a premium cost. It certainly would eventually pay for itself in Band-Aids and balloons over the years.
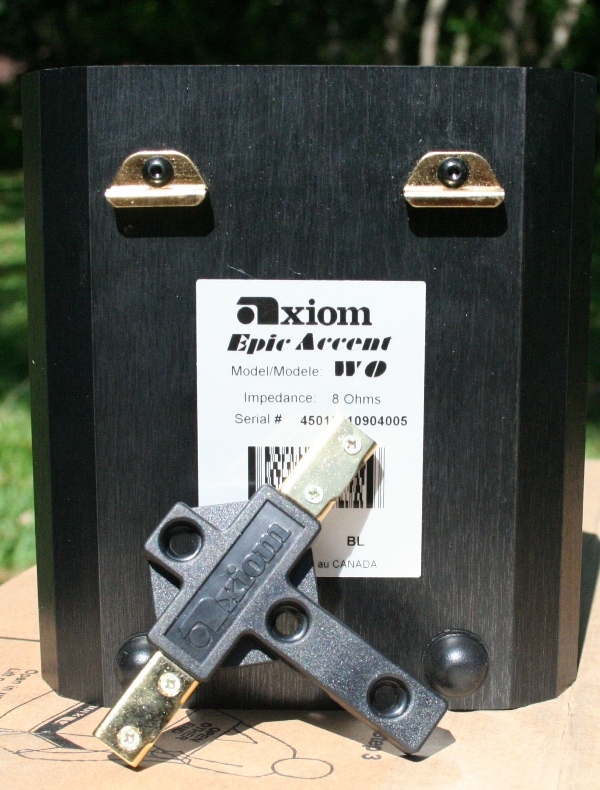
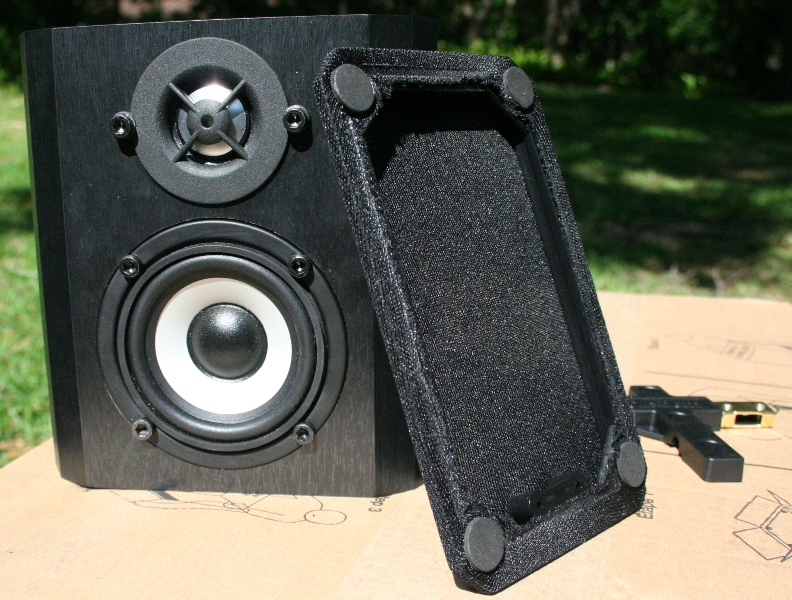
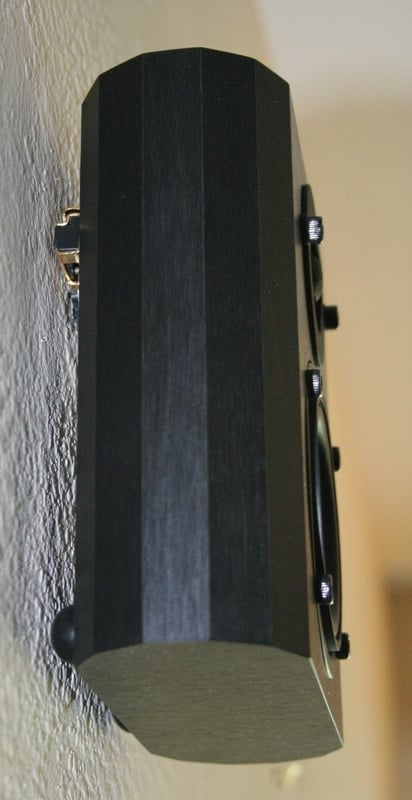
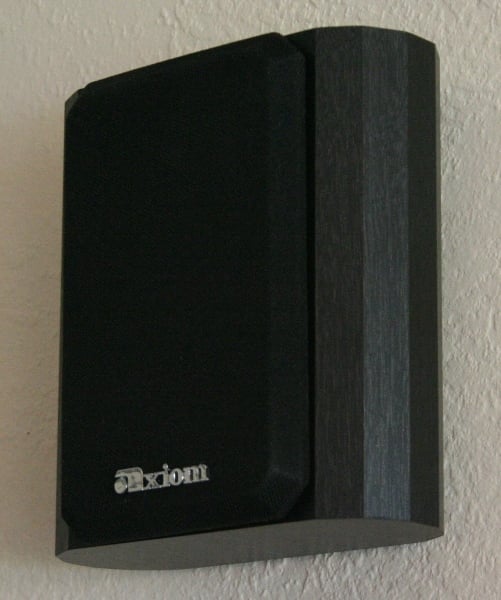
The big innovation in the M0 on-wall speakers is the bracket system. You'll notice on the back of the speaker a complete lack of terminals - 5 way or otherwise. There are two rubber bumpers on the bottom and a pair of gold-plated brackets near the top. The T-shaped bracket has three holes for wall mounting and two gold ends on the sides. This allows the wires to be mounted directly to the bracket instead of to the speaker. With a speaker as small as the M0, that last thing you want is space taken up by traditional binding posts. This makes for a very clean installation. You have a hole in the wall very near the bracket and the T-bracket on the wall with the wires tied into it. The speaker can be popped on and off the bracket at will.

 In addition, for the first time ever, Axiom is offering magnetic grills with a speaker. This very well may be because they didn't want to take extra room for the connection points for the grill. Regardless, Axiom Audio has done well here. The grills snap into place securely and without any vibration or movement. I've had experience with other magnetic grills that have moved around so that you were never sure if they were perfectly centered or not. Not so with the M0s. They were very secure and held firmly. They only came off when I wanted them to and a casual brush didn't seem to faze them at all.
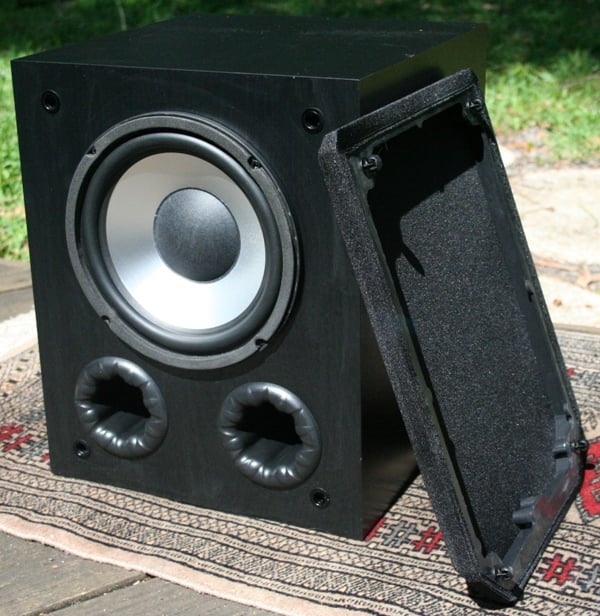
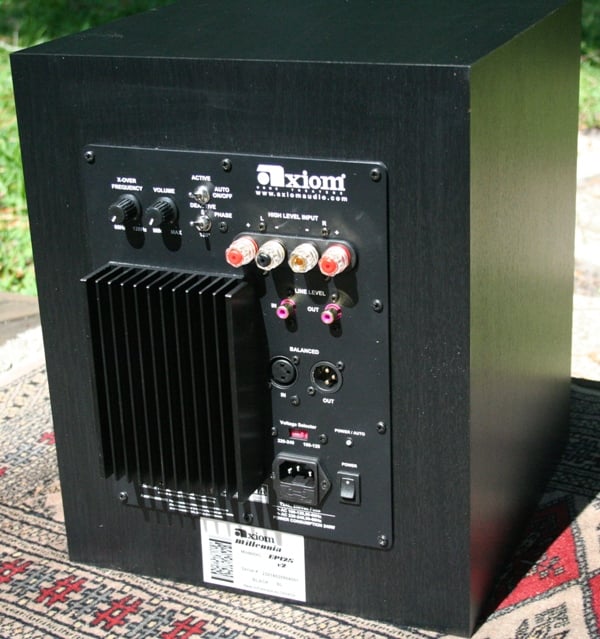
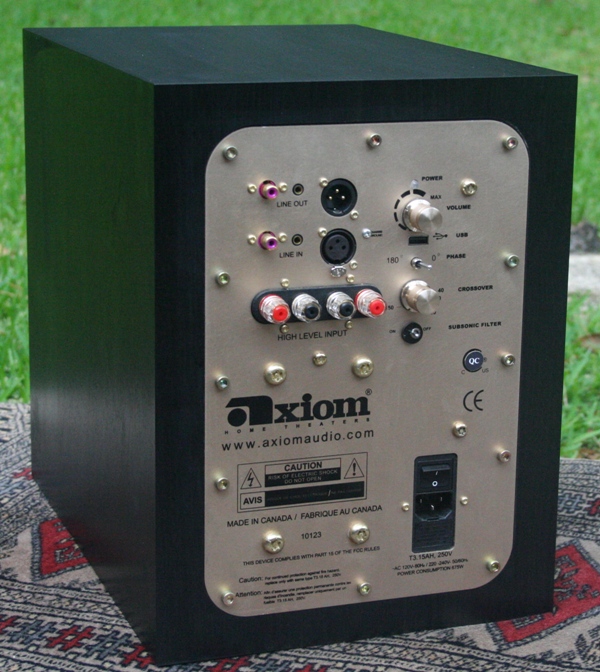
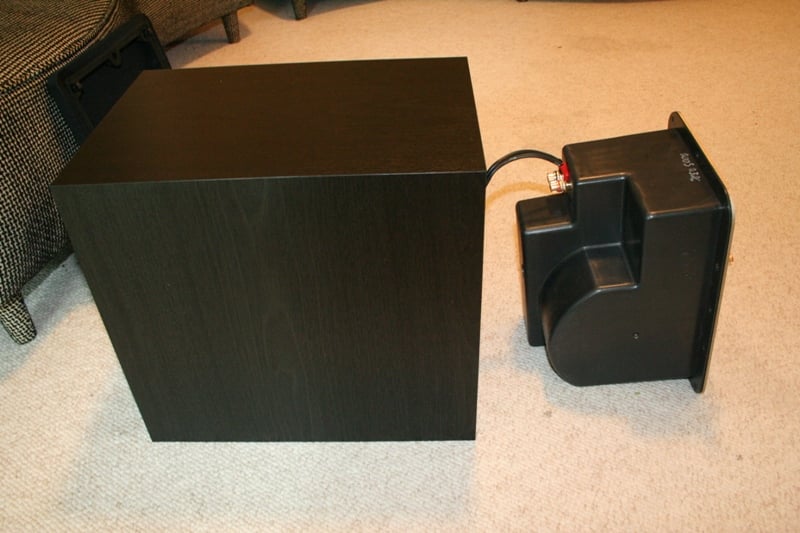
The two different subwoofers were as different as the price point suggest. The EP125 comes in at $375 with the EP400 just shy of 3x's that price at $1100. The EP125 was, as I mentioned, only slightly smaller than that EP400 but it is less than half the weight! If for no other reason, you'll recognize the difference in the quality of the subs just by picking them up. The EP125 feels about right for the size while the EP400 feels like it was filled with lead. The driver size is the same though you'd never guess as much by looking at the subwoofers. This is mostly because the surround on the EP400 is so much larger to allow for a greater excursion of the EP400 woofer. The EP125 is double ported with two of Axiom's iconic "puckered" ports. This is designed to cut down on port noise and chuffing. The EP400 on the other hand is completely sealed. The most significant change (at least from the outside) is in the amp. The EP400 has similar amplification as the EP500 with a DSP controlled amplifier with trim control, much more power (500 vs. 125 watts), and more connections. In my opinion, the EP125 looks a bit better with the grill off (both grills are sturdy and well connected) as the plain top part of the EP400 looks a bit odd. The bottoms sport threaded inserts for either rubber bumpers or the trademark Axiom spikes.
| EP125 | EP400 |
|---|---|
 |
 |
 |
 |
 |
 |
The M0s have a look that should be familiar to Axiom lovers. The woofer is constructed out of aluminum and has a 3" diameter with a black dustcap. The tweeter is a 1" titanium driver typical of Axiom speakers though it has a smaller plastic plate for attachment to the baffle than you may be used to seeing. This is due to the decreased size of the speaker. The speakers feel very hefty for their size and very, very solid. The weight of each speaker is under 3 pounds, so hanging them should be little problem. The biggest omission in the packaging is that there are no included drywall anchors. While in the review installation it wasn't an issue, drywall anchors should be standard equipment especially considering that the bracket only has mounting points vertically down the center. This means that you're either in a stud or you aren't. With drywall anchors, you wouldn't need to be. There may be an argument that three connection points without anchors might be fine with such a light speaker but I'm not making it. I would definitely suggest anchors as the size of the speaker doesn't really lend itself to stud placement.
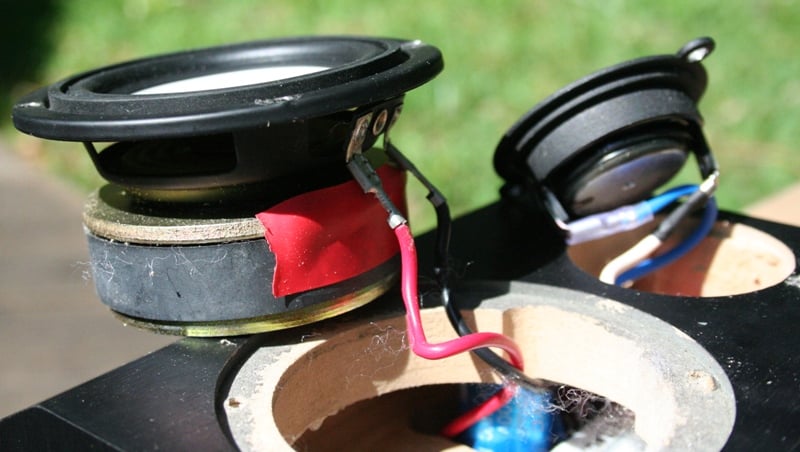
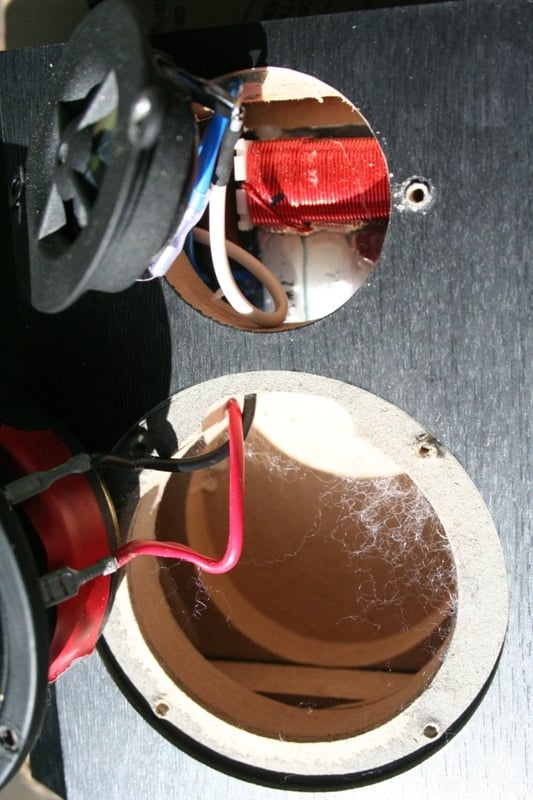 Opening up the speakers, we see that space in the M0s is at a premium. These are sealed speakers with a 5/8" MDF enclosure. There is less than an inch of free space inside. The crossover takes most of the internal volume and obviously can't be removed without completely disassembling the speaker. This is a heavily engineered speaker that obviously isn't meant to be serviced in the field. A bit of polyfil was present though it was probably inserted to stop any noise from wires rubbing more than increasing the perceived box volume the woofer sees. The drivers are magnetically shielded so you'll have no problems with placement near a legacy CRT. The woofer has a stamped basket and has a rather large motor structure for such a small driver. The tweeter uses a conventional ferrite magnet instead of a compromised neodymium design often seen in speakers this size and price... At $135 a pop, that's about what you'd expect. The crossover utilizes costly air core inductors and polypropylene capacitors and ceramic resistors. We were surprised to see so much attention to detail in the crossover design for such a small inexpensive speaker system.
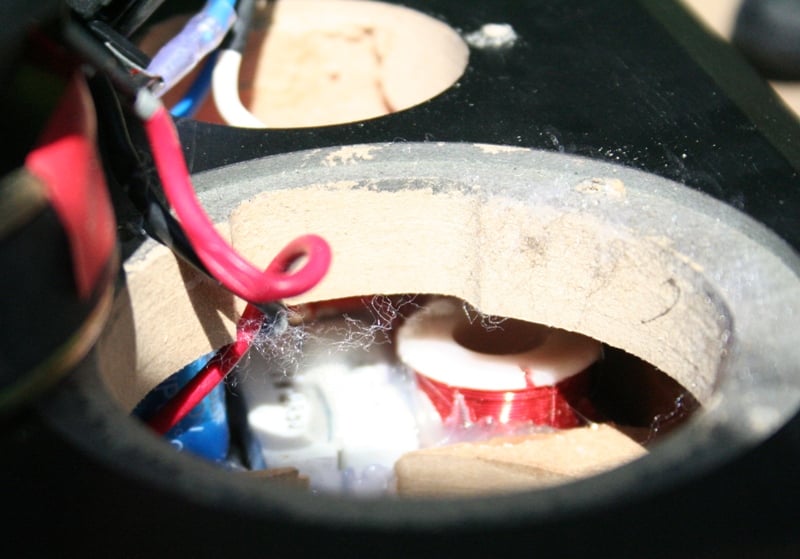
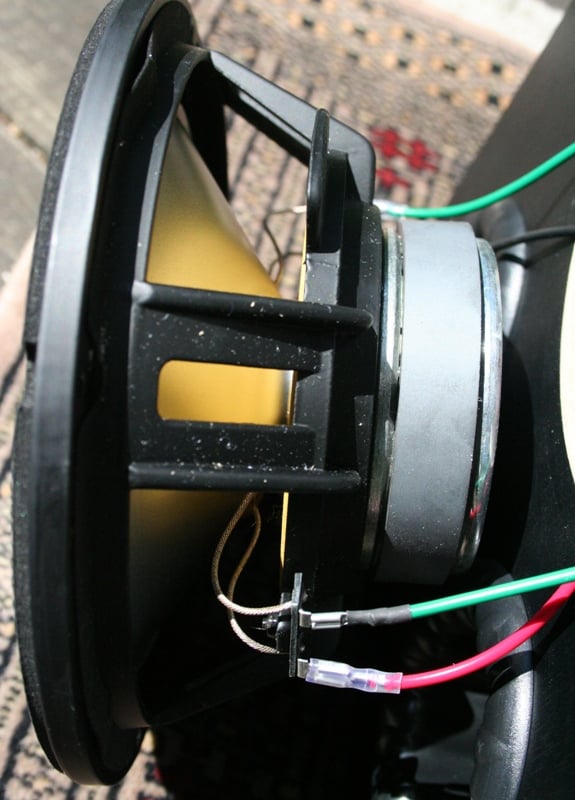
The two subwoofers are as different as night and day on the inside. While both of the enclosures are constructed out of 3/4" MDF, the driver on the EP400 is a completely different league. While the EP125's driver has a cast basket and respectable sized motor structure, the EP400 has a driver that is so beefy that I literally could not get it out of the enclosure. This is because they have actual binding posts on the driver with a spade connection from the amplifier! The side connection of the spade connector blocked the driver from coming out. I was able to get access to the back of the driver by removing the amp. If you are wondering where all the extra weight of the EP400 is coming from, the driver is a culprit as is the amp. The amplifier on the EP400 weighs in at a stunning 16 pounds! That's some serious amplification for such a small sub. Don’t forget the amplifier in this sub is a Class D design so most of that weight is in the oversized analog power supply. Most subwoofer companies skimp here and use a lesser designed SMPS power supply which usually cannot deliver their power rating on a continuous basis, but also have little or no headroom to spare. You can be assured this is not the case with the Axiom as they didn’t skimp on this amplifier design.
With the size of the driver and the amp box, there really isn't all that much room left inside the EP400. Both subs have at least a layer of polyfil in them with very thick wires running from the amps to the drivers. One of the other quality differences that was immediately apparent was that the EP400 had threaded inserts for all connection points (driver/amp) while the EP125 was limited to just the feet. When you are spending as much as you are on the EP400, you'd like to know it isn't just for a bigger amp and driver. This is definitely the case as the quality differences are obvious with the EP400. One thing that is missing from both the subs is any sort of internal bracing or baffling. While the knock test of the EP400 seemed sufficiently dead (probably due to the added weight of the amp and driver), the EP125 could have used a bit extra in my opinion. Reinforcements on both the subs were nonexistent as the walls looked like they were glued and screwed only. Given the smallish size of these enclosures, it is understandable to not sacrifice box space for bracing and I am certain Axiom considered this when designing the products.
| EP125 | EP400 |
|---|---|
 |
 |
 |
 |
M0 Setup and Installation
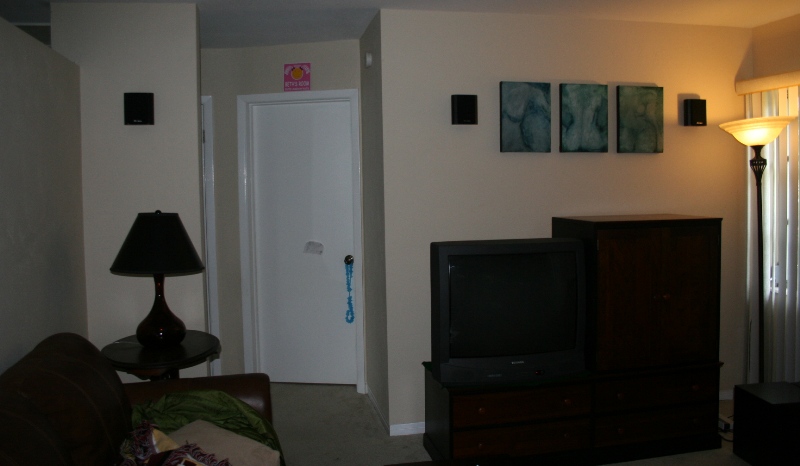
 Since this is an on-wall product, the only way to properly evaluate it is to install it on a wall (duh!). Since I've no need for additional 5.1 systems (I'm sure I could find a room if I really wanted to), I enlisted the "help" of a friend. This family lives about 4.5 hours away from me though we see each other at least a few times a year. After experiencing surround sound at my house, the father has been itching for a system of his own. The problem is that their room is at the front of the house and really doesn't have space for freestanding speakers or even small bookshelf speakers. It's small (20 by 13.5 by 8 feet tall) but open to the rest of the house (including the left wall which is open at the top to the kitchen). The wife isn't all that interested in large holes in her wall since this probably won't be their last home and didn't want in-walls. The solution? On-walls.
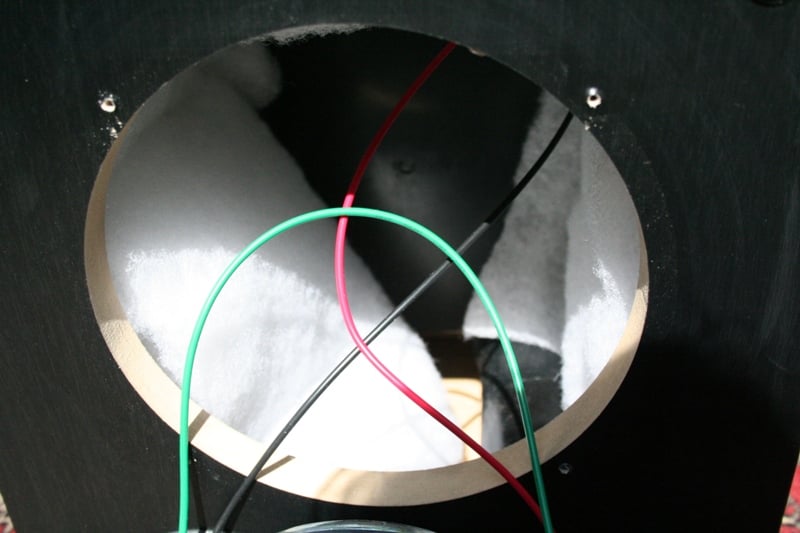
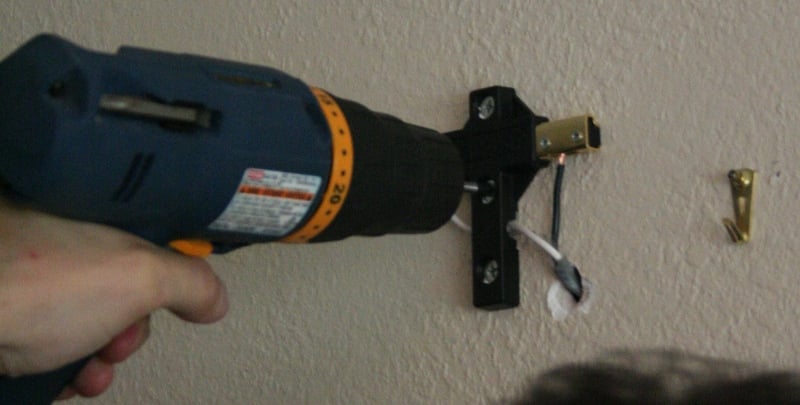
The nice thing about on-walls is that you can install them with minimal damage to the existing structure. You need about a 2" square hole so that you can see and fish out the wire as it is dropped down the hole. A 2" hole is fairly easy to repair (certainly easier than a speaker sized hole) so the wife was happy. The size of the Axiom M0's also impressed her as she was afraid I'd try to press on her "man sized" speakers like the ones I have. Basically, the M0s had all the things she wanted - small size, on- instead of in-wall design, and minimal visual impact on her carefully tailored décor.
 While I'm not going to walk you through the entire install since we've done that a number of times on this site, I will give you the highlights. If I had to sum up the experience, I'd say, "There is always a way." No matter what your room looks like or the challenges you face, there is always a way to get surround speakers up. There just is. It may not be easy and it may not be fun, but there is a way. From the onset, I elected the help of Clint DeBoer (Editor-in-Chief) for the install that I thought was going to be pretty easy. Even though the right surround was on an exterior wall, the roof was far enough overhanging that we thought we could still have access to the header. There were other problems with the left surround specifically that the top of that wall was open though we thought we could run the wire down the half wall and across the top. Well, we found out that it wasn't all that easy as the roof was extremely shallow and absolutely PACKED with insulation, the walls were plaster instead of drywall, and all our plans ended up having to be changed on the fly. This is part and parcel of installing speakers and in the end, no matter what we ran into, we were able to figure out a workaround.
 You'll really have very little problem understanding how to install the brackets and wires once you read the instructions. Our review pair of speakers were so new that they actually were marked W0 instead of M0 (one of those last minute name changes). Only one of the brackets had the +/- stickers on it though the final product will, making knowing where the wires go absolutely no problem. The Axiom Accent M0 speakers have some interesting differences than other on-wall speakers, most notably, the bracket. As mentioned above, the bracket doubles as the termination point. You'll be tempted to try to install the wires in the bracket before you install them on the wall. While this will certainly work (and I did it this way on most of the speakers), I'd suggest installing the bracket first before terminating the wires. You'll want to loosen the terminals before you mount the bracket to the wall but once you do, you should have no problems inserting the wires and locking down the terminals according to the directions.
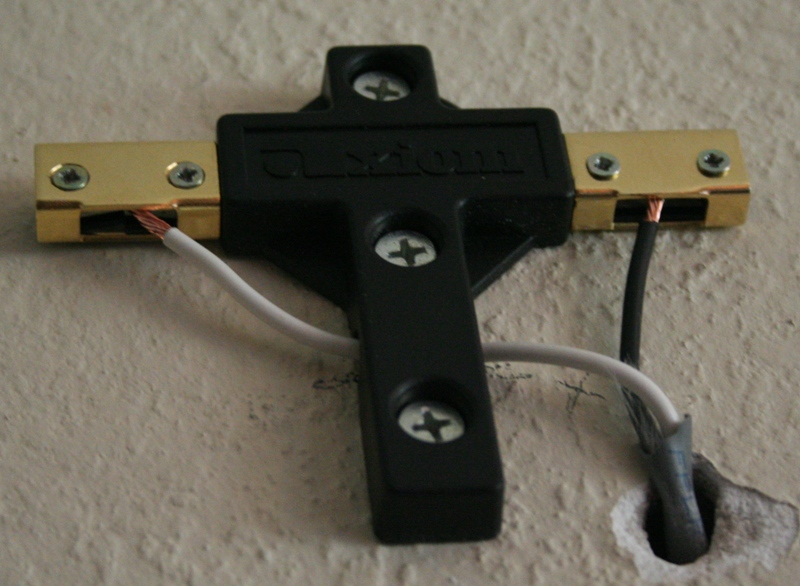
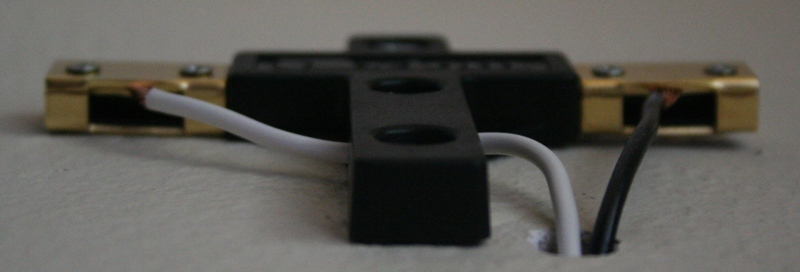
M0_bracket_bottom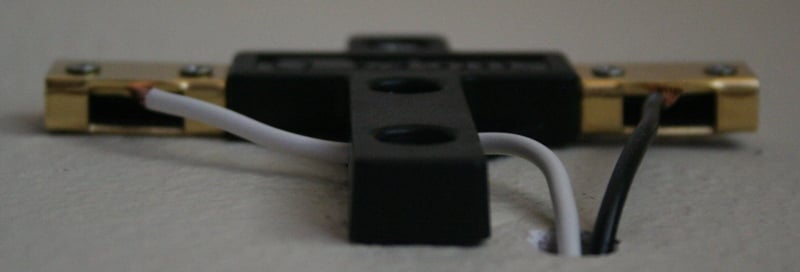 This is where I ran into one of my few criticisms of the M0 speakers. The termination points on the bracket consist of dual screws to sandwich the wire between two plates. On each of the five brackets I had, at least one screw either threatened to or actually did strip. In one case, we had to drill out the screw and go with only one screw on that wire. In the future, I'd like to see either more robust screws or ones with an Allen wrench end, or perhaps some sort of spring or compression type terminal. I could envision some kind mason jar like lock down for the wires.
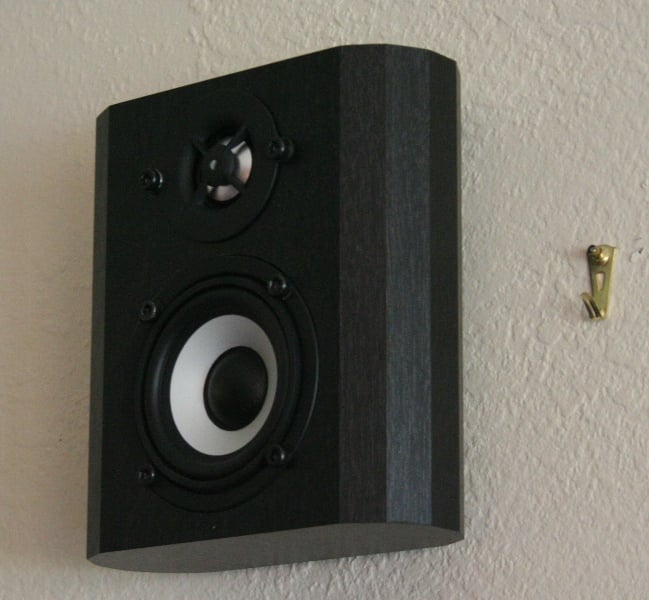
 The brackets, while innovative and unique, weren't without their quirks. While I never experienced this myself, the owner of the home reported that from time to time one of the speakers would pop off the bracket. While the speaker didn't fall off the wall (and in fact it was still fairly securely attached), it moved just enough to break the connection. This would have the effect of either disengaging the speaker completely or causing it to crackle. A quick push down on the speaker would reseat it on the bracket and re-establish the connection.
The second issue I ran into was the actual size of the speaker. They are SMALL. While that's a good thing for decorators, it isn't so hot for hiding that hole you used to run the wires. The real issue is that the speaker, because of the bracket, sits off the wall. This gives anyone that is to the side of the speaker a possibility of seeing the hole. Even if you limited the hole to a 2" square, the speaker is only 6" wide. In the best possible situation you're within an inch of the edge. As the speaker sits about 1/2" off the wall, this can be clearly visible. While I'm still a fan in general of the Axiom M0 bracket, I wish there were some sort of masking system for the edges.
 The M0s were paired with both the EP125 and the EP400. The M0s are rated down to 160Hz (-3dB) while both of the subs are only rated up to 150Hz (-3dB). While I'm sure there is some wiggle room there, you can see the irony. Setting up the subs was similar for both with a single RCA from the receiver. I turned the crossover up as high as possible for each sub and switched them out from time to time. I also asked the owner to switch between the two subs from time to time as I was preparing the review. His evaluation will be included below. What was nice was that no matter what sub I used, I had little problems calibrating and matching with the M0s. Of course, with the EP400, I had much more extension and volume and the trim control gave me many more options to fine tune the bass based on the room. This is an untreated living room which is common for this type of system. It is small but open to the rest of the house. While this makes the M0s job easier, it isn't kind on the subs as the rest of the house essentially becomes a bass trap. Luckily, the EP125 did just fine as far as SPL levels were concerned. I placed the subs up near the front of the room, which I highly recommend for any sub/sat system, but particularly with a system that will be crossed over has high as the Axiom Accent system. This will help reduce noticing the sub, as anything above 80Hz is localizable by most people. I highly recommended running dual subs (placed towards the front of the room under the main channels) for a small system like this for this very reason.
M0 Measurements and Conclusion
For laboratory measurements I used the Sencore SP395A FFT Audio Analyzer plugged directly into the internal amp of the subwoofer or amplified by a Sherbourn 2/75B amp for the satellites. When I measured the surrounds, I couldn't place them on a wall so I put them on a stand with a large, thick piece of wood behind it to simulate the effects of the wall boundary. This allowed me to take a measurement in my heavily treated with Ready Acoustics Chameleon Bass Traps AV Rant podcast room. The first thing I did was take the sub outside and so a groundplane measurement at one meter for the Axiom EP125.
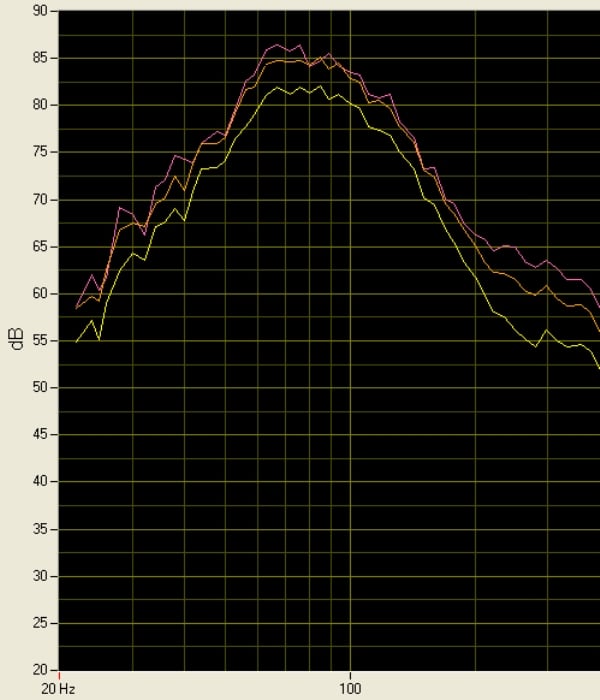
Axiom EP125 Subwoofer Groundplane Measurement 1 Meter
As you can see, the EP125 has a fairly linear response from down to 50Hz where it drops off significantly. At the price point, this isn't entirely unexpected but certainly can be expected to be better in a small room where the sub was designed to be utilized.

Axiom EP400 Subwoofer Groundplane Measurement 1 Meter
I borrowed Gene DellaSala's (Audioholics President) measurements of his EP400s when he wrote the article Are two subs better than one?
As you can clearly see, the EP400 is light-years ahead of the EP125 in terms of performance (as it should be for the increase in price. Axiom claims an inroom response as low as 17Hz and with these measurements, we can believe them.
For laboratory measurements of the M0 On-Walls, I used the Sencore SP395A FFT Audio Analyzer and a Sherbourn 2/75B amp, I measured the M0's in-room on- and off-axis frequency response with 1/12th octave resolution.
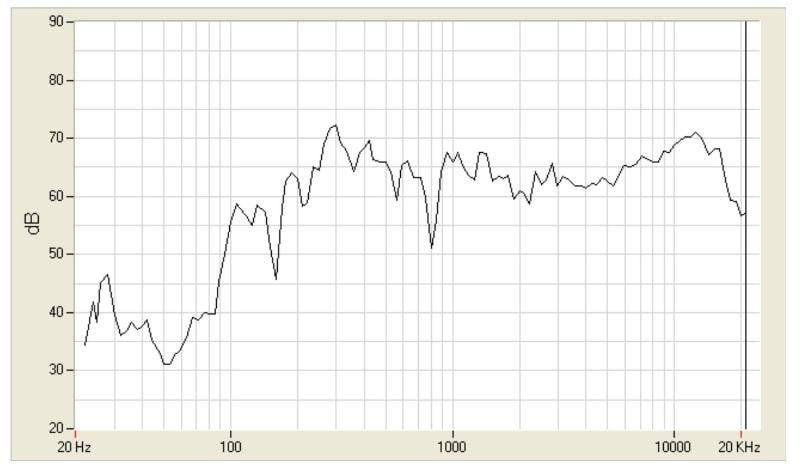
Axiom M0 1 Meter Frequency Response (1/12th Octave) On Axis
Note - this is NOT a 1 watt measurement
As you can see, the Axiom M0s measures fairly flat on axis except for a bump around 15kHz and again at around 300Hz. This could also be interpreted as a dip in the midrange (which is how I see it). The speakers seem to drop off around 160Hz, which falls in line with Axiom's claimed specs. There is also a substantial dip at 800Hz but that is probably a measurement anomaly.
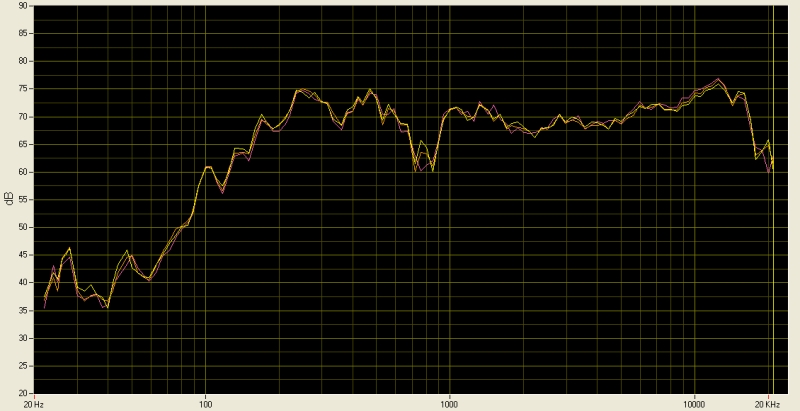
Axiom M0 1/2 Meter Frequency Response (1/12th Octave)
What's important in this graph is how well the on- and off-axis response matches up on these speakers. There is practically no difference between the on-axis response and off-axis all the way out to 30 degrees. This should make for a very even listening experience across a wide listening area. This graph looks a lot more flat than the 1-meter graph with a bit more extension on the low end. They aren't quite reaching 100Hz but they look much better down to 200Hz and maybe as low as 150Hz. The 800Hz dip has gained a 600Hz buddy but again, that's likely just measurement error. Axiom's graph (below) looks a bit better due to their better measurement equipment and facilities but the overall shape (as you can see) is the same.
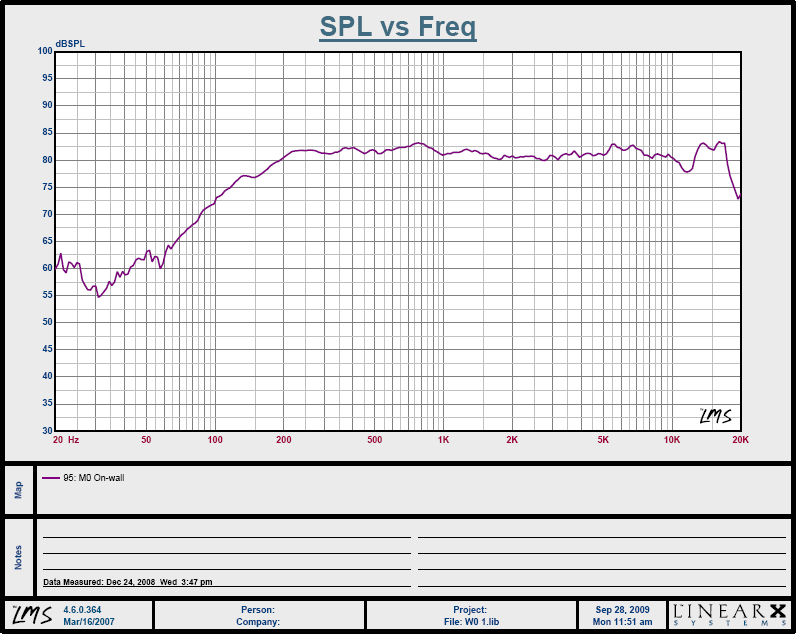
Axiom M0 1 Meter Frequency Response (manufacturer measurement)
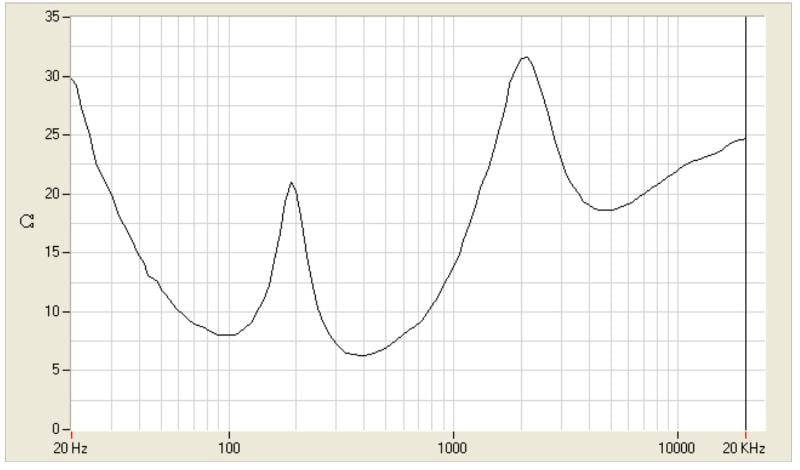
The Sencore consistently measures impedance 1 ohm low. Axiom specs the M0s at 8ohms. That seems just about perfect based on these measurements. The M0s should play well with any receiver you choose to pair them with it.
Listening Tests
The installed system was really destined to be used for TV, movies, and games. The owner of the home is a huge Rock Band 2 gamer, so music performance is also important. From time to time, the system will be used to provide background music for dinner parties but will not likely be used for critical music listening. The first thing that both the owner and I noticed was how well the EP125 held up. As mentioned, the EP400 is clearly a superior sub, in an application where neither sub will be able to pressurize the space, the differences become less apparent. What is clear, however, is that the EP400 is a sub that will be able to grow with the system. Put the EP400 in a smaller space or add a second sub and you're going to see an exponential increase in performance. When asked, the owner said that he clearly enjoyed the EP400 more as he felt it was stronger and hit harder and lower. I felt that the EP400 was more linear and definitely more flexible. Overall, I was impressed with both subs and particularly impressed with the EP125. I honestly expected it to struggle, rattle, chuff, and bottom out at the listening levels I was using. It is a testament to Axiom Audio's commitment to quality that their least expensive offering is clearly well designed.
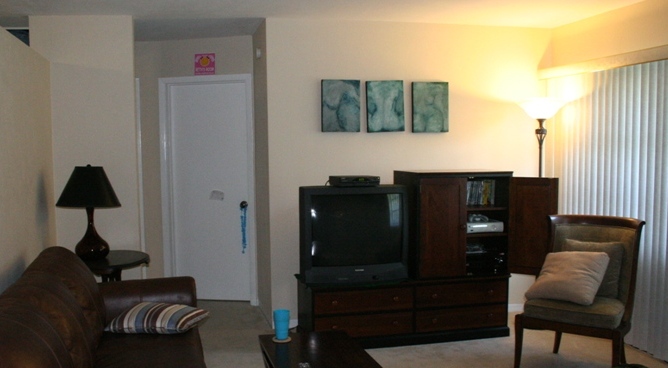
| Room Before |
Room After |
|---|---|
 |
 |
DTS DVD: Blue Man Group: The Complex
While the owner might not be all that interested in music, I wanted to test some music that is not only fun to listen to but is also high quality. Frankly, The Blue Man Group: The Complex DTS DVD is something that any movie lover can appreciate with its intense bass and high tech sound. The bass was strong with both subs but the EP400 was significantly lower and more linear. What I was really interested in was how well the M0's dealt with the quickness of the percussive instruments. I found out quickly that the M0s did just fine and kept up well. In some instances the vocals sounded a little strained, but overall, I was impressed. I really believe that anyone that invests in this package (with either sub) is going to be blown away. For movies and casual listening, this is a great system.
One thing that is really nice is that since the M0s are all the same speaker, they are completely timbre matched. This makes pans and movement around the sound field much more uniform than it might otherwise have been. The soundstage was really quite wide and sounds were well localized within it. You have to remember that this installation was not in a dedicated room so placement was dependent on a number of factors including the suffrage of the woman of the house. So if non-optimal (the norm for on/in-wall speakers in my opinion) positioning still yields good results, that is a huge plus. If nothing else an on-wall speaker has to be flexible. The M0s are definitely flexible.
DTS DVD: Porcupine Tree: Deadwing
I had every intention of listing movies The Lord of the Rings and 300 in the listening tests. They are really what these speakers will spend all their time playing after all. But I really couldn't help popping in another surround music DVD. While the EP400 and EP125 sounded about the same for much of the movie content in this room, with this DVD the differences were apparent. While I enjoyed the EP125 at first, a quick A/B showed just how much more articulate the EP400 was. It's like eating Pizza Hut all your life and then going to Naples for pizza. Sure, Pizza Hut tasted fine until you learned what real pizza is supposed to taste like. The M0s again did very well with this content. The guitars, piano, drums, and more all sounded for the most part natural and clear. Volume wasn't an issue as I was able to push the M0s far past how loud I would ever listen without signs of them straining. The off axis response of the M0s helped create a very wide and diffuse soundstage. While the surround speakers aren't as diffuse as their QS speakers (a speaker that might make a good if significantly larger rear speaker with a set of M0s up front), they did a great job of handling surround effects and pans.
Conclusion
 The fact is that you are making a compromise with an on-wall speaker system. Freestanding speakers have the ability to be larger, can be moved around the space, and have many fewer design restrictions. In a lot of ways, an in-wall speaker has advantages over an on-wall speaker in that it can at least have a backbox. The on-wall speaker needs to be small, thin, and powerful - a tall order. The Axiom Audio M0 delivers. From the magnetic grills to the innovative (if quirky) wall mounting bracket system, the M0s are a speaker unlike any other. Of course, coming from Axiom you'd expect them to deliver sonically - and they do. If you are looking for an unobtrusive on-wall system for a smaller room, the M0s are a very good choice and deserve to be on your short list. At $135 each and free 30 day in home trial, you've got little to lose except your preconceptions about what a small speaker can do.
Axiom Audio M0 On-Wall Speaker System
$135/each, $998 (5.1 w/EP125) or $1686 (5.1 w/EP400)
Highway 60
Dwight, Ontario
Canada
P0A 1H0
About Axiom Audio
Axiom Audio has been designing, engineering and manufacturing award-winning high-end, high-value loudspeakers since 1980. The company’s products feature transparent, wide-range sound developed through double-blind listening tests and extensive research. As a testament to its emphasis on quality design, Axiom Audio’s loudspeakers have received multiple Product Of The Year honors from the Consumer Electronics Show as well as virtually every major audiophile media source. A 100% Internet-based company, privately-owned Axiom Audio services a worldwide customer base from its headquarters and manufacturing facilities situated in the unspoiled Muskoka district of Ontario. To learn more about Axiom, visit www.axiomaudio.com.
The Score Card
The scoring below is based on each piece of equipment doing the duty it is designed for. The numbers are weighed heavily with respect to the individual cost of each unit, thus giving a rating roughly equal to:
Performance × Price Factor/Value = Rating
Audioholics.com note: The ratings indicated below are based on subjective listening and objective testing of the product in question. The rating scale is based on performance/value ratio. If you notice better performing products in future reviews that have lower numbers in certain areas, be aware that the value factor is most likely the culprit. Other Audioholics reviewers may rate products solely based on performance, and each reviewer has his/her own system for ratings.
Audioholics Rating Scale
 — Excellent
- — Very Good
- — Good
- — Fair
- — Poor
| Metric | Rating |
|---|---|
| Build Quality | |
| Appearance | |
| Treble Extension | |
| Treble Smoothness | |
| Midrange Accuracy | |
| Bass Extension | |
| Bass Accuracy | |
| Imaging | |
| Soundstage | |
| Dynamic Range | |
| Fit and Finish | |
| Performance | |
| Value |
As Associate Editor at Audioholics, Tom promises to the best of his ability to give each review the same amount of attention, consideration, and thoughtfulness as possible and keep his writings free from undue bias and preconceptions. Any indication, either internally or from another, that bias has entered into his review will be immediately investigated. Substantiation of mistakes or bias will be immediately corrected regardless of personal stake, feelings, or ego.
View full profile