
Pioneer VSX-818V 5.1 Channel A/V Receiver Review
- Product Name: VSX-818V 5.1 Channel A/V Receiver
- Manufacturer: Pioneer Electronics
- Performance Rating:

- Value Rating:

- Review Date: August 29, 2008 17:25
- MSRP: $ 249
Power Amplifier Design: PHAT
Surround Power: 120w x 5
THD: 1kHz w/O.O5% THD @ 8 ohm
Inputs/Outputs:
2 Video
HDMI
3 component
video in / 1 monitor out
4 AV in / 1
Rec. out
5 Audio in
/ 1 Rec. out (including tuner and front)
iPod
compatible through USB
XM and
Sirius ready
1 Digital
coaxial input
2 Digital
optical input / output
Room EQ: Auto MCACC Speaker Calibration
(including 5 EQ bands)
DSP: Dolby Digital 5.1, Dolby Pro-Logic
II, DTS 96/24, WAM9 Pro, EX HD Surround
Additional Features: Onscreen Display, Sleep Timer,
Display Dimmer, Front A/V Terminals, 30 AM/FM Presets
Remote: Preset
Dimensions (inches): 16 9/16 x 6 1/4 x 13 7/8
Weight: 17 lbs 9 oz
Warranty: 1
Year
Pros
- On-screen display
- Large speaker binding posts
- Great sound
- Excellent Value
Cons
- Non-discrete output devices for all but the main channels
- Limited digital inputs
- Cluttered remote control
- No HDMI audio support
- No 5.1 pre-amp outputs
Pioneer VSX-818V Introduction
To see how much Pioneer has progressed in its entry level receivers and determine if manufacturers are truly taking advice from consumers and review publications like Audioholics, I compared the VSX-818V to the Pioneer VSX-815 which we reviewed in 2005.
| Pioneer VSX-815 | Pioneer VSX-818V | |
| Surround Power: | 100 watts
x 7 (1% THD @ 8-ohms, 1kHz) |
120 watts x 5 (.05% THD @ 8 ohm, 1kHz) |
| Stereo Power: | 100 watts
x 2 (20Hz-20kHz; 0.7% THD @ 8-ohms) |
95W per channel (20Hz to 20kHz, THD .06%, 8-ohms) |
| DSP: | Dolby Digital 5.1/EX, DTS-ES 6.1 Discrete, DTS 96/24/Neo6, Pro Logic IIx/Game Mode, WMA9 Pro, 9 Advanced Surround modes, 7-channel stereo, Virtual surround back | Dolby Digital 5.1/EX, DTS-ES 6.1 Discrete, DTS 96/24/Neo6, Pro Logic IIx/Game Mode, WMA9 Pro, 9 Advanced Surround modes, 7-channel stereo, Virtual surround back, EX HD Surround |
| Inputs: | 3 component video, 4 A/V, 5 digital ins (2 optical/1 front optical/2 coax), 5.1 multi-channel input, front AV inputs (including optical) | 2 HDMI (switching only), 3 component video, 4 A/V, 5 Audio in
(including tuner and front), 5
digital ins (2 optical/1 front optical/2 coax), iPod compatible through USB, XM and
Sirius ready |
| HDMI: |
None |
2 in/1 out (switching only) |
| Outputs: | 1 component, 2 A/V,
headphone output |
1 component, 1 A/V, 1 Audio out, 2 Digital optical outs, headphone output |
| Analogue Pre-outs: |
7.1 preamp outputs (includes subwoofer) | Subwoofer only |
| Room EQ: | Auto/Manual MCACC (including 5-band EQ) | Auto/Manual MCACC (including 5-band EQ) |
| Additional Features | Sleep timer, dimmer option, multi-way loudspeaker binding posts, AM/FM tuner | Sleep Timer, Display Dimmer, Front A/V Terminals, 30 AM/FM Presets |
| On-screen Display: |
No |
Yes |
| Dimensions: | 16 9/16 " W x 6 1/4" H x 15 13/16" D | 16 9/16 x 6 1/4 x 13 7/8 |
| Weight: | 22 lbs. 4 oz. | 17 lbs 9 oz |
| Warranty: | 1 year | 1 Year |
| MSRP: | $365 | $249 |
Although comparing a 7.1 channel receiver (which retailed at over $100 more) to a 5.1 channel receiver may seem like comparing apples to oranges, the VSX line has made some notable improvements over the last 3 years. Our two biggest concerns against the VSX-815 in 2005 were that it didn’t have video upscaling or on-screen display. The VSX-818V does come with on-screen display, but still leaves video upscaling to its bigger brothers (we really didn’t expect it at this price point anyways.) It does however have 2 switching-only HDMI inputs and 1 output, something that wasn’t possible at this price point just last year. The lowest price model that Pioneer offers with video upscaling is the VSX-1018AH which comes in at $599.
Pioneer VSX-818V First Impressions
Pioneer shipped the unit directly to my house and it arrived in a standard off-the-shelf retail box. I was a little leery at what I was going to find inside. If you are considering buying the VSX-818V off the Internet, keep in mind that it will most likely be shipped in the same way (ie, not double-boxed - so you won't want UPS leaving this outside your house if you're not home). With all the complaints we have with big box stores, the one benefit is that you can always walk back in and return a damaged unit (assuming you can get any service).
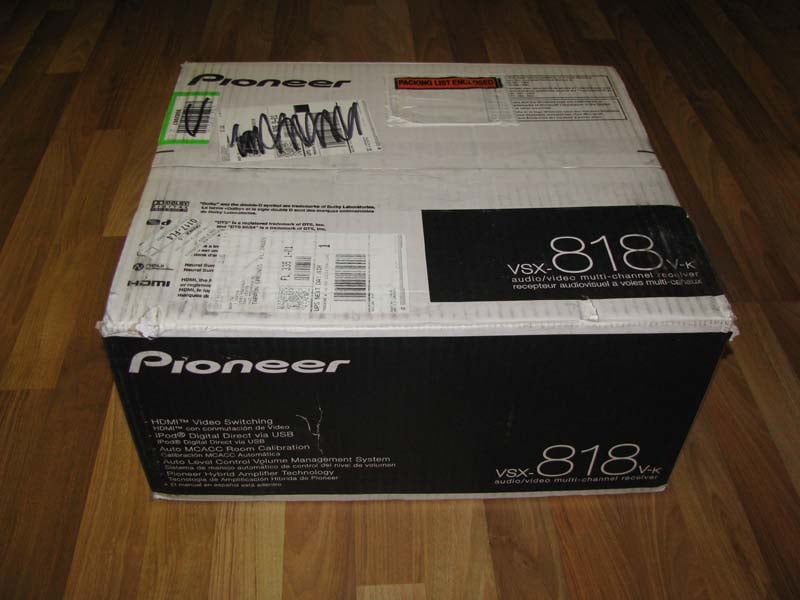

As I opened the box my concerns were not alleviated. The remote, MCACC microphone, and am loop antennae were freely moving around the box right against the single layer of corrugated cardboard. The only thing separating them from the receiver was a thin layer of plastic and the foam packaging.
I unpacked the components and visually inspected them for damage. Luckily everything seemed to be fine.
Build Quality
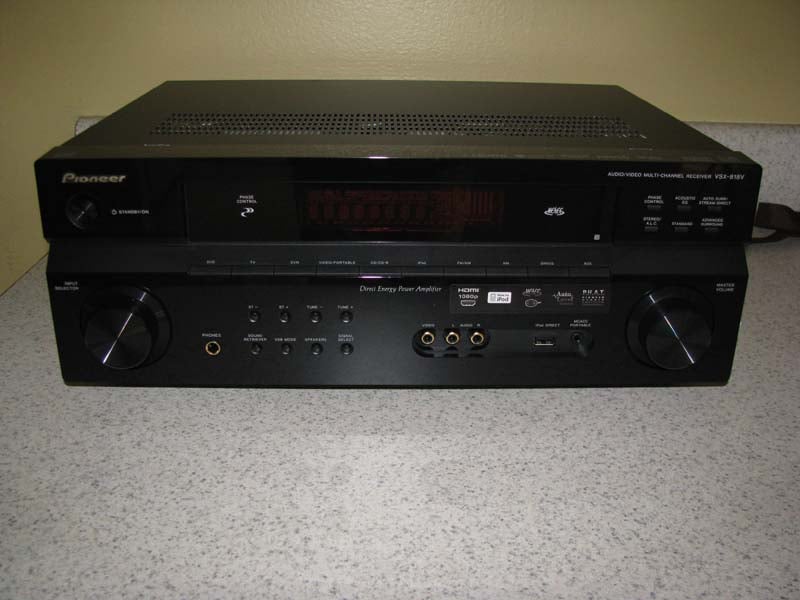 The unit itself had a clean design. The labels were easy to read and the buttons
were arranged in practical groupings. Two rotating knobs are located at either
end of the unit. The left one is for changing the input selection, and the
right is the master volume. I found the
redundancy of an input knob impractical (and likely a holdover form the more complex models) since the buttons for the inputs are
clearly labeled in the middle of the receiver.
Why scroll through all the selections, when you can simply press a
button?
The unit itself had a clean design. The labels were easy to read and the buttons
were arranged in practical groupings. Two rotating knobs are located at either
end of the unit. The left one is for changing the input selection, and the
right is the master volume. I found the
redundancy of an input knob impractical (and likely a holdover form the more complex models) since the buttons for the inputs are
clearly labeled in the middle of the receiver.
Why scroll through all the selections, when you can simply press a
button?
I was excited to see that the VSX-818V came equipped with a front audio/video terminal on the receiver. My 42” Panasonic Plasma TV did not come with front A/V jacks so every time I want to use a piece of portable equipment, I either have to move the display, or leave a length of A/V cable connected to the TV (which doesn’t rate very high on the WAF [Wife Acceptance Factor] scale).
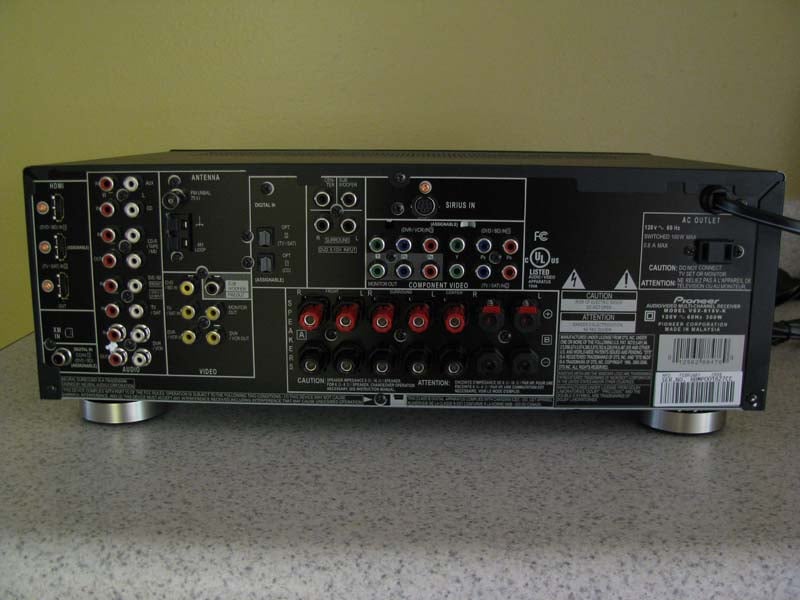 Most budget-minded consumers will be pleased to see that the VSX-818V comes with plenty of
inputs for an entry level receiver, including: 2 HDMI inputs, 3 component
video inputs, 4 composite inputs, 2 digital optical inputs, and 1 digital coaxial
input. This receiver
provides a multitude of connections for a receiver in this price range. Outputs include 1 HDMI, 1 component, and 1 composite video connection. There are no S-video connections (good riddance!)
Most budget-minded consumers will be pleased to see that the VSX-818V comes with plenty of
inputs for an entry level receiver, including: 2 HDMI inputs, 3 component
video inputs, 4 composite inputs, 2 digital optical inputs, and 1 digital coaxial
input. This receiver
provides a multitude of connections for a receiver in this price range. Outputs include 1 HDMI, 1 component, and 1 composite video connection. There are no S-video connections (good riddance!)
One of the most surprising features are the large binding posts for speaker connections that come with this unit. Many receivers under $250 only provide spring clips for most of the channels. Instead, this unit sports binding post connectors on all the channels with good quality spring clips for the “Speaker B’ connection.
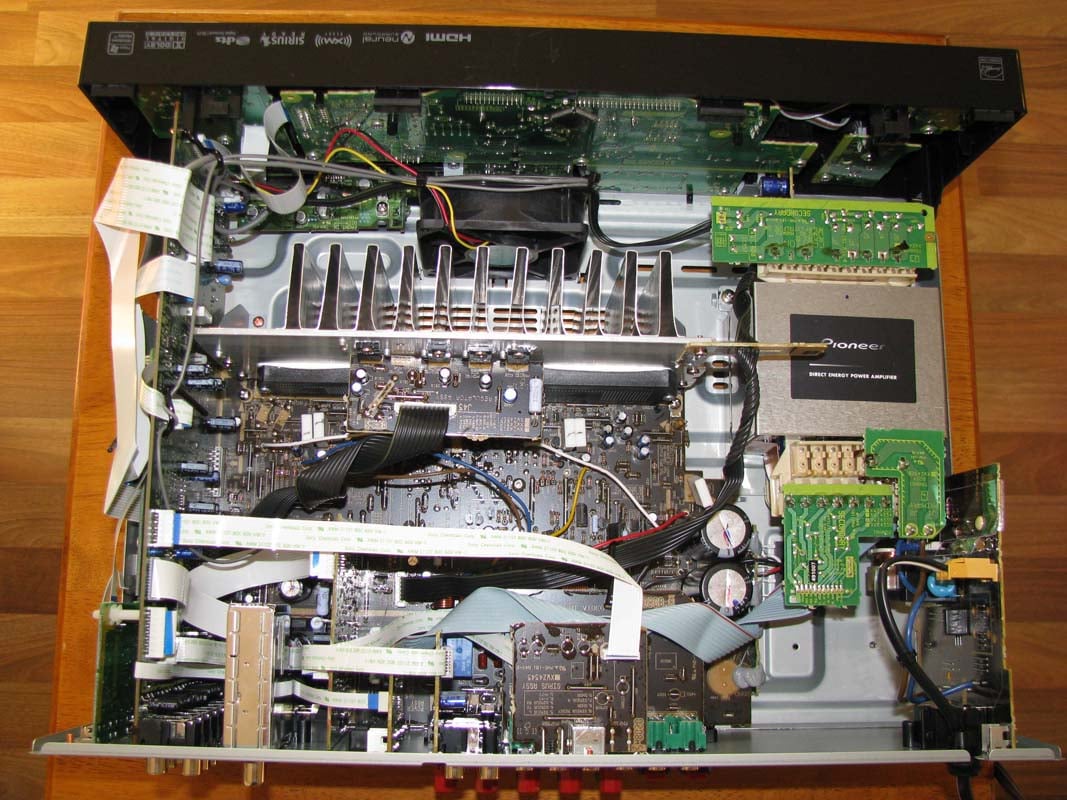 The
interior of the unit again provided a clean arrangement of components. Although
the receiver’s components weren’t remarkable, the arrangement of parts was well thought
out for an efficient use of space. Though we were mildly disappointed that Pioneer used power opamps for the center and surround channels instead of discrete output devices for all channels. This is an understandable sacrifice one must make to get HDMI switching built in at this price level.
The
interior of the unit again provided a clean arrangement of components. Although
the receiver’s components weren’t remarkable, the arrangement of parts was well thought
out for an efficient use of space. Though we were mildly disappointed that Pioneer used power opamps for the center and surround channels instead of discrete output devices for all channels. This is an understandable sacrifice one must make to get HDMI switching built in at this price level.
Heat issues are addressed through the use of an ultra quiet fan positioned at the front of the receiver. Even during the quietest of intervals in my listening sessions I never did hear the fan turn on.
Pioneer VSX-818V MCACC and System Setup
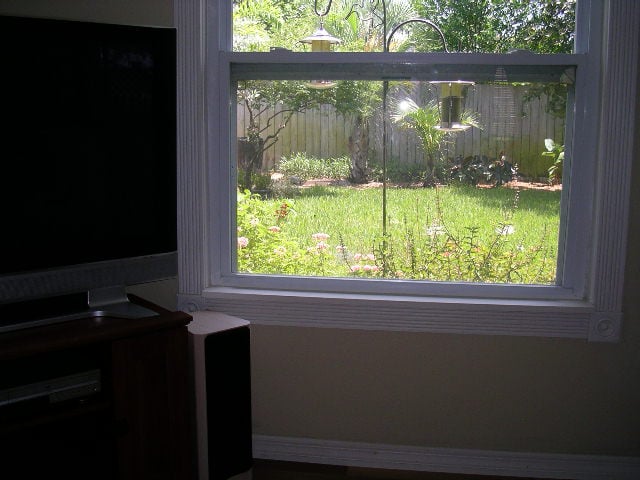
I really wanted to challenge the auto MCAAC
(Multi-channel Acoustic Calibration) so I connected the VSX-818V to my family
room system rather than my home theater room. We spend a lot of time in this
room and the couches are set up to overlook the butterfly garden and bird
feeders in our backyard with the TV in the corner. This room doesn’t have the preferred
rectangular design of my home theater room and in addition the cozy space of
the room allows little adjustment 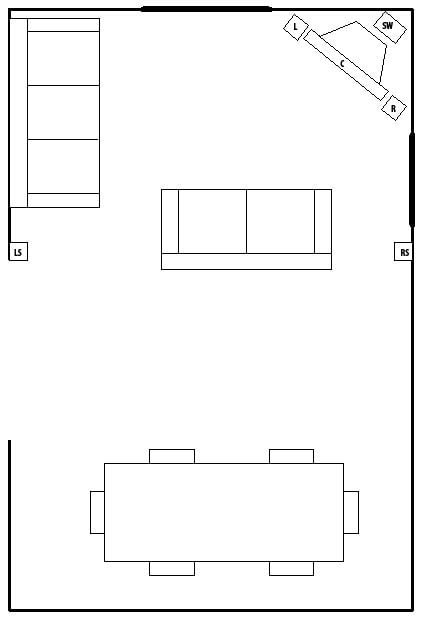 for perfect speaker placement.
Although it would have been nice to see more digital inputs in the back of the unit, I again realized how nice it was having large speaker binding posts on this receiver since my speaker cables already had banana clips attached to them. After connecting the speakers, subwoofer, and Sony DVD player to the receiver, I then connected it to my 42” Panasonic Plasma TV. I connected the supplied microphone to the MCACC portable jack on the front panel of the receiver, placed it at ear level near my favorite seat, and followed the directions for the MCACC setup.
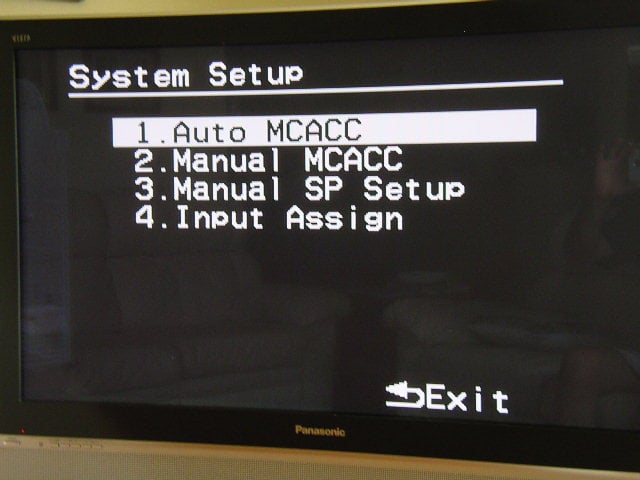
Using the on-screen display on my TV and the remote I navigated through the screens and selected Auto MCACC from the system Setup Menu. The receiver automatically detected the subwoofer and the rest of my speakers in my 5.1 system.
 Once the program
detects your speakers it gives you 30 seconds to decide if you want to continue
with the MCACC setup. You have the
option of hitting the enter button at any time to continue with the setup, but
after 30 seconds the MCACC setup will continue automatically. The program cycled through the test tones to
determine the optimum receiver settings for channel level, speaker distance,
and acoustic calibration EQ and completed its diagnostics within 5 minutes.
Once the program
detects your speakers it gives you 30 seconds to decide if you want to continue
with the MCACC setup. You have the
option of hitting the enter button at any time to continue with the setup, but
after 30 seconds the MCACC setup will continue automatically. The program cycled through the test tones to
determine the optimum receiver settings for channel level, speaker distance,
and acoustic calibration EQ and completed its diagnostics within 5 minutes.
To check
the auto MCACC setup I went to the Manual SP Setup. I was especially concerned with the distance
the system configured for each of the five speakers 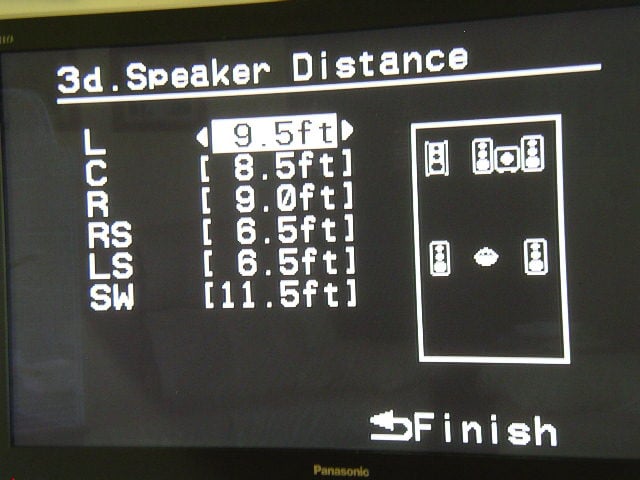 and what the actual distance
turned out to be.
and what the actual distance
turned out to be.
I checked each of the actual distances of the five
speakers with a tape measure and compared them to the distances calculated by
the auto setup. All channels measured by
the MCACC were within 1 inch of the actual distance from the microphone to the
speaker with the exception of the subwoofer which was, not uncommonly, nearly a foot off. Because of the size of the room and the
furniture placement the only visually appealing place to put the subwoofer was
behind the TV. The subwoofer's internal crossover probably added the foot of
delay since it’s not totally defeatable. To change the settings I decided to
check out the Manual MCACC.
Manual MCACC
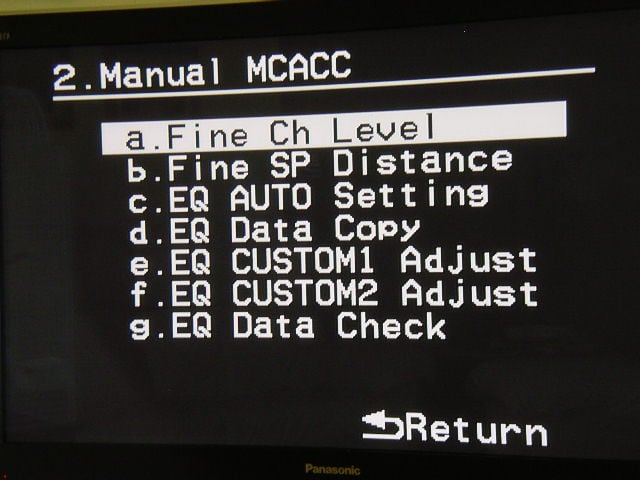 I decide to
adjust the fine channel levels first.
The default setting is 0db on all channels and can be adjusted by 10db.
Once selected the system puts out a -13db tone for each speaker as it’s selected.
I decide to
adjust the fine channel levels first.
The default setting is 0db on all channels and can be adjusted by 10db.
Once selected the system puts out a -13db tone for each speaker as it’s selected.
Editorial note: When using some of the menus such as the Fine Channel Level option, a countdown clock from 25 to 0 appears on the screen. Although it only takes a few seconds for the clock to countdown to zero it still is quite annoying.
Bass Management
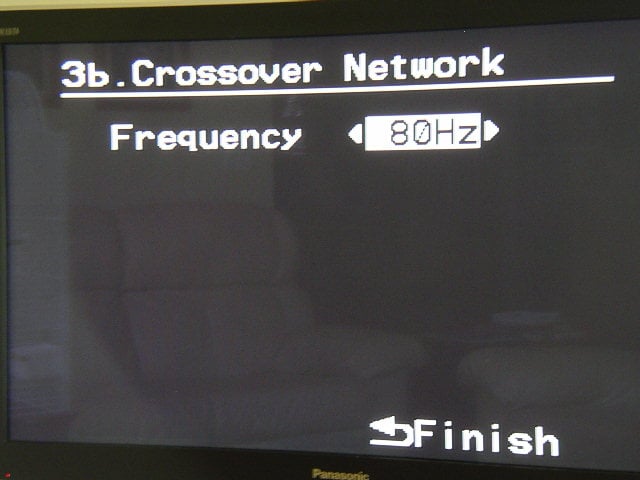 The MCACC
system set up my left and right speakers as Large speakers, which the Axiom Millenia
M22Ti I own are definitely not. I adjusted the manual settings for Small
speakers and checked the default crossover setting for the subwoofer. The default
setting for the VSX-818V is 100Hz (most likely since this receiver is most likely to be used with satellite speaker systems). After
my listening test I decided to adjust the crossover to 80Hz. Not a big change, but with the small room,
wood floor, and windows, this small adjustment made the lower frequencies from my system blend better and sound
more realistic.
The MCACC
system set up my left and right speakers as Large speakers, which the Axiom Millenia
M22Ti I own are definitely not. I adjusted the manual settings for Small
speakers and checked the default crossover setting for the subwoofer. The default
setting for the VSX-818V is 100Hz (most likely since this receiver is most likely to be used with satellite speaker systems). After
my listening test I decided to adjust the crossover to 80Hz. Not a big change, but with the small room,
wood floor, and windows, this small adjustment made the lower frequencies from my system blend better and sound
more realistic.
Remote Control
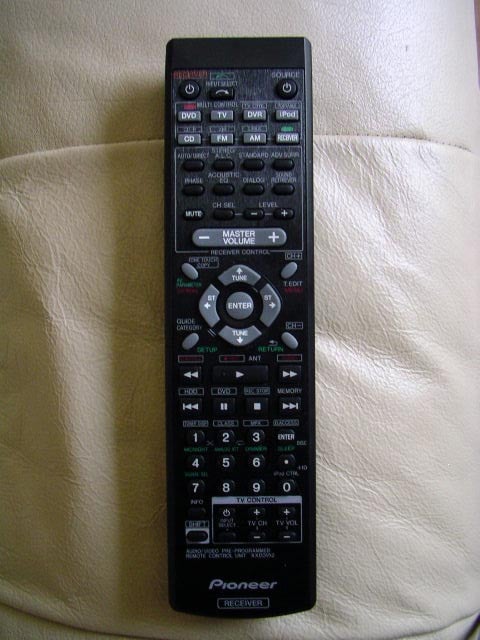 Although I could control all the functions I needed
to with the remote control, the layout still felt cluttered. One of the first features used on the remote
is the setup for the receiver which can only be accessed by using a “shift”
style button configuration similar to a scientific calculator. You have to hit
the “Receiver" button first before you can use the “Setup” and “Return” buttons
which are labeled in green under the buttons for “Guide category” and
“CH-“. I guess Pioneer figures that most
people never adjust their home theater system once it’s setup and don't want people accidentally entering the Setup menu.
Although I could control all the functions I needed
to with the remote control, the layout still felt cluttered. One of the first features used on the remote
is the setup for the receiver which can only be accessed by using a “shift”
style button configuration similar to a scientific calculator. You have to hit
the “Receiver" button first before you can use the “Setup” and “Return” buttons
which are labeled in green under the buttons for “Guide category” and
“CH-“. I guess Pioneer figures that most
people never adjust their home theater system once it’s setup and don't want people accidentally entering the Setup menu.
Of course the biggest problem with the remote is that it doesn’t have any backlit buttons. I know that this is a budget-minded receiver, but even the $50 DVD player in my bedroom has a backlit remote.
iPod Connectivity
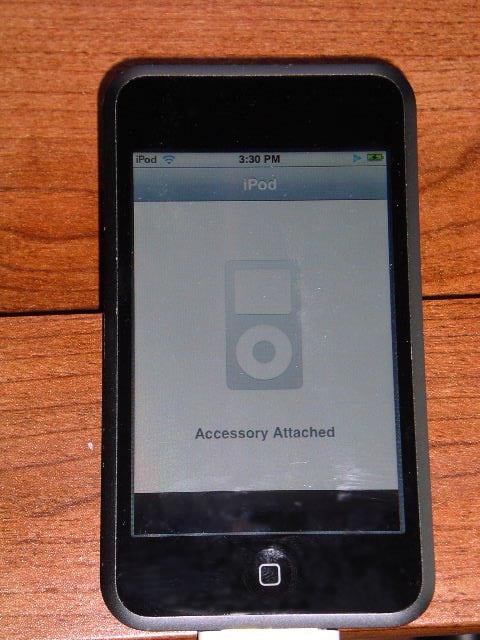 The VSX-818V allows the connection of an iPod through
a USB input port on the front of
the receiver and connects to the iPod through the port in the bottom of
the iPod. Unlike other receivers at this price point, the iPod connection is
digital, which Pioneer guarantees to be a full digital transfer without
intermediate digital to analogue to digital conversions.
The VSX-818V allows the connection of an iPod through
a USB input port on the front of
the receiver and connects to the iPod through the port in the bottom of
the iPod. Unlike other receivers at this price point, the iPod connection is
digital, which Pioneer guarantees to be a full digital transfer without
intermediate digital to analogue to digital conversions.
I decided to try out my iPod Touch with the receiver and see how it worked. I set the receiver to Standby mode while I connected the USB cable to my iPod. After the cable was inserted into the iPod Direct input terminal on the front panel of the receiver, I turned the receiver on. The iPod almost instantly went into a standby mode displaying “accessory attached” on the screen. All functions of the iPod screen were turned off and directed to the TV.
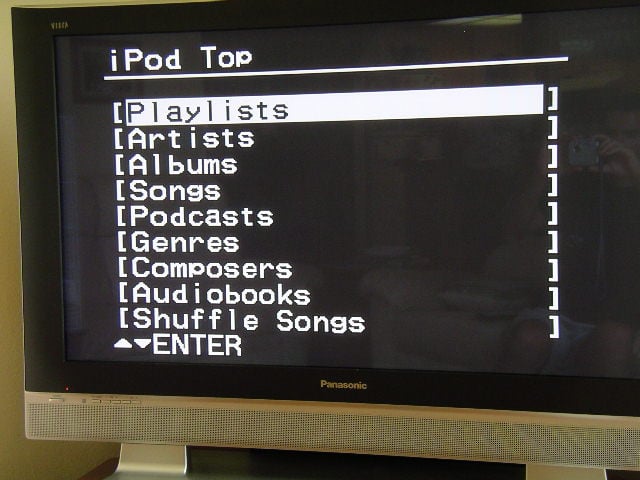 I found that scrolling through the menus was far more
tedious on the TV screen than on either my iTouch or iPod nano (yes I own two
iPod products, Steve Jobs owns my soul). For instance, if I have a
particular song I want to play on my iTouch I can go directly to the first
letter of that song (or artist, or album) and then search from there. With the
on-screen display I had to scroll through hundreds (if not thousands for some
iPods) of songs before I got to the one I wanted. To help narrow down my search I could select
a particular artist, but I currently have over 90 artists on an 8 gig iTouch
and if you decide to pick an artist
near the middle of the alphabet you have to scroll through all the letters and
all the artists before it.
I found that scrolling through the menus was far more
tedious on the TV screen than on either my iTouch or iPod nano (yes I own two
iPod products, Steve Jobs owns my soul). For instance, if I have a
particular song I want to play on my iTouch I can go directly to the first
letter of that song (or artist, or album) and then search from there. With the
on-screen display I had to scroll through hundreds (if not thousands for some
iPods) of songs before I got to the one I wanted. To help narrow down my search I could select
a particular artist, but I currently have over 90 artists on an 8 gig iTouch
and if you decide to pick an artist
near the middle of the alphabet you have to scroll through all the letters and
all the artists before it.
After reading through the manual, I found out that there is an iPod control button on the remote. By pressing this button you can switch over the iPod's controls between the iPod and the receiver - either turning the receiver’s remote control and OSD active or inactive. This allows you to use the iPod screen. I even found that if you have a long enough USB cable you don’t even need to get off the couch to work it!
Pioneer VSX-818V Listening Tests and Conclusion
Since I primarily watch standard DVDs and listen to standard CDs in the family room, I decided to use them for my listening tests. The receiver is hooked up to a pair of Axiom Millenia M22ti speakers in the front, a pair of Unisound DAC1 surrounds and center channel, and an Onix X-Sub subwoofer. My DVD player is a Sony upscaling unit model DVP-NS700H/B. All of the cables were furnished by Impact Acoustics from their Sonicwave series of interconnects and 14/2 AWG bulk speaker cable.
DVD: Lord of the Rings - Return of
the King While I didn’t watch all four hours of the last of
the LOTR movies (although hopefully we’ll see some movement with The Hobbit
soon), the scenes I did watch with the VSX-818V provided a great listening
experience. Because the visual
experience of watching any of the LOTR movies is stunning, I had to take a
moment and remind myself that this was an AUDIO review. I reluctantly closed my eyes and focused on
the details in the sounds of the battle of Gondor. The VSX-818V carved out the imaging of a
battle exceptionally well. I could hear each
of the hoof steps of Gandalf's horse, Shadowfax, as it rode through the castle to the top of
Gondor to stop Denethor from killing Faramir. Each boulder cast into the castle
by trebuchet sounded as if it was coming right in the room.
While I didn’t watch all four hours of the last of
the LOTR movies (although hopefully we’ll see some movement with The Hobbit
soon), the scenes I did watch with the VSX-818V provided a great listening
experience. Because the visual
experience of watching any of the LOTR movies is stunning, I had to take a
moment and remind myself that this was an AUDIO review. I reluctantly closed my eyes and focused on
the details in the sounds of the battle of Gondor. The VSX-818V carved out the imaging of a
battle exceptionally well. I could hear each
of the hoof steps of Gandalf's horse, Shadowfax, as it rode through the castle to the top of
Gondor to stop Denethor from killing Faramir. Each boulder cast into the castle
by trebuchet sounded as if it was coming right in the room.
DVD: Finding Nemo While I was analyzing the visual and audio effects of
Return of the King, I failed to notice that my 2 year old daughter had wandered
in the room drawn in by the sounds of battle.
“What’s that?” she asked as an Orc raised its weapon and prepared to
storm the castle. Rather than getting
into a conversation about Orcs with a two year old I decided instead to switch
DVDs to her favorite movie, Finding Nemo. She curled up in my lap and together
we watched Marlin in his adventures across the sea to find his son. The VSX-818V
easily handled the subtle background
sounds of the ocean and the fish swimming across the screen. My daughter actually looked around when Darla
pounded on the tank singing “twinkle twinkle little star”.
While I was analyzing the visual and audio effects of
Return of the King, I failed to notice that my 2 year old daughter had wandered
in the room drawn in by the sounds of battle.
“What’s that?” she asked as an Orc raised its weapon and prepared to
storm the castle. Rather than getting
into a conversation about Orcs with a two year old I decided instead to switch
DVDs to her favorite movie, Finding Nemo. She curled up in my lap and together
we watched Marlin in his adventures across the sea to find his son. The VSX-818V
easily handled the subtle background
sounds of the ocean and the fish swimming across the screen. My daughter actually looked around when Darla
pounded on the tank singing “twinkle twinkle little star”.
iPod
I also
decided to see how good Pioneer's claim of digital to digital iPod connectivity
actually was.I scrolled through the iPod menus and decided to
listen to Queen’s Greatest Hits since I knew that I had personally transferred
that to my computer and iPod rather than buying it off of iTunes.
Having seen Wayne’s World way too many times, I decided to skip “Bohemian Rhapsody” and go straight to “Fat Bottomed Girls”. There’s nothing like a quiet excitement before a big opening of a song like “Fat Bottomed Girls”. I remember listening to this song as a kid and knowing that the introduction was getting ready to start playing because of the hiss of a low fidelity system. With the VSX-818V that amazing opening harmony from Queen stuns you from out of a silence so quiet that at times I wasn’t sure the receiver was on.
 The
VSX-818V also did an excellent job with the classic Queen song “Bicycle Race”. The receiver created the great effect the musicians had in mind when they produced this song by surrounding the room with
its dueling guitars, bicycle bells and harmonic riffs.
The
VSX-818V also did an excellent job with the classic Queen song “Bicycle Race”. The receiver created the great effect the musicians had in mind when they produced this song by surrounding the room with
its dueling guitars, bicycle bells and harmonic riffs.
With the Olympics just ending, I also decided to test the John Williams classic “Olympic Fanfare and Theme” from his Greatest Hits 1969-1999 album. In this version of the song Leo Arnaud’s 1958 “Bugler’s Dream” opens the song with it resounding timpani and bright brass then resolves into Williams’ 1984 composition for the Los Angeles games. The VSX-818V handled the pounding timpani like a champ and kept the clean crisp sound of the trumpets and other brass alive with a bright ferocity.
The Downside
Unfortunately at this price, there are compromises. For one, the HDMI interface on this receiver serves as a switcher function only and does NOT support audio or OSD functionality. In actuality, you are better off using component video on this receiver if your sources are all limited to 480p and perhaps run the one source you have that is 1080p directly into your display via a separate HDMI input.
If you interested in 1080p upscaling and HDMI OSD support and audio processing, then this receiver is not for you. We’ll check out some of Pioneer's budget priced models with 1080p upscaling soon and let you know what we think.
Conclusion
It was nice to see that Pioneer produced a featured-packed A/V receiver that also sounds good for only $250. With its well thought out interior layout and plenty of inputs in the back, the Pioneer VSX-818V is a solid choice to get you into the world of home theater for the first time. Pioneer's MCACC auto setup system allows beginners to easily setup their 5.1 home theater room, but still gives plenty of manual options for tweakers like me. If solid performance on the cheap is what you are after, than I am pleased to report that Pioneer delivers.
The Score Card
The scoring below is based on each piece of equipment doing the duty it is designed for. The numbers are weighed heavily with respect to the individual cost of each unit, thus giving a rating roughly equal to:
Performance × Price Factor/Value = Rating
Audioholics.com note: The ratings indicated below are based on subjective listening and objective testing of the product in question. The rating scale is based on performance/value ratio. If you notice better performing products in future reviews that have lower numbers in certain areas, be aware that the value factor is most likely the culprit. Other Audioholics reviewers may rate products solely based on performance, and each reviewer has his/her own system for ratings.
Audioholics Rating Scale
 — Excellent
- — Very Good
- — Good
- — Fair
- — Poor
| Metric | Rating |
|---|---|
| Multi-channel Audio Performance | |
| Bass Management | |
| Build Quality | |
| Fit and Finish | |
| Ergonomics & Usability | |
| Ease of Setup | |
| Features | |
| Remote Control | |
| Performance | |
| Value |
Tony is our resident expert for lifestyle and wireless products including soundbars. He does most of the reviews for wireless and streaming loudspeakers and often compares soundbars in round ups and helps us cover the trade shows.
View full profile