
Pioneer VSX-815 Receiver Review
Pioneer VSX-815-K Receiver
- Product Name: VSX-815
- Manufacturer: Pioneer
- Performance Rating:

- Value Rating:

- Review Date: June 19, 2005 19:00
- MSRP: $ 365
|
Power Amplifier Design: Thermal Compensation Transistor Surround Power: 100 watts x 7 (1kHz; 1% THD @ 8-ohms) 700 Watts total system power Stereo Power: 100 watts x 2 (20Hz-20kHz; 0.7% THD @ 8-ohms) 200 Watts total system power Digital Decoding & Processing: Double-precision 48-bit Motorola DACs; 192kHz/24-bit DACs, 96kHz/24-bit ADCs DSP: Dolby Digital 5.1/EX, DTS-ES 6.1 Discrete, DTS 96/24/Neo6, Pro Logic IIx/Game Mode, WMA9 Pro, 9 Advanced Surround modes, 7-chanel stereo, Virtual surround bac Inputs: 4 audio/video/s-video, 5 digital ins (2 optical/1 front optical/2 coax), 5.1 multi-channel input, 3 component video, front AV inputs (including optical) |
Outputs: 1 component, 2 audio/video/s-video, headphone output, 7.1 preamp outputs (includes subwoofer) Room EQ: Auto/Manual MCACC (including 5-band EQ), Additional Features: Sleep timer, dimmer option, multi-way loudspeaker binding posts, AM/FM tuner Remote: Preprogrammed with manufacturer codes and 1-line 8-character LCD Dimensions: 16 9/16 " W x 6 1/4" H x 15 13/16" D Weight: 22 lbs. 4 oz. Warranty: 1 year parts & labor MSRP: $365 |
Pros
- Three (3) 40MHz HDTV-compatible component video inputs
- Plays loud
- Flexible amplifier assignments
- Dolby Pro Logic IIx Game Mode
- Front A/V Inputs
- Easy to Setup
Cons
- Auto Setup not accurate for bass management
- No video upconversion
- No On-Screen Display (expected at this price point)
Pioneer VSX-815 Introduction
Despite all of the mid-fi and hi-fi product reviews written by us at Audioholics, we get a steady stream of reader requests for more entry level systems. In fact, it's almost imperative that we provide them because to assume that a manufacturer's flagship products necessarily reflect the quality and usability of its entry-level units ignores the lessons learned from our article on Product Managing Receiver Platforms & Power Ratings .
So, it was with a desire to investigate Pioneer's new entry-level line of receivers that we requested the VSX-815 and HTP-4600 , two products that give us a nice slice of Pioneer's lower-priced offerings. The VSX-815 is a 100 watt x 7 product with auto setup and room EQ. Main features for this receiver include:
- MCACC auto setup with calibration microphone
- 100 watts x 7 (1kHz; 1% THD @ 8-ohms)
- Integrated biamping mode for 5.1 systems (using Surround Back amplifiers)
- Powered Zone 2 (using Surround Back amplifiers) *not independent source
- Programmable remote control with 1-line 8 character LCD
- Speaker delay settings with 0.5ft increments
- Selectable crossover (50/80/100/150/200)
Pioneer VSX-815 First Impressions and Build Quality
The Pioneer VSX-815 is a pretty clean-looking receiver. Source buttons are easily located in the front of the unit - the active source being lit. Two rotating knobs grace the front of the unit on the right side. One is for the Master Volume and one serves as a jog wheel for menu selection and tuning. There are a decent number of inputs on the back of the unit and the receiver even provides for 7.1 channel pre-outs and a 5.1 channel analogue input for a DVD player. The manual was easy to understand and well diagrammed and labeled.
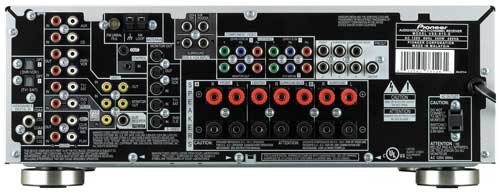
Plenty of inputs for a $365 receiver
Looking at the back of the receiver we see a few significant things. First of all, the receiver has multi-channel preamplifer outputs - almost unheard of at this price point. If you have an extra amplifier lying around you can use it in conjunction with this receiver to achieve better system performance or drive more difficult loads. It also has binding posts for all speaker connections while many other receivers offer spring clips for at least some of the channels. For a receiver that often has a street price under $300 I'm not sure any other connections or features could be added to this unit without Pioneer losing money in the process.
Build Quality
 The VSX-815 is of average build quality for a receiver at this price point. While it states 7 x 100
watts output, that is obviously not an "all channels driven" rating (nor
is it implied in the specs) and based on the power supply and information we could glean from the
components, you can expect to have no trouble powering a set of 8-ohm moderately efficient speakers in
an average sized living room with this receiver.
The VSX-815 is of average build quality for a receiver at this price point. While it states 7 x 100
watts output, that is obviously not an "all channels driven" rating (nor
is it implied in the specs) and based on the power supply and information we could glean from the
components, you can expect to have no trouble powering a set of 8-ohm moderately efficient speakers in
an average sized living room with this receiver.
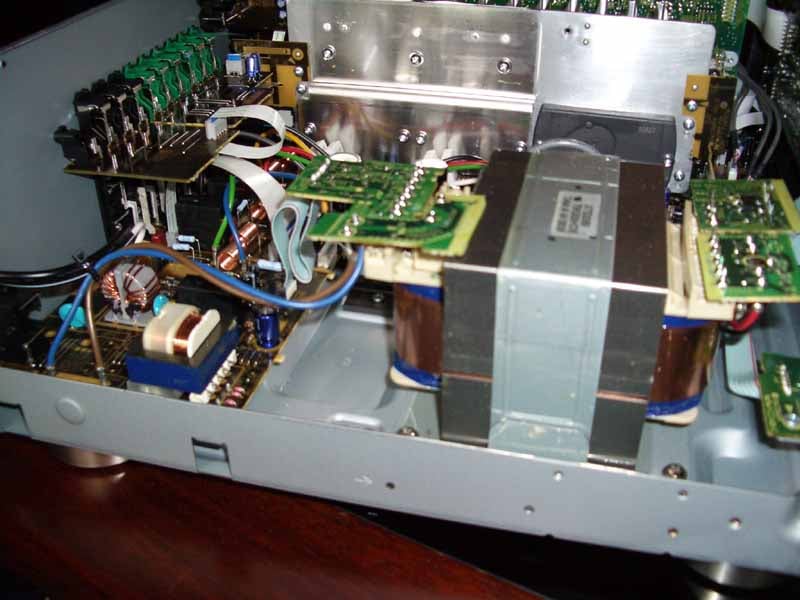
A respectable power transformer and a pair of 4700uF capacitors make up the major components of the power supply. Heat is dispersed through the use of an aluminum radiator well-positioned over air intake vents. A fan is also present just beyond the heat sink fins though I never actually heard it turn on during or just after my listening sessions. The overall layout seems to be organized and efficient. I noticed no apparent issues in terms of grounding or interference and the engineering that went into this product seemed to be very well thought-out.
Pioneer VSX-815 Setup & MCACC Room EQ
Touring the Menu System
The setup on this receiver is accomplished through the System Setup activated by the remote control or front panel of the unit. In either case, the LCD panel will give you abbreviated guidance and indication of where you are in the process and what available options you will have access to. It may take a few times to get used to the menu system. Basically you use the up and down (tune) controls to get to new options, and the left and right controls to effect changes to the system. Backing out is accomplished by pressing the 'Return' button. As the options are brief, let's explore the main items in enough detail to help you through the process:
SB.SYSTEM
This enables you to set the Surround Back amplifiers
to control either the Surround Back speakers (the default), ZONE 2 (which sends the program material
currently selected for the main speakers to another Zone), and BIAMP which makes good use of the two
unused amplifiers in a 5.1 system.
Editor's Note on Biamping Receivers:
We get asked about passive biamping in receivers all the time and it is important to have realistic expectations when attempting it (not to mention taking care to do it properly). When considering the finite output impedance of most AV receivers, the question remains whether there is real benefit for passively biamping a low impedance loudspeaker system when the receiver in question offers such an ability. The idea of passively biamping a speaker system is not so much for added headroom, but for minimizing frequency response variations in amps with finite output impedances offering better system control and smoother frequency response. The best advice here is to try it and determine if it works for your situation. This of course assumes you will be running a 5.1 system, otherwise you will need those two extra amplifiers to power the back channels in a 7.1 configuration
If you want to biamp your main speakers using this feature, there are a couple of requirements:
-
Your main loudspeakers must have a set of "high" and "low"
binding post terminals.
Note: Check with the manufacturerdealer of your loudspeakers to make sure your speakers are in fact biampable and not just biwireable.
- You must remove the jumper which normally connects the "high" and "low" speaker terminals.
- You will need an extra pair of speaker cables (bi-wire cables will not work and will actually damage your receiver.)
To passively bi-amp your Pioneer VSX-815, simply follow these steps:
- Remove the jumpers that join the "hi" and "low" binding post inputs on your main speakers
- Connect the Front Left & Front Right outputs to the "high" binding post inputs of each of the respective loudspeakers
- Connect the Surround Back speaker outputs to the "low" binding post inputs of each of the respective loudspeakers
- Se the SB.SYSTEM setting to "BIAMP"
A. MCACC (Automatic MCACC Setup and Room
Correction)
On the surface, Auto MCACC was impressive in that it
spent significantly more time configuring the system with various bursts and snaps than either the
Yamaha RX-V2500's YPAO or the Denon AV-3805's setup and room EQ systems. In the end, however, it set
both my RBH Sound 1266-LSEs and 61-LSEs to Large (the latter are not full range speakers). This was
likely due to the 61-LSEs being positioned against the back wall which must have produced enough
boundary gain to trip up the system. It nailed the distances, including the subwoofer, which correctly
showed as 10.5 feet. Levels varied quite a bit from my findings; however this may also have to do with
the application of MCACC's 5-band EQ room correction feature.
|
Settings - Manual vs. MCACC |
||||
|---|---|---|---|---|
|
Speaker |
Size
|
Size
|
dB SPL
|
dB SPL
|
|
Front Left |
Small |
Large |
0 |
0 |
|
Front Right |
0 |
+1.0 |
||
|
Center |
Small |
Large |
0 |
0 |
|
Surround Left |
Small |
Large |
+2.0 |
-0.5 |
|
Surround Right |
+2.5 |
+1.0 |
||
|
Subwoofer |
Yes |
Yes |
+3.5 |
-2.0 |
|
Crossover Setting: 80 Hz |
||||
|
Manual Reference Level Calibration to 75 dB SPL |
||||
In terms of Room EQ, here is what the system did using its 5-band equalizer:
|
Settings -MCACC 5-band EQ |
|||||
|---|---|---|---|---|---|
|
Speaker |
40Hz |
125Hz |
250Hz |
4kHz |
13kHz |
|
Front Left |
-5 |
-5 |
+1 |
-2 |
0 |
|
Front Right |
-6 |
+2 |
+1 |
-4 |
-2 |
|
Center |
-5 |
0 |
+3 |
-1 |
0 |
|
Surround Left |
-6 |
-2 |
+6 |
-1 |
0 |
|
Surround Right |
-6 |
-4 |
+6 |
+1 |
+1 |
|
Crossover Setting 80 Hz |
|||||
As you can see, the Room EQ seems to be doing something; the question is whether or not it is helpful. That answer would need to be addressed in several ways. First of all, I began listening to Diana Krall's Love Scenes DVD.
Pioneer VSX-815 Receiver Setup - Part Two
Diana Krall: Love Scenes (DTS)
To quickly examine what MCACC was doing I
listened to this disc with the receiver as it was automatically configured. I felt that the system
sounded decent, but there were some odd things going on with regard to the low frequency extension (it
was not as tight as I'd hoped). I also felt that the decay time of the reverb present in the recording
was somewhat truncated or reduced. First of all, the MCACC had configured all of my main RBH Sound
speakers as 'Large', giving them full range audio bandwidth. As an apparent result of this, the system
had also lowered my RBH Sound 1010-SEP subwoofer level by 5.5dB. The RBH Sound 1266-LSEs sound great
and can really push some low end, but with an entry level receiver you want to reduce the load to the
amplifier whenever possible and let your powered subwoofer pick up the slack. This frees up your
receiver's amplifier to power your main speakers through a narrower slice of the total program
bandwidth.
Editor's Note on the Review System:
This review scenario was admittedly difficult for the Pioneer receiver. We set it up in Reference System 3, which features two RBH Sound 1266-LSE loudspeakers in addition to a pair of 61-LSE surrounds, a 661-LSE center channel and a 1010-SEP powered subwoofer. The 1266-LSEs are moderately efficient 4-ohm speakers - a difficult load for any receiver in this price range. To help the scenario, as indicated in the listening tests, we configured all speakers to Small to reduce the load to the amplifier and all listening tests are taking into account the fact that this receiver will likely be used with smaller, less expensive, andor more efficient loudspeakers.
With the default MCACC settings I felt the overall room sounded less "live", with the wonderful natural reverb coming from Diana's Krall's vocals being clipped just a bit short. Reconciling this with the settings, this was likely due to the correction put on the front speakers at 4 kHz.
In speaking further about the MCACC system, there are several ways to use the Room EQ available via the "Acoustic EQ" button on the remote control. When any Room EQ mode is selected, the MCACC logo lights up on the front of the receiver to indicate that you have it engaged. You can cycle through four possible settings: ALL CH (where all channels are fully EQ'd per the settings), F. ALIGN (a somewhat cryptic mode that appears to apply more correction on the surround and center channel speakers), CUSTOM 1/2 (two custom settings stored as Manual MCACC configurations), and EQ OFF.
SP SETUP
This section allows setup of the loudspeaker size, crossover setting, channel trim levels and speaker
distancedelay. When configuring the system manually I arrived at the following settings (also noted
above):
|
Settings - Manual |
|||
|---|---|---|---|
|
Speaker |
Size |
Distance |
dB SPL |
|
Front Left |
Small |
9.0 |
0 |
|
Front Right |
9.0 |
+1.0 |
|
|
Center |
Small |
8.5 |
0 |
|
Surround Left |
Small |
9.5 |
-0.5 |
|
Surround Right |
9.5 |
+1.0 |
|
|
Subwoofer |
Yes |
10.0 |
-2.0 |
|
Crossover Setting 80 Hz |
|||
|
Manual Reference Level Calibration to 75 dB SPL |
|||
INPUT ASSIGN
In the Input Assignment section you can assign source devices to the digital coax and optical inputs.
The digital inputs are numbered as in a higher-end receiverprocessor, but also provide labels for
suggested input assignments. The three component inputs, also numbered, can have devices assigned to
them as well.
M. MCACC (Manual MCACC Setup and Room Correction)
The Manual MCACC setup section allows you to run
some or all of the MCACC tests one at a time so as to fine tune or re-tune your system as needed. In
addition to being able to use the included microphone and perform an automatic speakerroom calibration
and setup, the Pioneer VSX-815 provides for manual tweaking of the
MCACC system by way of an
integrated
5-band EQ. To do this you will want to select
the C1 or C2 ADJ EQ settings which give you two custom user settings for the multi-channel 5-band
EQ.
This is a neat feature to include in an entry level receiver and it can be used to tame, adjust, or otherwise alter what the Automatic MCACC system configures for the room. The graphical representation of the 5-band EQ is helpful and from the listening position you can visually associate what you are doing with the audible effects. Obviously this is not a tool that will effectively tame any real bass issues due to its wide Q (the "width" of frequencies affected when making adjustments to a particular band) but it does serve as an effective way to perhaps blend speakers that posess differing tonal characteristic or simply customize the sound as desired in your room.
OTHER
DRC (Dynamic Range Control) for Dolby Digital and DTS soundtracks can be found in this section along
with Dual Mono
&
LFE attentuation for limiting ultra-low bass frequencies present in DTS
&
Dolby Digital source material. If, for example, you are experiencing a lot of distortion while using a
smaller subwoofer system (perhaps one that use single or multiple 6.5" drivers), you can enable this to
drop out 10dB of gain. This allows a less robust system to attain better overall performance and
efficiency.
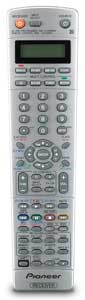
Pioneer VSX-815 XXD3086 Programmable Remote Control
 Pros
Pros
- Lots of buttons for all necessary functions
- Super easy programmable remote with embedded preset codes
- Single line 8-character LCD for device identification
- Can control 7 additional devices
Cons
- No backlight
- No learning functions
- Does not have some of the latest TV manufacturers
- Quantity of buttons makes "touch" memorization of remote functions difficult
If I were to design a website for this remote I would name it "buttonaholics". There are more buttons on this remote than on the original set of Star Trek . Pioneer saw fit to add a 'shift' function to the remote so that even the buttons could have buttons. On a more serious note, the Pioneer XXD3086 remote was flexible and programmable. If you so desired, it could conceivably control your entire AV system. A total of 7 additional components can be programmed into this unit using manufacturers' preset codes (we did two devices and stopped there).
If you have an odd device or (like me) are using a new product from the latest Korean manufacturer to hit the US market, you may be out of luck. The manual doesn't list manufacturers' codes as they are all stored and selectable on the remote itself. The good news is that a lot of this hardware is shared throughout the industry, so another manufacturers' code might work with your set even if it's not the correct name. Nevertheless, if you think you need a learning remote you can take a look at the VSK-915K which adds this along with some other goodies like composite to s-video upconversion.
The one-line, 8-character LCD screen lets you know what device you are controlling and you can even skip through the inputs one at a time with the "Input Select" button - which I suppose is comparable to channel surfing on a TV.
There is no light on the remote, so using it in the dark will be tough. I'm a fan of fixed-button remote controls, but the sheer number on the XXD3086 will render it hard to memorize beyond the volume and directional buttons (though to their credit, Pioneer did attempt to vary button sizing to help.)
Overall this is an average remote that covers all the bases in terms of control. Considering the price of the receiver costs less than some universal remote controls I am familiar with, I think this is about all we could ask for.
Pioneer VSX-815 Receiver Listening Tests
These listening tests were conducted with MCACC disengaged, all speakers set to 'Small', and a crossover setting of 80Hz.
 DVD-Audio:
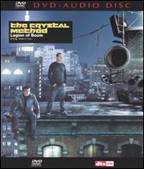
The Crystal Method:
Legion of Boom
DVD-Audio:
The Crystal Method:
Legion of Boom
This disc, being almost completely synthesized with
the exception of instrument sweeteners and guest vocalists, puts forth a nice pinpoint mix or
percussive surround information you don't typically hear unless you're a techno fan (the Crystal Method
is so far off the beaten path it's hard to drop them into any category). Imaging was decent on the RBH
Sound 1266-LSEs but I could tell that they would have benefited from more power and amplifier control
There was no doubt, however, that the Pioneer could play
loud
, but it tended to start to lose
detail once I extended it past 85dB at the seated position. Track 5, "I Know It's You", was a good
overall mix that made great use of the surrounds as well as the full frequency spectrum and reminded me
a lot of their older sounds (which I happen to like). I liked the subtle effects in the surrounds (and
guest starring vocals by Milla Jovovich) and the room-filling reverb, which came across as smooth and
airy. A pervasive low end driving growl appears near the end of the song and seemed to carry seamlessly
from the lower subwoofer range through to the main speakers.
Track 6, "Realizer", gave me a bit more of high frequency to listen to and involved some smooth pans across the soundstage, which was narrow but pleasing. Overall, this album sounded wonderful (and loud) on the Pioneer. If you need the volume, it's there, though with some constraints due to the capabilities of the power supply when driving low impedance, moderately efficient speakers such as my reference setup.
 CD:
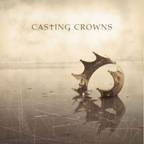
Casting Crowns: Casting Crowns
CD:
Casting Crowns: Casting Crowns
This is probably one of my favorite albums (my
two-year-old can sing most of the choruses) and I wanted to evaluate it on the Pioneer VSX-815. "What
If His People Prayed" starts off the CD and features a lot of compressed, processed electric guitars in
the chorus which present themselves as a reinforcing wall to the lyrics. Combined with the vocals, it
pushed a lot of material through the 1266-LSEs but didn't seem to run out of steam, even at higher
volumes. Track 2, "If We Are the Body", delivered clean vocals that were well-imaged between the front
speakers. I've heard more detail with more robust amplifiers, but I couldn't fault the VSX-815
considering its value and ability to push the SPLs I heard coming from my speakers.
Casting Crowns is a Christian rock band whose music finds its way into worship music across the country's many churches and radio stations - spanning multiple denominations and featuring both male and female lead vocalists. They combine solid rock rhythms with meaningful lyrics and diverse instrumentation, including violins, drums, bass, keys, accordion, and solid backing vocals. The music is recorded and mixed in Tennessee and I have found the mixes to be solid, though a bit compressed (unfortunately to fit in with today's "louder is better" radio mixes).
Some of their slower songs, like "Who Am I" and "Here I Go Again" gave me some examples of smooth vocal reverb and a simpler mix during verses, which proved to be well-balanced and finely detailed, with backing vocals coming across as well-articulated. On some more compressed tracks I felt that cranking up the Pioneer resulted in a more recessed sound with loss of some of the soundstage and detail.
An interesting item to note is that the VSX-815 has an audibly clean output gain stage until the volume hits -18. At that point, a noticeable hiss emerges from the speakers. This seemed to indicate that as the preamplification approached its maximum gain, it was introducing audible noise to the outputs. Turn the dial to -19 and the noise goes away. While this is certainly fascinating to note, the fact of the matter is, if you are playing the system at that level, noise is the least thing you will be concerning yourself with as it will be entirely masked by the output levels.
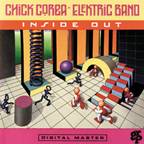 CD:
Chick Corea Elektric Band: Inside
Out
CD:
Chick Corea Elektric Band: Inside
Out
Wanting to listen to some music with a greater
dynamic range, I popped in Chick Corea's Inside Out album. As expected, I was able to crank up the
Pioneer louder and enjoy some real dynamics from an album that was mastered before the mastering
engineering profession was told to cater to the whims of record label execs who think that the loudest
songs sell the most albums.
Editor's Note on Compression and Digital Clipping in Recordings:
Please refer to the articles referenced below for information regarding these issues. We see much of this happening these days with RockPop music and would like to see more awareness in the recording studio to appease us audiophiles that demand higher quality recordings of the artists we admire.
This album really allowed the Pioneer to shine. Eric Marienthal's sax in Track 2 just filled the room, and the added reverb sounded smooth and open. Dave Weckl's solid and rhythmic drumming in track 6, "Kicker" was impressive as ever and came through the 1266-LSEs convincingly and without seeming to lose anything in translation. Overall, I felt that 2-channel sound on the VSX-815 was excellent for this level of receiver. You can get better detail and control, but you'll be spending more to do so. How Pioneer gets decent sound plus the features it has in this box for only $365 is a manufacturing mystery that should please potential owners everywhere.
 DVD:
Star Wars Episode IV: A New
Hope
DVD:
Star Wars Episode IV: A New
Hope
Two-channel sounded nice, but multi-channel was what
this system was made for. I "needle-dropped" Star Wars into the
Denon
DVD-5900
and cranked up the volume. The opening battle sequence was phenomenal, with good imaging
in the surrounds and ample amounts of laser blasts and LFE sweetening that exercised all of my
loudspeakers. The light speed engines on the Millennium Falcon have undergone some exceptional
enhancements in the new Star Wars DVDs. The final Death Star battle sequence has a good mix of music
score and X-wing/Tie-fighter-bys that showed excellent front-to-back imaging in the system. Star Wars
is a good example of how this receiver excels in home theater use. With a greater amount of low
frequency information being routed to a dedicated subwoofer, the Pioneer can focus on driving the
center channel and providing stereo and surround effects
&
music tracks. This is a great home
theater receiver for the money.
Pioneer VSX-815 Conclusions & Overall Perceptions
I am hesitant to say anything too negative about a $365 receiver, but for good reason. The VSX-815 offers a tremendous amount of features for the money and is not overtly lacking in anything that others in its price range might offer. Combining a host of video and audio options with a solid interface, and an auto setup feature that may or may not be to your liking, this Pioneer entry level receiver can power your home theater to very high SPL levels. We also were impressed by how well it tackled the unfair challenge we put before it with our Reference System speakers - and our ratings take this into account. While those demanding only the best in terms of signal to noise ratios and amplifier power will have to shell out for more power, this unit should be more than sufficient to drive any 8-ohm home theater speakers within its comparative price range. There are a host of retail dealers that carry this unit and you should be able to give one a test drive and see if it has the features you want at this price point. My guess is it will and you'll be able to enter the world of home theater with a smile on your face and some money still left in your wallet.
The Score Card
The scoring below is based on each piece of equipment doing the duty it is designed for. The numbers are weighed heavily with respect to the individual cost of each unit, thus giving a rating roughly equal to:
Performance × Price Factor/Value = Rating
Audioholics.com note: The ratings indicated below are based on subjective listening and objective testing of the product in question. The rating scale is based on performance/value ratio. If you notice better performing products in future reviews that have lower numbers in certain areas, be aware that the value factor is most likely the culprit. Other Audioholics reviewers may rate products solely based on performance, and each reviewer has his/her own system for ratings.
Audioholics Rating Scale
 — Excellent
- — Very Good
- — Good
- — Fair
- — Poor
| Metric | Rating |
|---|---|
| Multi-channel Audio Performance | |
| Two-channel Audio Performance | |
| Bass Management | |
| Build Quality | |
| Fit and Finish | |
| Ergonomics & Usability | |
| Ease of Setup | |
| Features | |
| Remote Control | |
| Performance | |
| Value |
Clint Deboer was terminated from Audioholics for misconduct on April 4th, 2014. He no longer represents Audioholics in any fashion.
View full profile