
VApex 100" Electric Projector Screen Review
VApex 100" Electric Projector Screen
- Product Name: VApex 100" Electric Projector Screen
- Manufacturer: Visual Apex
- Performance Rating:


- Value Rating:
- Review Date: December 12, 2011 04:05
- MSRP: $ 319.00
- Screen material: 1.1 gain CinemaWhite
- Format: 16:9
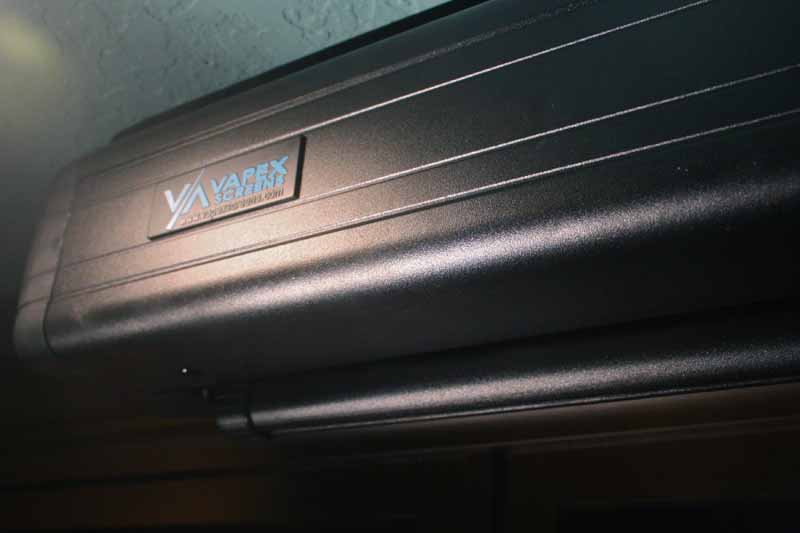
- Case Material: Black aluminum
- Remote: RF w/laser pointer
- RS485 (RS232C-compatible) control
- Size: 100" diagonal (92, 100, 106, 120 available)
- Viewable size: 87" x 49"
- Includes: Block & stud wall mounting hardware
Pros
- Super easy to install
- RF remote w/laser pointer
- 12V wireless trigger included!
- Quiet operation
- 80 degree viewing angle
- 18" black drop
- 3-way wall switch included
- Removable power cable
- Vertical limit setting
Cons
- None at this price
VApex Electric Screen Full Review
 With any screen review we started with the features - what are we getting into and what can we expect? Well, for starters, all of those optional accessories that you;d have to pay extra for from most manufacturers seem to be included with the VApex screens - at least the ones you'd really want - and even some you might not expect. First of all, take the installation. The included L-bracket makes it easy to install the screen on a ceiling or wall - take your pick. You may need some additional hardware to secure it to, say, a masonry ceiling, but for residential applications, it's likely that everything you need is already included. We secured our review sample to the ceiling using wood screws and the brackets, allowing us to position the screen just behind a row of in-ceiling can lights and in front of a row of built-in bookcases. The installation was actually quite impressive since it was a dedicated study with a full wrap-around library. For this home, the ceiling was 10 feet and the additional 18" of black drop came in handy so our screen didn't demand a dramatic viewing angle.
Features and Favorites
So why is the VApex Electric screen so amazing. Well, for $319 you get a whole LOT of features. Check out what's included:
- RF Remote
An RF remote means you never have to point the remote at the screen - and Visual Apex even includes the batteries! This remote includes a laser pointer, but other than that - it's Up, Down and Stop. And you know what? That's all you need. - Installation Options
As with their Electric Tensioned screens, Visual Apex' VApex screens include hardware that is flexible enough to handle either a ceiling or wall mounted position. On top of that you can put the screen up in both wood and block applications, just have a drill/driver handy and the proper bits (hey, they can't give you everything!) - Wireless RF Trigger
If you thought the RF remote was cool - Visual Apex' included RF Trigger means that you can have your screen drop and rise when your projector is turned on and off - automatically. Configuring this is simple and all the hardware is included, provided your projector has the standard 1/8" mini jack and not the proprietary DC charging jack as some models are wont to include. When you get the RF Trigger installed, you can all but throw away the remote control (don't really, you might need it some day.) - 18" Black Drop
In addition to allowing you to set the exact drop distance, and even tweak the retract distance, the VApex screen has a full 18" of black at the top so that you can send the screen lower in order to avoid any keystoning effects on ceiling-mounted projectors with a large vertical offset.It's surprising how many projectors overdue to the offset, so this is no small matter.
Build Quality
We liked the build quality of Visual Apex' Tensioned Electric screens and so it was no surprise to find that the Standard Electric screens were just as well-made. In fact, the quality reminded us of a much pricier company who manufactures similar screens. The mounting system is very flexible and we liked how it allowed for left-to-right/horizontal adjustment while holding the screen securely in place during installation. Since this is a non-tensioned screen, the edges of the screen will have a tendency to curl inwards, but this wasn't something we noticed much of during our initial installation and the weight of the bottom bar was sufficient to keep a nice amount of even, vertical tension on the screen during use.
The standard 1.1 gain Glass Fiber Matte White screen had a neutral texture that didn't cause any hotspots, nor moire effect during use, even with 3D imagery. On top of that, the test images we threw up were natural in presentation and not colored. This seems to be an easy screen to use for reference material and it's easy to get a consistent picture with no uniformity issues. It was a bit thinner in design than the CinemaWhite screen material we saw with the Tensioned Electric screens, so if you want what appears to be a better material, you might want to save up for the upgrade. The included accessories (remote, 12V RF trigger, etc) came in a separate box that protected it from shipping. Each component had instructions for attachment (when applicable) and use.
Included Accessories
The 100" VApex Electric Projection Screen includes the following accessories and installation parts:
- RF remote control with laser pointer
- Wireless RF 12V trigger system
- 3-way wall switch
- Removable power cord
- Sliding L brackets
- Vertical limit adjustment tool
- Wireless 12V trigger tool
- Mounting hardware for stud & masonry walls
The VApex Electric Screen we tested was 100" diagonal (model VAPEX9100SE) but the screen is also available in 120", 106", 100" and 92" screen sizes.
Installation and Use
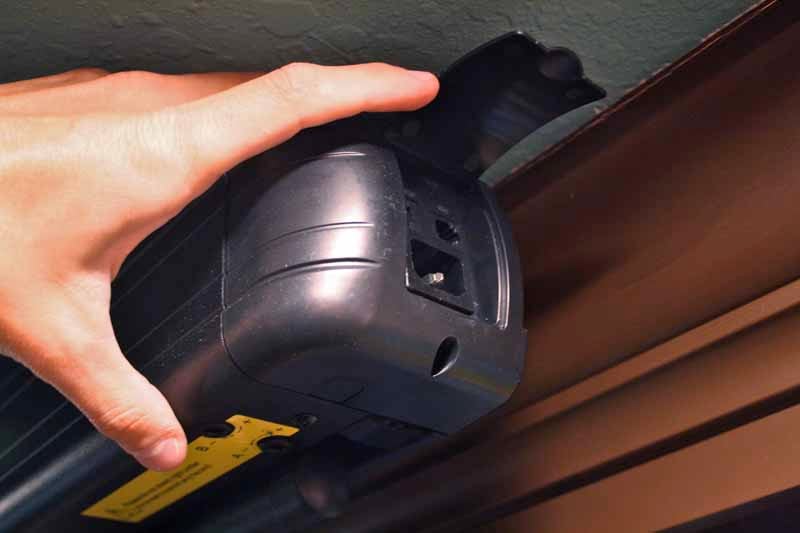
Installation was a breeze with this screen. All we had to do was measure out our desired installation points and locate studs. Locating the studs is a matter of preference, but since we had a ceiling power receptacle, we had a great built-in reference point and could measure over to find the positions of our ceiling joists. Once we marked our locations, we tested them with a small bit and, once we hit wood, swapped out for our Philips bit. Placing the L-brackets in place, we found we could easily and securely fasten them to the ceiling with two 3" wood screws and a couple of washers to ensure they had a snug and secure fit. The design of the L-brackets is such that you can use 4 screws for a secure concrete installation, or two centrally-located fasteners for an anchored stud install.
With a helper (and twin ladders), we lifted the screen up and loaded it into the brackets, making sure we caught the overhang points securely before letting go and verifying our horizontal positioning. We also had to make sure - in our case - that the power cable for the screen was correctly routed prior to loading the screen in place so that we could make our electrical connection without the cable having to wrap around the side of the screen.
Sliding the screen slightly to the right we again climbed our ladders and secured the brackets so that they held the screen tightly. The screen was now installed. This was one of the simplest installations we had ever done.
Setting the Screen Height
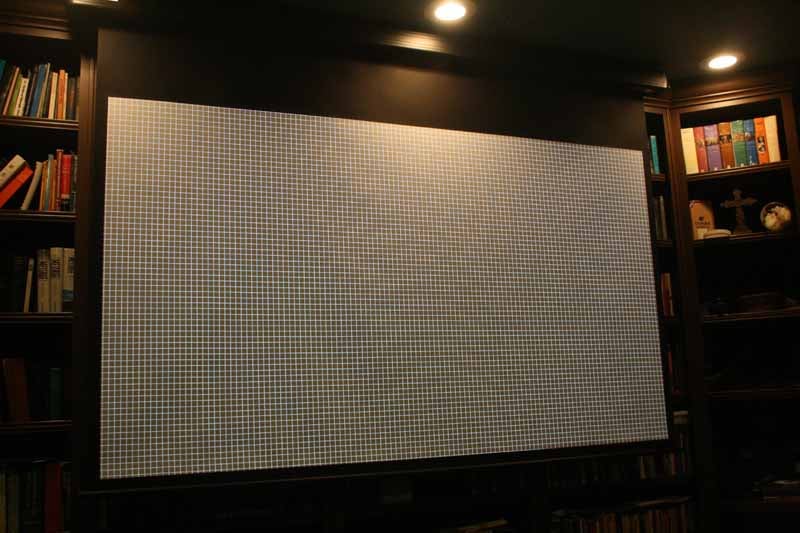
Right off the bat, the RF remote worked perfectly, but we needed to set the perfect drop height for the screen so it would be at the proper height for our projector. Since our BenQ model didn't include any vertical lens shift, our goal was to set the screen height such that we didn't incur any vertical keystoning. To accomplish this we used the included yellow "adjustment wand" which is a plastic tool made to fit perfectly into the set screws located within the projector body. On the upper right of the screen A & B adjustment points let you set both the drop and retract end points. Each time you make an adjustment, you can re-drop the screen using the RF remote to see if it's perfectly lined up where it needs to be. The adjustments are best done with a fixed pattern - such as those found on most projectors and made accessible by the menu system or remote control. We used a grid and were able to line up the screen to near-perfect positioning.
Next up came the installation of the accessories. The 12V RF trigger didn't fit in our projector's absolutely lame DC-charger-style connection so we opted to use the very capable RF remote. We were able to use the RF Trigger in our review of the VApex Tensioned Electric Projector Screen review, so check that out if you're interested in reading more about it. The other thing that fascinated us was the included 3-button walls switch. With some longer cable, you can extend the switch to mount it near the entrance to the room. If you just want something as a backup, you can also put it into the wall right next to the screen, which should be a simple endeavor if you're against an interior wall. If not, you can still get it done, it may just take some more planning and elbow grease.
Viewing Tests
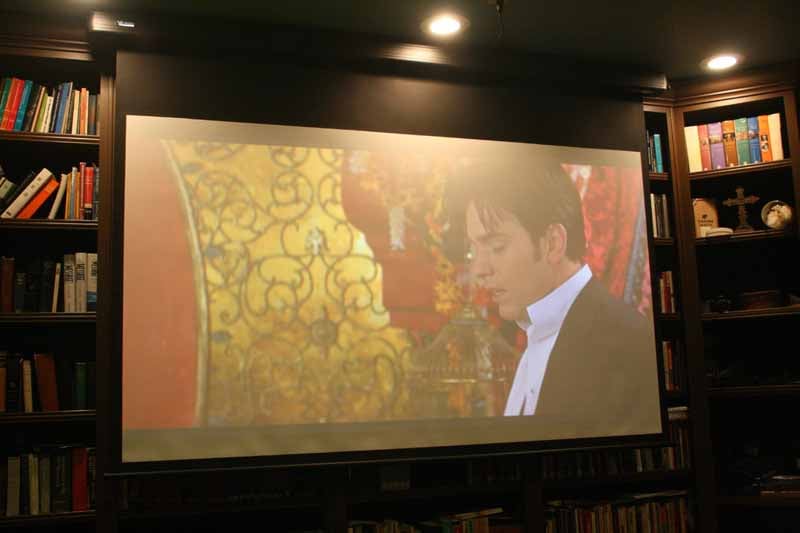
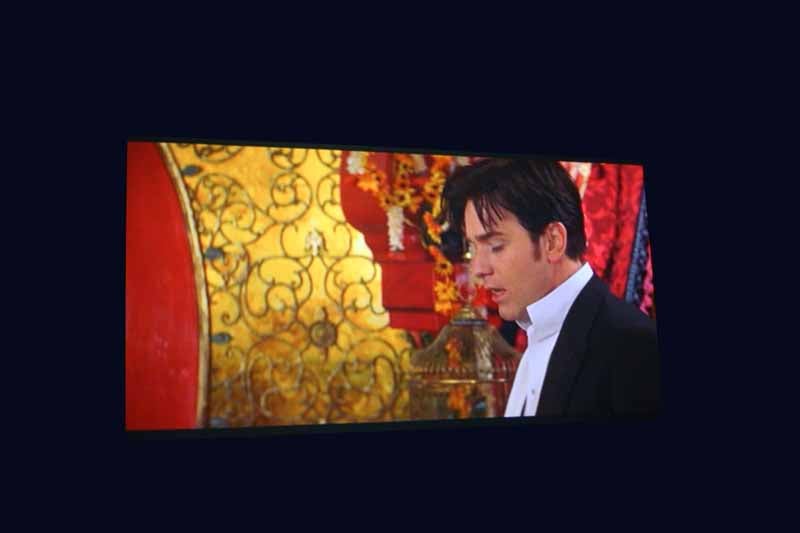
We watched a variety of material on this screen. First up was some of the cableTV content available from the local provider. Colors were rich, but we wanted to check out some higher resolution material and so quickly opted to pop in a Blu-ray disc. We Popped in Moulin Rouge and settled back to gaze at the stunning clarity and color of the film as it presented itself on the VApex screen. The picture was amazing and this is a great movie for testing out natural depth and black levels. Since our room was completely light-controlled, both were excellent. Check out the same image taken in both ambient light as well as the dark with all of the lights turned off:
Conclusion
Overall this is an amazing screen. But what's fascinating is that the price is low enough that it might just draw people who hadn't thought to do the projector route - or perhaps who felt they couldn't afford a screen. To get a handle on the budget, let's take a quick look at what you save going with VApex screen over the competition. Once you check this out you may then have one more thing to figure into your thought process before you scratch "projector" off your list - or perhaps before you allocate the additional funds for a more expensive screen. For our comparison we'll use a 106" Electric Screen:
| Manufacturer | Description | Model |
Size | Screen Material |
Gain |
Remote | Wall Control | Price |
|---|---|---|---|---|---|---|---|---|
| Da-Lite | Designer Cinema Electrol | 92671D | 106" |
HC Matte White |
1.1 | No |
No |
$620 |
| VApex |
Standard Electric |
9120SE |
106" |
GF Matte White |
1.1 | RF/Wi12V |
Yes |
$339 |
| Draper | Baronet Electric |
129125-HD |
106" |
Flex Matte Wht |
1.0 |
No |
No | $623 |
| Elite | Spectrum Series |
Electric106X |
106" |
MaxWhite | 1.1 | IR/12V | No | $193 |
| Elite | VMAX 2 Series |
VMAX106UWH2 | 106" |
MaxWhite | 1.1 | RF/IR/12V | Yes | $348 |
| Vutec | Lectric 1 |
LI050-089MWW | 103" |
Matte White |
1.1 | RF/IR | Yes | $672 |
As you can see, there are compelling reasons why you would want to consider giving some of the cheaper guys a shot. If anything it should help to note that I haven't run into too many people who have had projector screen failures. Still, it happens - and that's why you want to be sure you're with a company that stands by their products. In that case, I think VisualApex has more than proven themselves. For that reason, they get our thumbs up on this new direction. If you thought you couldn't afford a projector or a real screen system, perhaps now's the time to reconsider.
The Score Card
The scoring below is based on each piece of equipment doing the duty it is designed for. The numbers are weighed heavily with respect to the individual cost of each unit, thus giving a rating roughly equal to:
Performance × Price Factor/Value = Rating
Audioholics.com note: The ratings indicated below are based on subjective listening and objective testing of the product in question. The rating scale is based on performance/value ratio. If you notice better performing products in future reviews that have lower numbers in certain areas, be aware that the value factor is most likely the culprit. Other Audioholics reviewers may rate products solely based on performance, and each reviewer has his/her own system for ratings.
Audioholics Rating Scale
 — Excellent
- — Very Good
- — Good
- — Fair
- — Poor
| Metric | Rating |
|---|---|
| Build Quality | |
| Ergonomics & Usability | |
| Ease of Setup | |
| Features | |
| Remote Control | |
| Fit and Finish | |
| Performance | |
| Value |
Clint Deboer was terminated from Audioholics for misconduct on April 4th, 2014. He no longer represents Audioholics in any fashion.
View full profile