
Focupix HDVio Electric Screen with RF Remote
Focupix Electric Screen with RF Remote
- Product Name: HDVio 16:9 Electric Screen
- Manufacturer: Focupix
- Distributor: HTDepot.com
- Performance Rating:


- Value Rating:
- Review Date: May 05, 2008 08:10
- MSRP: $ 399
- Screen material: High Contrast Grey
- Fabric: anti-static, anti-acid fabric (prevents dust accumulation, mildew proof)
- Format: 16:9
- Case Material: aluminum, titanium grey
- Remote: RF (Radio Frequency)
- Size: 110" diagonal (96" x 54")
- Viewable size: 104" (91" x 51")
- End-to-end size: 102" x 65"
- Includes: Block wall mounting hardware
Pros
- Super easy to install
- RF remote with wired backup
- Flexible power options
- Quiet operation
Cons
- No IR or 12VDC trigger control
- Doesn't include hardware for stud installation
HDVio Intro, Features and Build Quality
We were more than skeptical when we first heard of the Focupix electric screens. In fact, that's a bit of an understatement. Their retail price hovered around $799 for a 104-inch screen, however the typical street price was just $329.99. With a retail drop-off that steep we wondered how on earth anyone could pack enough equipment into the box to make this screen actually function. But it was too late - our interest was piqued. It turns out these electric screens must be easier to make than I thought. The overall quality and performance of the Focupix HDVio screen had us rethinking what an electric screen should truly cost the average consumer.
Features and Favorites
 What's nice
about an electric screen is that it opens up the possibilities. Focupix added
some real niceties that stirs the pot and brings a lot of value to consumers:
What's nice
about an electric screen is that it opens up the possibilities. Focupix added
some real niceties that stirs the pot and brings a lot of value to consumers:
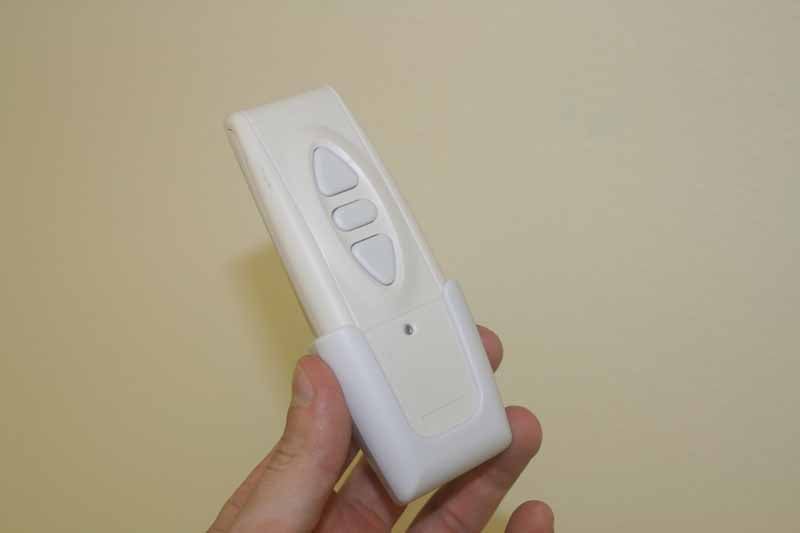
- RF remote
Both a blessing and a curse, an RF remote is included in the package. While this leads to exceptional performance without requiring line-of-sight, there are some trade-offs we'll get to later in the review.
- Super-easy Installation
The installation steps are so easy it's not even necessary to break out the instruction manual.
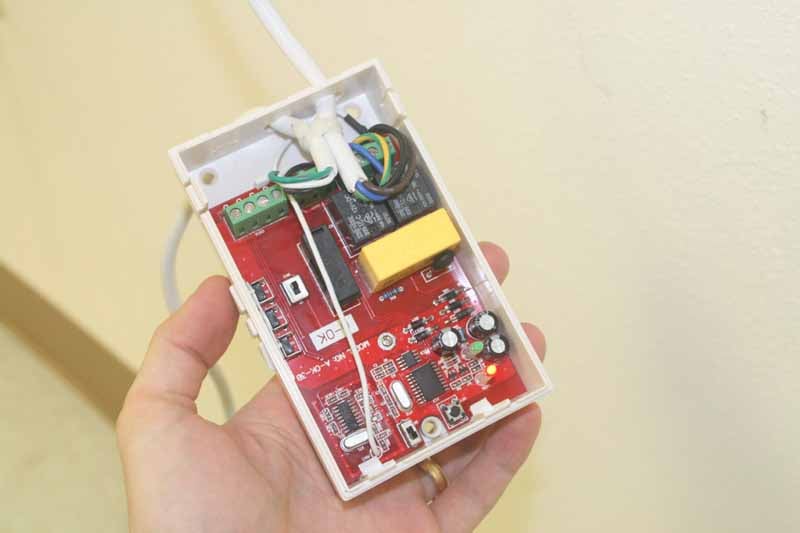
- Hard-wired control and flexible
power options
Rather than leave users in a lurch with an RF remote and no other way to control the projector, Focupix opted for the more convenient and safe hardwired backup - just in case. This is also the box which receives power for the projector and feeds it to the main screen. You can easily wire a hard power line to it, allowing for an almost endless amount of installation options which do not require a dangling power cord.
- High
Contrast Grey Screen material (with other options)
While Focupix offers an array of screen materials, including Matte White (1.3 gain), BriteG (2.0 gain), High Gain (2.2 gain), and Grey1.8 (1.8 gain) we opted for the High Contrast Grey (0.9 gain) in order to maximize black levels during presentations which were not always in the best of lighting conditions.
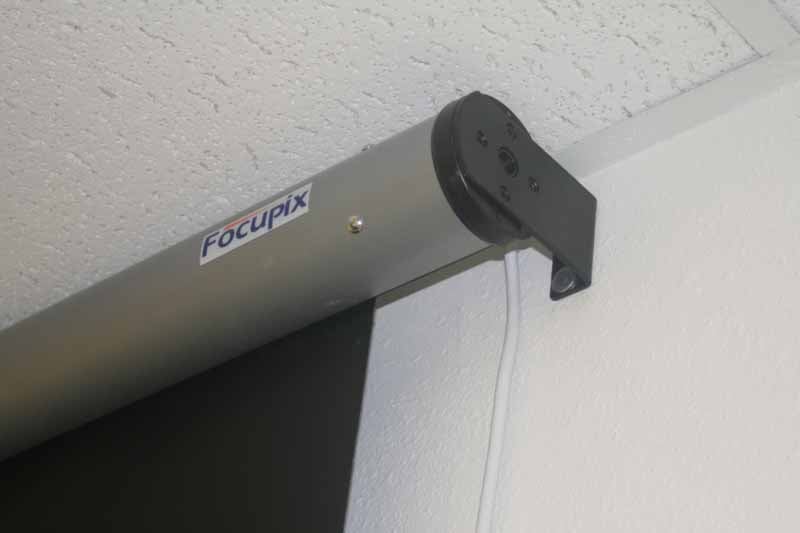
Build Quality
 The electric screen system came well-packed, in a box
that had Styrofoam surrounds to protect the main unit's aluminum enclosure. The
main system was wrapped in plastic and didn't show any signs of wear from the
shipping process. Once I pulled the unit from the box, I quickly realized that
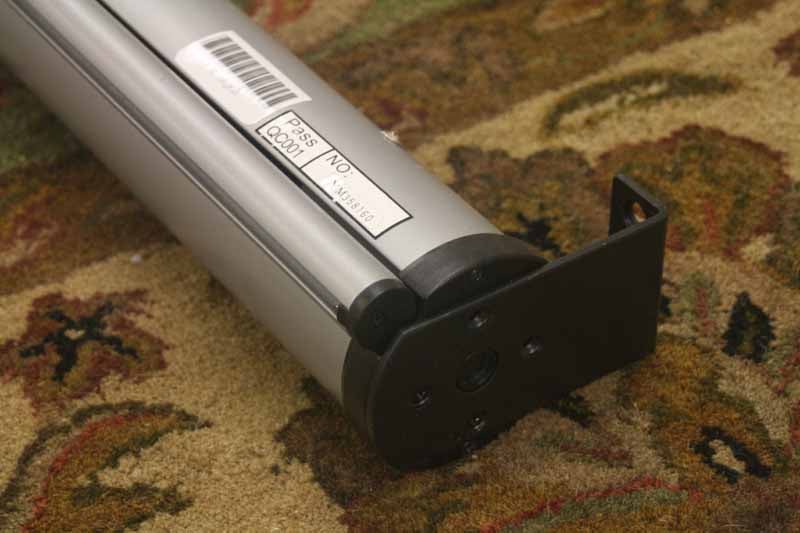
Focupix had put a lot of care into the design of the projector screen. Taking a
close look at the mounting hardware I noted that the system used four machine
thread "bugle head" screws which mounted flush into the wall/ceiling
bracket. In addition, the center of the bracket had a hole which overlaid a
circular nipple which centered the projector system and ensured that there
could be no slippage or misalignment of the screws.
The electric screen system came well-packed, in a box
that had Styrofoam surrounds to protect the main unit's aluminum enclosure. The
main system was wrapped in plastic and didn't show any signs of wear from the
shipping process. Once I pulled the unit from the box, I quickly realized that
Focupix had put a lot of care into the design of the projector screen. Taking a
close look at the mounting hardware I noted that the system used four machine
thread "bugle head" screws which mounted flush into the wall/ceiling
bracket. In addition, the center of the bracket had a hole which overlaid a
circular nipple which centered the projector system and ensured that there
could be no slippage or misalignment of the screws.
The screen material itself is sturdy and smooth. I noticed no obvious imperfections or anything that would disrupt the picture or cause me to see any sort of patterns. In addition, we put a lantern behind the screen and turned it on with the lights out. I'd say the screen is around 90-95% opaque, so light from your projector won't be passing through the screen to the wall behind it. The black surround on the screen is dense and rather thick, in terms of width. I actually like this, though it cuts back on the viewable screen size. Keep this in mind as you select your screen as it will surely impact your image. Here is a rough guide of the available sizes for the HDVio Electric line:
- 120" diagonal = 113" viewable
- 110" diagonal = 104" viewable
- 100" diagonal = 95" viewable
- 92" diagonal = 86" viewable
- 90" diagonal = 84" viewable
- 80" diagonal = 77" viewable
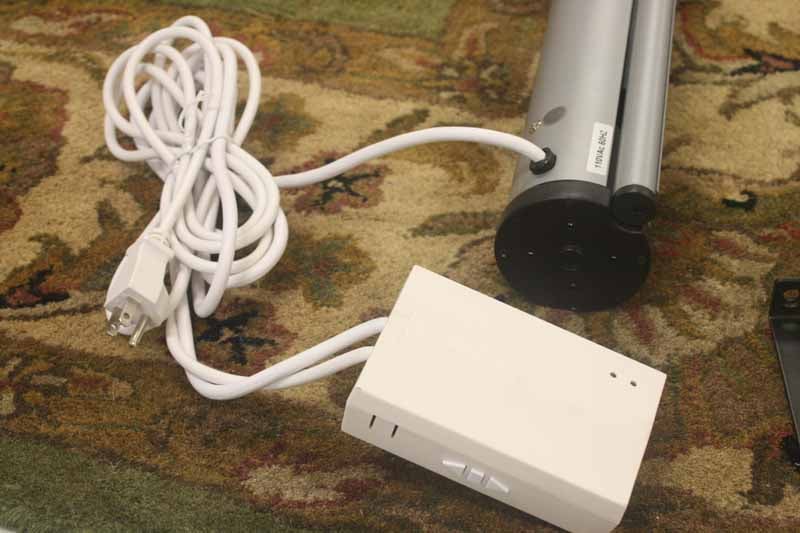 The
manual controller and power box was housed in a plastic enclosure which didn't
look terribly modern, but provided a good access point for AC power. The
controller also gives the user a reliable backup plan in the event that the
primary RF remote is misplaced. I would have liked to have seen a slightly more
robust set of connection terminals, as romex would undoubtedly be difficult to
insert into this system - putting way to much tension on the screw-down
terminals. A metal box with a rear-access option and metal screw-down terminals
would have made this the perfect box for hard-wiring the screen.
The
manual controller and power box was housed in a plastic enclosure which didn't
look terribly modern, but provided a good access point for AC power. The
controller also gives the user a reliable backup plan in the event that the
primary RF remote is misplaced. I would have liked to have seen a slightly more
robust set of connection terminals, as romex would undoubtedly be difficult to
insert into this system - putting way to much tension on the screw-down
terminals. A metal box with a rear-access option and metal screw-down terminals
would have made this the perfect box for hard-wiring the screen.
HDVio Installation and Viewing Tests
 The actual installation of this projector was so easy
it's hard to come up with enough words to put it into an actual paragraph. Two
people are recommended as you can then easily mark the correct position of the
electric screen system on the wall. Here are my recommended supplies for a stud
installation:
The actual installation of this projector was so easy
it's hard to come up with enough words to put it into an actual paragraph. Two
people are recommended as you can then easily mark the correct position of the
electric screen system on the wall. Here are my recommended supplies for a stud
installation:
- Four wood screws of sufficient depth (not included)
- Four steel washers (not included)
- Philips screw driver
- Level
- Cordless drill with drill bit and Philips bit
- Drywall anchors
- Optional (if you can't hit at least one stud): set of 4 toggle bolts
We were able to hit studs on 3 out of four screws. The reason is that we had an ample-sized header in our room that caught both top holes of the wall anchor. Locating the one side to a vertical stud allowed us to catch one more. Given the weight of the electric screen this was extremely secure and we felt that using a drywall anchor for the fourth hole was a reasonable move.
To begin installation, first decide on the location. Since the unit requires power, you'll need to decide if you want to hire an electrician to permanently wire up the electric screen, or run a power box high on the wall so you can simply plug the unit in without running a cord down your wall. In our installation, which took place in a local church's Sunday School room, we opted to have the electrician follow code but allow us to wire the power into the ceiling, eliminating all visible wiring from the room.
Once you locate the position for the screen, take care to locate your studs (the system comes with anchors for cinderblock, but we'll assume stud/wall installation as that is more common with our readers). Once you've found the studs, see if you can mount at least one side of the screen so that the bracket will hit the stud wall. If you mount it high enough, as we did, you may actually catch the header 2x4 and guarantee at least 2 solid anchor points, regardless of where you locate the screen horizontally.
Once you find your position, attached the included brackets to the screen and use an assistant to help lift the screen onto the wall so you can mark the location of the brackets and mounting holes with a pencil. Once this is done on both sides you can lower the screen and remove the brackets. Go ahead and mount the brackets to the wall at this point, taking care that you either contact studs or use sufficient drywall anchors where studs aren't found. We don't recommend installing with simply four drywall anchors. Rather, use toggle bolts on both sides to ensure you have the system "secured" onto the drywall in a manner that isn't likely to pull out over time. If you catch at least 2 studs (either on one side or one on each) then using drywall anchors in the remaining positions should be fine.
Once the brackets are installed, you can lift the screen into place and screw the four machined screws into the screen on each side to secure it to the bracket. At this point you simply have to plug the screen in and test it out. Please note that the screen should be positioned such that the Focupix logo is straight in front and the screen material doesn't rub at all when it descends. If it rubs, then you may have installed the screen at a 90-degree tilt. Simply remove the machine screws holding the screen to the brackets and readjust. Since the screen system is a tube and there are no real differentiating marks to align it (save the logo) it's easy to mount it at an incorrect tilt angle without realizing it.
Screen Material & Viewing Tests
The screen material we used was the High Contrast Grey. It has a gain of 0.9 and actually does a great job in a classroom setting where you have ample projection power, but want to pull out better black level performance without having to plunge the room into darkness. I always prefer to opt for a more powerful projector and play with the screen material, rather than have to rely on a high gain screen to get my light levels up where I need them. The resulting image is much better and definitely more pleasing to the eyes.
When we viewed material on the screen we used a combination of laptop PC screens and some movie footage. Both looked excellent, though the system was absolutely intended (and best at) producing high contrast picture with presentation material. The projector was a Panasonic PT-F200U which is a great hybrid model that can put out a ton of light while still maintaining a decent contrast ratio. Here are some screenshots of the movies to show off the black level and detail:
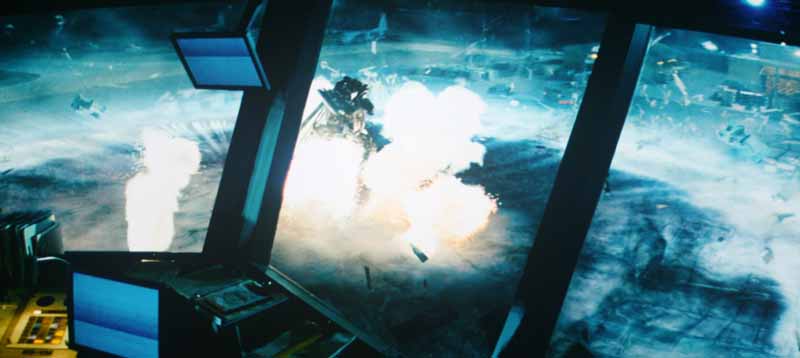

Transformers


The Bourne Ultimatum
HDVio Review Conclusion & Ratings
Focupix is making some waves in the industry with these screens. They are priced way below the competition (most of whom don't start offering screens until you pass the $400 mark) and they are built very well. The only downside is that they seem to be catering to the consumer-direct market. What that means is that if you are a home installer, then you won't have features such as 12VDC trigger control and customization of the screen drop distance and stopping point. For those who want at least some automated control over the screens I'd recommend looking at the Flexio models which come with an IR option. RF is wonderful, but it doesn’t allow for interaction with a universal remote control system which uses IR emitters. I would highly recommend Focupix screens to anyone looking to grab an electric screen at an affordable price. I really have seen no other negatives worth mentioning - at least not at this price.
Focupix HDVio 16:9 High Contrast Grey Electric Screen
SRP: $399
HTDepot.com
14080-F Sullyfield Cir
Chantilly, VA 20151
800-620-8006
sales@htdepot.com
About Focupix
Focupix screens are
offered by HTDepot.com, a company based in Chantilly, Virginia
and which specializes in fixed and electric projector screens from 80-inches up
to 205-inches.
The Score Card
The scoring below is based on each piece of equipment doing the duty it is designed for. The numbers are weighed heavily with respect to the individual cost of each unit, thus giving a rating roughly equal to:
Performance × Price Factor/Value = Rating
Audioholics.com note: The ratings indicated below are based on subjective listening and objective testing of the product in question. The rating scale is based on performance/value ratio. If you notice better performing products in future reviews that have lower numbers in certain areas, be aware that the value factor is most likely the culprit. Other Audioholics reviewers may rate products solely based on performance, and each reviewer has his/her own system for ratings.
Audioholics Rating Scale
 — Excellent
- — Very Good
- — Good
- — Fair
- — Poor
| Metric | Rating |
|---|---|
| Video Performance | |
| Build Quality | |
| Ergonomics & Usability | |
| Ease of Setup/Programming/Integration | |
| Features | |
| Performance | |
| Value |
Clint Deboer was terminated from Audioholics for misconduct on April 4th, 2014. He no longer represents Audioholics in any fashion.
View full profile