
Optoma EP7150 DLP Front Projector Review
Optoma EP7150 DLP Projector
- Product Name: EP7150 DLP Projector
- Manufacturer: Optoma
- Performance Rating:

- Value Rating:
- Review Date: January 03, 2007 00:00
- MSRP: $ 1299
|
Display Technology: Single 0.55-inch DDR DMD DLP™ Technology from Texas Instruments Brightness: 2000 lumens (typical) Displayable Colors: 16.7 million Noise Level (typical): 40 dB standard (38dB ECO) |
Projection Lens: f = 21.83 – 23.81 mm. F/2.35 – 2.47 (1.10x manual zoom and
focus) Optional Accessories: Ceiling mount kit, 15-pin to 3 RCA-Component HDTV Adapter, DVI to DVI Cable, DVI to HDMI Adapter, Gold Service Warranty Dimensions: 8.5 x 6.65 x 2.44 in (216 x 169 x 62 mm) Weight: 2.7 lbs (1.2 kg) |
Pros
- Ultra-portable
- Can be used to signal the space shuttle in orbit (very bright)
- Laser pointer remote with “mouse” functionality
- Built-in 1W speaker for multimedia use
- USB connectivity for limited desktop control via included remote
Cons
- No direct component video inputs (can use VGA adapter cable, not included)
- At brightest levels, colors desaturated
- Intrusive fan noise (Eco mode doesn’t lessen)
Optoma EP7150 Features, Setup and Connections
Features and Favorites
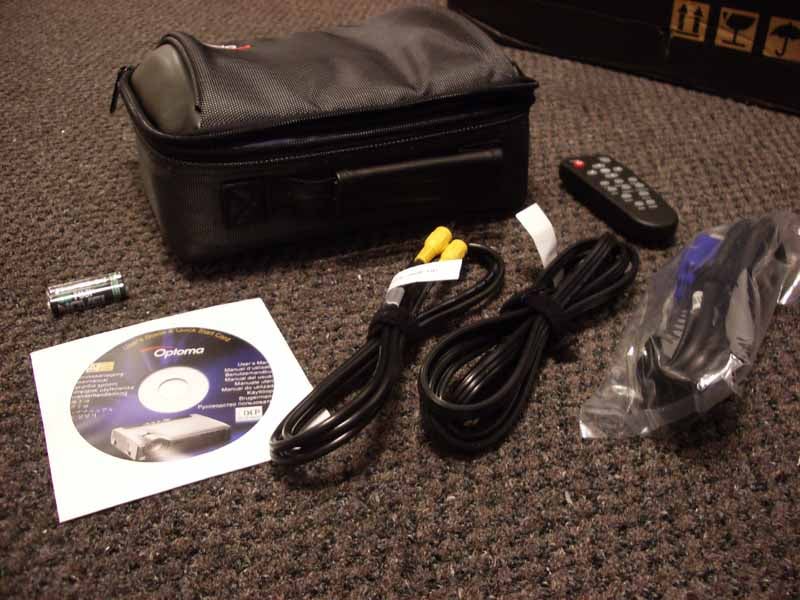 The EP7150 comes packaged in a nice box that includes a ton of goodies.
First of all, the padded carrying case is a wonderful inclusion as it provides
protection for a unit that is almost certainly destined to be carried about on
business trips. S-video and VGA cables ensure that the two main methods of
connectivity for this product are taken care of and a remote control (with
integrated laser pointer) accompany a durable, removable power cable and CD-ROM
user manual.
The EP7150 comes packaged in a nice box that includes a ton of goodies.
First of all, the padded carrying case is a wonderful inclusion as it provides
protection for a unit that is almost certainly destined to be carried about on
business trips. S-video and VGA cables ensure that the two main methods of
connectivity for this product are taken care of and a remote control (with
integrated laser pointer) accompany a durable, removable power cable and CD-ROM
user manual.
I always point out the features that set a projector or display apart from its peers. The EP7150 has a couple that caught my attention:
- 2000 Lumen Output
There’s 2000 “stated” lumens, and then there’s 2000 “real” lumens. This projector has the output to fill a fully lit room with a 60-inch tall image. I’ll show some pics later, but it’s very impressive. - Rapid start-up Shut-down
Unlike most systems which take over a minute to boot up, the EP7150 takes just over 20 seconds (each action) to boot up and shut down. That’s pretty impressive and eliminates that odd “waiting period” when running a presentation.
There are many more features to be sure, but for now these really stood out to me during the use of this projector and are sure to be considerations when searching for an ultra-portable display.
advertisement
Basic Setup and Installation
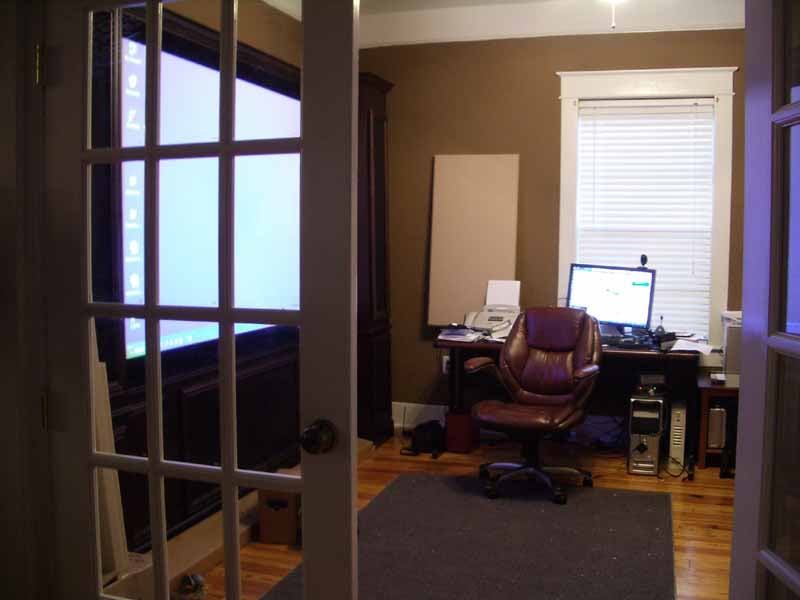
While I utilized a Stewart Studiotek 130 screen with this projector, I’m sure most users will be situating this projector on a desk or table and firing it at a pull down or otherwise portable projector screen. Although a high (1.6-2.0) gain screen is going to be the typical complement to this projector, the images I took were from a 1.3 gain screen and still showed a very bright and vibrant image.
Take a look at the 4:3 throw chart to see how the Optoma will work in your situation:
Throw Chart for Distancing the Projector from the Projection Screen
|
Screen
Size |
Distance (Feet) |
|
|
|
wide |
tele |
|
60 |
7.7 |
8.5 |
|
70 |
9.0 |
9.9 |
|
80 |
10.3 |
11.3 |
|
90 |
11.6 |
12.8 |
|
100 |
12.9 |
14.2 |
|
110 |
14.2 |
15.6 |
|
120 |
15.5 |
17.0 |
|
130 |
16.8 |
18.5 |
|
150 |
19.4 |
21.3 |
|
170 |
22.0 |
24.1 |
|
200 |
25.8 |
28.4 |
I found the zoom range on the EP7150 to be just about perfect for presentations. If you are in a smaller room and cannot position the projector at least 11 feet away from the screen, then you’re going to be looking at less than 80-inch diagonal screen size. That’s still pretty large, and the light output from this projector is good to over 190-inches of screen (from ~25 away) before you’ll want more light output.
I placed the EP7150 in a temporary, but fixed, location and made sure all tests were done using the standard operating modes. I selected the “PC” mode for my brightness testing as I was sourcing the images from a Dell laptop PC. This is the typical mode you’d be using for a presentation in a brightly lit room.
Connections
The EP7150 doesn’t have a ton of inputs, but it doesn’t need to. Just like an ultra-portable laptop may not have an on-board optical drive, the EP7150 saves weight by eliminating things such as HDMI/DVI and reducing the optical system (for instance, it utilizes a smaller 2x speed 4-segment color wheel).
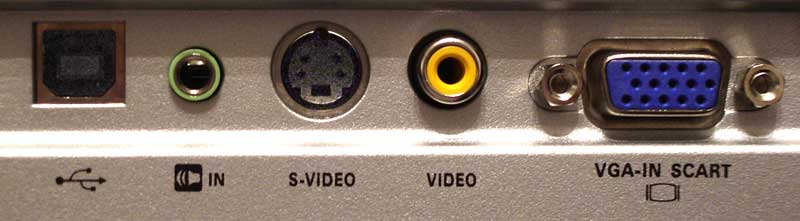
I tested both the VGA input connections as well as the composite video connections for our viewing tests, however I believe the VGA input to be the most commonly use on this type of projector. While you can connect a DVD player to this projector using VGA or s-video I don’t think that running a full suite of benchmark tests would be an appropriate fit – it would be like entering a Porsche into a truck pulling contest – wrong class, wrong test.
Remote Control
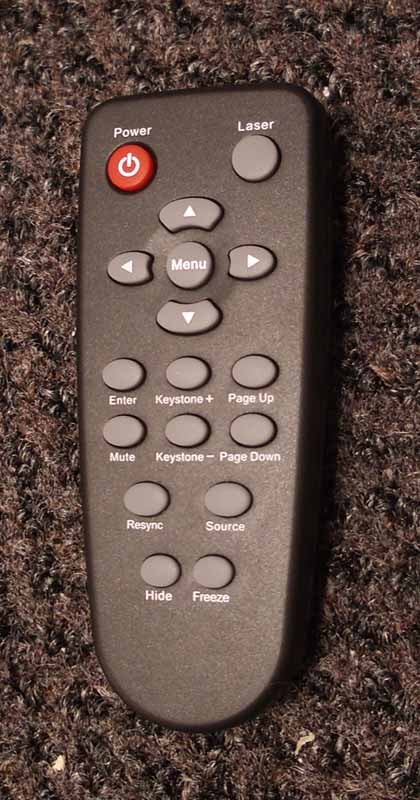 True to their style, it
seems as if every Optoma projector sports a different remote control – that
changes with ever new model. This one is functional, and since it will almost
certainly be used in full light (and not a home theater environment), there’s
no reason for it to be backlit. The obligatory on-board laser pointer is easy
to use, however I did find that it had a “slippery” trigger. Sometimes I’d have
the button down, but it would somehow deactivate the laser anyway so I’d have
to “reacquire”. The handy ‘Resync’ and ‘Source’ buttons work well if you don’t
have Source Lock engaged and want to use two different sources for some reason.
The USB connectivity allows you to utilize the remote as a mouse, though I
found the ‘Menu’ and ‘Enter’ buttons to be somewhat flipped. The other function
that would be a great addition to the remote is the ‘Display Mode’ – for
cycling through the output and color options. If you are in a light-controlled
board room, the Movie mode will
result in much more accurate color reproduction than the PC or Bright modes. Audio
is also not controllable via the remote (nor is there a Mute button) which is a
major oversight in my opinion.
True to their style, it
seems as if every Optoma projector sports a different remote control – that
changes with ever new model. This one is functional, and since it will almost
certainly be used in full light (and not a home theater environment), there’s
no reason for it to be backlit. The obligatory on-board laser pointer is easy
to use, however I did find that it had a “slippery” trigger. Sometimes I’d have
the button down, but it would somehow deactivate the laser anyway so I’d have
to “reacquire”. The handy ‘Resync’ and ‘Source’ buttons work well if you don’t
have Source Lock engaged and want to use two different sources for some reason.
The USB connectivity allows you to utilize the remote as a mouse, though I
found the ‘Menu’ and ‘Enter’ buttons to be somewhat flipped. The other function
that would be a great addition to the remote is the ‘Display Mode’ – for
cycling through the output and color options. If you are in a light-controlled
board room, the Movie mode will
result in much more accurate color reproduction than the PC or Bright modes. Audio
is also not controllable via the remote (nor is there a Mute button) which is a
major oversight in my opinion.
Keystone buttons are readily available, and with a business-class projector you’ll finally hear me recommend its use. In fact, the net effect when observing text on the screen is akin to anti-aliasing, making the fonts appear to be “bold”:
Optoma EP7150 Menu, Viewing Evaluation & Conclusion
The menu system of the Optoma EP7150 is simplistic in use, but robust enough to deliver all of the basic functions you’d need or expect in an ultra-portable unit. The system is divided into 6 sections: Image-I, Image-II, Audio, Language, Management, and Lamp Setting. Here is the basic layout:

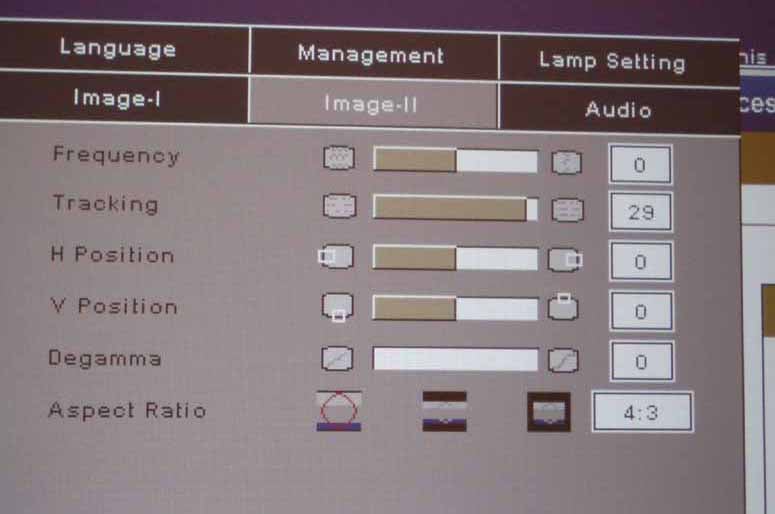
The key items that will come in most handy are the Display Mode, White Peaking and Color Temp settings under the Image-I menu. White Peaking is great when you have a lot of ambient light in the room, but it will also result in your oranges being converted to brown due to the artificially high contrast. If you get some light control, dialing this setting down will give you much more accurate colors. If you do happen to utilize a source that is 16:9, you can go under the Image-II menu and switch to 16:9 mode.
Under the Audio menu you can
raise or lower the volume and mute the projector. As we mentioned previously,
this is not directly available on the remote – a potential problem if you
frequently need to adjust or mute audio output in your presentations.
Calibration is also not something you can do handily with this unit – but then
again I’m not sure why you’d bother with anything beyond basic color controls
(and universal RGB adjustments are available if needed.)
Viewing Evaluation
This is not a hybrid or home theater projector. You could certainly hook it up to a DVD player and enjoy movies – it has 16:9 aspect ratio support and is certainly bright enough to entertain. I didn’t feel, however that taking this unit and running it through DVD viewing tests was the correct use of the product. Instead, we connected up a Dell laptop and ran through several “presentation-style” applications.
 Lights On? No Problem
One of the continuing themes of this review is brightness and lamp
output. The EP7150 is so bright that I had a hard time, with digital
photography, getting the concept across using a picture. Finally, I snapped a
shot from outside the viewing environment after I removed all drapes and light
blocking material from the room. With full lights on you can see the results
here – a super-bright image that can be easily seen. It’s almost unreal how
much light output you can get from this tiny projector.
The rest of the pictures you’ll see in this review were also taken with the room lights on. There simply was no reason to dim the room for photos.
PC: Website Navigation
We wanted to show a typical website
– a very common navigational item to be displayed on a projector of this type,
so we queued up the Beta version of Audioholics 2.0. If you look closely,
you’ll see that the orange subnav bar is almost brown. This is due to the White
Peaking setting being set at maximum. The result is an incredibly bright white
level, but at the expense of color accuracy. The increased Contrast turns
colors darker – especially reds and yellows. Backing down the White Peaking setting
will bring things back to normal, but you may want to decrease ambient light if
doing so. These are the compromises you make when attempting to project images
in lit rooms.
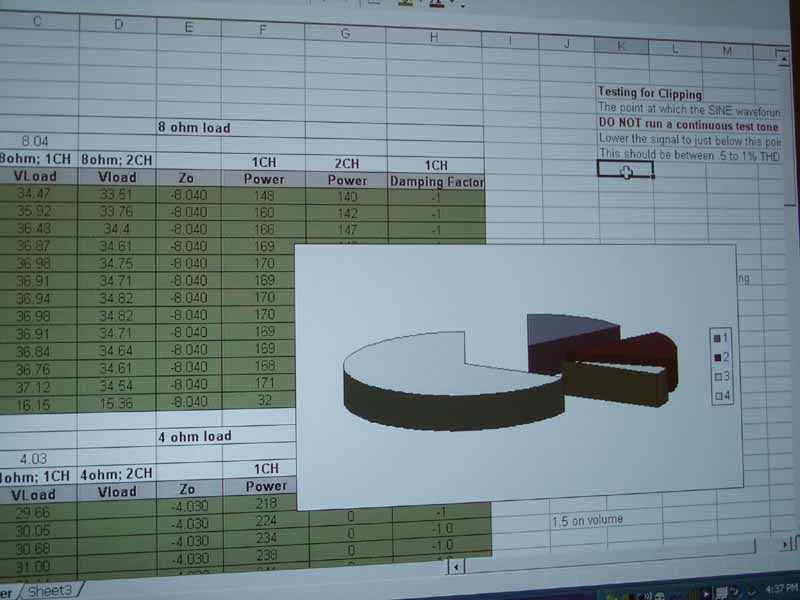
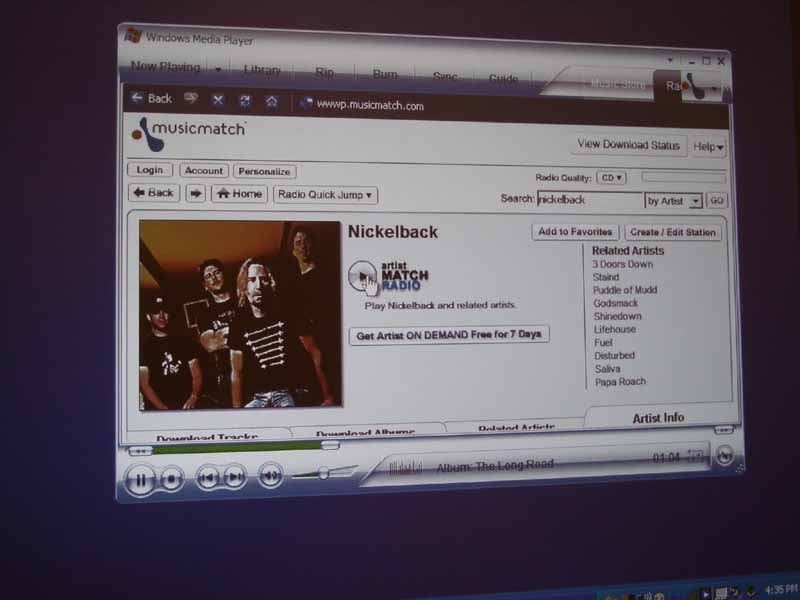
PC: Charts, Microsoft Office and MusicMatch
Charts look pretty colorful
and text is, of course, extremely legible at the native resolution of this
projector. I always recommend flipping the source PC to the projector’s native
resolution. When you’re projecting on to a screen, you don’t want to match the
laptop screen – it’s all about 1:1 pixel mapping onto the projector. The result
is clean, clear, readable text that isn’t “fuzzy” or artificially anti-aliased.
When utilizing Windows Media Player and MusicMatch, all information was easily
viewable on our oversized screen.
Conclusion
I remember switching from a full-sized 15-inch laptop to a more portable 12-inch model over a year ago. When I did this, I entered a brave new world of portability and convenience. Sure, I gave up some screen real estate, but I gained so much more in terms of flexibility and ease-of-use. With the Optoma EP7150 I believe users will experience the same thing. If you’re still lugging around a 7 pound projector and having to dim the lights for your presentations it’s time to step up. This Mighty Mouse projector is here “to save the day” – and do it without making your clients or associates have to take notes in the dark.
The Score Card
The scoring below is based on each piece of equipment doing the duty it is designed for. The numbers are weighed heavily with respect to the individual cost of each unit, thus giving a rating roughly equal to:
Performance × Price Factor/Value = Rating
Audioholics.com note: The ratings indicated below are based on subjective listening and objective testing of the product in question. The rating scale is based on performance/value ratio. If you notice better performing products in future reviews that have lower numbers in certain areas, be aware that the value factor is most likely the culprit. Other Audioholics reviewers may rate products solely based on performance, and each reviewer has his/her own system for ratings.
Audioholics Rating Scale
 — Excellent
- — Very Good
- — Good
- — Fair
- — Poor
| Metric | Rating |
|---|---|
| Detail and Resolution | |
| Contrast and Black Levels | |
| Color Reproduction | |
| Calibration Options | |
| Build Quality | |
| Ergonomics & Usability | |
| Ease of Setup | |
| Features | |
| Remote Control | |
| Fit and Finish | |
| Performance | |
| Value |
Clint Deboer was terminated from Audioholics for misconduct on April 4th, 2014. He no longer represents Audioholics in any fashion.
View full profile