
Marantz VP-15S1 DLP Projector Review
Marantz VP-15S1 DLP projector
- Product Name: VP-15S1 DLP Projector
- Manufacturer: Marantz
- Performance Rating:


- Value Rating:
- Review Date: February 19, 2008 09:27
- MSRP: $ 8999.99
|
Brightness: 1000 ANSI lumens (Iris =
F3.0) Video Processing: Gennum VXP GF9351 processor Video Inputs: 2 x HDMI-HDCP (1.3), 2 x component, composite, S-video and PC/RGB (HD15) Control: RS-232C, IR remote in/out, 2 x DC triggerProjection Lens: f: 30.7 – 44.5, manual focus & zoom (long throw lens available) Lens Shift: Vertical only (+165%, -85%) |
Keystone Correction:
vertical only Warranty: 3 years parts & labor + 90 days lamp Dimensions: 16” x
18.3” x 6.1” (404
x 498 x 158 mm) |
Pros
- Excellent build quality
- No real-world rainbow effect
- Excellent remote
- Best-of-class Gennum VXP video processing
- Custom optics with long-throw lens option
Cons
- Expensive for single-chip DLP
- No horizontal lens shift
VP-15S1 Build Quality and Features
Passion is what drove me to become a videoholic. I love good quality video - be it HDTV or high definition DVD. It doesn't matter if the subject matter is retarded African pigmy elephants, a great picture will glue me to the screen. With that said, this review started off as any other except that after a while I began to become obsessed with how well this projector integrated into my room. I found that I more quickly became drawn into the story lines of films and my ability to forget I was sitting in my theater room instead of being a part of the on-screen content became greatly diminished. In short, this projector made me covet...
Build Quality
 The
chassis of the Marantz VP-15S1 weighs 28.6 pounds. Yeah, I actually had to
exert effort when mounting the unit to my Peerless PRG-UNV Precision Gear
universal projector mount. Lucky for me my mount is literally anchored to the
top of my ceiling joists or I may have been concerned that the unit, with its
rigid die-cast chassis, could have pulled out of my ceiling. As it stands, you
can rest assured that this is a cut above the type of build quality found in
budget consumer DLP projectors.
The
chassis of the Marantz VP-15S1 weighs 28.6 pounds. Yeah, I actually had to
exert effort when mounting the unit to my Peerless PRG-UNV Precision Gear
universal projector mount. Lucky for me my mount is literally anchored to the
top of my ceiling joists or I may have been concerned that the unit, with its
rigid die-cast chassis, could have pulled out of my ceiling. As it stands, you
can rest assured that this is a cut above the type of build quality found in
budget consumer DLP projectors.
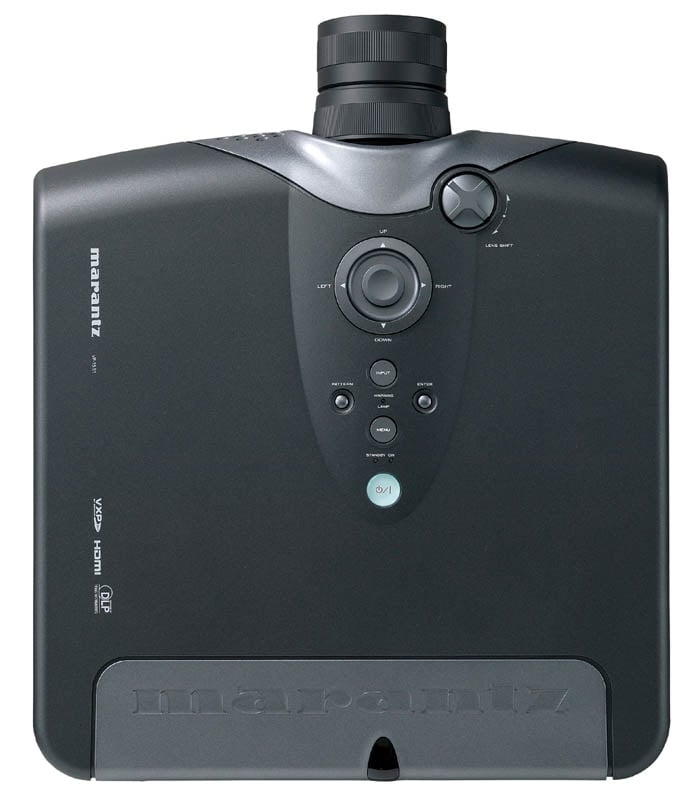
If you take a head-on look at the projector you can't help but notice the rather impressive looking glass protruding from the center. A custom-built Konika Minolta 1.45x zoom lens gives the VP-15S1 an edge that is readily-apparent when comparing the system to other high-end projectors. It was the same difference between an all-in-one point-and-shoot camera and a high-end Digital SLR model. The glass does affect the image and likely explains why the viewing tests we'll get into later were so phenomenally detailed.
Features
Marantz spared no expense on this unit, except to refrain from including a full 3-chip DLP system, that is. We'll leave the "Why aren't there 3-chip DLP projectors under $15,000?" question for another time, however and simply point out that the VP-15S1 includes Texas Instruments' Darkchip3 1080p DLP technology. Coupled with a high-end Gennum VXP video processing chipset, this projector packs a high definition video punch that is hard to beat. We've discussed the Gennum VXP GF9351-based system in the past, so we don't need to rehash its top of the line? deinterlacing, scaling, and motion adaptive noise reduction features here - oops, too late.
The light engine utilizes a large 98mm 6-segment color wheel that spins at a 5x speed (9000 rpm) which is apparently very favorable to people like me who perceive rainbow effect (RBE) everywhere there is a single chip DLP. I'm not going to say there isn't RBE, but it's mostly apparent on test patterns and doesn't rear its head too easily on typical program material. The color wheel was also very quiet from about 5 feet away, even though at this speed you would think it would sound like a small jet engine. The "fluid dynamic bearing motor" apparently works as advertised to reduce noise in this area.
One other item that deserves mentioning is the presence of vertical lens shift. This is extremely helpful in making sure your installation avoids keystoning, especially when you are unable, for whatever reason, to correctly align the projector at the exact proper height to the screen. I do have to take away marks, however for not including a horizontal lens shift - at this price there is simply little excuse for missing this important feature.
The system itself has adjustable feet which I can't imagine ever being used by anyone who can afford this projector (who wouldn't be utilizing a mount?). There are ventilation holes on the bottom of the chassis for air intake and exhaust holes on the front of the unit and on the lamp cover. The lamp is rear-replaceable, something I like to see in good-quality projectors since this means you don’t have to remove the unit from a ceiling mount in order to provide simple maintenance. There are dual IR sensors - one on the front and one on the back, so the included remote should be able to make contact regardless of how you mount the projector.
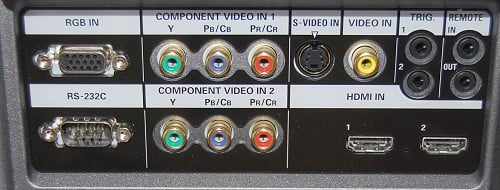
Connections
Taking a look at the rear panel of the unit you will see that Marantz has provided a pair of HDMI and component video inputs, both of which can support up to 1080p/24/60 resolution. The HDMI inputs included in this system are 1.3-compliant, supporting up to 12-bit Deep Color (per channel). There are also composite and S-video inputs, but if you use these I will personally come to your home and replace this projector with a $999 DLP unit since you obviously can’t tell the difference! I liked the inclusion of dual triggers and RS-232C is mandatory at this price point.
VP-15S1 Setup, Overview and Menu System
I installed my Peerless PRG-UNV Precision Gear universal mount to the projector in about 30 seconds flat and eased it into my ceiling mount. From there it was a simple matter of dialing in the manual vertical lens shift and then fine tuning the mount to get the picture perfectly centered onto the screen. If you don't have a way to line up the center of the image horizontally, you will undoubtedly incur some keystoning since the VP-15S1 has neither horizontal lens shift nor horizontal keystone correction. This is rarely an issue in most installations, but triple check your placement prior to fixing the projectors in place.
Once the projector is physically installed, you'll want to dial in the image as best you can. Best practice for this is to use the Pattern button on the remote. In this way you will be able to see every square inch of screen real estate and ensure your image isn't out of focus on the edges due to not being properly squared (aligned) to the screen. You'll also be able to set the desired physical overscan for your screen by physically configuring the manual zoom lens to where the image only slightly overlaps the edge of the screen. Hopefully you have some kind of light-absorbing velvet material surrounding your screen. Work the zoom and focus controls until the image is pristine and crisp. We used to discuss methods of defocusing slightly when you sit too close to the screen, but 1080p resolution has truly made that unnecessary.
To get up and running immediately, the only settings you'll need to configure are the Installation mode, which sets front/rear and ceiling/desktop. In my case, I adjusted from the default "Front" to "F + Ceiling" to accommodate my ceiling mount (essentially flips the image upside-down). Beyond this, you'd want to watch out for the Aspect button on the remote to ensure you're properly viewing the material on the screen. We get into the advanced calibration settings later in the review.
Throw Chart for Distancing the Projector from a 16:9 Projection Screen
The Konika Minolta's ample zoom lens allows for a reasonably flexible placement of the projector. In our room we had the unit positioned back around 11 feet via ceiling mount and projecting onto a 100-inch diagonal Stewart Studiotek 130 screen.
| Screen Size Diagonal (inches) |
Size (Inches) | Distance (Feet) | ||
| width | height | wide | tele | |
| 70 | 61.0 | 34.3 | 7.3 | 10.8 |
| 80 | 69.7 | 39.2 | 8.4 | 12.3 |
| 90 | 78.4 | 44.1 | 9.5 | 13.9 |
| 100 | 87.2 | 49.0 | 10.6 | 15.4 |
| 110 | 95.9 | 53.9 | 11.6 | 17.0 |
| 120 | 104.6 | 58.8 | 12.8 | 18.6 |
| 130 | 113.3 | 63.7 | 13.8 | 20.1 |
| 150 | 130.7 | 73.5 | 16.0 | 23.2 |
| 170 | 148.2 | 83.3 | 18.1 | 26.4 |
| 200 | 174.3 | 98.1 | 21.4 | 31.0 |
Menu System
The menu system for the Marantz was easy to navigate and its structure seemed to make sense. The picture mode is always located at the top left of the menu, and below are the 9 (count 'em) menu sections: Picture Adjust, Fine Menu 1, Fine Menu 2, Input Signal, RGB/HD Adjust, HDMI, Display, OSD/Blanking, and Config. We'll pretty much ignore Input Signal, which allows the manual configuration of what resolution the inputs will be accepting (always set this to Auto - the default). We'll also bypass making much ado about the RGB/HD Adjust menu which allows HTPC users to really tweak the resolution, position and phase of the incoming signal. If you have an HTPC and a propeller hat, you'll likely spend a lot of time here.
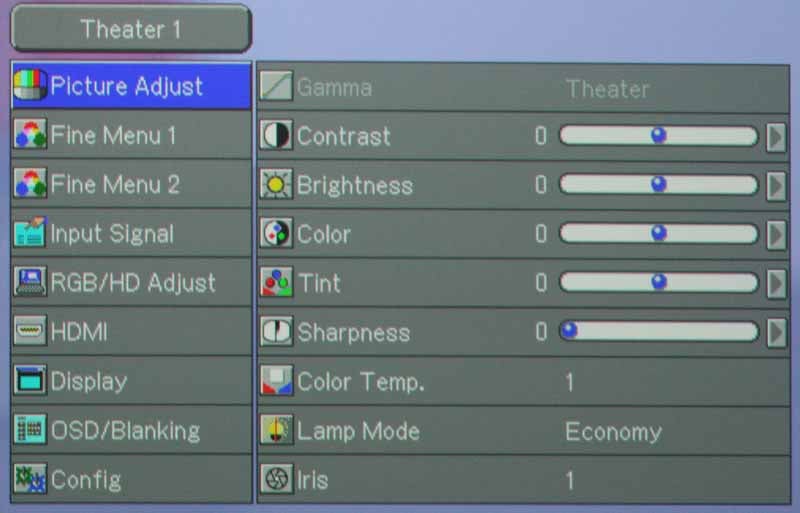 Picture
Adjust
Picture
Adjust
Your basic picture controls are here,
including Contrast Brightness, Color Tint and Sharpness. You can also adjust
the global Color temp for the particular input and set the lamp mode to Economy
(recommended for theater use) or Normal. Keep in mind that the lamp will also
be adjusted automatically based on the Picture Mode you have selected. As with
most (but not all) projectors we've reviewed, Sharpness (almost a dummy control
in this projector) is best left at 0, and the Color and Tint controls can be
left where they are for best performance.
Fine
Menu 1
This
is where you will return again and again if you are calibrating this projector.
The Marantz VP-15S1 is one of the easiest projectors we've ever had the
pleasure of calibrating, and the easily accessible Gain and Bias (cut) controls
are largely responsible. We'll discuss Noise Reduction settings later and
Luminance Gain and Chroma delay are not for use with HDMI (our primary utilized
input for calibration and testing).
Fine Menu 2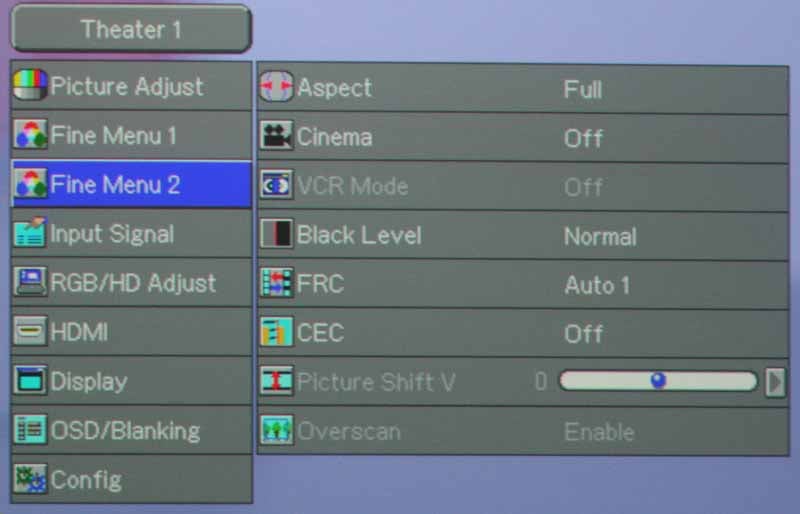 This
menu allows control over the aspect ratio of the displayed image. You can
choose from Full, Normal, Zoom, V-Stretch and Through. These are becoming more
and more familiar to most viewers, so I'll just say to leave it on Full for
16:9 (and 4:3 if you like your images stretched to take up the whole screen) and
Normal for 4:3 aspect ratio content. I
honestly have no use for the other modes, but feel free to experiment as you
see fit. Should you actually make use of the Zoom or V-Stretch modes, realize
that the "Picture Shift V" control unlocks to allow you to vertically
move the picture to optimize the screen presentation. As for the Black Level
setting: Set this to 'Expand' . Typically we always recommend leaving this to
'Normal', however with this projector 'Expand' is the only way to achieve
Blacker-than-Black response via HDMI. A CUE (Chroma Up-sampling Error) mode is
provided for 1080i input signals. You can leave this to 'Off' unless you
encounter a source requiring it (doubtful). Lastly, for standard definition
signals (up to 480/576p) you can enable or disable Overscan to eliminate the
outermost edges of the picture.
This
menu allows control over the aspect ratio of the displayed image. You can
choose from Full, Normal, Zoom, V-Stretch and Through. These are becoming more
and more familiar to most viewers, so I'll just say to leave it on Full for
16:9 (and 4:3 if you like your images stretched to take up the whole screen) and
Normal for 4:3 aspect ratio content. I
honestly have no use for the other modes, but feel free to experiment as you
see fit. Should you actually make use of the Zoom or V-Stretch modes, realize
that the "Picture Shift V" control unlocks to allow you to vertically
move the picture to optimize the screen presentation. As for the Black Level
setting: Set this to 'Expand' . Typically we always recommend leaving this to
'Normal', however with this projector 'Expand' is the only way to achieve
Blacker-than-Black response via HDMI. A CUE (Chroma Up-sampling Error) mode is
provided for 1080i input signals. You can leave this to 'Off' unless you
encounter a source requiring it (doubtful). Lastly, for standard definition
signals (up to 480/576p) you can enable or disable Overscan to eliminate the
outermost edges of the picture.
HDMI
This
menu allows configuration of color space and color bit-depth settings. You'll
want to keep these on Auto unless you have a source component that isn't
sending the proper flags to the display via HDMI.
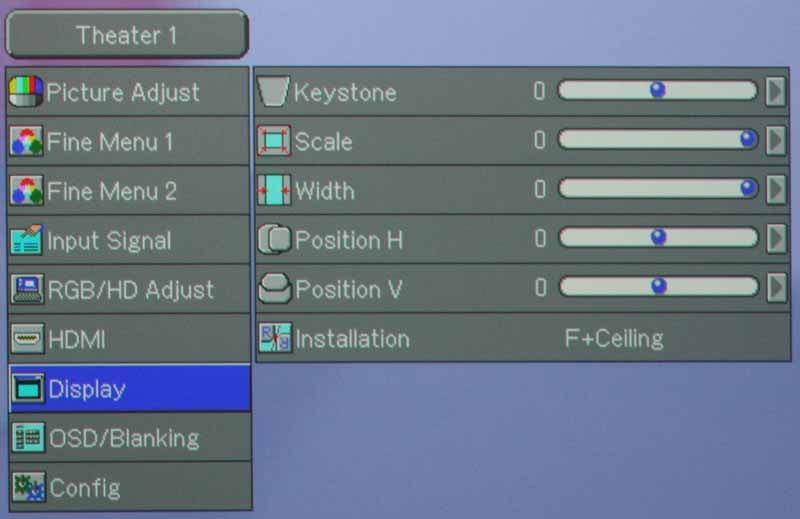 Display
Here you can set the vertical Keystone
(ridiculous given the presence of physical lens shifting), Scale the image down
(up to 70% its original size) and even change the Width of the image apart from
height. The Scale function is actually helpful in the event that you cannot get
the projector far enough away from your screen using the wide angle lens. Apart
from these features, you can adjust the horizontal and Vertical position of the
image on the DLP panel. This is also the place you'll go to configure the type
of installation you'll be using (Front/Rear Desk/Ceiling).
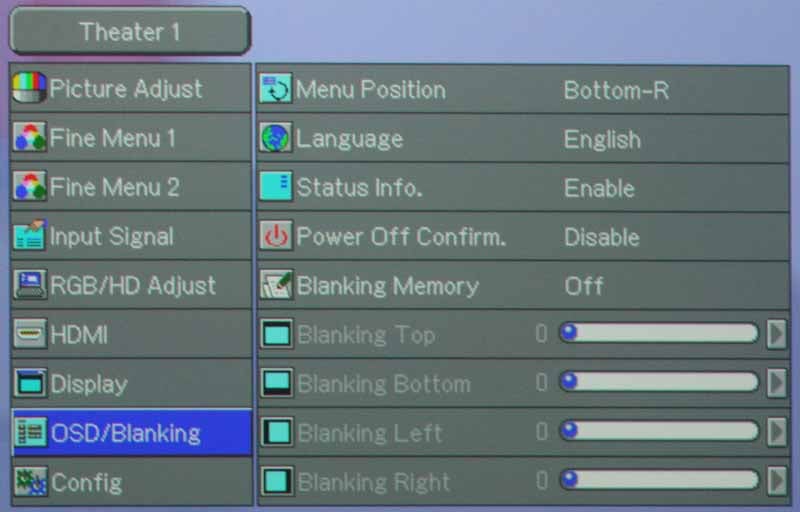 OSD/Blanking
The OSD/Blanking menu is set up to
allow you to control the menu function (Language and Position) and adjust
Blanking, or the amount of "underscan" of sorts is provided on each
edge of the image. This is helpful if you consistently have issues with
artifacts along one or two of the edges of the picture. You can store up to
three different Blanking configurations in the memory slots provided. There are
a couple more functions such as Power-OFF Confirm and Status Info, but they are
self explanatory.
Config
The final menu primarily controls functions
related to the Trigger and Remote Control functions. The Trigger 2 function
allows you to send a 12VDC trigger signal during particular Aspect ratio/modes.
I enabled Auto Power Off as it is a sensible setting that automatically powers
down the projector if no signal is received for 10 minutes.
VP-15S1 Calibration, Remote Control, and Recommendations
 I
really like the remote supplied with the Marantz VP-15S1. Aptly named the
RC-11VPS1, this is a fully backlit remote with direct access to all primary
functions, including Input selection and video modes. After initial calibration
it would be unlikely you'd ever need to actually enter the Menu system to make
any adjustments since the remote gives you direct control over Blanking, Black
Level, Aspect Ratio and even Iris, Color Temperature, Gamma and Lamp control.
The backlight function isn't automatic, but an easily accessible side switch
puts the light on for 10 seconds at a time. In addition to simply providing
backlighting, the remote actually separates various areas of the remote by
utilizing both green and amber coloring. There are four User/Gamma modes (only
the first three buttons work and they toggle up to 9 settings overall) which
allow you to store custom Picture Modes. With these modes you can literally
customize Picture settings until you have one for every day of the week… and
then a couple more.
I
really like the remote supplied with the Marantz VP-15S1. Aptly named the
RC-11VPS1, this is a fully backlit remote with direct access to all primary
functions, including Input selection and video modes. After initial calibration
it would be unlikely you'd ever need to actually enter the Menu system to make
any adjustments since the remote gives you direct control over Blanking, Black
Level, Aspect Ratio and even Iris, Color Temperature, Gamma and Lamp control.
The backlight function isn't automatic, but an easily accessible side switch
puts the light on for 10 seconds at a time. In addition to simply providing
backlighting, the remote actually separates various areas of the remote by
utilizing both green and amber coloring. There are four User/Gamma modes (only
the first three buttons work and they toggle up to 9 settings overall) which
allow you to store custom Picture Modes. With these modes you can literally
customize Picture settings until you have one for every day of the week… and
then a couple more.
Calibration
 We
took some before measurements after resetting the projector to its Factory
defaults. We then calibrated the system and compared the end results to the
original. For calibration we utilized datacolor's ColorFacts Professional software with a Spyder2 sensor
(tristimulus colorimeter). I have to say, this was one of those projectors that
really only needed to be set to the correct menu configuration. Calibration was
not something that dramatically improved the already excellent picture.
We
took some before measurements after resetting the projector to its Factory
defaults. We then calibrated the system and compared the end results to the
original. For calibration we utilized datacolor's ColorFacts Professional software with a Spyder2 sensor
(tristimulus colorimeter). I have to say, this was one of those projectors that
really only needed to be set to the correct menu configuration. Calibration was
not something that dramatically improved the already excellent picture.
To begin with, and this is something I try to do with all projectors, we analyzed the various default Picture modes and took a look at how that related to color temperature. Using an 80IRE full field gray screen, we received the following results:
- Dynamic - 8700K
- Standard - 6400K
- Theater - 5300
Now, the default Theater 1 mode ran the projector with the lamp set to normal. With the Iris set to 1 and the lamp on Economy color temperature jumped to 5800. Select Color Temp 2 in the menu system and the results fall in line at 6400K. With that said, we recommend Theater 1 mode with an Iris level of 1 and Color Temp set to '2' for your default theater mode. This will give you excellent color as well as the deepest Black levels this projector is capable of delivering. The color reproduction of this projector is nothing short of brilliant for HD signals per our CIE chart which displayed our RGB measurements.
As indicated in the menu section, Black Level is a setting we typically tell everyone to leave at 'Normal', however with the VP-15S1 you will need to set this to 'Expand' if you are using HDMI and want to be able to view (or calibrate with) Blacker-than-Black signals. With this setting I made an adjustment to the Brightness control which placed it at -10 for optimal results in my room. The calibration images below came from the settings indicated above and were viewed on a 100-inch Stewart Studiotek 130 screen.

Gamma was a solid 2.2
and had a nice smooth response

Color temperature was
generally excellent across the board

RGB levels showed
very respectable tracking and calibration only pulled in the values a little
bit more than the default
Audioholics/HQV Bench Testing Summary of Test Results
Perfect Score is 130
Marantz VP-15S1 Benchmark Score: 95 (Respectable and will satisfy nearly any videophile)
| Test | Max Points |
Component Results |
Component Pass/Fail |
| Color Bar | 10 | 10 | Pass |
| Jaggies #1 | 5 | 5 | Pass |
| Jaggies #2 | 5 | 5 | Pass |
| Flag | 10 | 10 | Pass |
| Detail | 10 | 10 | Pass |
| Noise | 10 | 10 | Pass |
| Motion adaptive Noise Reduction | 10 | 10 | Pass |
| Film Detail | 10 | 10* | Pass |
| Cadence 2:2 Video | 5 | 0 | Fail |
| Cadence 2:2:2:4 DV Cam | 5 | 0 | Fail |
| Cadence 2:3:3:2 DV Cam | 5 | 0 | Fail |
| Cadence 3:2:3:2:2 Vari-speed | 5 | 0 | Fail |
| Cadence 5:5 Animation | 5 | 0 | Fail |
| Cadence 6:4 Animation | 5 | 0 | Fail |
| Cadence 8:7 animation | 5 | 0 | Fail |
| Cadence 3:2 24fps film | 5 | 5 | Pass |
| Scrolling Horizontal | 10 | 10 | Pass |
| Scrolling Rolling | 10 | 10 | Pass |
| Total Points | 130 | 95 |
|
*with 480i sources on HDMI you'll need to set Cinema mode to Auto
Comments on Bench Testing
In running our multitude of benchmark tests I found the VP-15S1 was indeed an excellent performer. For one, this is the first single-chip DLP projector that really exhibited no practical rainbow effect to my eyes. When viewing a Rainbow Dither pattern I could strain and see the telltale red, green and blue smearing, but in typical viewing they were completely absent. Moving Zone Plate tests performed well in 2-3 modes, but did poorly in Video and 2-2 modes, which always prove difficult for every system I've tested to date. Clearly, the Gennum VXP GF9351 processor is no slouch and a respectable system to have on-board in a projector of this price class.
Recommendations
There aren't a lot of recommendations to make for a projector that does things as well as the VP-15S1. Other than requesting Texas Instruments lift the price blockade on 3-chip systems, my recommendations for this system would be limited to things that would make this even more of a luxury product. Primarily, I'd love to see horizontal lens shift in addition to the vertical. I also believe it would be a good thing to have motorized zoom and focus at this price point. For around $9000 on a single-chip system this would be a nice perk indeed.
VP-15S1 Viewing Tests and Conclusion
We tested a lot of high definition material on this projector and even quite a bit of standard definition. What we really looked for was a lot of color and motion, and also dark scenes with lots of black level detail. If a projector can portray these real-world images with clarity, lack of rainbow effect and accurate color - then you've got a successful product. The level of almost "perfectionism" exhibited by this projector made it seem more like a 3-chip system than the single-chip DLPs we've seen in the past. Following are a sequence of representative images showing off some of the more impressive pictures we viewed while reviewing the VP-15S1. All HD DVD movies were played on a Toshiba HD-XA2 (outputting 1080p) and standard definition content was viewed on a Denon DVD-3930CI (outputting 480i).
HD
DVD: The Bourne Ultimatum
This
movie had it all, form dark scenes whose details would get lost in a lesser
projector, to bright, detailed establishing shots that pushed the system's
ability to render accurate detail and jaggie reduction.
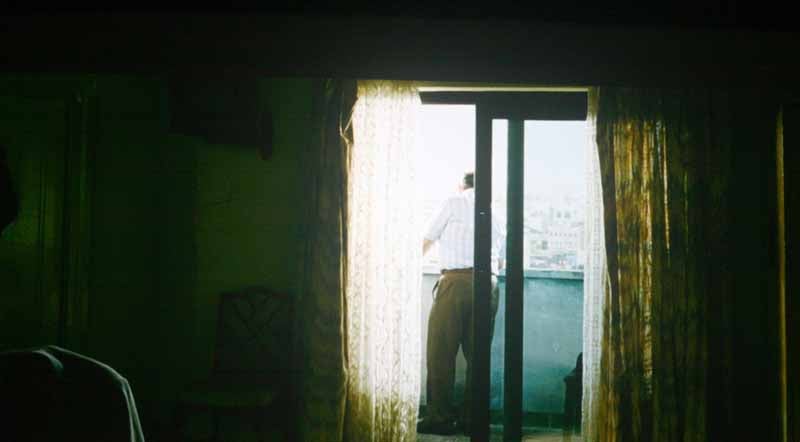
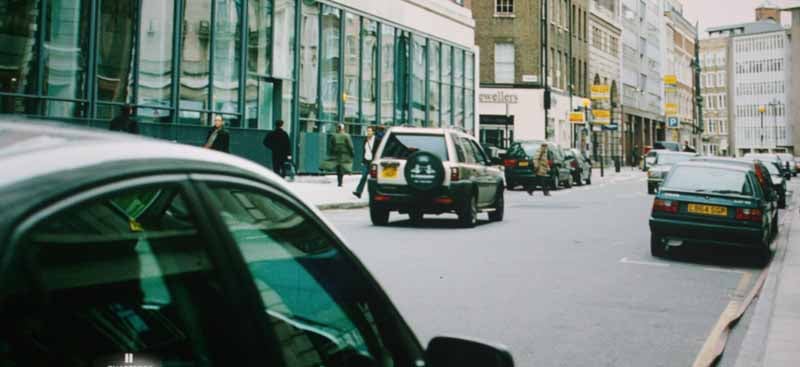
While none of these
images pictures Matt Damon, they do capture the rich black detail and
exceptional clarity the VP-15S1 puts out during the playback of HD DVD movies.
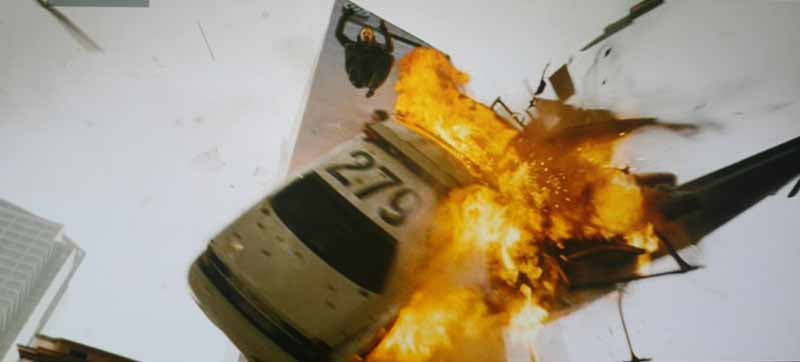
DVD:
Live Free and Die Hard
This
was another very dark movie and it gave the Marantz DLP projector a chance to
extend itself to the deepest blacks and show that it could still reveal
textures and patterns in brick and concrete. I especially loved the bricks
which revealed themselves cleanly behind Matt Farrell as he converses with
Bruce Willis in an alley-based scene. I have seen a lot of projectors, DLP and
LCD alike, which crush blacks, leaving no detail in dark scenes. Watch a Horror
or Sci-fi movie and it's like watching a bunch of people move in and out of
black splotches. Not so with the VP-15S1 which seemed almost uncanny at
producing even the lowest levels of black. Turn up the lights and you see that
the Marantz does equally well at higher light levels. Explosions, like the one
where Bruce launches a police car into a helicopter, didn't just fill the
screen with bright flashes - flames had detail and clouds took on definition.


HD
DVD: Transformers
Who
doesn't love a movie about robots from outer space that takes a childhood
memory and smashes it to little tiny pieces? While Transformers was more about watching an impossible-to-believe
adolescent love story than a saga about a robot war, it did provide some great
sound and video moments and remains a pretty decent test disc. We captured some
rich color, vivid detail and almost three-dimensional textures which seemed to
strengths of this film in terms of its video quality.

Yep, just look at that skin detail...

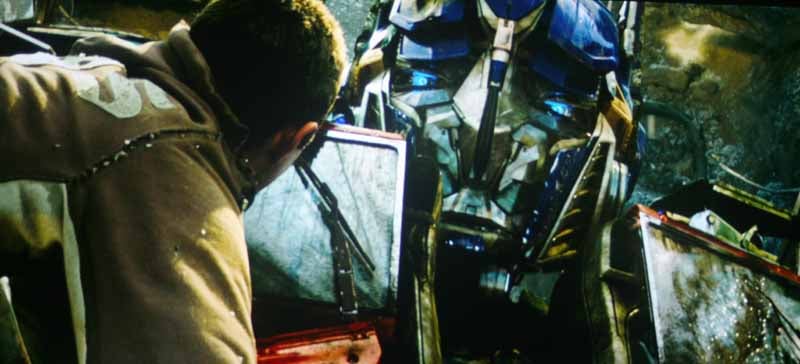
As seen above, there were some very colorful aspects to Transformers that really allowed the depth of the projector to show through. I also felt that the subtle details provided in the 3D characters, like the dirt on Optimus Prime's windshield and the gritty nature of most of the surfaces favored by the filmmaker and his penchant for driving sequences. When cars exploded on the highway chase scene, you really saw the layers within the flames. Concurrently, while the action was fast-paced the scenes still showed off incredible edge detail and motion blur wasn't applied so liberally as to destroy the on-screen focus.
DVD:
Shrek 3
This
movie looked good, even if the Shrek
series should probably have stopped after the first sequel. Colors really pop.
If you want to get a good feel for the capability of your projector to
reproduce colors, one of DreamWorks Animation's films is a solid choice. What
was nice about Shrek 3 was that it
provided a complete pure palette of color and depth to examine the capabilities
of this projector. When you view animation, you get no film grain, no dust, no
transfer errors - just pure digital picture. In the scene where the King (frog)
dies... again and again... I noticed that the Marantz did an uncanny job of
showing the lily pad bedsheets and area around the bed. At the same time you
witnessed a superb skin texture on the frog, and the color and highlights
provided on the screen were vivid and realistic. Close-ups of Fiona displayed
incredibly textured hair that looked truly lifelike - and this is animation!


Conclusion
This projector is pricey, but the added cost includes a tremendous amount of quality and performance. Video processing is superb, as is the color and clarity of the picture. The Konica-Minolta system used for the Zoom lens is amazing and ensures a very crisp, accurate picture. I also loved the little features and customizations you can do with this projector. Small details like the menu remembering where you were last, and the ease of which you can calibrate the projector and save a myriad of User settings makes it very easy to use and configure. For a custom installer, this projector offers nearly the quality of a three-chip DLP system, but at a price more users can afford. Blacks are black and rich, colors are vibrant and the system comes very well calibrated out of the box. If you pick up the VP-15S1 you're going to basically have the equivalent of a Cinema DLP projector in your home - or very close to it. If you're looking for a top-quality projector that doesn't cost as much as your car, this is the unit for you. I highly recommend it with very few reservations.
Marantz
VP-15S1
MSRP $8999
Marantz of America
100 Corporate Drive
Mahwah, NJ 07430-2041
http://us.marantz.com
About Marantz of America
Marantz America is committed to upholding the tradition of technological
superiority initiated by founder Saul Marantz. In keeping with this emphasis on
quality, Marantz audio and video components are carried only by the nation's premier independent audio/video specialty
retailers. Additional information is available at www.marantz.com.
Marantz America is a wholly owned subsidiary of D&M Holdings Inc.
The Score Card
The scoring below is based on each piece of equipment doing the duty it is designed for. The numbers are weighed heavily with respect to the individual cost of each unit, thus giving a rating roughly equal to:
Performance × Price Factor/Value = Rating
Audioholics.com note: The ratings indicated below are based on subjective listening and objective testing of the product in question. The rating scale is based on performance/value ratio. If you notice better performing products in future reviews that have lower numbers in certain areas, be aware that the value factor is most likely the culprit. Other Audioholics reviewers may rate products solely based on performance, and each reviewer has his/her own system for ratings.
Audioholics Rating Scale
 — Excellent
- — Very Good
- — Good
- — Fair
- — Poor
| Metric | Rating |
|---|---|
| Detail and Resolution | |
| Deinterlacing & Scaling | |
| Contrast and Black Levels | |
| Color Reproduction | |
| Noise Reduction | |
| Calibration Options | |
| Build Quality | |
| Ergonomics & Usability | |
| Ease of Setup | |
| Features | |
| Remote Control | |
| Fit and Finish | |
| Performance | |
| Value |
Clint Deboer was terminated from Audioholics for misconduct on April 4th, 2014. He no longer represents Audioholics in any fashion.
View full profile