
Optoma HD81 DLP Projector Review
Optoma HD81 DLP projector
- Product Name: HD81 DLP Projector
- Manufacturer: Optoma
- Performance Rating:

- Value Rating:
- Review Date: November 21, 2006 19:00
- MSRP: $ 9999
|
Brightness: 1400 ANSI lumens (high
power mode) |
Lamp: 300W UHP; 2000 hr
life |
|
Pros
- True native 1080p DLP
- Deep blacks, rich colors
- Outboard video processor with numerous inputs and Gennum VXP processing
- Consumer adjustment of RGB gain, cut and gamma
- Backlit remote
Cons
- Weak 1.2x Zoom Lens
- No lens shift
- Slow switching between formats/inputs
- Manual zoom/focus
- Loud fan
- Loud auto-iris with delayed response
- Requires long RS-232 serial cable for proper installation (not included)
- Frequent HDCP errors
- Locked ISF picture modes
HD81 Overview Basic Setup
The HD81 is not just a projector. It combines an excellent optical display system with an advanced external video processor that handles, among other things a host of inputs from composite all the way up to HDMI and RGBHV/component. What’s more, each input can be independently calibrated and the system has the capabilities to truly optimize each input source for best performance. When you buy this projector, you essentially get a ~$3000 video processor/scaler for free that includes a 3-input HDMI switcher and enough analogue inputs to satisfy any videoholic I’ve ever met.
I don’t want to turn this into a Gennum VXP review, but when I met with the Gennum reps at CEDIA this year in Denver I was blown away by the quality of both their new and legacy processors. Developed entirely for the HD-realm (and of course more than able to handle the tasks of standard definition work) these chipsets are incredibly advanced. Walking away, I knew I had to line up some products that utilized this technology to see if it stood up under rigorous independent testing. This is the first Gennum-based product we’ve received so far.
Overview of the Technology
In discussing the HD81, you are really talking about a lot of high-end tech put together into a cutting-edge package. For the most part the exciting features reside in the processor, though the projector display itself contains the latest 1080p technology from DLP and a robust optical system (though it lacks a lens shift function):
- Gennum VXP-based Video Processing (FineEdge, Fidelity Engine and TruMotionHD)
VXP is Gennum’s acronym for “Video eXcellence Processing” This system utilizes the GF9351 chipset and provides an incredible amount of features that includes: full 10-bit video processing, directional interpolation algorithms (jaggie reduction), pixel-based motion adaptive deinterlacing (2:2 and 2:3 pull-down) with bad edit detection, and noise reduction on both SD and HD content. - 1080p and Almost Limitless Format Support
The panel has a native resolution of 1920x1080 and does NOT utilize wobulation or any pixel doubling tricks. The DMD chip is the new .95” model with DarkChip3 technology. It has the most dense fill factor of anything DLP currently offers for home theater. The optical system includes a 6x (180Hz) 7-segment (RGB, RGB, White) color wheel that will alleviate a lot of the potential for incidental rainbow effects. - Inputs Galore
There are so many inputs on the HD81’s external video processor that it’s likely you’ll not require anything more to connect all of your current and legacy devices to this unit. I was personally able to dedicate inputs for an Xbox, Scientific Atlanta 8300HD DVR, VidaBox Lux HTPC, Denon DVD-3930CI DVD player, Velodyne SMS-1, and a couple other test DVD players. There is even an HDMI loop-through for connecting an AV receiver (giving you a ton more inputs if yours provides HDMI upconversion).
Basic Setup and Installation
The HD81 is a bit difficult in that it has a large (~27%) vertical screen offset (it needs to be mounted relatively high above the screen for ceiling installations) and requires a longish throw distance. One of the great aspects of 1080p is that – with all those densely-packed pixels – you should be able to sit very close to a large screen. While the Optoma HD81 could easily support a 1.0 viewing ratio (sitting as far away from the screen as it is wide), the limited zoom on the lens insists that this projector be mounted very far behind the seated position. Take a look at the throw chart:
Throw Chart for Distancing the Projector from a 16:9 Projection Screen*
|
Screen
Size |
Size (Inches) |
Distance (Feet) |
||
|
width |
height |
wide |
tele |
|
|
70 |
61.0 |
34.3 |
9.4 |
11.3 |
|
80 |
69.7 |
39.2 |
10.8 |
12.9 |
|
90 |
78.4 |
44.1 |
12.1 |
14.5 |
|
100 |
87.2 |
49.0 |
13.5 |
16.1 |
|
110 |
95.9 |
53.9 |
14.8 |
17.7 |
|
120 |
104.6 |
58.8 |
16.1 |
19.3 |
|
130 |
113.3 |
63.7 |
17.5 |
20.9 |
|
150 |
130.7 |
73.5 |
20.2 |
24.1 |
|
170 |
148.2 |
83.3 |
22.8 |
27.4 |
|
200 |
174.3 |
98.1 |
26.9 |
32.2 |
You can perhaps see that to hit your target screen size (and this projector is certainly bright enough to go to a larger sized screen) you’re going to have to have a fairly long room. I would have liked to have seen a bit more zoom on this lens, or at least the option to order a shorter throw lens for rooms that capitalizes on width and not depth. With the $9,999 retail price tag of this projector, Optoma is betting that this device will make its way primarily into dedicated theater rooms with a long throw or double row of seats. In my reference room I wasn’t able to hit my 100-inch Stewart StudioTek 130 at full size from the fixed mounting position and had to back the unit up against the back wall on my portable projector stand.
We utilized HDMI cables (from DVIGear) for the majority of our testing and also utilized component video cables (courtesy of Blue Jeans Cable). Our reference source player was the Denon DVD-3930CI which was able to output 1080p as well as 480i via HDMI – and the Optoma correctly handled and identified both formats with no problems.
All of our primary evaluations were done using the Film mode excepting times when we played with settings and gamma to tweak the projector and find out its capabilities and flexibility.
HD81 Connections, Remote & Menu System
To say that the external Gennum-driven process has an adequate number of inputs is like saying talk show radio hosts have a few opinions. Let's count just the video inputs: two composite, two s-video, two component (YPbPr), two BNC (RGBHV), three HDMI inputs (up to 1080p) and one "loop through" for connecting a receiver or HDMI jumper (bypass).
The connections are very easy to get to and are spaced apart in a leisurely fashion. RS-232 is available for control over the processor and a separate, dedicated RS-232 cable connects the processor to the projector. Dual 12V DC triggers round out this unit and make for a very flexible product that can either go near the projector (in the unusual case of a single source or table mount configuration) or in your AV component rack or equipment closet to serve as a master processor for all of your video sources (preferred).
Editor's Note: Receiver Loop-through Options
The HD81 video processor gives three ways to utilize the HDMI receiver loop-through option:Option 1 (HDMI 1.1+ capable receiver): Connect HDMI video inputs to the video processor. Take the'to AV receiver'output of the processor and run it to your AV receiver's HDMI input. This will allow the AV receiver to pull the HDMI audio from the sources and play the audio. Take the receiver's HDMI output and connect it to the'from AV receiver'input on the video processor.
Option 2 (non-HDMI capable receiver): Connect HDMI video inputs to the video processor. Connect audio from the source components directly to the receiver. Take the'to AV receiver'output and run it to the'from AV receiver'input using the supplied short HDMI jumper cable.
Option 3 (single HDMI source): Connect the single HDMI source components directly to the'from AV receiver'input. Run audio as you typically would.
There is, however, an undocumented (but implied) Fourth Option of this loop-through functionality that comes into play for those of you with a myriad of HDMI-capable components. It is identical to Option 1 above, but recognizes that you can now connect an additional set of HDMI input sources to the receiver 舑 thus expanding the capabilities of the system. How is this relevant? Simple. Instead of having a maximum of 3 HDMI inputs, users who have a Denon AVR-4306, for example, would effectively have two additional HDMI inputs to utilize. It can get confusing, but with some planning and a universal remote control you have almost limitless inputs.
Remote Control
This remote is (don't tell anyone I said this) sexy. It is the first remote I've seen which has backlighting for both the buttons as well as all of the text on the remote. Lacking a dedicated "light" button, you can simply press the "Enter" key to illuminate the remote control with a soft blue glow that surrounds each button and backlights the text. This is a "5-star" remote. There is really nothing missing and it provides an incredible amount of control over the projector. Let's face it, with a $10k price tag, no one will be using this remote for long (sorry product designers) but like a nice key ring, it makes this higher-end projector look smart.
About the only thing I could possibly say that detracts from the seemingly perfect remote is that its buttons are all the same above the "Gamma" and "Color" controls and below the "V-Shift" and "Overscan" functions. This means you'll have to look at the remote to control 2/3 of its features. The good news is that menu functions and "Overscan" controls (which I used predominantly) support tactile recognition (i.e. they're different than the other buttons) and are easily used without looking down. This is a clean, elegant remote (golf clap).
The Menu System
The menu system of
the HD81 is new and utilizes the Gennum VXP's overlay abilities. Organization was a mixture of
sensible and haphazard (which I've found is pretty much standard across the board). Overall most
items were easy to locate, though some had to be recalled from memory and seemed to be located in an
illogical place.
Image Menu
The Image menu allows users to access basic controls such as
Contrast, Brightness, Color and Tint as well as access the Advanced
menu for enhanced tweaking. The Advanced Menu is where you can
"get down to business"
if you're into really tweaking your system to its fullest. Here you have
access to Gamma, Color Temperature (more on this later when we
calibrate the system), Image Mode, and Color Vividness. A couple more
features exist that we don't recommend using due to their lack of performance or limited
usefulness: Edge Enhancement (leave this off), Noise Reduction (saw no
real effects via HDMI) and B/W extension would fall here. Based on a
sweep pattern the B/W Extension setting was the equivalent of tweaking
the Brightness control slightly and raised the level of the blacks
without really affecting white levels. As we indicated, Edge
Enhancement should probably stay
"Off"
as even a setting of
'1'
produced ringing artifacts on several of our test patterns. The
projector Modes has a wonderful ISF Day and ISF Night setting -
both of which even appeared on the remote control. Unfortunately, HD81
users are all waiting for a firmware update to activate these
functions. I have no idea why this wasn't done at the factory -
it defies logic.
Display Menu
The display menu is simple, providing options for the preset
formats (16:9, 4:3, LBX and Native). 16:9 will scale all inputs
(standard and high definition alike) into 1920x1080p. 4:3 will scale
all inputs into 1440x1080p, and LBX will stretch all inputs (standard
and high definition) 1.33x vertically.
For cinematic movies on a 2.35:1 aspect ratio screen, the LBX
(letterbox) mode can be utilized with an anamorphic lens to derive the
correct image. This ensures that you are utilizing all of the light
power of the projector when throwing the image onto the screen. Other
than this you have access to Overscan functions (handy for some cableTV
channels) and Image shift which digitally moves the picture within the
native resolution of the display.
System Menu
This menu allows access to source switching, background color
settings, 12V trigger assignments and main Projector options. The
Projector sub-menu grants control over important functions like the
IRIS setting, Projection orientation (front, rear, ceiling, etc),
Vertical Keystone, Brite Mode, High altitude (high fan) setting, Lamp
and Auto Power Off functions. You can also reset all of these settings
from the System menu or copy the settings to another input so you don't have to reconfigure the entire projector, say if you want to have all
of the HDMI inputs behave identically. And yes, you can change the menu
system to Portuguese, Chinese or Pig Latin if you so desire -
well, maybe not Pig Latin, but you get the idea.
Demo mode really allowed us to see what the HD81 was doing to the picture - making this a more objective evaluation than is typically possible in a review of this nature. The box drawn during the demo mode (though offset and not precise) essentially shows the processed video within so that you can compare this to the unaffected video surrounding the modified area. I found it to be mostly helpful for Color Vivid controls, B/W Extension, and Gamma settings.
Daytime
Viewing Experiences
Brite Mode gives you a bit of additional illumination at the
expense for a moderate increase in fan output noise. This is simply a
decision you'll need to make during daytime use. I would say that Brite Mode is
worthwhile for parties or when you aren't too concern with having the absolute quietest room possible. The HD81
produced a very bright picture on the screen during daytime hours and I
felt that this is a projector which is fully capable of replacing a
television (which is how I tend to use my projector).
Editor's Note: Gamma & DeGamma Settings
You can utilize the degamma and gamma settings in order to adjust the way the HD81 projector performs in your theater room. We found the Film digamma setting to result in the most dynamic picture, with deep blacks and a more "real" picture. If you're watching sporting events or simply want a brighter, more even image (giving you more details n darker scenes, for instance), select the TV degamma setting.Here's the kicker, because the HD81 has such a tremendous contrast and ability to hit all of these levels, you can simulate almost any projection type or look with this system. Want a smoother and brighter image? Switch to TV degamma and try adjusting the gamma settings up a bit. The Color Vividness control will also allow you to get that punchier color pop visible in many LCOS displays.
Keep in mind that each screen and room will yield some different results, so play around and experiment to see what you prefer - then store those settings for later recall depending upon the type of material you are viewing.
HD81 Glitches, Calibration & Benchmarks
If I unplugged power to the video processor and reconnected before I started my video source, the cableTV system would incorrectly inform me that the display did not support HDCP. The error occurred with every channel and the Scientific Atlanta 8300HD DVR box was connected directly to the HD81's outboard video processor via HDMI (with low-bandwidth 480p resolution as the lowest common denominator. Subsequent success with other displays, cable integrity was easily ruled out as a potential cause of the error). The only solution involved disconnecting and reconnecting power to the projector itself - except that this didn't always work. Power cycling any of the other devices or terminating power to the video processor did nothing. After rebooting the processor and projector everything tended to again work perfectly, but sometimes the entire system would have to be brought down. After a few more days of viewing this happened again when switching channels - about an hour into watching television. This happened several more times over the course of 30 days and I could not seem to discern a pattern. Switching sources from cableTV to DVD did not seem to help - the HDCP error was still present, ruling out the source. No other projector installed into this reference system has ever behaved in this manner.
The other thing you'll need to be aware of is a rather slow switching process when the resolution changes on an input (think HD cable boxes). At about ~7 seconds, you will experience some delays when going from Fox HD (720p) to CBS HD (1080i) channels. Channels surfers will be most affected and there is no delay when switching between identical formats (i.e. the 480p digital SD channels).
Calibration - Getting Those Black Levels Right!
Though the HD81 is the best Optoma has to offer currently, it will take a few tweaks to get it behaving perfectly. I found that even when set to Warm color temperature and having Brite Mode disengaged, the system could not quite measure flat across the grayscale, nor did it have a smooth luminance response (we'll explain this later). Real-world performance was excellent, but if you use numbers to determine the best projector - you'll need to spend some time tweaking to get optimal results. CIE showed a lack of blue, green and red saturation in varying degrees.
We utilized datacolor's ColorFacts Professional 6.0 software to calibrate and measure the grayscale response of the HD81. Starting positions were a bit off what we expect to see in a high-end projector, but calibration proved successful for the most part as we quickly dialed in the HD81 to approach ISF levels. For the "before" measurements, Auto Iris was engaged and the settings were configured for best film response in a light-controlled room.
|
Before Calibration |
After Calibration |
|
Looking at our starting settings, the HD81 picture is a tad cool with a color temperature of around ~7600K. |
I was able to dial in the projector quite a bit, but would recommend further work for anyone looking to really get a flat response. 80IRE "rubber banded" into place, leaving the other IRE levels off the mark. |
|
Checking out this luminance histogram you'll see that the Auto-iris affected the results just a tad, lol. This graph captures the erratic but effective behavior of the Auto Iris system. |
The after measurements were done with the Iris permanently set at 16. After doing a few more measurements (not shown here) I determined a setting of 10-12 may be a better choice for many. |
|
Color temp was a bit erratic at first and we measured around ~7600K. |
After calibration, the system measured ~6500K at 80 IRE. You can see a characteristic bump at 40IRE that could be tied to the meter. |
Both before and after settings looked fantastic to be honest. The calibrated image was much warmer, which is what I've grown accustomed to. We noticed a lack of smooth grayscale response. While 30 and 80 IRE were dialed in, areas in between seemed to run a bit loose. Further adjustments are recommended and you may want to set your lower level at 40 IRE for calibration. This projector had more of a "rubber band" effect than most, where adjustments in one area seemed to bring down that IRE level, but areas of higher and lower light levels wanted to stay where they were.
Our best "real world" measured contrast after calibration was 1648:1, pretty decent given our parameters and the resolution of our meter (we had several errant measurements showing over 20,000:1 but I think it's safe to throw those out and blame an unstable low light reading). Brite Mode will drop the color temperature a couple hundred K so take this into account when calibrating for various uses. At maximum output, we measured over 152 cd/m^2 reflected off the 100-inch Stewart StudioTek 130 screen. Yeah, it's bright.
Audioholics/HQV Bench Testing Summary of Test Results
Perfect Score is 130
Optoma HD81 Benchmark Score: 71
(The Optoma should be considered a suitable video processor for
almost all uses. If you happen to have a high end player, simply feed
progressive out of that component and the Gennum will handle the
scaling of the input signal to the native resolution of the projector.)
|
Test |
Max
|
HDMI 480i
|
HDMI 480i
|
|---|---|---|---|
|
Color Bar |
10 |
10 |
Pass |
|
Jaggies #1 |
5 |
3 |
Pass |
|
Jaggies #2 |
5 |
3 |
Pass |
|
Flag |
10 |
5 |
Pass |
|
Detail |
10 |
10 |
Pass |
|
Noise |
10 |
0 |
Fail |
|
Motion adaptive Noise Reduction |
10 |
0 |
Fail |
|
Film Detail |
10 |
10 |
Pass |
|
Cadence 2:2 Video |
5 |
0* |
Fail |
|
Cadence 2:2:2:4 DV Cam |
5 |
0 |
Fail |
|
Cadence 2:3:3:2 DV Cam |
5 |
0 |
Fail |
|
Cadence 3:2:3:2:2 Vari-speed |
5 |
5 |
Pass |
|
Cadence 5:5 Animation |
5 |
0 |
Fail |
|
Cadence 6:4 Animation |
5 |
0 |
Fail |
|
Cadence 8:7 animation |
5 |
0 |
Fail |
|
Cadence 3:2 24fps film |
5 |
5 |
Pass |
|
Scrolling Horizontal |
10 |
10 |
Pass |
|
Scrolling Rolling |
10 |
10 |
Pass |
| Total Points |
130 |
71 |
|
* While the HD81 locked on to 2-2 cadence but had periodic "jumps" where it would quickly lose and reacquire the correct lock.
Comments on HQV Testing
All tests were done by feeding the projector a 480i signal via HDMI. Right off the bat we realized that the Gennum processing, at least this GF9351 chipset didn't have the smoothest jaggie reduction we'd seen. It was definitely reducing jaggies, but in a way that produces smaller jagged edges, rather than a truly smooth line. As a result we gave partial credit for those tests. This manifested itself not only in the Jaggies tests, but also with the more real world Flag test as well.
Failing the noise reduction tests really took me by surprise. I cranked up the Noise Reduction controls all the way to 10 and so absolutely no difference in the picture (even using the Demo mode for comparison). I would have to say that I saw no evidence for this function being enabled over HDMI.
The HD81 was a mixed bag on the AVIA Pro Moving Zone Plate tests, failing the standard Zone Plate test, but doing very well on the 2-3 tests in horizontal, vertical, diagonal, and circular directions (it seemed to take a while to catch on to the vertical movement, but afterwards didn't skip a beat). The 2-2 Zone Plate test went very well in horizontal, took some time to adapt in vertical and showed periodical glitches on that pattern as well. Overall, it sported impressive results that translated to excellent real-world performance.
In testing for rainbow effect (RBE) I found the unit to be pretty good unless you dart your eyes. If you have a "white on black" shape and move your eyes left to right, you're going to see rainbows (if you are susceptible to this). What this tells me is that people who sit very close to the screen (you know who you are!) and have to physically move their eyes to take in the left-to-right action may have some issues. The majority of viewers will not and I was never distracted during normal viewing.
Optoma HD81 Viewing Evaluation and Conclusion
This is a good looking projector, despite its flaws and quirks. I'm not going to talk a lot during this section, let's just take a look at the pics.
HDTV: DiscoveryHD - Shark Rebellion
I love DiscoveryHD. It's one of the only stations that you can simply turn on at any time of the day and watch whatever is on. It's also the only channel that I am given an almost 100% chance of finding good source footage - any time of day. This is especially good on those nights when I'm up until 2am reviewing a product. This footage below doesn't do the show justice, but Shark Rebellion was as cool as its name - with very clean dark areas and shadow detail that actually surprised me.


HDTV: DiscoveryHD - Fantastic Festivals of the World
This show had absolutely gorgeous imagery from around the world. Take a look at the mask below as well as the intricate detail on the rooftops of the buildings. From sunscapes to cityscapes, this program showed off the high resolution features of the HD81.


HDTV: DiscoveryHD - The Desert Speaks
OK, one more detail show from Discovery HD. 1080i was scaled to 1080p by the HD81 with crystal clarity. There were no jaggies in sight anywhere and the picture showed off incredible hair and rock detail that I attempted to capture here.


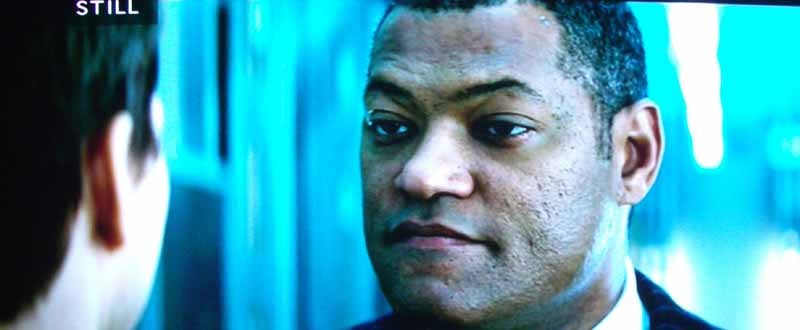
HDTV: CSI - Miami
This is one of my favorite shows on TV, despite David Caruso's somewhat monotonous acting style. The stories are always engaging and often have somewhat heartwarming endings. Since a majority of the scenes occur indoors, this show offers plenty of opportunities to examine dark scenes, shadows and things that go bump in the night. A plethora of close-ups also ensures that facial detail and color tint are also front and center. While you may not see it here, the clothing was the dead giveaway of this projector's shadow resolution.


HDTV: Bones
This fantastic show has some of the best camera shots in non-sporting HDTV. Not only is everything well framed, the quality of the lenses and storyboarding are apparently pristine if the images here are any indicator. Hair and faces showed fine nuances of detail and clothing and materials had plenty of texture (check out the picture matte frame here).

DVD: Over the Hedge
Animated movies do well to show color and absolute resolution and detail. As the sources are perfect, it's an effective gauge to see how well a display can reproduce everything to its fullest potential. And yes, that is a turtle's bottom staring at you from a paved road. Over the Hedge was great in that they paid particular attention to fur, making this one of the most fur-intensive animations to date (just watch a couple animals hug and you'll understand).


DVD: Mission Impossible III
This third installment of the M:I series was "ok" but I wouldn't exactly run out and purchase the DVD (though perhaps for audio it would be worth it). What I did like about the film was its consistent presentation of dark scenes which were juxtaposed with high-action scenes and tight close-ups. Black levels were excellent post-calibration and we found that you could really peer into the dark and pull out a very deep, 3-D picture. With the myriad of explosions during the beginning of the film, it also tested out the top end of the grayscale, showing me that there was no posturization or banding present on this unit.

HD81 Projector Review Conclusion
The HD81 is a bright, colorful and visually stunning projector - there's no arguing that. The picture quality is above par and the calibration options are extensive enough (in the user menu) to allow for a calibration that dials in the unit to where you need it. Where Optoma stumbles is in having some glitches and missing features that would truly make this a great purchase. In particular I feel that lens shift, or at least additional lens options should be available at this price point. Having access to default, unlocked ISF modes would also seem to make sense and I'm hoping these are unlocked and set with a future firmware update. Fan noise was a bit louder than I would have expected, though with the required throw distance this might not be so significant to many. This is the first native 1080p DLP projector I have reviewed this year and I can absolutely pronounce that it is an excellent device that just seemed to get pushed out the starting gate before all issues were completely ironed out. Recommended? Yes, but be sure to check out the competition as well for comparison.
MSRP: $9,999
Optoma Technology, Inc.
715 Sycamore Drive
Milpitas, CA 95035 USA
Tel : 408-383-3700
www.optomausa.com
About Optoma
Optoma Technology, Inc. is a leading manufacturer of award-winning digital display products and home entertainment projectors for consumers, businesses, education, professional audio/video (Pro AV) and CEDIA (Custom Electronic Design and Installation Association) channels.
The Score Card
The scoring below is based on each piece of equipment doing the duty it is designed for. The numbers are weighed heavily with respect to the individual cost of each unit, thus giving a rating roughly equal to:
Performance × Price Factor/Value = Rating
Audioholics.com note: The ratings indicated below are based on subjective listening and objective testing of the product in question. The rating scale is based on performance/value ratio. If you notice better performing products in future reviews that have lower numbers in certain areas, be aware that the value factor is most likely the culprit. Other Audioholics reviewers may rate products solely based on performance, and each reviewer has his/her own system for ratings.
Audioholics Rating Scale
 — Excellent
- — Very Good
- — Good
- — Fair
- — Poor
| Metric | Rating |
|---|---|
| Detail and Resolution | |
| Deinterlacing & Scaling | |
| Contrast and Black Levels | |
| Color Reproduction | |
| Noise Reduction | |
| Calibration Options | |
| Build Quality | |
| Ergonomics & Usability | |
| Ease of Setup | |
| Features | |
| Remote Control | |
| Performance | |
| Value |
Clint Deboer was terminated from Audioholics for misconduct on April 4th, 2014. He no longer represents Audioholics in any fashion.
View full profile