
Planet Waves ZM Series Cables & Custom Installation Kit Review
Planet Waves Cables Kit
- Product Name: ZM Series Cables & Custom Installation Kit
- Manufacturer: Planet Waves
- Performance Rating:

- Value Rating:
- Review Date: April 21, 2009 03:00
- Made in USA
- Meets 75 ohm HD standard
- Sweep-tested 3GHz over 100ft with nominal db loss
- Nominal Capacitance: 18.2 pF/ft
- Premium oxygen-free copper
- 100% shielding with 95% tinned copper braid & tin foil shield
- Nitrogen-gas-injected foam PE dielectric
- TPE Jacket
- CM & CL2 rated for in-wall installations
- Max Pulling Tension 2359 PSI
- Max Bend Radius 2.25 inches (Single/Dual/Triple/RGB3/RGB5)
Pros
- Easy, repeatable, virtually fool-proof
- Tool verifies tip, shield and tests shorts
- Radial cutter provides easy bundle cable stripping
Cons
- Expensive when compared to traditional bulk connectors and cables
Planet Waves ZM Introduction
Time is money. You know it, I know it… your custom installer who just landed that contract wiring up that 6-figure whole home audio & video system knows it. And if you can save countless hours wiring up your audio and video cables, why wouldn't you want to take advantage of all that reclaimed labor? Planet Waves has designed and refined its system to reduce on-the-job labor costs and substitute an easy-to-use and reliable cabling system that makes soldering and crimping AV cables a thing of the past.
 We were introduced to
Planet Waves quite some time ago and were at once captivated by their line of
quick-assembly cables and interconnects. At the time we were dazzled, but still
wanted more - primarily a solution for more robust bundled cables. Fast forward
to last winter and the company gave us a sneak peek at some of their latest and
greatest products. This included some new cabling products as well as a
revamped line of connectors (their ZM Series). When the kits were finally
ready, we jumped at the chance to take a closer look at these cables and see if
indeed "change is good".
We were introduced to
Planet Waves quite some time ago and were at once captivated by their line of
quick-assembly cables and interconnects. At the time we were dazzled, but still
wanted more - primarily a solution for more robust bundled cables. Fast forward
to last winter and the company gave us a sneak peek at some of their latest and
greatest products. This included some new cabling products as well as a
revamped line of connectors (their ZM Series). When the kits were finally
ready, we jumped at the chance to take a closer look at these cables and see if
indeed "change is good".
Planet Waves ZM Series Overview and Assembly
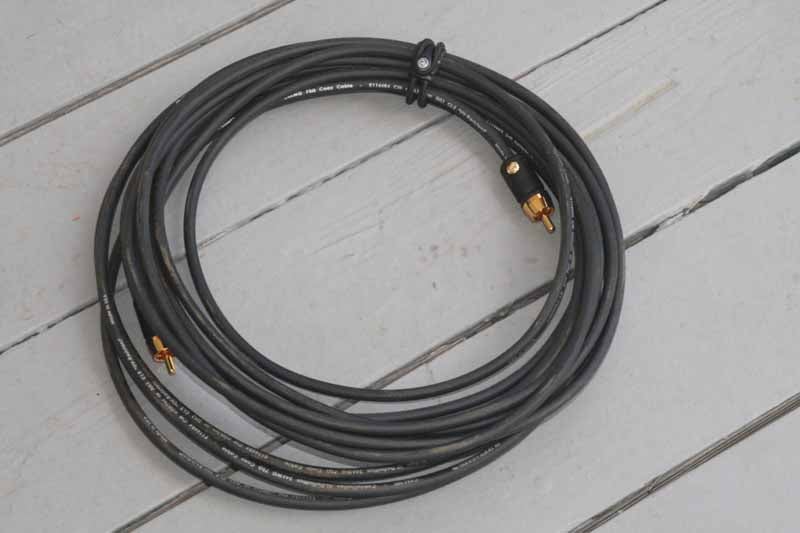
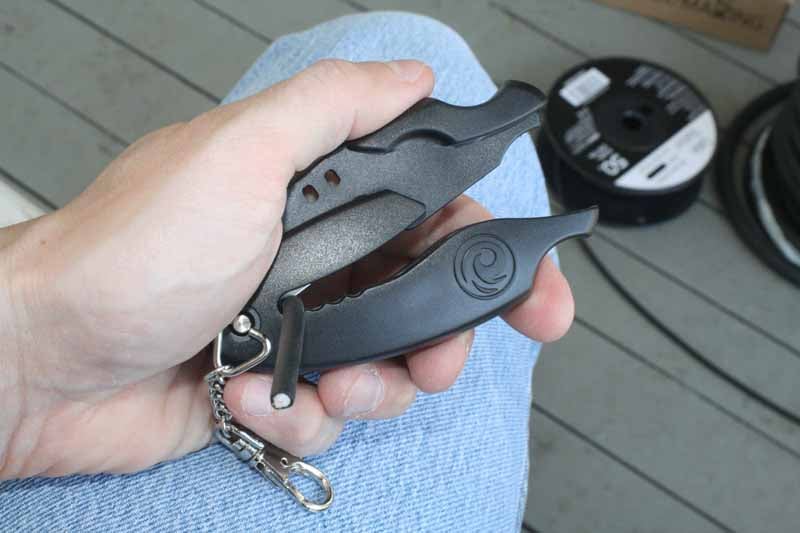
The first thing I did after opening the box and arranging the contents, was set about making a 20 foot subwoofer cable (frankly, because one of our staff members could use one). I selected the 50 ft. roll of 3/16" diameter coaxial HD interconnect cable and also the Custom Installation Tool Kit. This tool kit comes with a Planet Waves Triple Cutter and a Screwdriver. The Triple Cutter is designed to cut single, dual and triple coax runs and is designed to fit comfortably in the hand. The first thing I noticed was that the Triple Cutter provides no way to insert your fingers into the razor knife cutting area of the tool - ensuring that no matter how casually you hold the tool, you're not likely to get cut unless your fingers are the size of a 3 year old (i.e. don't give this to your kids as a toy). The tool also has a sort of chain-tethered clip that will allow it to be secured to a belt or metal loop should you have something like that on your tool belt.
Using the Triple cutter I was actually pleasantly stunned when it simply clipped the single coax cable neatly with a very minimal amount of pressure. The tool is extremely easy to use and I couldn't believe that I didn't need to add more pressure in order to slice through the coax like butter. The effect was very much like an expensive cigar cutter. It also had the same satisfying "clip" sound that let you know the razor had hit home.
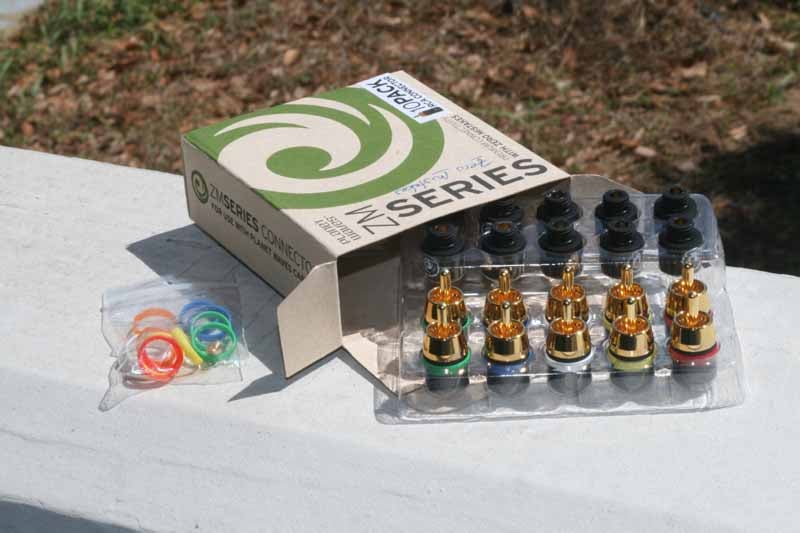 As for the actual RCA ends, we had an
ample supply of the standard (ST Series) connectors, but instead grabbed Planet
Waves' new top of the line ZM Series (ZM stands for "Zero Mistakes"
in case you were wondering). Taking a
look at the 10 pack's contents, we noted that the new ZM Series connectors are
actually two-parts: a base which fastens to the coaxial cable and a
"tip" which screws onto the base. If you're jumping ahead, you've
probably figured out what took me only 10 short seconds to realize - the tips
are interchangeable. This means that if you go from a device requiring an RCA
input to one that can handle BNC connections, just change out the tip. It
really is that simple. While we're certain people won't be changing out tips
every week it's a nice added feature. The other advantage to the screw-on tips
is that the amount of pressure needed to have the tip come in contact with the
center wire of the coax cable is fixed. You can only screw it down so far. With
the ST Series connectors you have to screw them in, manually making the tip
connection by the sheer fact that you think you can't screw it down any
further. The old system/connector is fine, it's just not as exacting.
As for the actual RCA ends, we had an
ample supply of the standard (ST Series) connectors, but instead grabbed Planet
Waves' new top of the line ZM Series (ZM stands for "Zero Mistakes"
in case you were wondering). Taking a
look at the 10 pack's contents, we noted that the new ZM Series connectors are
actually two-parts: a base which fastens to the coaxial cable and a
"tip" which screws onto the base. If you're jumping ahead, you've
probably figured out what took me only 10 short seconds to realize - the tips
are interchangeable. This means that if you go from a device requiring an RCA
input to one that can handle BNC connections, just change out the tip. It
really is that simple. While we're certain people won't be changing out tips
every week it's a nice added feature. The other advantage to the screw-on tips
is that the amount of pressure needed to have the tip come in contact with the
center wire of the coax cable is fixed. You can only screw it down so far. With
the ST Series connectors you have to screw them in, manually making the tip
connection by the sheer fact that you think you can't screw it down any
further. The old system/connector is fine, it's just not as exacting.

 To make the actual connection, we took
our cut-to-length coaxial cable and secured the bottom half of the new ZM
Series RCA by backing out the ground screw, slipping it over the cable and
seating it all the way in. The connector is made so that the cable must be
pushed all the way in. It won't pass through the connector, but instead hits an
internal lip which keeps it flush to the top of the lower piece. Once seated,
crank down the ground screw until it stops. After this you simply screw on the
tip until it is completely seated. While this sounds like a lot of steps, the
process was pretty much clip, screw, twist, done. It takes approximately 30
seconds for even a rookie to make a connection. So there you have it, 1 minute
and 30 seconds to make a 20 foot long subwoofer cable. Not bad. But now I
wanted to move onto component video.
To make the actual connection, we took
our cut-to-length coaxial cable and secured the bottom half of the new ZM
Series RCA by backing out the ground screw, slipping it over the cable and
seating it all the way in. The connector is made so that the cable must be
pushed all the way in. It won't pass through the connector, but instead hits an
internal lip which keeps it flush to the top of the lower piece. Once seated,
crank down the ground screw until it stops. After this you simply screw on the
tip until it is completely seated. While this sounds like a lot of steps, the
process was pretty much clip, screw, twist, done. It takes approximately 30
seconds for even a rookie to make a connection. So there you have it, 1 minute
and 30 seconds to make a 20 foot long subwoofer cable. Not bad. But now I
wanted to move onto component video.

Planet Waves ZM Series RGB3HD Bundles
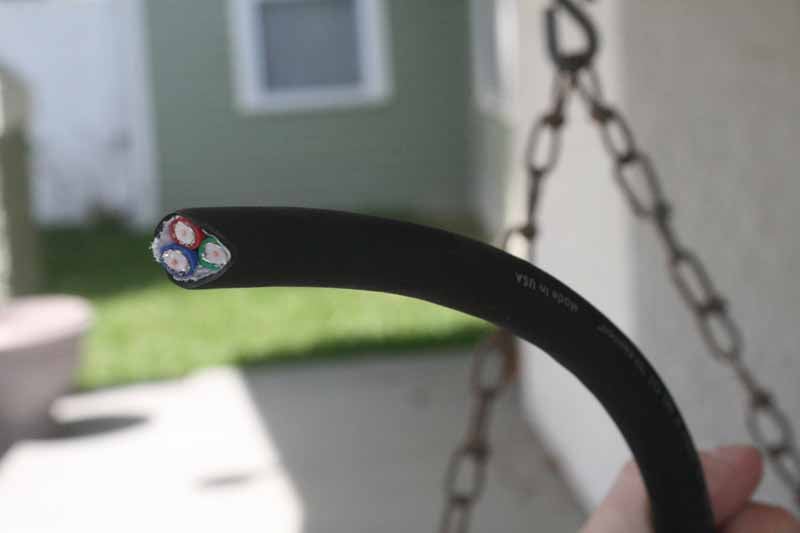 For this next cable I
was itching to try out Planet Waves' new 24AWG RGB3HD
bundled component video cable. This is a larger diameter cable that houses
three individual coaxial cables (one for each of the red (Pr), green (Y) and
blue (Pb) cables). Taking a closer look I found that the cable felt well-built.
It is very flexible and each of the dual shielded coax cables was wrapped in a
non-metallic insulation. I also realized I'd get to try out a new tool, Planet
Waves' RC01 Radial Cutter.
For this next cable I
was itching to try out Planet Waves' new 24AWG RGB3HD
bundled component video cable. This is a larger diameter cable that houses
three individual coaxial cables (one for each of the red (Pr), green (Y) and
blue (Pb) cables). Taking a closer look I found that the cable felt well-built.
It is very flexible and each of the dual shielded coax cables was wrapped in a
non-metallic insulation. I also realized I'd get to try out a new tool, Planet
Waves' RC01 Radial Cutter.
 The Radial Cutter is a new tool that
allows you to set a specific depth with which to cut through the shield of a bundled
cable (incidentally it will work with any bundled cable, not just those
from Planet Waves). The way the tool works is that a small, curved-edge razor
blade sits inside the tool atop an adjustable depth gauge (called a
"knurled head" in the instructions). A spring-loaded upper jaw frame
(cable guide) presses the cable bundle to the knife's edge. Setting the depth
gauge is as simple as twisting the knurled head until the razor sticks up just
high enough to slice the jacket without damaging the cables underneath. My recommendation
is to test the depth on the last inch of wire or a scrap piece if you have it.
After you have the depth correct you can simply insert the wire and spin the
tool around the cable. It slices neatly and accurately. But there's more. The
head rotates 90 degrees, so after you have made your initial cut through the
jacket all the way around the bundled cable you can rotate the upper jaw frame
with your thumb and then pull the blade lengthwise to split the jacket all the
way down the length you are removing. In all my cuts I opted for a conservative
depth, so that the blade never had a chance to penetrate any of the cables
below. This gave me some additional prying to get the outer sheath removed, but
was a good compromise overall. This tool fits well with the Planet Waves line -
it allowed me to strip both sides of a 3 foot long component cable in less than
2 minutes.
The Radial Cutter is a new tool that
allows you to set a specific depth with which to cut through the shield of a bundled
cable (incidentally it will work with any bundled cable, not just those
from Planet Waves). The way the tool works is that a small, curved-edge razor
blade sits inside the tool atop an adjustable depth gauge (called a
"knurled head" in the instructions). A spring-loaded upper jaw frame
(cable guide) presses the cable bundle to the knife's edge. Setting the depth
gauge is as simple as twisting the knurled head until the razor sticks up just
high enough to slice the jacket without damaging the cables underneath. My recommendation
is to test the depth on the last inch of wire or a scrap piece if you have it.
After you have the depth correct you can simply insert the wire and spin the
tool around the cable. It slices neatly and accurately. But there's more. The
head rotates 90 degrees, so after you have made your initial cut through the
jacket all the way around the bundled cable you can rotate the upper jaw frame
with your thumb and then pull the blade lengthwise to split the jacket all the
way down the length you are removing. In all my cuts I opted for a conservative
depth, so that the blade never had a chance to penetrate any of the cables
below. This gave me some additional prying to get the outer sheath removed, but
was a good compromise overall. This tool fits well with the Planet Waves line -
it allowed me to strip both sides of a 3 foot long component cable in less than
2 minutes.

 Before I moved on to actually
attaching the finishing pieces and connectors I did want to point out that
Planet Waves missed sending me one important tool: something that could cleanly
slice through the 3-cable jacketed RGB3HD
bundle. To use standard wire cutters would potentially crush the ends of the
coaxial cables inside, so instead I took a cue form their other tool and grabbed
a razor knife and a fresh blade and cut through the bundle cleanly and quickly.
In fact, given the rough-cut state of the bundle ends, you'll want to be certain
to use a razor knife on the end to make sure you have a clean starting point.
Once I had my cable ready and the stray insulation cleaned up I placed two RGB3 end caps on the cable (do this first) and prepared to attach my Red,
Green and Blue ZM series RCA connectors. It took all of 4 minutes and 10
seconds to get all six connectors onto the cable, including verifying my work
with the Planet Waves Cable Tester. Not bad at all, and I finally made myself
that 30-inch component video "jumper" cable I'd always wanted.
Before I moved on to actually
attaching the finishing pieces and connectors I did want to point out that
Planet Waves missed sending me one important tool: something that could cleanly
slice through the 3-cable jacketed RGB3HD
bundle. To use standard wire cutters would potentially crush the ends of the
coaxial cables inside, so instead I took a cue form their other tool and grabbed
a razor knife and a fresh blade and cut through the bundle cleanly and quickly.
In fact, given the rough-cut state of the bundle ends, you'll want to be certain
to use a razor knife on the end to make sure you have a clean starting point.
Once I had my cable ready and the stray insulation cleaned up I placed two RGB3 end caps on the cable (do this first) and prepared to attach my Red,
Green and Blue ZM series RCA connectors. It took all of 4 minutes and 10
seconds to get all six connectors onto the cable, including verifying my work
with the Planet Waves Cable Tester. Not bad at all, and I finally made myself
that 30-inch component video "jumper" cable I'd always wanted.


I duplicated this same cable, but with the addition of two more lines with the new bundled RGB5HD cable which includes 5 coaxial cables in a single bundle (Planet Waves also offers the same cable with a CAT5e cable nestled within). This would be excellent for any number of things, from legacy RGBHV lines, to component-plus-analogue audio, to analogue 5.1 audio jumper cables. In either case we made one simply to tie together component video and stereo audio for a kids room system that didn't have surround or an advanced A/V receiver.

Planet Waves ZM Series Wall Plate Connectors and Conclusion
So what do you do when you have a ton of cable left over in bundled, dual, single and triple wire configurations? Why you go to town, that's what you do. I completely rewired my living room system. Then I called some friends and made some cables for them. And my in-laws. By the time I was done I had made over a dozen AV cables and hadn't even broken a sweat. One of the things included with this package was a Premium Cable-Making Kit. That alone had the necessary supplies and tools to make 10-12 cables depending upon your required lengths. At last year's Superbowl Party I found that I had given away one of my long length component video cables and had to cobble several, together in order to get HDTV to our outdoor projector. With the Planet Waves cables staring me in the face I decided to manufacture a long component cable to eliminate the problem for next year (by the way, try running ~100 feet of HDMI cable outdoors and see how far you get without an EQ or other active solution!)
 The last thing we tested were the new
wall-plate connectors that Planet Waves had given us as part of this evaluation
package. What they've done is take their 3-step cable-making process and
applied it to wall plate connectors. This means that you can get the same
solder-less, crimp-less connections at your wall that you do behind your home
theater equipment. It works really well and the connectors come in many
variations - each based on the ZM Series and made by securing the bottom
section and then screwing the connector on top, with the wall plate sandwiched
between. We were able to play with female RCA, BNC, and F connectors - which
make up the majority of what you'd want in a system like this. For more sophisticated
installations, what you'll want to do is simply group your connectors into two
Decora-style plates. One can be the Planet Waves-compatible connections
(CableTV, component video, audio, etc) and the other can be for such things as
HDMI, IR emitters and triggers.
The last thing we tested were the new
wall-plate connectors that Planet Waves had given us as part of this evaluation
package. What they've done is take their 3-step cable-making process and
applied it to wall plate connectors. This means that you can get the same
solder-less, crimp-less connections at your wall that you do behind your home
theater equipment. It works really well and the connectors come in many
variations - each based on the ZM Series and made by securing the bottom
section and then screwing the connector on top, with the wall plate sandwiched
between. We were able to play with female RCA, BNC, and F connectors - which
make up the majority of what you'd want in a system like this. For more sophisticated
installations, what you'll want to do is simply group your connectors into two
Decora-style plates. One can be the Planet Waves-compatible connections
(CableTV, component video, audio, etc) and the other can be for such things as
HDMI, IR emitters and triggers.
Speaking of IR and triggers, Planet Waves also now has mono 3.5mm connectors which can be used to make trigger cables or as jumpers for IR emitters in conjunction with RF remote controls. Their musician's line includes 1/4" connectors and can facilitate instrument cables and custom solutions to link up multiple guitar pedal boxes. The system is very complete and Planet Waves even offers various length HDMI cables for those looking to get a "one-stop-shop" complete solution for all of their analogue and digital audio & video needs.
Conclusion
The Planet Waves Custom Installation Tool Kit and new line of ZM Series connectors is an excellent solution for anyone wanting to clear up the clutter in the back of their AV systems. But it's also a great way to save on installation labor and simplify the way you do your AV cable runs. For pros, the expanded lineup really offers just about anything you could ask for and makes fashioning custom cable runs and interconnects a quick, easy and reliable process. Planet Waves' new line of ZM Series high-end connectors and their interchangeable tips are more than revolutionary - they're simply going to make you money if you do this for a living. This system isn't cheap, but for those who place a dollar value on their time and want testable reliability, this is a one-two punch that is revolutionizing the way both consumers and custom installers handle crafting custom interconnects. Highly recommended.
About Planet Waves
D’Addario
& Company, Inc. designs, manufactures, and markets complete lines of
strings for fretted and bowed musical instruments, drumheads, drum practice
pads, and guitar and woodwind accessories under the proprietary brand names
D’Addario, Evans Drumheads, Planet Waves, Rico, HQ Percussion and PureSound
Percussion. The company also runs the popular Gbase.com online gear source.
D’Addario products are marketed in approximately 120 countries.
The Score Card
The scoring below is based on each piece of equipment doing the duty it is designed for. The numbers are weighed heavily with respect to the individual cost of each unit, thus giving a rating roughly equal to:
Performance × Price Factor/Value = Rating
Audioholics.com note: The ratings indicated below are based on subjective listening and objective testing of the product in question. The rating scale is based on performance/value ratio. If you notice better performing products in future reviews that have lower numbers in certain areas, be aware that the value factor is most likely the culprit. Other Audioholics reviewers may rate products solely based on performance, and each reviewer has his/her own system for ratings.
Audioholics Rating Scale
 — Excellent
- — Very Good
- — Good
- — Fair
- — Poor
| Metric | Rating |
|---|---|
| Performance | |
| Function | |
| Versatility | |
| Build Quality | |
| Ease of Setup/Programming/Integration | |
| Performance | |
| Value |
Clint Deboer was terminated from Audioholics for misconduct on April 4th, 2014. He no longer represents Audioholics in any fashion.
View full profile