
Auralex SonoLite 1" Absorption Panel Review
Auralex SonoLite
- Product Name: SonoLite
- Manufacturer: Auralex
- Performance Rating:


- Value Rating:
- Review Date: October 28, 2011 12:50
- MSRP: $ 30 per panel
Description: 1" fabric wrapped absorption panel
Dimensions: 2' x 2' x 1"
Color options: tan, black
Pros
- Effective absorption on the cheap
- Black and Tan color options
- Easy to install
Cons
- Only comes in 1" thick panels
Auralex SonoLite 1" Absorption Panel Introduction
 Auralex
announced their new 1” absorption panels at the 2011 NAMM claiming it was a
cost effective solution to help eliminate flutter echo. This piqued our interest as a few months back
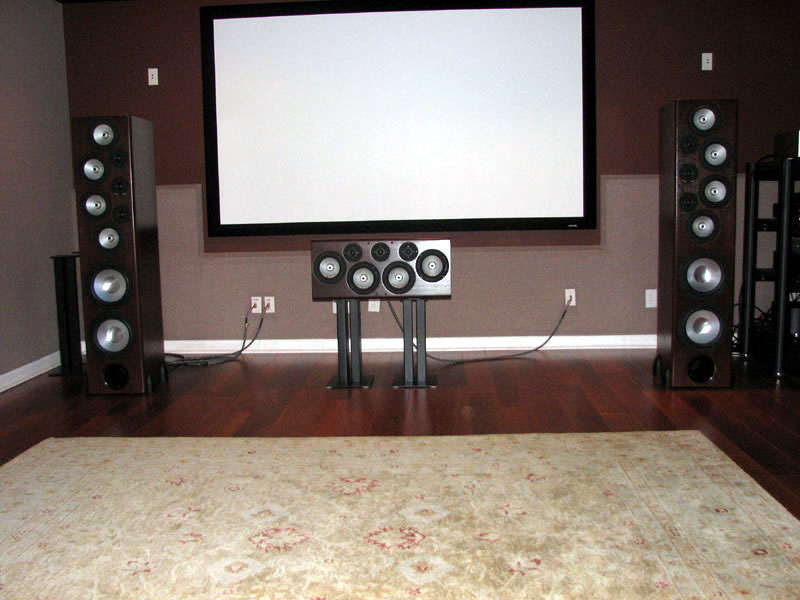
we decided to change out the carpeted flooring of the Audioholics Showcase
Theater system in favor of a high quality laminate.
Auralex
announced their new 1” absorption panels at the 2011 NAMM claiming it was a
cost effective solution to help eliminate flutter echo. This piqued our interest as a few months back
we decided to change out the carpeted flooring of the Audioholics Showcase
Theater system in favor of a high quality laminate.
We did this for several reasons:
- The builder grade carpets left much to be desired as the years wore on
- Aesthetics
- To liven up the room a bit
We knew there would be some risks in going from a flooring that acted like an absorptive membrane to one that acted like a reflector at high frequencies (the laminate). However, we suspected this could be controlled with a thick throw rug and pad at the primary first reflection point between the front speakers and listening area.
Auralex SonoLite Flutter Echo Eliminator
 Prior
to installing the throw rug, we geared up for a quick listening session. To our dismay, the resultant sound quality
was a disaster. Despite our room being
quite robustly acoustically treated (courtesy of Auralex), adding that much
reflective surface area to the floor wrecked havoc on the sound quality. Stereo imaging lost focus and low level
details seemed to be muddied in excessive echo.
Even the upper bass just didn’t sound right. There was too much mid-bass overhang compared
to how the system sounded when the floor was carpeted. "Don’t panic", I thought to
myself. All cannot be lost, we just
need to make some tweaks here or there to reduce the coincidence of hard
parallel surface (ceiling and floor) reflections also known as flutter echo.
Prior
to installing the throw rug, we geared up for a quick listening session. To our dismay, the resultant sound quality
was a disaster. Despite our room being
quite robustly acoustically treated (courtesy of Auralex), adding that much
reflective surface area to the floor wrecked havoc on the sound quality. Stereo imaging lost focus and low level
details seemed to be muddied in excessive echo.
Even the upper bass just didn’t sound right. There was too much mid-bass overhang compared
to how the system sounded when the floor was carpeted. "Don’t panic", I thought to
myself. All cannot be lost, we just
need to make some tweaks here or there to reduce the coincidence of hard
parallel surface (ceiling and floor) reflections also known as flutter echo.
Our heavy throw rugs and pads showed up, one for the first reflection point relative to the front speakers, and the other to place under our electric drum kit and bongos towards the right side of the room. A throw rug was necessary for the drum area because the upper midbass region sounded boomy and hollow and also because the foot pedals and drum kit weren’t secure on the wood flooring. The throw rug overlayed on the wood flooring simply looks stunning in our opinion. We felt it really jazzed up the rooms appearance almost making it feel like a studio environment.
 To our relief, the throw rug greatly
helped the drum area. The resultant
sound character was similar to what it was with the carpeted flooring, only it
was now a bit more lively (which is what we were after.) We were really quite amazed that the flooring
made such an impact at upper bass frequencies.
To our relief, the throw rug greatly
helped the drum area. The resultant
sound character was similar to what it was with the carpeted flooring, only it
was now a bit more lively (which is what we were after.) We were really quite amazed that the flooring
made such an impact at upper bass frequencies.
The 8’ x 10’ throw rug we placed at the first reflection point for the home theater area cleaned things up significantly. Speech intelligibility improved dramatically and the sound started coming into focus. Stereo imaging was greatly improved and the soundstage emanating from the front speakers felt larger than it had with the carpeted flooring. We found that moving the left mid-wall sub about 2 feet closer to the font wall helped tighten up the bass. This was confirmed both audibly and with measurements. The overall sound quality of the room just sounded livelier overall, though we still did notice some degradation of sound quality and listening fatigue at very high playback levels - something not experienced with the carpeted flooring.
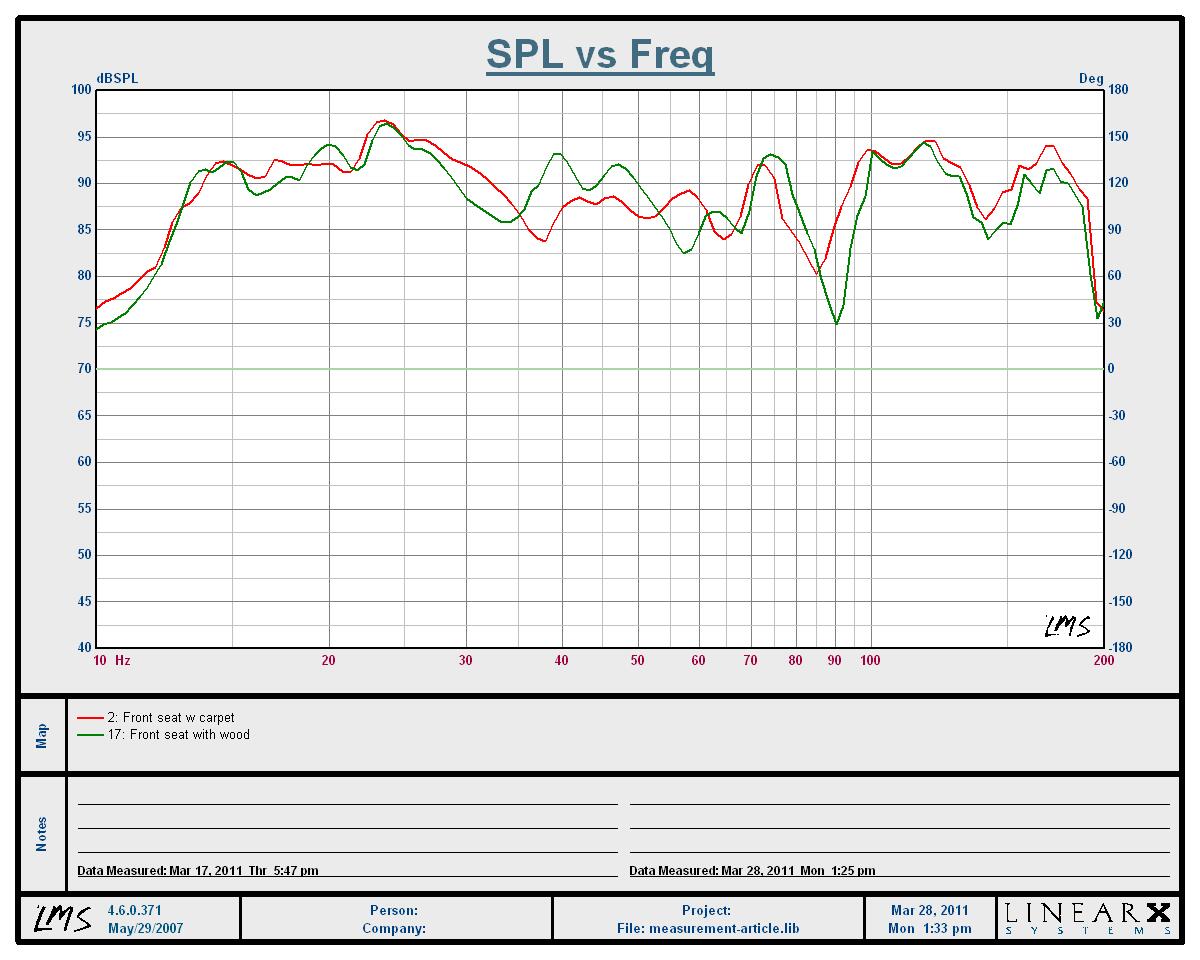
In-room Low End Frequency Response; red- wood flooring green – wood flooring
For comparative purposes I pulled a low frequency measurement at the front row location with the carpeted flooring (red) and wood flooring (green) using as close to identical mic positions as possible. The measurements tracked each other fairly closely with perhaps a bit more output in the 30-50Hz range with the wood floors. It is possible part of the boominess I was hearing was related to this bump that wasn’t present with the carpeted flooring. Repositioning the left midwall sub and EQing the overall response of all 4 subs helped dial back in our optimal frequency response.
The Clap Test
 Walking around the room and using the
somewhat crude, but useful, 'clapping hands' tests, we found a huge area
towards the right side that suffered excessive flutter echo issues due to the
bare hard parallel surfaces of the ceiling and hardwood flooring. This is the “L” shape area of the room to the
"starboard" side of the right front speaker. To more accurately assess its impact, we had
one person standing by the right front speaker clapping their hands, while I
sat at the primary listening area listening for unwanted flutter echo. The results were far less dramatic than
clapping directly under the origin point at the side of the room, but it was
still audible nonetheless. Considering
that we often listen to music at much higher playback levels than we could
achieve by clapping our hands, it was logical to presume this imbalance was an
offending contributor to premature listening fatigue and the blurring of the
soundstage at high playback levels.
Walking around the room and using the
somewhat crude, but useful, 'clapping hands' tests, we found a huge area
towards the right side that suffered excessive flutter echo issues due to the
bare hard parallel surfaces of the ceiling and hardwood flooring. This is the “L” shape area of the room to the
"starboard" side of the right front speaker. To more accurately assess its impact, we had
one person standing by the right front speaker clapping their hands, while I
sat at the primary listening area listening for unwanted flutter echo. The results were far less dramatic than
clapping directly under the origin point at the side of the room, but it was
still audible nonetheless. Considering
that we often listen to music at much higher playback levels than we could
achieve by clapping our hands, it was logical to presume this imbalance was an
offending contributor to premature listening fatigue and the blurring of the
soundstage at high playback levels.
Interestingly enough, when standing directly in front of the right and left front speakers, we could hear distinct differences between the corresponding flutter echo while clapping our hands at each point. This was also observed at the listening area too. There was obviously an imbalance between the front left and right speakers that wasn’t present (or noticeable) when carpeted flooring was installed. Asymmetry is not a good thing between a stereo pair of speakers, so it was becoming clear to us that this problematic area of the ceiling needed to be treated with absorption.
At this point I had two options:
- Fabric wrap 1” absorption to preserve the black color of my ceiling
- Consider pre-made 1” absorption tiles
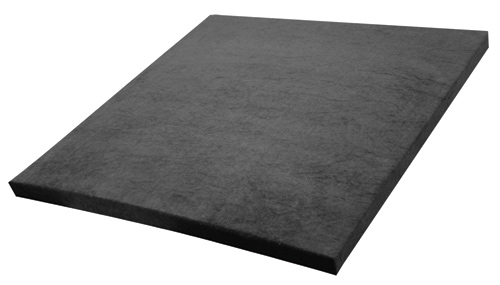
Most absorption tiles are not offered in anything other than white, so I was quite pleased to discover the Auralex SonoLite panels which also come in either black or tan. I chose black. SonoLite is a 2’ x 2’ x 1” fabric wrapped absorption panel with a Studiofoam Pro core which Auralex claims is a cost effective alternative to fiberglass fabric-covered panels.
Installation
The area we wanted to treat was roughly 10’ x 8’ and we estimated about 10-12 panels would do the job nicely. The SonoLite panels can be installed by using either adhesive spray glue or Velco industrial strength double-stick tape for a less permanent mounting solution. I chose to use the glue option but in hindsight, I’d strongly advise using adhesive tape instead. Glue smells bad while its wet, it’s messy and it takes a lot of time and patience to get an object to stick against the ceiling while fighting against the force of gravity. It’s also rather difficult to remove requiring a complete repainting of the ceiling if you later decide to remove the panels. Make sure you really want the panels in the location you chose before glueing them down!
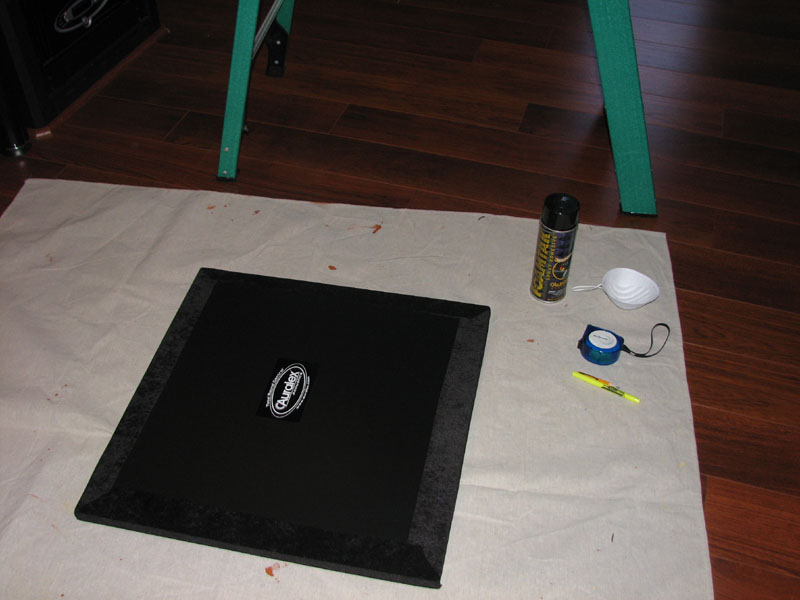
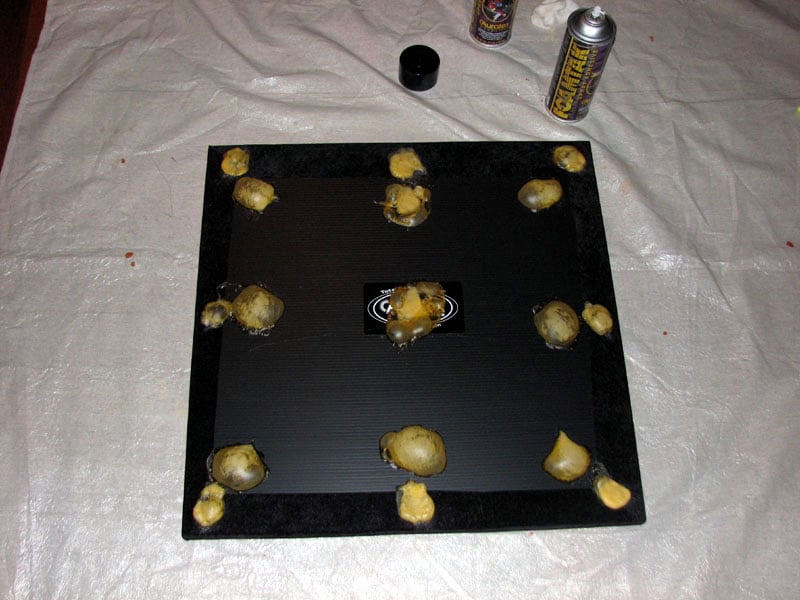
Auralex
SonoLite & accessory equipment needed for installation(left pic) & glued panel (right pic)
The items you will need for installation are as follows:
- Step ladder
- Measuring tape
- Marker
- Spray Adhesive or Velco tape
- Large plastic sheet or old blanket (if using glue)
- Mask (if using glue)
- Gloves (if using glue)
 We found the Auralex adhesive glue is
about the best spray glue I’ve ever used.
It’s a bit denser than the stuff you can buy at your local hardware
store. The best way to get the panels to
stick on the ceiling while not using massive amounts of glue is to spray little
circles in all of the corners and sides as well as the center area. I initially used crisscross patterns but
found it used too much glue and it didn’t work as well. Now here comes the hard part: getting these
panels to adhere to the ceiling. Make
sure you have your gloves on when handling the panels. I found that pressing the panel against the
ceiling, then removing it for a second and reapplying really helped to get the
panels to stick. You also will need to
apply constant pressure against the panel while also lightly patting it all
around. I used my head at the center
while I patted the panel. Be careful not
to press too hard or else you risk compressing the panel which will limit its
effectiveness. Each panel took a good 5
minutes or so to stick to the ceiling, so patience is needed. I actually found that I had to go back 20-30
minutes later to each panel and press them against the ceiling to get them to
permanently stick. This whole process
was murder on my neck and back but a true Audioholic is willing to endure some
pain for the betterment of sound quality.
A smart Audioholic however will learn from my mistake and take my advice
to use Velcro tape adhesive instead of glue.
Because we used glue, we found it difficult to precisely place the
panels where I wanted them so the installation wasn’t perfectly straight, but
good enough in a darkly lit room. We
wound up installing 11 of the 12 supplied panels which covered the area
nicely. The extra panel was stowed away
for future use or replacement if needed.
We found the Auralex adhesive glue is
about the best spray glue I’ve ever used.
It’s a bit denser than the stuff you can buy at your local hardware
store. The best way to get the panels to
stick on the ceiling while not using massive amounts of glue is to spray little
circles in all of the corners and sides as well as the center area. I initially used crisscross patterns but
found it used too much glue and it didn’t work as well. Now here comes the hard part: getting these
panels to adhere to the ceiling. Make
sure you have your gloves on when handling the panels. I found that pressing the panel against the
ceiling, then removing it for a second and reapplying really helped to get the
panels to stick. You also will need to
apply constant pressure against the panel while also lightly patting it all
around. I used my head at the center
while I patted the panel. Be careful not
to press too hard or else you risk compressing the panel which will limit its
effectiveness. Each panel took a good 5
minutes or so to stick to the ceiling, so patience is needed. I actually found that I had to go back 20-30
minutes later to each panel and press them against the ceiling to get them to
permanently stick. This whole process
was murder on my neck and back but a true Audioholic is willing to endure some
pain for the betterment of sound quality.
A smart Audioholic however will learn from my mistake and take my advice
to use Velcro tape adhesive instead of glue.
Because we used glue, we found it difficult to precisely place the
panels where I wanted them so the installation wasn’t perfectly straight, but
good enough in a darkly lit room. We
wound up installing 11 of the 12 supplied panels which covered the area
nicely. The extra panel was stowed away
for future use or replacement if needed.
Editorial Note:
As an alternative aid to installation, you can also use a couple of home-made "T-bars" made from inexpensive 2x4s to prop up the panels while they set.
The Results
Flutter echo directly under the SonoLite treated area simply vanished. We were a bit concerned given the ample spacing between panels, but it all seemed to work out fine. We repeated the clap tests at the listening area for the front left and right speaker locations and found the nasty echo sounds gone. There was definitely more symmetry between the speaker locations now which is exactly what we were hoping for.
We cued up some music starting with the wonderfully recorded Porcupine Tree Anesthetize Blu-ray concert. One cannot help but to just peg the volume up on the song “Anesthetize”. The musicianship and coolness of this song is just off the charts. We sat through the full 23 minutes of this song in awe at Gavin Harrison’s excellent drum work and the fluidity of the band, unaware of the passage of time. Nobody complained of listening fatigue or wanting the volume lowered.
We moved on to some two-channel music listening to Marc Anthony “Ahora Quien”. This song has a lot of high frequency energy and percussions. Before installing the throw rugs and Auralex SonoLite absorption panels, this song was painful to listen to. After everything was in place, it transformed into a sonic delight. The sound was now well focused while our RBH T-30LSE speakers imaged as good as we had ever heard them. On top of that, the soundstage was slightly larger and livelier than when we had carpeted flooring. It seemed apparent to use that with the help of Auralex SonoLite, we improved the spectral balance of our system which is particularly important for critical two-channel listening.
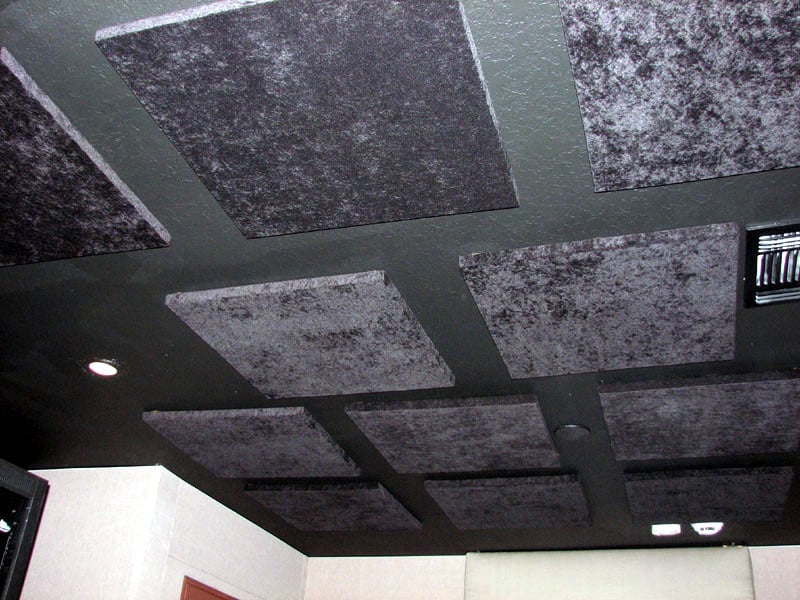
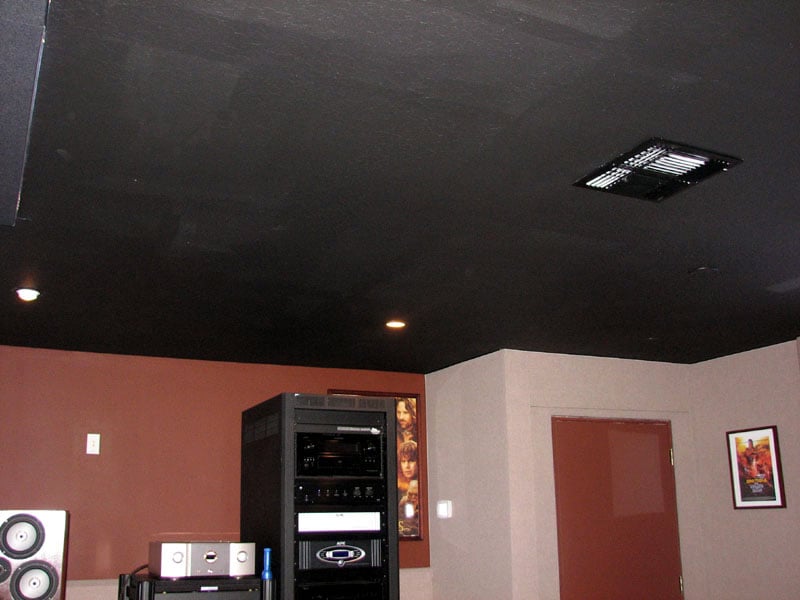
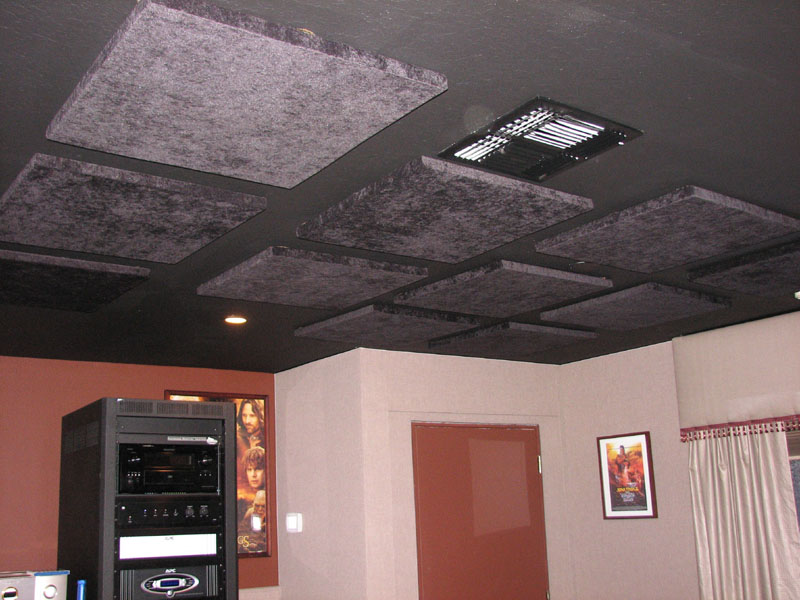
Auralex SonoLite Panels installed on ceiling
Conclusion
Auralex proved their new SonoLite panels offers the performance and aesthetics you need when fine tuning the acoustics of your theater room. SonoLite is easy to install and it addresses the issues of excessive flutter echo which may arise in a theater room where there is a great deal of parallel hard surface areas (wood floor and drywall ceiling). Best of all, SonoLite is a tool-less solution which doesn’t require any fancy tucking of fabric into pre-installed mounting tracks. Simply apply an adhesive and place them in the problem areas and you’re done. If you find your home theater system to be fatiguing over extended listening sessions, consider evaluating and addressing your room acoustics issues before spending hard earned dollars on upgrading equipment (or even worse, cables). For less money than a cable tweak, Auralex Sonolite ($30 per panel) provides a real solution to potentially transpose your listening experience from good to excellent. Highly recommended.
About Auralex Acoustics, Inc.
Located in Indianapolis, Auralex Acoustics was founded in 1977 with a mission to provide top performing acoustical treatment products at the best value. Since then, thousands of satisfied Auralex customers have experienced improved acoustics, expert advice and exceptional customer service. Auralex products enjoy widespread use among prominent artists, producers, engineers, corporations, celebrities and government agencies.
Auralex
Acoustics has become the industry leader in innovative sound control solutions
and continues
to enjoy rapid growth through an international network of authorized
dealers. Visit the Auralex web page at www.auralex.com.
Auralex can be reached via email at auralexinfo@auralex.com or by calling 1.800.959.3343.
Gene manages this organization, establishes relations with manufacturers and keeps Audioholics a well oiled machine. His goal is to educate about home theater and develop more standards in the industry to eliminate consumer confusion clouded by industry snake oil.
View full profile