
Audyssey MultEQ Pro Sound Equalizer Review
Audyssey Sound Equalizer with MultEQ Pro
- Product Name: MultEQ Pro Sound Equalizer
- Manufacturer: Audyssey Laboratories
- Performance Rating:

- Value Rating:
- Review Date: October 10, 2006 19:00
- MSRP: $ 2500
|
Analogue input: 8 channels,
unbalanced Room correction: MultEQ XT filter for each channel applied at sub/sat splice |
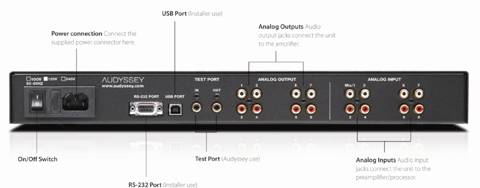
SNR: 108dBA Connections: RS-232 port, USB 2.0, 4 pairs analogue RCA (unbalanced) outputs, 4 pairs analogue RCA (unbalanced) inputs, test port (Audyssey use only) |
Pros
- Unprecedented calibration ability
- Delivers 8x more bass accuracy than MultEQ XT receiver-based version
- 2 X accuracy over MultEQ XT above low-bass region
- Unit appears transparent within system
- High value for installers & integrators
- Highest quality DACs and ADCs utilized
Cons
- Requires professional setup and calibration for best results
- Requires optimal speaker placement for best results
- Lower cost speakers may not exhibit desired performance envelope
- Typically requires separates or amplifier
- 8 pairs of RCA interconnects required for full utilization
- No +12V Trigger
Audyssey MultEQ Pro Sound Equalizer Introduction
Ultimate audio performance within the listening area starts with the loudspeakers and the room. How the Installer gets the loudspeaker system to integrate within the listening space is what can make or break even the best assembled audio systems. In our article Better Sound Through Active Room Correction (recommended reading before reading this review) the important metrics of loudspeaker placement and selection, room acoustics, and how to best integrate all of these variables using the new Audyssey Pro MultEQ enabled processor for the ultimate theatrical experience in the comforts of your home was discussed. We now expand upon this with a formal review of the Audyssey MultEQ Pro sound equalization processor.
Audyssey comes to the table with a proprietary phase and frequency measurement technology. Co-founder and Chief Scientist, Tom Holman, in my December 2004 interview with he and cofounder and CTO Chris Kyriakakis states "While real-time analysis is 'time-blind' (so you have to know something about the time domain before you use it) nevertheless, if you clean it up, it has some advantages over the FFT-based analyzers. The THX R2 (from the eighties) was readily able to do spatial averaging and temporal averaging and we realized if we made an extension of it using a laptop with an add-on spectrum analyzer peripheral that we could send signals across dynamically from the analyzer and do a lot of mathematics to it and therefore clean up the signal."
To gather the precise phase and frequency data requires another capability; extremely accurate (claimed to within 0.25" !) speaker-to-microphone distance information. When an installer begins to go through the Audyssey Sound Equalizer measurement routine the first packet of data he feeds into the MultEQ Pro's memory is the speaker task-name such a left-front, center, etc. (The installer will have already defined the size of the room [length, width and height] on a previous screen within MultEQ Pro). While it is taking distance information MultEQ Pro will also take the first 200 milliseconds of phase and frequency data and place the information into the i.e. "left-front" folder. Repeat the operation with the microphone stationary at this first "sweet spot" eight times (for the Sound Equalizer's 8 channels) for all satellites and subs in the room. MultEQ Pro will now have a very precise map of how the speakers are arranged in the room.
Audyssey MultiEQ Pro EQ Software and Setup
Audyssey Installer
Kit Contents
-
Calibrated Microphone Preamplifier with power supply
- Calibrated and Serial Numbered Microphone
- Tri-Leg Microphone Stand with Boom
- Serial Numbered MultEQ Pro Application CD, matched to Microphone Calibration Curve
- 4) 18'
Microphone XLR Cables
- 10'
USB Cable
- XLR-to-RCA Adapter
- Audyssey Sound Equalizer Installer Carrying Case: nylon with internal partitions
This $325 installer's kit is terrific as is: The microphone preamp comes pre-calibrated and level matched to the proprietary Audyssey-developed test tones within the MultEQ Pro routine. A Rane inline power supply with a 6' connector going to the pre-amp and a 6' power cord are included and stowed in the same small center partition in the Installer's case.
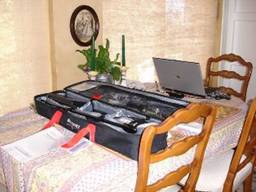
Audyssey Installer s Kit, $325. HP 8301 host computer.
The serial numbered microphone is calibrated to an $8000 Bruel & Kjaer 4136 (frequency response of 4Hz to 70kHz -3dB) with the calibration curve being stored on Audyssey's in house documentation computer for reference. The microphone comes in a foam padded plastic case along with the microphone holder and threaded attachment for screwing the mic holder to the stand.
The tri-leg boom microphone stand is a smooth operating, easy-to-adjust Samson model. The microphone holder is a shove-from-the-back friction fit affair. The pliable holder expands while gripping the microphone securely making it less prone to airborne vibration. It was a pleasure to use for quick, precise positioning.
Four 18' microphone cables fit into the last of the four compartments in the nylon Audyssey installer's kit. The cables are very pliable professional models with good quality, strain-relieved XLR male and female connectors on either end.
After setting up and running the MultEQ Pro routine a couple of times I purchased an additional 10' USB extension cord to go with the 10' cord included in the kit. This made it was easier to get my HP 8301 laptop computer further away from the Sound Equalizer. I had mounted the Sound Equalizer in the equipment rack underneath our (front-of-room) video display. Adding the 10' extension allowed me to place the laptop back on our dining room table.
Our open floorplan living room, dining room and rear-of-living room stairwell measure 21' wide by 24' long with our ceiling gently sloping up from the front door/left surround speaker wall to the corner mounted L/C/R video display/picture window wall. Ceiling height averages 8' in height. This gives a rough cubic volume of over 4000 cubic feet.
My main audio goal with this, my personal home install, was to be able to incorporate the highest performance components available at superb value price points. The target was $10,000 (at full list prices) for all audio components including the $2500 Audyssey Sound Equalizer. In a future article I plan to evaluate the sound performance of the receiver-based Audyssey MultEQ XT versus the stand-alone Sound Equalizer with MultEQ Pro and the Outlaw Audio 7075 amplifier. The table below breaks down the full list price costs of the review system with and without the Audyssey Sound Controller ($2500 SRP) + Outlaw Audio 7075 ($699 SRP).
Under $10K Surround Audio System with & without Audyssey Sound Equalizer
|
Manufacturer |
Model |
Description |
MSRP |
|
Denon |
3806 |
Pre-amp Processor w/MultEQ XT disabled |
$1,300 |
|
Audyssey |
Sound Equalizer |
MultEQ Pro Speaker/Room Calibration 8ch.in/8ch.out |
2,500 |
|
Outlaw Audio |
7075 |
7x 75 watts power amplifier |
699 |
|
Toshiba |
SD-K860 |
DVD player |
80 |
|
Tripp-Lite |
1000VA |
1000VA Surge suppressor with battery back up |
100 |
|
JBL |
SP5 SoundPoint series |
5 1/4" two-way in-walls 3pr. @ $175/pr. |
525 |
|
Infinity |
Intermezzo 1.2 |
850 watt subwoofer |
1800 |
|
Infinity |
CSW-10 |
650 watt subwoofer |
1000 |
|
Impact Acoustics |
SonicWave |
"Y" Interconnect x 2 |
38 |
|
Impact Acoustics |
SonicWave |
Stereo Audio Interconnect $33/pair x 8 |
264 |
|
DH Labs |
Silver Sonic T-14 |
14 gauge twisted pair wire (10 x 3) @ $3.50/foot |
105 |
|
Monster Cable |
off-the-roll 2 conductor |
135' twisted 14-gauge speaker wire (45' x 3) @ $.50/ft |
68 |
|
DH Labs |
cable terminations |
bananna plugs & spade connectors |
15 |
|
TOTAL: Audio system w/ Audyssey Sound Equalizer |
$8,494 |
||
|
TOTAL: Audio system w/o Audyssey Sound Equalizer |
$5,295 |
||
For consistency's sake the Sound Equalizer's eight channels were configured in the same standard rotation format as is built into most receivers and pro-pros. Starting with the Denon AVR-3806's eight external outputs going to the Audyssey Sound Equalizer's eight analog inputs the channel assignments are:
Denon left front ext out > Audyssey analog input #1
- Denon center ext out > Audyssey analog input #2
- Denon right front ext out > Audyssey analog input #3
- Denon right surround ext out > Audyssey analog input #4
- Denon right rear/left rear ext outs > Y-connector > Audyssey analog input #5
- Denon left surround ext out > Audyssey analog input #6
- Denon subwoofer ext out > Y-connector > Audyssey analog inputs #7 & #8
Assignments from the Audyssey to the Outlaw Audio 7075 amplifier or direct to the front and rear subwoofers were:
- Audyssey analog out. #1 > Outlaw Audio 7075 left front input
- Audyssey analog out #2 > Outlaw Audio 7075 center input
- Audyssey analog out #3 > Outlaw Audio 7075 right front input
- Audyssey analog out #4 > Outlaw Audio 7075 right surround input
- Audyssey analog out #5 > Outlaw Audio 7075 right rear surround input
- Audyssey analog out #6 > Outlaw Audio 7075 left surround
- Audyssey analog out #7 > Front Infinity Intermezzo 1.2 subwoofer
- Audyssey analog out #8 > Rear Infinity CSW-10 subwoofer
This type of interconnect info looks fairly simple here. But it's handy info to have stored on the Audyssey site should a future problem arise with one of your installations.
Installing the MultEQ Pro software
Setting up the Mic, Stand, Mic-Pre and XLRs; tieing the Sound Equalizer to a PC via USB
The Installer kit comes with a well-written, easy to understand spiral-bound Installation Manual. And because the actual calibration routine is so easy I'll just touch on a few of the highlights here. Mike Thuresson, Audyssey Installer Program Manager has told me that by the time this article is in print many of the suggestions which I'll highlight here may have already made it into the first revision of the Manual.
Installing the MultEQ Pro application on your computer is a simple as any professionally produced CD-based application. Once you insert the disc you're greeted with a MultEQ Pro Setup Wizard . And after you're done with the Setup a MultEQ Pro launch icon will appear in the Start Menu. I dragged my MultEQ Pro icon to the right side of my desktop for convenience.
The MultEQ Pro CD that comes in your Installer's Kit is serial-number-matched to the microphone. The Audyssey microphone is calibrated to an $8000 Bruel & Kjaer 4136 reference. Each individual microphone's calibration-to-the-4136 data package is stored on the like serial numbered MultEQ Pro installation disc that comes as part of the kit. In my experience with measurement microphones the sample-to-sample variation between installer's microphones may be almost nil. But keeping matched serial number CDs and microphones together insures the absolute closest adherence to the B & K standard.
Audyssey MultEQ Pro EQ Listening System - Part 1
The Subwoofers
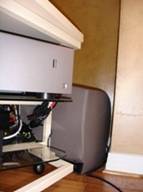
In our living room/home theater layout I run an acoustic suspension Infinity Intermezzo 1.2 1", 850-watt sub in the front corner of our living room. The sub sits just behind the equipment rack that will hold our 56" Samsung LED DLP video display. Using Infinity's R.A.B.O.S. CD measurement system, in-room response of the 1.2 measures -1 dB @ 20 Hz with ±1.5dB frequency response up to 80Hz. Back at the center-of-couch listening position the 1.2 can hit 108dB without breaking a sweat.

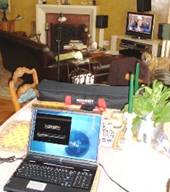
Listening area; left surrounds at top left above fan blade. Listening sofa at bottome left. Three Beta
10 LCRs and Infinity Intermezzo 1.2 tucked behind equipment rack in corner. On right, close-up of
Intermezzo 1.2 in front corner behind equipment rack.
A second sub, an acoustic suspension Infinity CSW-10 was one of my designs and originally part of the Infinity Beta series. The CSW-10 is a 25 lb. magnet structure, 10", 650-watter, also with an on-board R.A.B.O.S. single-band parametric equalizer. The CSW-10 is only 6' behind our sofa but 8' away from the two rear walls because a 90°- bend, two-section staircase to our downstairs is built into that corner. That leaves the CSW-10 working much harder then the Intermezzo 1.2 because the smaller 10-incher doesn't have the luxury of free sidewall or corner bass augmentation. (And yes, for those who may be wondering, the still available Revel SP12 is essentially the same subwoofer.)
If I calibrate the Infinity CSW-10's R.A.B.O.S. parametric in it's open floor position six feet behind our sofa, the sub will chart down to -3dB @ 27Hz and -6dB @ 24Hz, (at 105dB and ±1.5dB to 80 Hz). These are exactly the lower roll-off points and max SPL I had measured in Harman's large 4 pi anechoic chamber when I was designing it. (In the chamber the frequency response was much flatter at ±0.5dB.)
Now plug the two subs together by using a Y-connector from the receiver's subwoofer output and bingo, 6dB more headroom than with a single subwoofer and smoother in-room response, right? Well, not so fast. Once I plugged the two subs together using the Y-connector to the Denon AVR-3806's single subwoofer output I re-plotted the two subwoofers' frequency response to see how the two subs reacted together at the listening position. Horrors! The interaction of the two subs together raised the 3dB down point to 33Hz and the frequency response variation envelope expanded to ±2.5dB up to 80Hz.
The reason for this problem was that the Infinity subs only have 0° or -180° phase controls. And the CSW-10's position, back 75% into our room would require its compatible (at the listening position) phase setting ( relative to the Intermezzo 1.2) somewhere in between the 0° and 180° choices. When trying to use the Denon AVR-3806's internal MultEQ XT along with the Infinity subs' 1/20th octave frequency dial-in capability the phase differential problem could not be resolved with enough accuracy. Thus, to apply a sufficiently accurate frequency-phase data package for each sub, as measured from the listening position, requires two completely separate packages. (The Denon AVR-3806 can't measure the subs separately as it has only one dedicated and assigned subwoofer channel.)
This interaction of two different, but very capable subwoofers points out just how absolutely intertwined, because of wavelength, half-wavelength and every portion of wavelength in between both the room and asymmetrically placed subwoofers become. At the listening position each mono, electrically correlated bass note will arrive in a slightly differing positive or negative phase, ready for a fight. Remember the rest of Forest Gump's "Life is like a box of chocolates" line?
The upfront corner mounted Intermezzo 1.2, for instance, would generally be assumed to be at 0° starting phase because of its position in the front system corner. This sub is almost in line physically and therefore should be pretty close phase-wise with the front 5.25" two-way L/C/R-s. Plus the L/C/Rs' close proximity to the corner walls augment their low bass performance. Thus when read by the mic at the primary listening position the Beta10s might appear to be able to go down past 80Hz (-6dB) with ease. My thinking then was that the often tough 80Hz subwoofer-to-satellites splice should be a pretty easy blend for either the Audyssey MultEQ XT or MultEQ Pro programs.
The problem comes when the second CSW-10 is added into the mix. If you're talking about any room over 2000 cubic feet of enclosed volume, the potential ~6dB extra SPL headroom gained with a second subwoofer will always be needed to get to realistic SPL on low bass program peaks. The larger your room and the lower you want to go into the first 20Hz to 40Hz bass octave the more headroom (subwoofers) will be required. The Robinson and Dadson equal loudness curves below illustrate this.
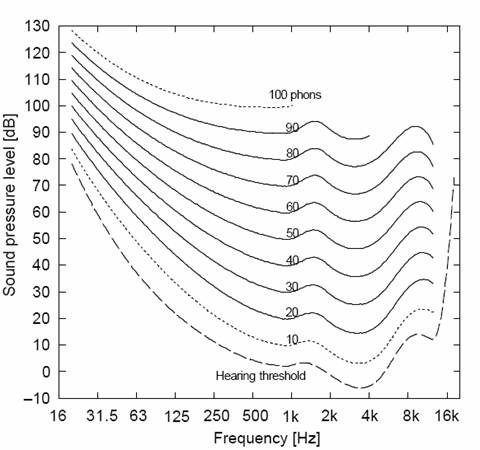
To attain a rather loud 85dB at 1kHz you'll see that to match the subs to the satellites you need 27dB of subwoofer gain at 31.5Hz! Since the auto set-up routines for Dolby Digital EX and DTS Neo 6 already boost sub levels +10dB we still need 17dB of below-80Hz gain just to get to "equal loudness". That's one reason why two subs is always so much better a solution than a single larger or more powerful sub. And since we're talking about achieving the smoothest, widest bandwidth possible over the largest acoustic bubble listening area I would consider two high quality/high acoustic output capability subwoofers the absolute minimum to wring out the best bass performance from Audyssey's Sound Equalizer and most listening environments.
Listening Position Seats Matter: Keep Listener heads in the clear
The Audyssey technologies are computer programs which must depend on the skill of the System Designer and the Electronics Tech to chose proper equipment and install, position and calibrate the room/components as a unified system. Even the seats are part of the system so do yourself and your clients a favor and stay away from the high backed models that block the ears' ability to hear direct surround information.
Audyssey MultEQ Pro EQ Listening System - Part 2
The
Satellites
The current L/C/Rs for our home system are three Infinity Beta10 s; rear ported, 5.25" two-ways with a 1" metal-composite dome tweeter, ($150ea. SRP). Before you turn up your nose take at look at Dr. Floyd Toole's CEDIA class outline which is available online.
Check out the performance graphs. At the bottom of page 19, the $300pr. of anonymous speakers; that's the Beta 10s. And that's the type of performance envelope specifications that even non-golden eared people will favor time after time after listening double-blind versus similarly priced competitors' speakers.
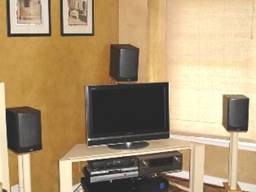
Audyssey Sound Equalizer at lower left on top shelf in rack. Infinity Beta 10 L/C/Rs. Beta 10s aligned to 34"
H @ midpoint on sofa. Sony 32"
XBR LCD is temporary.
Surrounds consist of three pairs of JBL SP5 s; 5.25" two- way in-walls with 1" metal-dome tweeters, ($175/pair SRP). The SP5's have swiveling tweeters but I set them straight forward. I like keep the horizontal and vertical axis of woofers and tweeters the same, especially for surrounds. Speakers that are designed to a flat response with smooth but continual high frequency attenuation when moving off axis have been proven to provide a superior performance envelope. So why mess with success? Tilting a tweeter toward the listening area destroys the performance envelope with which it was designed. It also calls far off-axis attention, very high frequencies only, to an area which is supposed to be invisible, for envelopment.
Inserting the Sound Equalizer
For the eight stereo pairs of interconnects required going into and coming out of the Audyssey Sound Equalizer's eight inputs and eight outputs I went with seven and a half 3' pairs of Impact Audio's SonicWave interconnect. The single long-run interconnect going to the rear subwoofer is a no-name that I made up from cable I had on hand. The required Y-connector from the single subwoofer out on the Denon AVR-3806 to the two subs was also an Impact Audio SonicWave interconnect.
Each of our three pairs of surround speakers (right, rear & left) is wired in series which presents a very easy-to-drive 12 ohm load back at the amplifier (6 ohms + 6 ohms for each JBL SP5). Note from the pictures that each of the monopole surround speaker pairs points at 90° perpendicular angles to each other and toward a different wall (for reflection generation). All surrounds point away from the "acoustic bubble listening area".
I can't refer you to a set of performance graphs for the SP5's but I can tell you that all Harman (monopole) speakers are designed to the same criteria; flat on-axis frequency response with smooth and continual high frequency attenuation when moving off axis.
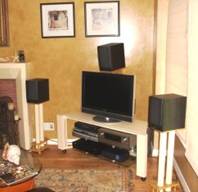
Looking across sofa back. Dual JBL SP5 5.25"
two-way right surrounds. Dual
JBL SP5 5.25"
two-way left surrounds.
Wire runs from the surround speakers are 14 gauge, twisted two-conductor, off-the-roll Monster. The longest wire runs to the left and right surround rears is ~45'. For the short runs to the L/C/Rs I've used the same DH Labs Silver Sonic T-14 (twisted-pair, 14-gauge) for many years.
Terminations to the in-wall SP5s with push in spring terminals are 3/8" bare copper wire; simply twist wire ends (tin lightly if you like) and insert. Wire terminations to the L/C/Rs are gold-plated and silver-soldered spade connectors which give a tight connection when the gold-plated barrel + and - terminals of the Beta 10s are tightly snugged down. Terminations to the Outlaw Audio 7075 amp are self expanding, gold plated, spring-steel and copper alloy banana plugs which are again silver-soldered to stripped wire ends.
Our 6.2 Set-up: The Electronics
The power amplifier. In the days of stereo receivers many of the higher quality units had true pre-amp out, power amp in jumpers. With today's multi-channel receivers that particular feature is almost non-existent. So when I started thinking about a low-cost, well-built multi-channel power amplifier I turned to long time industry colleague Peter Tribeman of Outlaw Audio and Atlantic Technology. Back in the eighties Peter was one of the founders of NAD, a brand always known for tremendous audio performance for the dollar. A quick perusal of the Outlaw Audio 7075's specs indicated this $599, 7-channel amp looked to be out of the same low dollar, high performance mold.
The Outlaw amp's 75 watts/channel x 7, , looked to be exactly the choice to replace the 7-channel amp section in the Denon AVR-3806. The 7075 is built like a pro product. Heavy gauge steel chassis with beautifully rounded front-to-back edges, a just-under 0.5" (!) thick black anodized front panel, 12V amp-to-pre-pro trigger, and five-way binding posts on the rear. This little bad boy is only 4" H x 15.5" D x 17.2" W yet it weighs 41 lbs (due to a beefy toroidal transformer), more than the entire Denon AVR-3806 receiver.
I knew I was going to high pass all the satellite (loudspeakers set to "small") at 80Hz so the 7075's power supply section would be loafing along even when driving all "small" loudspeakers to their limits. What really sealed the deal though was a damping factor greater than 400 from 10Hz to 400Hz and a slew rate of 50V/microsecond. The 12-ohm surround speaker pairs would be extremely well controlled at their 80Hz high-pass crossover frequency. (Given the lack of an engineered back enclosure for most in-wall speakers, electronic control in the form of electronic damping applied to the speakers - voice coils aids bass damping and control at the in-walls - applied 80Hz low frequency cut-off.)
Inserting the Sound Equalizer
For the eight stereo pairs of interconnects required going into and coming out of the Audyssey Sound Equalizer's eight inputs and eight outputs I went with seven and a half 3' pairs of Impact Audio's SonicWave interconnect. The single long-run interconnect going to the rear subwoofer is a no-name that I made up from cable I had on hand. The required Y-connector from the single subwoofer out on the Denon AVR-3806 to the two subs was also an Impact Audio SonicWave interconnect.
With the Audyssey Sound Controller between the Outlaw Audio amp and the Denon AVR-3806, the receiver now became a preamp-processor. In preparation for putting the system through its paces immediately after running the MultEQ Pro routine I went into the Denon's menu and configured it as follows:
- Room EQ (Audyssey, Front and Flat) > Off
- Tone Defeat > In
- Left, Center, Right, Left/Right Surround > Small
- Speaker B > None
- Speakers Surround Back > 1 Speaker
- Subwoofer > LFE
- Crossovers > Subwoofers and all Satellites > 80Hz
- Important! Set "3. Input Function Level" on the AVR-3806 to +9 to +10dB for all inputs. i.e. Tuner, Phono, CD, Tape, DVD, VDP, etc. The MultEQ Pro's equalization algorithms can add a maximum of +9dB boost at selected frequencies. So inserting the Audyssey Sound Equalizer between pre-pro and amp attenuates all signals by -9dB to self-assure adequate headroom. Thus when contemplating the use of another model or brand of "pre-pro" it is imperative that the unit's pre-amp section has a true 3 to 4 VRMS gain stage to ensure adequate headroom and protection against input signal overload.
Now the Denon AVR-3806, configured as a pre-pro, can be turned off. It can remain off during the whole Audyssey Sound Equalizer set-up and calibration routine.
The Input Source & Protecting the A/V System
The final pieces of audio gear for our home theater is the main A/V source DVD player and a UPS. The DVD player is an $80 Toshiba SD-K860. That's right, a Costco special. How can you beat a player that comes with its own HDMI cable included? Simply amazing value.
One last piece of gear is a Tripp-Lite Omni (aka Smart) 1000 LCD 1000VA UPS with battery backup. Also from Costco and another bargain at $100. This unit is a basic surge and spike protector but with a beefy 1000VA transformer. Neither the subs nor the Outlaw amp is currently plugged into this unit but the amp probably could be without any current limiting. So it's adequate protection until I substitute an APC H-15 with voltage regulation, at which time I will also plug in the Outlaw Audio 7075 satellite amplifier. The two subs each are plugged into their own dedicated 15 amp circuits.
Audyssey MultEQ Pro EQ Calibration and Acoustic Bubble
Beginning the Calibration Sequence
Before an installer begins his first installation he will have been asked to register himself and his serial numbered kit on the Audyssey website. Doing this will establish a personalized folder of the various installs that the Installer has performed. This in-house data base will allow Audyssey and the custom installer's company to have a full time access to all his installations.
NOTE: Since I knew that Audyssey Sound Equalizer should now be capable of approximately 1/24th octave data gathering in the two low bass octaves I switched out the on-board R.A.B.O.S. parametric equalization on both Infinity subwoofers. Now that I had two separate bass channels I figured the Sound Equalizer should easily be capable of doing this most band-critical phase and frequency equalization.
Once past the initial Audyssey welcome screen here are the screen sequences that follow:
- Product selection : Audyssey Sound Equalizer (or Audyssey OEM's product and model numbers later on)
- Options : Serial numbered microphone matched to CD s/n is listed.
- Zone Configuration : How channels in each zone are assigned. For instance Zone 1 could be a 5.1 system set up in the home theater room and Zone 2 could be a stereo set-up in another room. For my combination living room/home theater set-up I chose to do a 6.2 system because I needed two separate bass channels. (This is due to my non-symmetrical layout of the subwoofers in our living room.) This meant that I had to place the left-rear and right rear surround channels in series instead of operating them independently as I'd done when only the Denon AVR-3806 receiver was being used. Two notations:
-
a) This 6.2 configuration leaves one channel of the
Outlaw Audio amp unused.
b) There are only 6.1 channels (maximum) of information discretely recorded on a Dolby Digital EX or DTS Neo 6 release.
The 6.1 to 7.1 split that takes place in most receivers uses matrixing to derive the seventh rear surround channel.
- Select a Zone : If you have more than one Zone this screen comes up.
- Room Dimensions : Enter Length, Width and Height and the Room area comes up. I would have thought room cubic volume to be more helpful information but Mike Thuresson tells me that this screen's information is not tied into any type of calculation relating to the selection of high frequency roll-off curves which is seen on a later screen.
- Rather, this Room Dimension screen meant to be used as a guide to the installer/technician who is running the software. This screen aids the technician and his client in selecting the curve that would be most appropriate for his client's room and taste in sound balance. Thus, at a later date the installer can;
- Have a record of the room's square footage.
- Use this screen's information to inform the client of the possible future need for recalibration if, for instance, the client moves his listening position furniture around.
- Additionally, Audyssey uses this data for R & D purposes to create better algorithims.
- Equipment Info : Spaces are given for Primary Source Component, Preamp/Processor, Amplifier(s), Main speakers, Center Speaker, Subwoofer(s), Surround Speakers and Back Speakers. I filled in all relevant manufacturers, model numbers and in the case of speakers, a short description. i.e. 5.25" two-way.
- Measurement: At Last! The most important placement of the microphone is the first. Start at the position that, in theory, should give the best "sweet spot" flat-frequency response. i.e. Place the microphone at the seat height which would put your ears and eyes directly in line with your video display and center channel speaker .
- In our situation the center of our sofa is exactly 9.1 feet from the video display and our center channel speaker. The center channel Beta 10 speaker is mounted over the Sony HDTV and pointed (with the aid of a flat sided, red laser pointer), angling down toward where a 6' listener's head-center would be. The left and right front speakers are also toed in and angled (via laser pointer) to the exact center-of-sofa spot. In our set-up. The left and right speakers are 6' apart. This gives my set-up a slightly less than ideal ±20° spacing from the 0° center channel centerline. (Minimum recommended left-right spread is ±22.5°)
Note that neither my wife nor I usually sit in the center of the sofa. I sit on the left side of the sofa and my wife sits or even lays down on the right. The goal is to calibrate for optimal flat response performance within the acoustic bubble. The optimum acoustic bubble shape will be determined by the seating arrangement in the room.
Note: If you as an installer have already followed due diligence with respect to the THX/ITU775 speaker layout (from Part I of this review), building your acoustic bubble space from the center sweet spot outward will allow MultEQ Pro to work in optimal acoustic and psychoacoustic fashion.
Good data in = awesome performance out .
Once MultEQ Pro went through its first sequence to determine that all satellites were in proper absolute phase (or in phase with positive polarity) the actual measurement sequence could begin. Our room/satellite/subwoofer layout from the center-of-sofa, sweet spot microphone position is as follows: (Microphone at 35" height just above, inside sofa back.)
- Left Front; -20°, 35" H to midpoint between tweeter/woofer, 9.1' to mic
- Center; 0°, 53 舡 H to midpoint between t/w, angled downward, 9.1' to mic
- Right Front; +20°, 35" to midpoint between t/w, 9.1' to mic
- Right Surrounds; +90°, 96" to midpoints, woofers on top, 12.5' to mic
- Rear Surrounds; +200°, -160°, 85" to midpoints, woofers on top, 14.5' to mic
- Left Surrounds; -90°, 85" to midpoints, woofers on top, 15.5' to mic
- Subwoofer, Front; 0°, 10.1' to mic
- Subwoofer, Rear; +200°, -160°, 6' to mic. Sub faces forward toward listening position.
Building the Acoustic Listening Area Bubble
Managing bubble size expectations versus Room Dimensions, Surround Speaker Layout and Listening Area Location.
Most custom installers are just like the rest of us A/V enthusiasts. We get into the business for the love of sound and cinema. But most of us that do get into the business bring current preconceptions with us along with what we label as accepted practice. So when a radical and invisible new technology debuts it is hard to define a frame of reference as to the performance expectations that technology seems to promise versus what that technology can actually deliver.
When I first ran through my planned ten mic position, twelve sample iteration sequence it didn't occur to me until I got to the Detection Results screen that I'd have two different subwoofer trim settings to deal with. And the Denon AVR-3806 only has one subwoofer trim adjustment. Hmmm...
The answer is simple. I shortened the full system calibration sequence to only three microphone positions. Left, center and right, at head height across the sofa. That got me to the Detection Results screen quickly.
Once I could see the two different subwoofer gain results I readjusted each sub's gain controls accordingly to bring the trim figures more in line with each other. As would be expected the more powerful, corner mounted 12" front subwoofer needed to be dialed back a bit while the non-wall augmented 10" sub at the rear had to be driven harder.
I had to go through this sequence twice, re-adjusting each sub's gain controls until both showed that they needed the same amount of trim (in dB). Now I could go back and run the full ten microphone position, twelve-sample iteration sequence (to be explained) for all six satellites and both subwoofers. Note: individual subwoofer distances to the first sweet spot calibration position were added then divided in two to get a single averaged distance for the AVR- 3806 as pre-pro.
Realistically Sizing the Acoustic Bubble Listening/Viewing Area
The Audyssey system's true brilliance lies in its ability to overcome the most powerful of psychoacoustic phenomena, the precedence or Haas Effect, in enclosed spaces. In greatly expanding the acoustic bubble from a small sweet spot to a much larger area, Audyssey's room/speaker correction solution cheats longtime audiophiles - most deeply ingrained stereo dictum which states, "To hear the best reproduction of a recorded event one needs to sit at the tip of an equilateral triangle in the so-called sweet spot."
As it turns out, if you can hold the full bandwidth power response, especially with the L/C/Rs, as flat as possible over a very wide listening area your ear/brain mechanism perceives all sound sources with greater clarity. That is, at far-off-the-ideal-sweet-spot locations, i.e. say the outer right fringe of the Audyssey acoustic bubble, the left front and left surround speakers will still sound remarkably well balanced.
Said another way, with Audyssey engaged, sitting to the right of the sweet spot allows you to still hear the left front and left surround speaker clearly. Stay in that same right-of-sweet-spot position and turn Audyssey off. The acoustic bubble collapses and left front and left surround speakers become very difficult to hear. The Haas effect, closer right front and right surround speakers, takes prominence and the total surround envelopment effect is lost.
In my centralized-corner home theater the measured left surround-to-right surround diagonal span is 27". The width across my couch (for my data acquisition) is 8'. Our front-to-back-of-theater diagonal is 23.6'. And the depth of our elliptical acoustic bubble measure from in front of to behind our sofa is 5' .
With the above in mind here are the ten microphone positions (with twelve sets of data) that were used to "form" the optimized acoustic bubble listening area.
Audyssey's Dynamic Frequency Allocation Algorithm gets serious
Online comments from Audyssey CTO Chris Kyriakakis indicates that in the low bass region the Sound Equalizer running the new MultEQ Pro software is eight times (!) more precise than the original (low bass) Dynamic Frequency Allocation Algorithm built into the MultEQ XT receiver-based version. That would give both 20Hz-40Hz and 40Hz-80Hz low bass octaves 1/24th octave precision or better than 1Hz and 2Hz respectively for the lowest two octaves!! The eight octaves above 80Hz receive a doubling of the amount of taps of the receiver-based XT version.
Also bear in mind the Audyssey system captures and manipulates both frequency and phase information. So as long as a separate channel in the Sound Equalizer is assigned to each subwoofer the subs can be placed in non-symmetrical locations within a room and the "acoustic bubble" area within the listening area will still be very precisely optimized for both flattest bass frequency response and correct phase.
(Note: Careful symmetrical placement of dual subs, such as positioning each sub at 1/3rd distance across the front of a enclosed rectangular home theater can allow the use [via Y-connector] of only one of the Sound Equalizer's channels. Thus, two Sound Equalizer channels could be utilized to run four subwoofers just as long as the symmetry of the woofer positions is maintained relative to the desired "acoustic bubble" sweet spot listening position and the room.)
The promise of this extremely precise bass frequency correction for my non-symmetrically placed front and rear subwoofers was the factor that most intrigued me as I awaited the arrival of the Audyssey Sound Equalizer...
Audyssey MultEQ Pro EQ Micing the System
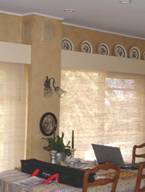
Microphone Calibration Position Summary
Note mic pre-amp and in-line power supply on end table. All other microphone positions were around different areas on, standing behind, and leaning forward on the sofa. My leftmost regular seated position on the sofa was run twice. My wife's rightmost normal sofa viewing position (toward camera) was also mic'ed twice. This double-mic'ing for data acquisition gives a higher weighting to the two most often used listening/viewing positions. Moving the microphone just a couple of inches within these two "weighted measurement" locations should give MultEQ Pro good, more diverse data in these most important areas.
- Mic position 1: The center of sofa, mic 35" H, one data set/8 ch.
- Mic position 2: My left side of sofa seat, mic 35" H, two data sets/8 ch.
- Mic position 3: My 5' tall wife's 30" H right sofa seat; two data sets/8 ch.
- Note: This position is below the level of the sofa back so the rear surround channel would theoretically have to boost its SPL level a bit on these two data acquisition runs.
- Mic positions 4, 5 & 6: One data set/8 ch. each was run at the left and right sofa arms. The height here is 24". I placed the pillows we often use on the sofa's arms when we both lay down across the couch and watch a movie. The first two positions form the outer width-wise perimeter of this oblong acoustic bubble. A third 24" H data set/8 ch. was made to the right-center of the sofa to simulate when I'm sitting up watching the movie and my wife puts her head on a pillow on my leg.
- Mic positions 7 & 8: One data set/8 ch. each were made at 30" height and 7 feet from the L/C/Rs at left-center and right-center front of the sofa. These two positions form the front portion of this oblong acoustic bubble and simulate unbelieving audiophiles leaning forward as they always seem to do at the same time their jaws are dropping.
- Mic positions 9 & 10: The last two data sets/8 ch. runs are at 66" height and 1 foot behind the left-center and right-center of the sofa. These two positions simulate the casual unbelievers who don't want to have to sit down to enjoy startlingly good sound.
Once all 12 sets of data had been collected at the ten mic positions I clicked the Calculate Filters box and the Audyssey Sound Equalizer's MultEQ Pro program started crunching away. Three minutes later - ta daaa!! The Detection Results screen displayed:
-
50Hz for Left Front: Beta 10 is rear ported and placed almost against wall.
- 40Hz for Center: Beta 10 is rear ported and working into a corner 2.5'
behind.
- 70Hz for Right Front; Beta 10 is rear ported and port blows into one very porous Roman shade then a
second fairly closed-surface window shade.
- 60Hz Right Surround; Two JBL 5.25"
two-ways mounted at 90° opposing angles with the corner of
the angles facing the listening area and woofers close to ceiling.
- Large for Left/Right Rear Surround: Two JBL 5.25"
two-ways mounted at 90° included angle and
inside corner facing listening area and woofers close to ceiling.
- 50Hz for Left Surround; Two JBL 5.25" two-ways mounted at 90° included angle to listening area with woofers close to ceiling.
Deciding Crossover Frequencies
When I saw the very low recommended crossover frequencies for the L/C/Rs and all the surrounds it seemed fairly obvious that the microphone, back at the listening position, was reading the combined low frequency energy of the speakers and the close-proximity walls.
Well, I'm being facetious here, but it's not really possible to equalize walls. And a reality of speaker design is that most 5.25" mid-woofers have a free air resonance around 65Hz to 70Hz. A third factor in the mix is that it is not known what type of target equalization, if any, the MultEQ Pro software might be trying to apply within this range of subwoofer-to-satellite splicing frequencies.
So in my opinion it is best to stick to a crossover frequency with which we are well assured both subwoofer and satellite can function optimally and within their mechanical and electrical design limitations. My favored target crossover frequency, 80Hz is virtually ubiquitous in the movie business since both Dolby Digital encoders and DTS encoders use 80Hz. (Dolby decoders are variable from 80Hz to 120Hz whereas DTS decoders are at a fixed 80Hz.)
"What if - you say - I've got a huge room dip at 72Hz so I can't bring the subwoofers up to 80Hz."
My first suggestion would be to change the location of the subwoofer if you're still using only one sub. A better plan would be to use two subs in the first place, symmetrically located so they can be coaxed to naturally smooth out their two octave frequency response at the listening position within a particular room. If you have two subs and you're still having problems try four subs. The room you're working with is probably huge. It needs four subwoofers.
"Why not just bring the satellites down to 60Hz or 70Hz"
You probably could bring the 5.25" satellites down below 80Hz but be aware that the maximum excursion capability of satellites would become the weakest link in the entire system. A 6.5 舡 mid-woofer in all satellites or at least in the three front L/C/Rs would be the wiser choice here.
Okay, back to the Detection Results Page.
Transferring Detection Results Parameters Into Your Customer's Pre-Pro
For each surround speaker in your room the Detection Results page will give Distance, Polarity (which you've already corrected or confirmed), Trim in dB and lowest recommended crossover frequency. I transferred All Distance and Trim settings over to the Denon AVR-3806 and set Subwoofer(s) low pass to 80Hz and all satellite high passes to 80Hz. Note that I averaged the two subwoofer distances to the listening position and entered a single number.
Note: This Denon allows +6dB maximum level gain, in 0.5dB increments, to be input into any channel. However, the Audyssey Sound Equalizer will likely read out trim differences which are larger. The trick here is to understand that the Sound Equalizer figures are TRIM or negative values from a 0dB reference.
Remember that I had to add +9-10dB of gain at the DVD input level screen? Well this is also a part of why that gain had to be added. If we now use the +6dB as the maximum gain of the pre-pro go to the Sound Equalizer's screen and SUBTRACT from the +6dB starting with the highest amount of trim called out for any channel. Here are the figures I entered into the AVR-3806 pre-pro: (starting with the highest trim number)
-
L/R rear surround trim= -11.5dB
Audyssey. If +6dB on Denon ref. 0dB then set
-5.5dB
- Left surround trim= -11.1dB Audyssey. If +6dB on Denon ref. 0dB then set -5.0dB
- Right surround trim= -10.4dB Audyssey
If +6dB on Denon ref. 0dB then set -4.5dB
- 2 Sub average trim= -10dB Audyssey. If+6dB on Denon ref. 0dB then set -4dB
- Left
&
Right Front trims= -5.4dB Audyssey. If +6dB on Denon ref. 0dB then set +0.5dB
- Center trim= -5dB Audyssey. If =6dB on Denon ref. 0dB then set +1.0dB
Make sure that the 3806's internal MultEQ XT correction is off (Audyssey, Flat, and Front de-selected). Also deselect the internal Cinema EQ high frequency filter in preparation for a first listen. You or your customer can always turn the Cinema EQ filter on if that first listen tells you there is still too much high frequency energy content.
Hint: If you choose to completely finish the MultEQ Pro programming procedure before going back to the Denon to transfer setting, it's a good idea to print out (if possible) or write out all settings on a piece of paper. Then you can completely disconnect your computer and USB and disconnect the microphone phone cord from input #1. As a final step remember to plug the appropriate input RCA back into the #1 analog input on the Sound Equalizer.
The second-to-last MultEQ Pro screen is the Target Sound Options page. Four curves are given, showing flat and three degrees of various high frequency roll-offs. There is a radio button by each curve. So, based on the dimensional information you entered back on the Room Dimensions page and your experience with other installations select the Target Sound Option you believe will work best bearing in mind room size and the probable amount of passive sound absorption and diffusion the client's room will provide to aid the Sound Equalizer in performing optimally. (Reverberation chamber-like rooms need not apply.)
In my particular 21' x 25' x 8' room I selected the High Frequency Roll Off 1 curve. I later also turned the Denon's Cinema EQ back on because the sound could get a bit too bright sounding on-less-than-well-recorded sound tracks. And when it comes to this point in my installations I always try to err on the side of what the woman client would prefer. They usually prefer very slightly less high frequencies rather than hear a sound track which is annoying and screechy from being poorly recorded. Eliminate nuisance call backs if at all possible.
Lastly, I went to the Save Results program screen which let me transfer the settings from my computer to the Sound Equalizer. A mouse click on "Transfer to Sound EQ" does the trick. It's imperative to "Save Permanently to EQ" though because if the customer's system experiences a power outage or the power-on rocker switch on the back of the Audyssey is switched off the settings will be lost.
If you still haven't entered the distance, dB and crossover settings from the Detection Results screen to the pre-pro, now's the time.
Audyssey MultEQ Pro EQ Review Conclusion
Evaluating the Home Theater Experience with the Audyssey Sound Equalizer
I feel fortunate to have been a loudspeaker engineer and one of the trained listeners who participated weekly in Floyd Toole's and Sean Olive's Multi-channel Listening Lab. Were I a full time audio writer talking about a solitary experience in the Listening Lab I doubt that I would have been converted so quickly to the absolute correctness of Floyd Toole's loudspeaker design dictum: "A truly good loudspeaker uniformly radiates its sound into the room at all frequencies (the Directivity Index). The on-axis and listening window curves will be smooth and flat. The early reflection and sound power curves will be smooth and gradually decreasing with higher frequencies."
(From: http://www.infinitysystems.com/homeaudio/technology/whitepapers/loudspeakers_rooms.pdf )
Why is this audio design truth so important to you, a custom installer or perspective purchaser of the Audyssey Sound Equalizer? The answer is simple. Tom Holman's protégés, the PhD level designers of the Audyssey technologies use this acoustically and psychoacoustically correct loudspeaker design criteria as part of MultEQ XT's and MultEQ Pro's target loudspeaker performance criteria.
The Audyssey system now reconstructs that phase-correct, flat on-axis response with an ever decreasing high energy (off-axis) power response target, as faithfully as its own fuzzy logic program says it can, into the acoustic bubble area defined by your customer's home environment. In other words, the optimized-at-one-meter, anechoic loudspeaker performance envelope is transported, as intact as possible, away from the room walls which are already coloring its sound and to the prescribed-by-the-customer acoustic bubble listening area.
If correct "performance envelope criteria" speakers have been placed according to ITU 775 (horizontal recommendations) and THX (vertical recommendations also) during the entire construction/installation phase, the Audyssey system is capable of transporting the listener/viewer back to the recording studio or sound stage, listening over the engineer's shoulder and hearing exactly what he heard.
When I first heard this phenomena in my own home, with whose acoustics I am intimately familiar, I was absolutely floored, in awe of what I realized is perhaps the biggest breakthrough in acoustic and psychoacoustic technology, applied to audio, in my career. I don't make that statement lightly. Done properly, with all speakers chosen for flat response (with smooth off-axis characteristics); positioned according to optimal layout, then driven by competent electronics, you too stand to be similarly floored.
It was on that first night with my wife dancing around just outside the measured perimeter of the acoustic bubble that it hit me. I'm not listening to the equipment! I can't hear what the (other) equipment might be "doing" to the system's sound.
Yes, the system's "sound" was there, 9 feet in front of me in the equipment rack; there in the left center rights and there in the surround speakers in our living room walls. But neither I nor my wife could "hear the system". All we could hear was what the great recording engineers had heard when they mixed the Motown and Orbison discs. Our "willing suspension of disbelief" was complete.
Epilogue
There is obviously a lot more ground to cover with the Audyssey Sound Equalizer. I plan a follow-on review which will cover this unit's construction and component parts as well as other installation tips I am learning day-by-day with this very versatile piece of gear.
Regarding construction: I can tell you the unit uses the best Burr-Brown A/Ds and D/As and the balance of parts making up the BOM are all selected and assembled to a MIL spec standard. Audyssey's meticulous attention to the unit's construction and parts quality is part of the reason I copped out on the unit's "sound". So far, I've not heard any sonic "character" I'd attribute to the sound Equalizer. It is that transparent. The unit is made in Southern California so Audyssey Co-founder and VP Engineering, Phil Hilmes, can closely monitor each hand assembled batch of product.
As well, I have a SmaartLive computer-based measurement system which is normally utilized to professionally set up and equalize small to large live venue music events. With the SmaartLive I hope to confirm frequency response from each of the speakers from my room's acoustic bubble positions and put some numbers on the x-y axes graphs for the more technically inclined.
Over the last several months Audyssey has been establishing a network of rep/distributors through which the Sound Equalizer will be available. Audyssey-certified installer/integrator companies will be the only dealers qualified to purchase this Audyssey-brand Sound Equalizer. Production is now fully ramped up so the Sound Equalizer pipeline should be filled by the time you read this.
I was so impressed with the Audyssey Sound Equalizer's acoustic and psychoacoustic performance that I have become a freelance Audyssey Sound Equalizer consultant/integrator for the Los Angeles/Orange County area. I offer consultation on both passive room treatments (if necessary) as well as Audyssey's active Sound Equalizer system integration. And using SmaartLive computerized software I can provide for both pre and post acoustic performance analysis.
MSRP: $2500
350 S. Figueroa., Suite 196
Los Angeles, California 90071
Tel: 213-625-4300
Fax: 213-625-4383
http://www.audyssey.com
The Score Card
The scoring below is based on each piece of equipment doing the duty it is designed for. The numbers are weighed heavily with respect to the individual cost of each unit, thus giving a rating roughly equal to:
Performance × Price Factor/Value = Rating
Audioholics.com note: The ratings indicated below are based on subjective listening and objective testing of the product in question. The rating scale is based on performance/value ratio. If you notice better performing products in future reviews that have lower numbers in certain areas, be aware that the value factor is most likely the culprit. Other Audioholics reviewers may rate products solely based on performance, and each reviewer has his/her own system for ratings.
Audioholics Rating Scale
 — Excellent
- — Very Good
- — Good
- — Fair
- — Poor
| Metric | Rating |
|---|---|
| Performance | |
| Value |