
Carada Projector Screen Review
Carada Criterion Projector Screen
- Product Name: Criterion Projector Screen
- Manufacturer: Carada
- Performance Rating:

- Value Rating:
- Review Date: February 23, 2005 19:00
- MSRP: $ 690
|
Frame: 3.25" x 1.5" 6063 T-5 Aluminum Frame Bracing: 14 gauge plate
steel |
Over-spill
Absorption: "Black Hole"
velvet trim |
Pros
- Rock solid tension with no visible inconsistencies in surface material
- Steel corner bracing and well-constructed aluminum frame
- Able to attain a very even grayscale uniformity and color balance
Cons
- Bottom wall-bracket somewhat cumbersome for anchoring screen to wall
Carada Screen Review: An Installer's Perspective
Throughout the past 15 years or so I have installed just about every type of front projection system including CRT, DLP, LCD, DILA in my home theater, custom home theaters, and commercial installations. I have used and installed screens from every manufacturer, ranging from the esoteric do-it-yourself, to top-of-the-line exotic self-masking models. I recently had the urge or nudge from my significant other to update our personal home theater system (currently a work in progress located in our family room). This system gets used more often than our other dedicated home theater, but has had the least amount of attention and has remained unfinished for the past year. As I started to ponder how to do the least amount of work and satisfy my wife's need for the change, I decided to change the screen I was using. After that, I will frame out the front wall to conceal the speakers and box in the screen.
After reading comments here at Audioholics and various other websites, I was intrigued by a fairly new screen company called Carada. After viewing their web site at www.carada.com , I decided to find out more information about their Criterion Series with Brilliant White screen. This is their top of the line fixed wall mount screen.
I was interested in this model because the
specifications looked very similar to the screen I have in my dedicated home theater, but it costs
less than half
the price. I called Carada and talked to David Giles. We had a long conversation
about various screen materials, projectors and our installation experiences throughout the years. I could
tell by this conversation that David was passionate about manufacturing screens and his involvement in
the home theater industry
I decided to order the Carada 92" diagonal (45x80) 16:9 Criterion Brilliant White screen. This screen is priced at $690.30. A few days later my new Carada screen arrived at my doorstep. Upon opening the box, I found that the screen packing from the Carada manufacturing facility was excellent. I have opened many screen boxes from various manufacturers and this is the best packing I have seen.
The box contained four sections of the frame, the screen material, one bag of screws, and installation instructions. The Carada Criterion screens all come with Black Hole trim; this is a velvet material that not only looks nice but it also helps absorb reflected light on the frame. To protect this finish while assembling the screen, I placed a bed sheet on the floor. It is also highly recommended to have clean hands or wear white cotton gloves to protect the finish while handling the screen and frame.
As I carefully removed the frame pieces from their individual
plastic bags and started to assemble them, I noticed that the frame was beautifully manufactured. Each
piece of the frame went together with precision; there was no gap at the miter where the frame pieces
meet each other. I have not seen this type of precision and quality of craftsmanship even from the mega
dollar manufacturers. I was astonished at how nice this frame was given the price. The assembly of the
frame was easy and straightforward. The instructions are easy to read. All that is required is a Phillips
screwdriver or low torque screw gun.
The next step is to install the mounting brackets. A laser line level will aid in the process but a conventional level will also work. Mount the top bracket level at least half an inch below any obstructions.
Chances are you are not going to hit studs when mounting the brackets, use the anchors pictured here to secure the bracket to the sheet rock. They are available at any hardware store and are rated to hold 35-50 pounds each. They are self-tapping anchors, but a small pilot hole will aid in their installation. Hold the upper bracket along the level line that you drew on the wall and mark the holes for the anchor installation.
Here the Upper bracket is installed on the wall level and centered. Install the lower bracket in the same manner and you are done with the mounting hardware.
Proceeding with the installation, I picked up the assembled frame and attached it to the upper bracket. Using a tape measure, I made sure the screen was perfectly centered on my wall. Make sure you have dry clean hands or wear clean cotton gloves when handling the screen frame as to not soil the velvet finish.
I marked the entire inside frame area on the wall with a pencil and carefully removed the screen frame from the wall. When installing a fixed screen, I have always either painted the area behind the screen flat black or used black indoor/outdoor carpet or black fabric behind the screen material. This helps minimize and absorb the light that is bounced back off light colored walls behind screen material.
I prefer to use the inexpensive black indoor/outdoor carpet
available at many home improvement stores. It is easy to install. All you need to do is cut it to the
inside dimensions of the screen frame and staple it to the wall that you previously marked out with the
screen frame temporarily installed. Just make sure that the black material is stapled tightly to the wall
so it does not touch the screen material.
Moving along, I carefully removed the screen material from its plastic bag but leaving it on the roll it was shipped in. With the screen lying with the back facing up, I placed the screen material at the top of the screen and began snapping the screen material to the frame carefully unrolling it a little at a time. If you do it this way you will reduce the risk of scratching the Brilliant White material. It will take a little effort to snap the screen material to the frame because it has to stretch, just alternate from side to side a couple of snaps at a time.
Then do the top and then the bottom. As I inspected the material, I noticed
that the material was of high quality. It is very uniform and the fit onto the screen frame was
perfect.
All that's left to do is hang the screen. I did this installation myself with no assistance, but I have installed many screens. This fixed screen was by far the easiest I have ever installed. For the last step of the installation, it may be wise to have an assistant to help you.
Carefully pick up the screen. The screen material is now fixed to the frame facing outward. Note: if you wear glasses, have big buttons on your shirt, or you are wearing jewelry take care not to scratch the screen material or let dirty hands come in contact with it. New white cotton gloves are very cheap and handy when handling your new screen.
Lift the top of the screen over the top bracket and make sure it is seated in
the gap on the back of the frame.
Now center the frame on the wall and the upper bracket. Light
tapping on the side of the frame will move the screen in either direction. Now that the screen is
centered, pull down with light pressure on the bottom of the screen and attach the bottom bracket. The
screen should now be tightly fixed to your wall check for level and center and you are done. The
installation process took me about 1-1/2 hours to complete. This was by far the easiest fixed frame
screen I have installed. The directions are easy to understand and follow.
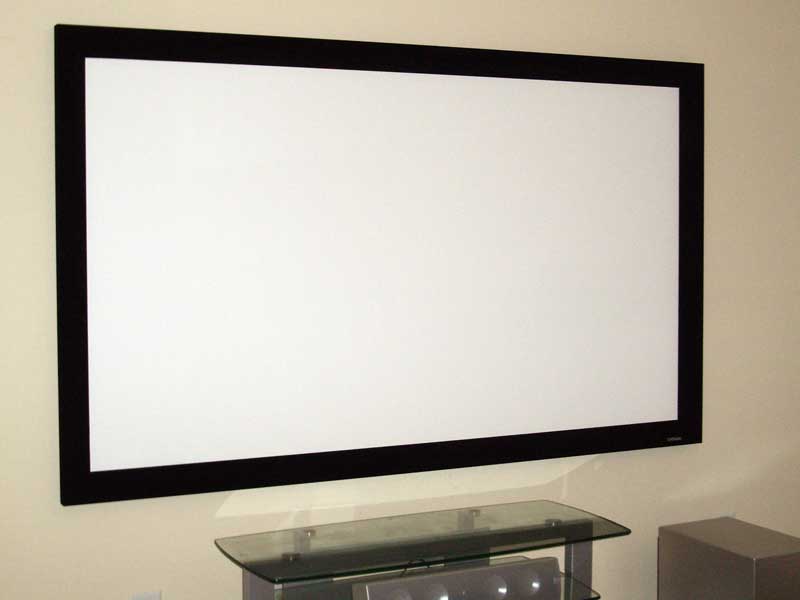
Now that I had the Carada Screen installed, I was able to give it a very close examination. The screen frame is absolutely marvelous. Its wide contoured frame is elegant and the mitered corners are cut so precise and assembled so tightly there is no visible seam. The Black Hole velvet coating is classy. The screen hanging on the wall even with no image projected on its surface looks like a fine piece of art.
I called my wife into our family room to get her reaction after the installation was complete. Her comments were, "Wow that looks gorgeous." Of course the next thing she said was, "how much did you spend on that?" Smiling the whole time, I told her. The next comment was, "You're kidding!" That rarely happens to the home theater enthusiast. I savored the moment wishing I had recorded the conversation for future reference.
As darkness fell, I began evaluating how the Carada Criterion Brilliant White screen material performed with the various projectors I had available. The first projector I used was the Infocus 4805 DLP projector. This is a very bright, high contrast DLP projector with a native 16:9 resolution of 854x480. I immediately noticed the colors were very vibrant and the images had depth and clarity. As I moved around the room I also saw that the Carada screen had a very wide practical viewing angle of about 35 degrees per side. This means that if you have seating that is off-axis from the center, you and your guests will still be treated to a nice, undegraded image.
The Infocus 4805 is a very bright projector. It is conservatively rated at 700 ANSI lumens and that specification is factory calibrated to near D65k. This, coupled with the Carada Criterion Brilliant White screen which yields 1.4 gain, gave me incredible vibrancy. The black level, however, was a little high and gray looking. Installing a natural density filter to the Infocus 4805 or any other high ANSI lumen projector and recalibration will rectify this problem and provide you with inky blacks, saturated colors, and very bright images. You also benefit by being able to remove the filter as your lamp ages to maintain brightness. Many installers are suggesting gray screens with moderately high ANSI lumen projectors. I don't like this approach as the image on these gray screens looks dreary and dull. This effect becomes more apparent as the lamp ages.
If you have a home theater that has total light control and have a true light canon projector like the Infocus 7210 DLP, DC-3 or Sanyo PLV 70 LCD, the gray screen might be the way to go. However, for most applications and projectors, a white screen should be the primary consideration. Many will disagree with what I have just said. This is my opinion based on the installations I have completed over the years and the information that I have compiled experimenting with different screens including gray, pink, silver and white. I always come back to the white screen of various gains.
The next projector I wanted to try was my old workhorse, the Sony 400Q LCD. This is a relatively low ANSI lumen projector with low contrast ratio. It is also a native 16:9 projector. I wanted to see how the Carada Brilliant White screen would handle this projector with its meager specifications. The old 400Q looked absolutely fabulous on this screen. The image was very saturated and bright. Even when I turned on the lights in the family room the image was watchable. The Carada Brilliant White screen would be an excellent choice for those of you that have any of the 1280x720 LCD projectors like the Panasonic AE-700, Sanyo Z-3, Hitachi TX-100 or any other high performance LCD projector.
The last projector I tried was the Sharp DT-200. This is a moderately bright DLP projector with average contrast ratio or 1000:1 The main reason for selecting this projector for evaluation is due to the fact that it is an 800x600 projector with a 16:9 mode. When projecting, using the 16:9 mode there is light spill on the top and bottom of the screen. I wanted to see how well the black hole material on the Carada Criterion screen would absorb the extra light spill from the 4:3 panel projecting onto a 16:9 screen. I am very pleased to say that the extra light projected onto the frame of the screen was completely absorbed by the Black Hole material on the frame and only a small trace was noted above and below the screen frame projecting on the wall surface. This means that those of you having native 4:3 projectors can effectively use your projector on the Carada Criterion screen without having the extra light generated by the 4:3 panel effect the viewing experience.
As you can tell by my more than glowing review of the Carada Brilliant white screen, I was thoroughly happy with my purchase. Everything, from the customer service of the company, to the way the packing was performed, to the excellent build quality of the Screen and high level of performance generated by the Screen, have me smiling from ear to ear. The Carada Criterion series screens have to be one of the best values in home theater display products. I would have no problems recommending this screen for the client that has either an entry-level projector or a mega dollar projector. This screen would be a very good choice for CRT, DLP, LCD and DILA projectors. The Brilliant White material should be considered unless you have a super high ANSI lumen projector. The Carada Criterion's elegant design, excellent fit and finish, and ease of installation make this an easy recommendation. Now all that is left for me to do is to sell my reference screen in my dedicated home theater and order another Carada Criterion. Highly Recommended 5+ stars!
Carada Screen Review: In-Depth Review
 I was somewhat surprised the other day when my FedEx
delivery man struck up a conversation with me about front projection systems. It seems that the
incredible value they offer in terms of price per square inch has started to catch on with the
mainstream. Add to that projector/screen deals from the likes of QVC and Costco/SAM
s Club and you've got a recipe for rapid wide adoption of the technology.
This was made even further evident when the
UPS guy
struck up a similar conversation with me and
even offered to buy my old Da-Lite high-power pull down screen. The world, it seems, is getting into
front projectors. The question is will consumers realize that in order to get the best possible picture
from their investment, they will need to project the image onto something better than an off-white
wall
I was somewhat surprised the other day when my FedEx
delivery man struck up a conversation with me about front projection systems. It seems that the
incredible value they offer in terms of price per square inch has started to catch on with the
mainstream. Add to that projector/screen deals from the likes of QVC and Costco/SAM
s Club and you've got a recipe for rapid wide adoption of the technology.
This was made even further evident when the
UPS guy
struck up a similar conversation with me and
even offered to buy my old Da-Lite high-power pull down screen. The world, it seems, is getting into
front projectors. The question is will consumers realize that in order to get the best possible picture
from their investment, they will need to project the image onto something better than an off-white
wall
Features and Favorites
The Criterion Series screens come with some significant upgrades from their Precision Series counterparts. Here are some of our favorites:
-
3.25"x1.5" 6063 T-5 Aluminum Frame w/Black Hole
Trim
The most visually-striking change to the Criterion Series is the presence of a new 3.25 x 1.5 custom extruded aluminum frame. This frame is nearly identical to other, more expensive screen manufacturers but is a custom-designed solution made and manufactured by Carada. Like other high-end screens, the frame is covered in a matte velvet trim that help eliminate over-spill from the projector. This allows you to completely fill the frame and maintain a nice clean edge. M ovie theaters use the same principle when they matte the feature film screens with heavy motorized black drop cloth material.
-
Steel Corner Braces
14 gauge plate steel corner braces hold the frame together and provide a perfect assembled fit.
-
3M adhesive-reinforced screen
borders
Instead of sewing the webbing around the borders of the screen material where the snaps are attached Carada opted for a 3 M adhesive solution. Reinforcing the edges of the screen material (which is under considerable tension) helps limit the sag between snaps, and prevents the screen material from tearing away from the snaps. The industrial strength 3 M adhesive is laminated to a heavy gauge vinyl that is then applied to the borders of the screen material before attaching the snaps. This custom-manufactured reinforcing border is 100% bonded to the screen material, resulting in less sagging and buckling between and around the snaps.
Unpacking and Inspection
The 92" Carada Criterion Series screen came in a box that was approximately 8" x 8" x
8'. Inside were the rolled up screen, four aluminum frame pieces (with steel corner bracing already
attached), wall bracket pieces and a small packet of screws (with extra snap-screws.) When I pulled out
the screen I noticed that it had not been tightly rolled and actually showed some creasing along the
length of the roll in several places. This concerned me at first, but I continued on with the assembly
with a mind to pay close attention to the end result and see if any of the creases remained after
snapping the screen in (they disappeared.) One thing to note is that, since every home and construction
type is different, Carada opted to not include any fasteners for the wall bracket. You'll need to locate
the appropriate screws for the job and base your choice on your wall construction.
Basic Setup and Installation
Setup could only be simpler if Carada had a person come to your home
and do it for you. I had the entire frame unpacked, assembled and on the wall in about 20 minutes. It is
essentially a four-step process and you'll need a Philips head screwdriver as well as something to help
you screw the wall brackets to the wall with (I used an electric screwdriver set to the lowest possible
torque.) I removed everything from the shipping box and laid out the parts, inspecting each for quality
and to make sure I wasn't missing anything. The first step is assembling the frame. Since the steel
corner braces are already attached and the top pieces are clearly marked with a 'T' this is a painless
and easy affair. You simply push the steel corners into the appropriate aluminum pieces and secure with a
screw. The holes lined up perfectly for a snug fit, and when I was done there wasn't a single gap to be
seen anywhere in the corner joints. The inset picture shows the dramatic difference between the Precision
and Criterion frames. The Criterion frames are much more robust, and the added width provides better
spill-over absorption (not to mention a more professional feel) when viewing movies.
The second step involves mounting the wall brackets. For this you'll
need 6-18 screws depending upon the size of frame you purchased. For frames under 110" wide Carada
supplies a shorter 8" bottom bracket. Make sure you use a level and make careful measurements on this
step as the accuracy of your top bracket determines whether your screen will hang parallel to the floor
or be a cubist/impressionist piece. I found the lower bracket to be a less than optimal method for
securing the bottom of the screen on account of having to invert it and get the bottom to "snap" over it.
It defies logic and I hope Carada eventually reworks the system to allow you to simply slide the frame
over two parallel wall mounts. This would be much easier and leave less room for error. Even after
carefully measuring, I was unable to get the bottom wall bracket to line up on the first
try.
After you have the wall brackets in place you can proceed to attach the screen. M ake sure the frame is laid out face down on a carpet or other smooth, soft surface. Next, unroll the entire screen and place it on top of the frame. Be sure that you unroll it so that the snaps are on the correct side and the part of the screen labeled with a "T" is oriented at the top of the frame. At this point, you simply work your way around the screen, alternating directions periodically, but always working outward without skipping over any snaps. It was at this point that I realized the small creases in the screen material that I had noticed earlier were completely going away. After I snapped in the screen there was nothing but a completely smooth, evenly-stretched surface. The last snap will be extremely difficult, but over all I think the effort required to snap in the screen makes up for itself in the wonderfully flat, tensioned surface.
After you are finished attaching the screen, get someone to help hang it on the attached wall brackets. The frame will need to be carefully lifted up and then lowered onto the brackets. At this point adjust for centering the screen properly on the wall. Once it's centered, push the bottom over the lower bracket for a snug fit against the wall (this last step may take some help and reconfiguring as it requires an exact fit.) That's all there is to it!
Calibration & Screen Material
I was able to get some pretty
good measurements off of the Carada screen, letting me know that in a light-controlled room, the
Brilliant white material does an adequate job of providing grayscale uniformity and color balance. I
could notice no hotspots or inability to render a smooth gradation. In fact, the test pattern we utilized
showed a nice, smooth white to black gradient in both directions across the face of the entire screen.
Here are some measurements taken on this screen with an ISF calibrated LCOS projector:
Considering these tests came out nearly identical on a different, more expensive projector screen, I think the Carada represents a tremendous value for those looking to upgrade from their wall or a cheaper pull-down solution.
The Brilliant White screen material has a gain of 1.4 and is
thicker and more opaque than the Classic Cinema White. It has a practical viewing angle of about 150 -
160 degrees and features a gentle light intensity rolloff with an absence of noticeable hotspots that
plague higher gain screens. The surface itself is washable, and has a smooth, almost rubbery feel. Based
on specifications, we felt that the Brilliant White would offer the best possible color saturation and
grayscale uniformity of the three screen materials Carada offers.
Viewing Tests and Evaluation
While I'd love to go over every nuance and detail I experienced while watching movies on the Criterion screen, I'll save the evaluations for the DVD and projector reviews. Suffice it to say, the Carada Criterion performs a superb job of giving back the light it receives. The goal of any screen is to accurately portray the picture you are projecting - and the Criterion does that with flying colors (pun intended.) Featured here are some images I snapped that show the excellent color and detail that can be realized from this screen. Our camera, a Pentax Optio S5i doesn't perfectly capture the colors due to the limitations of the camera, but it gives you a taste.


Conclusion
The Carada Criterion projector screen offers a bargain alternative to the fixed screen wall systems offered by the name brand companies. The seamless Brilliant White screen material, with its 1.4 gain and thicker density, nearly mimics the performance of the popular Studiotek 130 screen, though further testing would be needed to see just how close it comes. I think that those looking to acquire the look of a professional installation on a budget would do well to consider Carada's new Criterion series screens - the pricing, performance and ease of use make it hard not to.
Criterion Series 92" 1.78:1 Projection Screen
wBrilliant White Screen material
MSRP: $690 (as tested)
info@carada.com
www.carada.com
About Carada,
Inc.
Carada was started by home theater enthusiasts
who went through the process of shopping for an affordable performance screen to go with a new projector.
Seeing a gap in the marketplace for affordable fixed projection screens, they set out to create what
didn't exist... a high quality projection screen at a reasonable price. Carada's manufacturing plant is
based in the USA, and selling directly to consumers allows them to skip the middleman at a tremendous
cost savings to consumers. All projection screens come with a thirty day complete satisfaction guarantee
and a 3-year manufacturer's warranty.
The Score Card
The scoring below is based on each piece of equipment doing the duty it is designed for. The numbers are weighed heavily with respect to the individual cost of each unit, thus giving a rating roughly equal to:
Performance × Price Factor/Value = Rating
Audioholics.com note: The ratings indicated below are based on subjective listening and objective testing of the product in question. The rating scale is based on performance/value ratio. If you notice better performing products in future reviews that have lower numbers in certain areas, be aware that the value factor is most likely the culprit. Other Audioholics reviewers may rate products solely based on performance, and each reviewer has his/her own system for ratings.
Audioholics Rating Scale
 — Excellent
- — Very Good
- — Good
- — Fair
- — Poor
| Metric | Rating |
|---|---|
| Video Performance | |
| Build Quality | |
| Ergonomics & Usability | |
| Ease of Setup/Programming/Integration | |
| Features | |
| Performance | |
| Value |
Clint Deboer was terminated from Audioholics for misconduct on April 4th, 2014. He no longer represents Audioholics in any fashion.
View full profile