
How to Install a Hidden In-Floor or In-Ceiling Subwoofer
How to Install a Hidden In-Floor or In-Ceiling Subwoofer
At Audioholics, we’re firm in our belief that the subwoofer is one of the - if not the - most important speaker in a surround sound. However, we also know - whether it’s because of functional or aesthetic reasons - that it’s not always possible to place a standard subwoofer in a room. For such situations, in-wall, in-floor, and in-ceiling subwoofers can allow you to achieve glass breaking, bone cracking bass that is heard and felt but not seen. How cool is that?
In-Floor/Ceiling, and In-Wall Subwoofer Options
Generally speaking, there are only a few different styles of in-floor, ceiling, and wall subwoofers. In my opinion, the least compelling solution for a home theater is an in-ceiling subwoofer that’s simply a standard in-ceiling speaker with a large driver and an enclosure. These are great for multi-room music applications, but rarely deliver the bass needed for a home theater.
Standard in-wall subwoofers are designed to fit in a 2x4 or 2x6 wall, which places a drastic design limitation on subwoofer design due to decreased box volume and depth to mount a large motor structure woofer. These subwoofers often require a large grille cut-out that makes them more of an out-of-the-way solution than a truly hidden solution. For this article, I’ve chosen a third style that allows for much of the performance of a stand alone box subwoofer but is still completely out of sight. The subwoofer mounts in the floor or ceiling and in place of a speaker grille it uses a standard heating or cold air return vent.
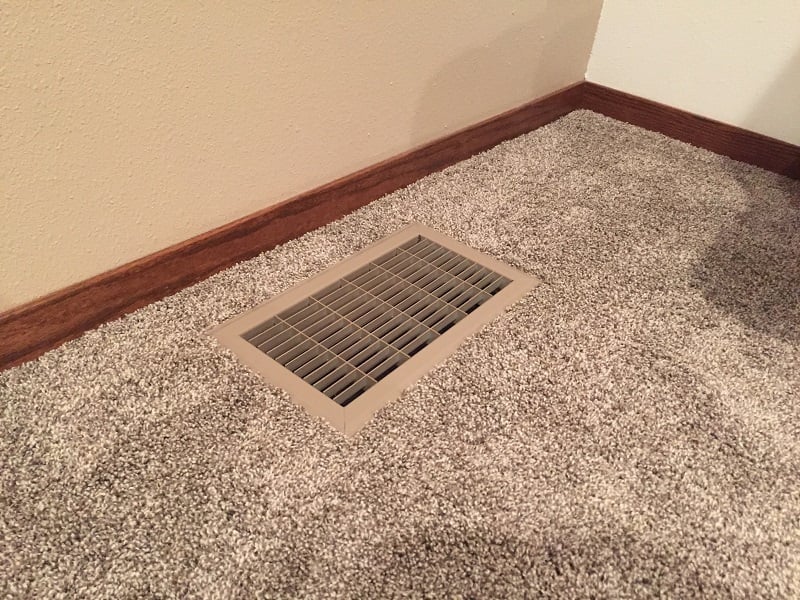
Finished In-Floor Subwoofer Installation
The specific model used in this article is the RBH Sound SI-1010. The SI-1010 measures 13-1/2" W x 42" H x 9" D, so it won’t fit in a wall but will fit between floor joists or roof trusses to be installed in-floor or in-ceiling. It sports dual 10” drivers, is rated down to 28Hz, and weighs a hefty 68 pounds. It was chosen because I wanted a subwoofer that was powerful enough to fill a large room, engineered well enough that I don't have to worry about it breaking down, and that came with a robust amplifier allowing me to really dial in the bass. The instructions covered in this article apply to similar subwoofers from any manufacturer.
How to Install an In-Floor or In-Ceiling Subwoofer
1. Determine ideal subwoofer location
The first step is to determine where the subwoofer should be placed. For in-floor installations, ensure that the vent won’t be in a main walkway and/or covered by furniture. Most importantly – as with any subwoofer installation – location can have a major effect on sound quality. Consider using an actual microphone and software, such as the XTZ Room Analyzer Pro II we reviewed, to measure how the subwoofer performs at multiple locations around the room. Alternatively, you can use the subwoofer crawl method for a less scientific but also less expensive – as in free – method to determine proper subwoofer location.
2. Determine if the subwoofer can be installed in chosen location
Once the ideal subwoofer location has been decided, you need to determine if it can actually go in that spot. If the subwoofer is going in the floor and you have an unfinished basement, simply take a quick look to see if there are any obstacles in the way, such as HVAC ducts. If the basement is finished, a visual check of vents on both floors should give you a general idea of where ducts are located. If there are no obvious obstacles, typically vents and lights, then you should cut out a single gang hole in the ceiling so you can see inside. In place of a professional borescope, use the camera and flash on your smartphone to get a better view of what’s in the ceiling. To ensure you’re viewing the proper area between the floors, drill a hole in the top floor just big enough to fit some sort of reference bit through. A common DIY reference bit is a cut metal coat hanger. Once you’ve determined that there are no obstructions in the way, cut out a hole to fit the entire subwoofer through.

The orientation of the floor or ceiling vent can be changed by removing the subwoofer baffle - shown removed here - and swapping it with a different baffle from RBH.
The instructions are easier for in-ceiling installations. After choosing a subwoofer location, drill a small hole in the ceiling and insert your chosen reference bit. Go into the attic and look for the reference bit. After finding the reference bit, brush away all of the insulation to find any hidden obstructions.
At this time also ensure that you can get speaker wire to the desired location. Remember that speaker wire can be hidden under carpet, behind baseboards, inside walls, and under crown molding. There’s almost always a way to get speaker wire to the proper location.
3. Cut hole in flooring/ceiling for vent
Now you're ready to cut the hole for the vent. Start by measuring the inside edge of the vent then marking the hole on the floor/ceiling with painters tape. Next, use a spade bit to drill a hole in each corner of the cutout large enough for a saw blade to fit. Use the saw of your choosing – I prefer a jigsaw – to cut out the opening.
If you’re dealing with carpet, use a utility knife to cut through the carpet and pad prior to using the drill or saw. This will help prevent the saw from tearing out strands of carpet.
If the subwoofer is being installed in the ceiling, use a drywall saw instead of any sort of power tool. Cutting drywall by hand is easy and creates less dust.
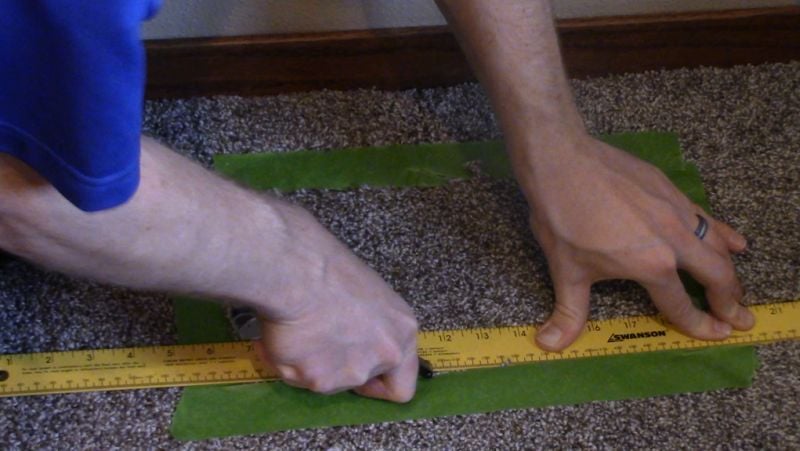
Cut the carpet with a carpet knife
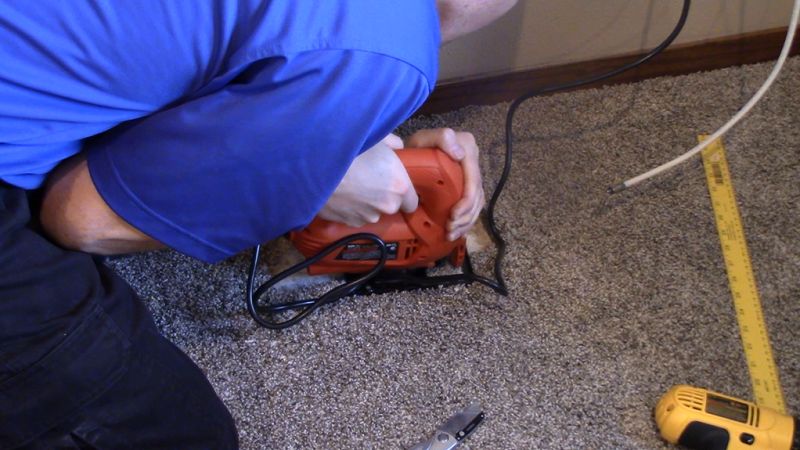
Cut the flooring with the saw of your choosing
4. Install the subwoofer
If you’re dealing with a serious subwoofer, like the 68 lbs SI-1010, there’s a bit of technique and finesse to positioning the subwoofer without hurting your back or watching the subwoofer crash through your ceiling. Whether you’re installing the subwoofer in the floor or ceiling, don’t try to do it by yourself. Get a friend, family member, or neighbor to help out.
In-floor installation
In this case, the instructions provided by RBH only cover installation in homes with solid 2x10 or 2x12 joists. If you have open floor trusses or I-Joists, you may have to improvise a bit. Still, the job isn't difficult, it will just take a bit more planning, time, and creativity on your part.
No matter the construction of your home, you will start by securing a 2x4 horizontally across two joists. This acts as a temporary support that will allow you to lift the subwoofer into position and rest much of the weight on the 2x4. I recommend having a second 2x4 ready to go so as soon as the subwoofer is lifted into place a second temporary support can be installed to take the rest of the weight of the subwoofer.
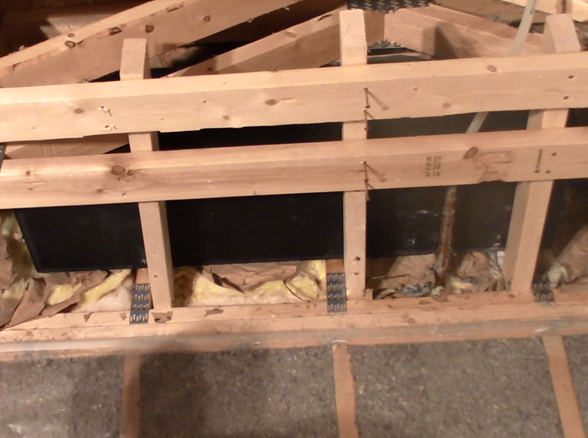
In this photo, the subwoofer is temporarily held in place by three 2x4s.
Typically the 2x4s would lay flat, but in this case they needed to be stood up to ensure the subwoofer was high enough to avoid hitting a water line.
From here, the installation will vary depending on the construction of your home. If you have solid 2x10 or 2x12 joists, push the subwoofer up until it's pressing against the floor above, then permanently secure it to the home by driving screws through the joists and into the sides of it. I find that using scrap pieces of wood and shims to position the subwoofer and then pre-drilling holes works better than having someone try to hold it in place while you scramble to drive in the screws.
If your home is built with open trusses or I-beams, you will have to be a bit more creative. You could secure plywood to the inside of the bay then drill through that and into the side of the subwoofer. Alternatively, you could support the subwoofer from the bottom, as is shown in the above video and photo. Choose whatever method works best for your situation. A little common sense will go a long way here.
In-ceiling installation
In-ceiling installation is much easier than in-floor, other than trying to get the subwoofer into the attic. There's no good method for getting it up a ladder, but one piece of advice is to try not to carry it across the attic while balancing on ceiling trusses. Lay down some sort of structure, like plywood, to walk on. Think about sliding the subwoofer over the top of the truss bottom chords - 2x4 on the bottom. Whatever you do, just be careful. It's easy to get hurt or put a foot through the ceiling while up in an attic.
Once the subwoofer is close to its final location, gently lay it down on the drywall and then drive screws through the trusses and into the side of the subwoofer. If you're worried about the subwoofer crashing through the ceiling when you lay it on the drywall, temporarily secure one or two 2x4s to the ceiling directly below it. This will help take the load off the drywall. To be clear, these 2x4s are on the finished side of the drywall, not in the attic. Once the subwoofer is secured to the joists, remove the temporary supports and patch the holes with spackle.
5. Connect Amplifier
Assuming you already have speaker wire in place, the next step is to connect everything together. Connect the speaker wire to the subwoofer and amplifier, then connect an RCA cable from the AV receiver to the amplifier. From here, you will need to reference the owner's manual on your AV receiver and subwoofer amplifier to properly dial in the sound. We have an entire section of our website devoted to subwoofer set up, so head over there to learn how to optimize subwoofer performance.
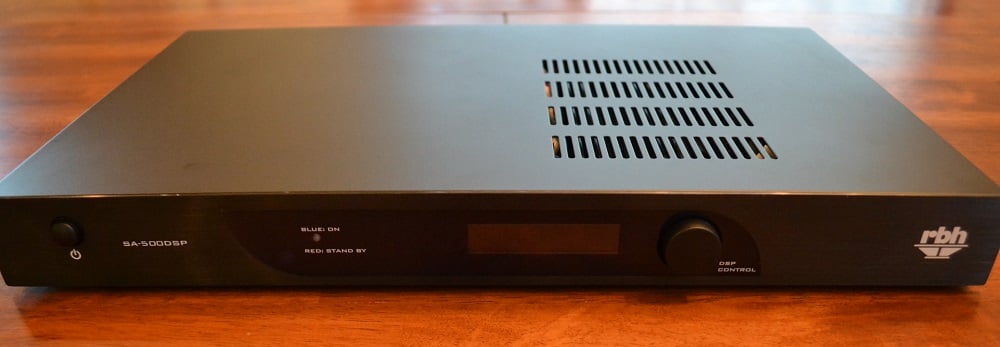
RBH SA-500 DSP Amplifier front panel
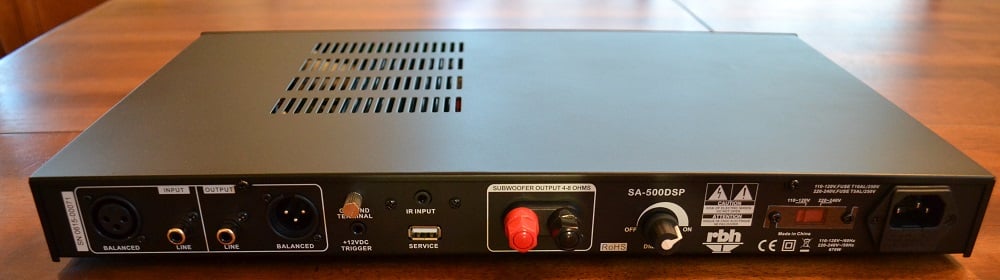
Amplifier rear panel
Conclusion
Installing an in-floor or in-ceiling subwoofer is a fair amount of work, but the end result is worth it. Whether your goal is to hide the subwoofer for aesthetic reasons, protect it from mischievous children, or to simply reclaim floor space, this style of subwoofer is a great addition to any home theater. Better yet, two or four of these would really fill a room with impactful bass that would surely confuse guests as they scan the room for giant subwoofers and find none.
Do you have any additional thoughts to share? Post in the forum thread below and let us know what you think.
Cliff, like many of us, has always loved home theater equipment. In high school he landed a job at Best Buy that started his path towards actual high quality audio. His first surround sound was a Klipsch 5.1 system. After that he was hooked, moving from Klipsch to Polk to Definitive Technology, and so on. Eventually, Cliff ended up doing custom installation work for Best Buy and then for a "Ma & Pa" shop in Mankato, MN.
View full profile